This post is written to show : Easy 4th of July Flag Crafts for Kids to Make This Summer to keep them engaged and creative.
Here’s one fact worth sharing with your kids, one that will genuinely surprise them:
The American flag your family hangs outside today didn’t always look like that.
In fact, it has been redesigned 27 times since it was first created in 1777. Twenty-seven versions over nearly 200 years. Each one updated as a new state joined the Union and earned its star.
The flag that feels so permanent, so fixed, so official, only became the version we know today on July 4th, 1960, the year after Hawaii became the 50th state.
That means the flag flying above your neighbourhood right now has only existed for just over 60 years.
Tell that to a curious eight-year-old and watch their face change. Wait, it used to look different? Yes.
Thirteen times in the 1800s alone, a new star was added. The design shifted, the layout of stars changed, and someone had to sit down and figure out how to arrange them all over again.
The flag was never a finished thing. It was always a work in progress, just like the country it represents.
That’s not trivia to drop and move on from. That’s the whole point of making it with your kids today.
When a child counts out 13 stripes or carefully dots in 50 stars, they’re not just doing a craft. They’re touching a 248-year-old story with their own two hands. They’re making something that took a nation nearly two centuries to get right.
In this guide, they will be learning and trying out one of the crafts discussed here.
Patriotic crafting becomes even more meaningful when every generation can join in, and 21 Easy 4th of July Crafts for Seniors to Celebrate Creatively is filled with simple ideas designed for connection, creativity, and celebration.
What Happens in the Brain When Kids Make Things
Physical movement strengthens the brain processes involved in encoding and recall, meaning when children engage their hands while learning, they build stronger memory connections than when they sit and listen passively.
Think about that in the context of the flag. A child who hears “the flag has 50 stars” will likely forget it by dinnertime.
A child who counts out 50 star stickers and presses them onto blue paper one by one? That number is going to stick. The physical act of doing encodes the information in a way that listening simply cannot replicate.
When learners physically interact with materials and act out concepts, they build stronger memory connections, because movement and repetition engage muscle memory, making information easier to recall.
This is exactly why flag crafts sit in a category of their own. They’re not just creative. They’re educational in a way that can’t be faked or shortcut. The craft is the lesson.
Keeping children entertained during the holiday gets much easier with 25 Easy 4th of July Popsicle Stick Crafts for Kids That Are Fun and Festive, packed with simple patriotic activities kids will actually want to make.
4th of July Flag Crafts for Kids
Crafts Made With What You Already Have
Budget-friendly. Zero prep. Nothing to buy.
These are the crafts where the supply list is basically “look in your kitchen and junk drawer.” If it’s the morning of July 4th and you haven’t planned anything, start here.
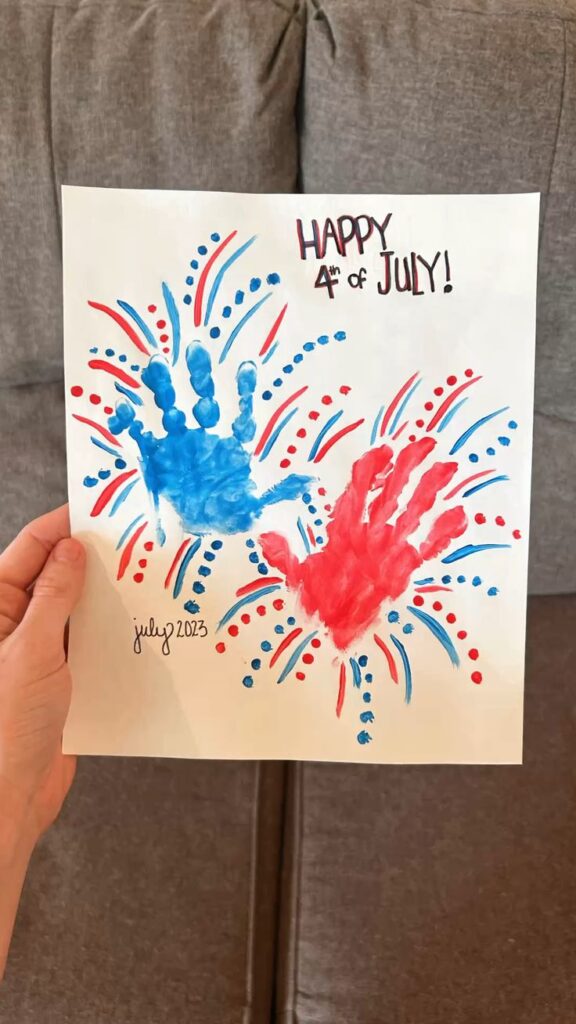
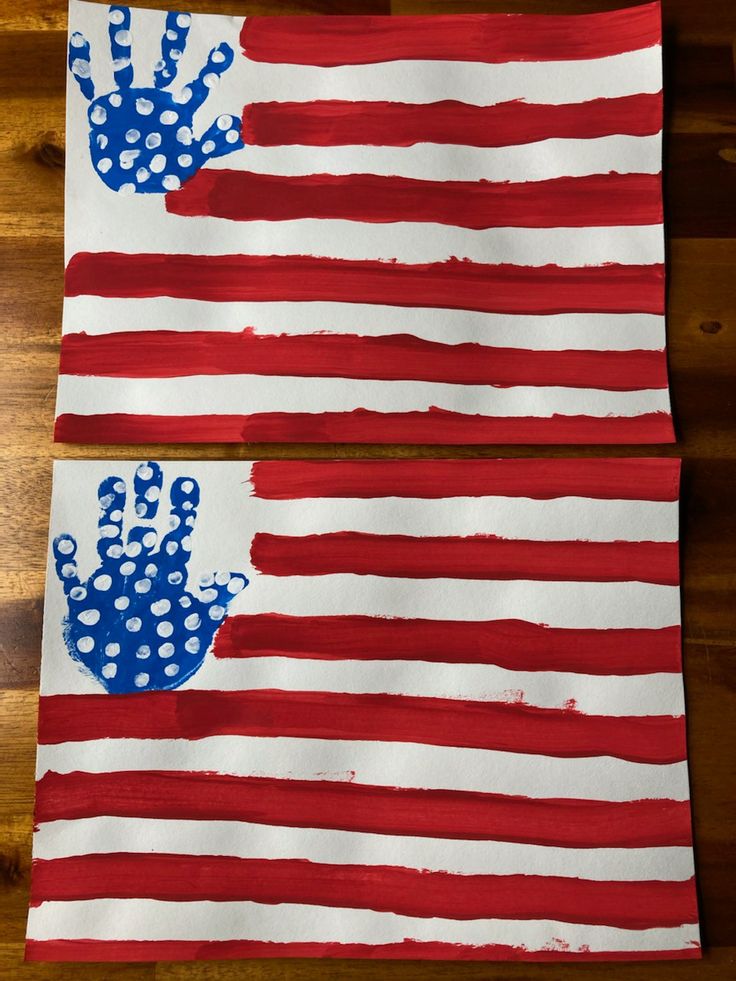
1. Handprint Flag
Ages: 2–8 | Time: 20 minutes
The most personal flag craft on this entire list, because no two are ever the same.
What you need: Washable paint in red, white, and blue; white paper or cardstock; a craft stick for the handle; star stickers or a Q-tip for dots.
How to make it: Paint your child’s fingers red and the palm of their hand blue, then press it firmly onto white paper.
Make sure there’s space between the fingers, those gaps become the white stripes. Once dry, add white star stickers or use a Q-tip dipped in white paint to dot stars onto the blue section. Glue to a craft stick and it’s ready to wave.
Honest tip: Do the handprint before the paint dries, lift straight up, no wiggling. One confident press is the move. Second attempts never look as good.
2. Finger-Paint Stripe Flag
Ages 2–5 | Time: 15 minutes | Mess level: High (and worth it)
The most sensory-rich craft on this list. Toddlers love it precisely because it requires zero tools, just fingers, paint, and paper.
What you need: Red and white washable paint; blue paint or a blue marker; white paper; star stickers.
How to make it: Draw or tape off a blue rectangle in the top left corner. Let your child drag fingers loaded with red paint across the page to make stripes, leaving white spaces in between. Fill the blue section with star stickers once the paint dries.
Honest tip: Don’t aim for even stripes. Let them press, drag, and smear. The texture is the point at this age, the flag is secondary.
3. Paper Plate Flag
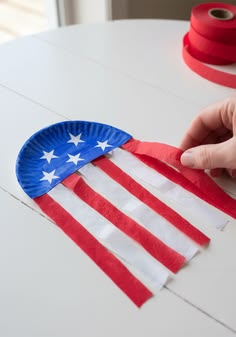
Photo credit: @ U
Ages 3–8 | Time: 20–25 minutes | Mess level: Low
One of the most versatile 4th of July flag crafts for kids on this list, it can be a wall decoration, a wearable badge, or part of a garland.
Just paint the top portion of the paper plate blue, then paint bold red stripes below it, leaving white gaps in between, and finish with foam or paper stars on the blue section. Made To Be A Momma
What you need: Paper plate; red, white, and blue paint; foam paintbrush; white star stickers or foam stars; ribbon or string to hang.
Honest tip: Paint the blue section first, it’s much easier to work the stripes around a dry blue corner than to try to paint blue neatly alongside wet red.
4. Tissue Paper Flag
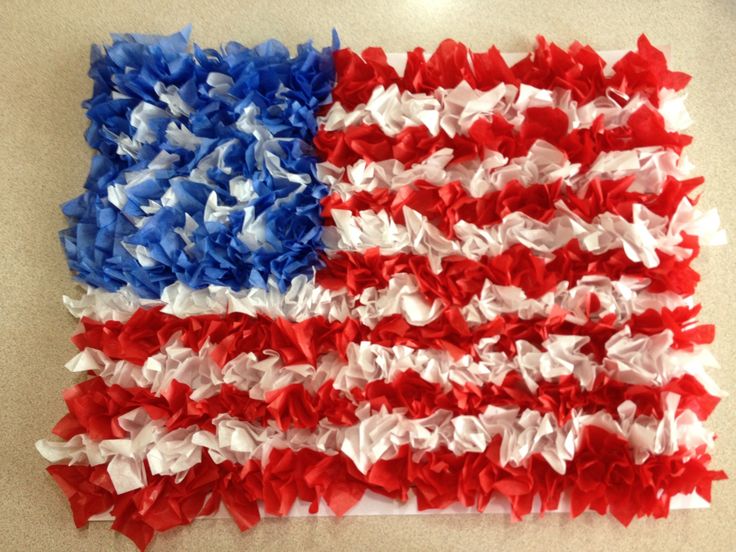
Photo credit: @ U
Ages: 3–7 | Time: 20 minutes | Mess level: Low
This one works especially well with scraps. Use leftover tissue paper in red and white, torn or cut into strips, and layer them onto a paper plate or cardstock base.
Don’t worry about perfectly straight cuts; uneven edges add texture and look great once it’s hanging up.
What you need: Red and white tissue paper; blue construction paper or paint; glue stick; white paper or paper plate.
Honest tip: Tearing the paper instead of cutting gives younger kids full independence and actually produces a more interesting finished result.
5. Crepe Paper Flag
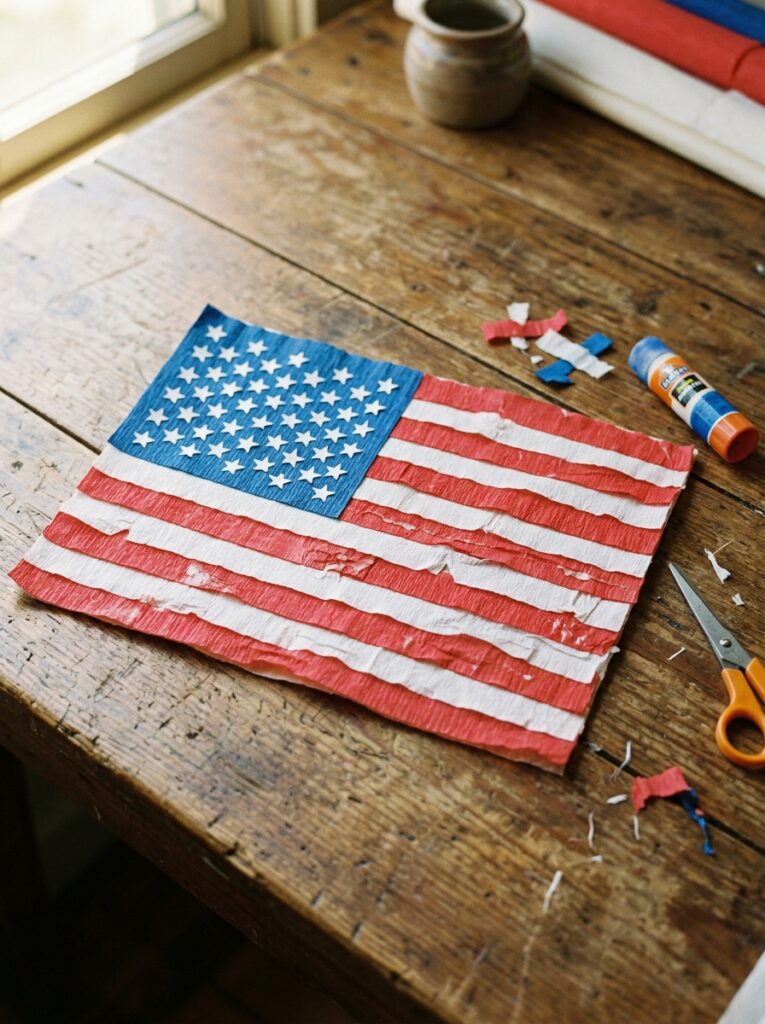
Ages 4–8 | Time: 25 minutes | Mess level: Low
An inexpensive craft that works great as a larger-format decoration for a 4th of July party. Uses party streamers most families already have in a drawer somewhere.
What you need: Red and white crepe paper streamers; blue construction paper; a paper bag or cardboard base; glue; star stickers.
How to make it: Glue horizontal strips of red and white crepe paper onto your base to form the stripes. Add a blue rectangle in the top left corner and finish with star stickers.
Honest tip: Cut the crepe paper strips before you sit down with the kids. Scissors plus streamers plus excitement is a combination that ends badly without pre-cutting.
6. Egg Carton Flag
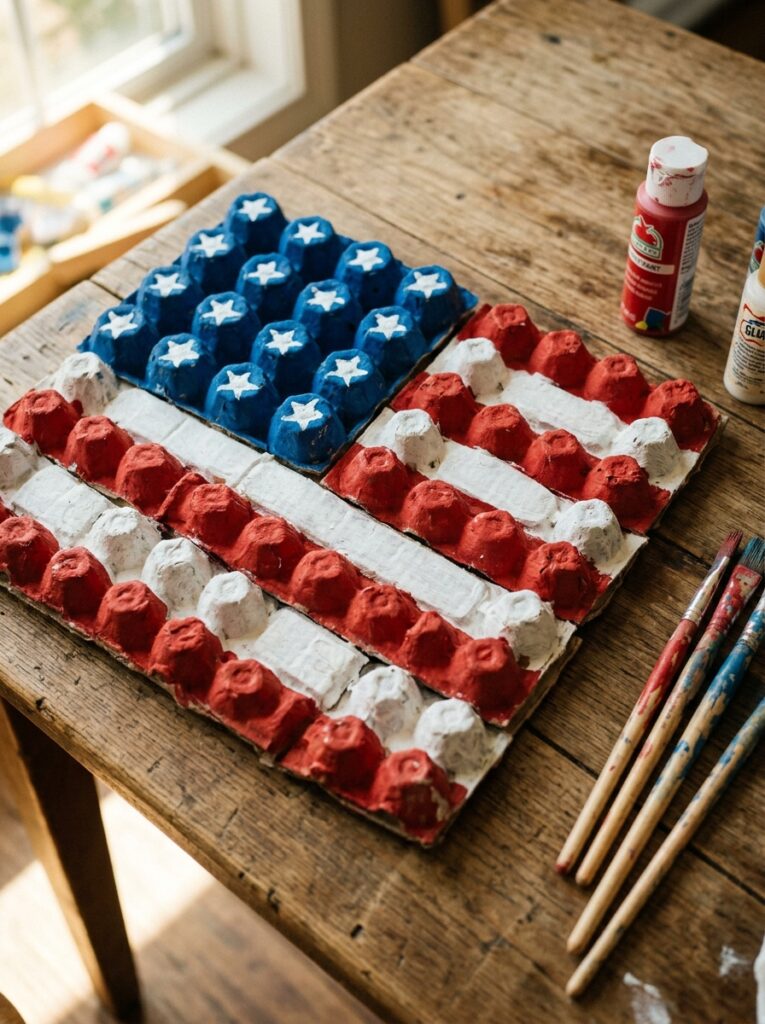
Ages 4–9 | Time: 30 minutes | Mess level: Medium
This one surprises people. The three-dimensional texture of an egg carton makes an unexpectedly beautiful flag, and it teaches kids that you can make something patriotic out of something you’d otherwise throw away.
What you need: One empty egg carton (12-cup); red, white, and blue paint; white paper stars or Q-tip dots.
How to make it: Paint the four cups in the top left corner blue. Paint red stripes into all the grooves between the cups.
Once the red dries, cover the raised tops of the remaining cups with white paint. Cut out small white stars and glue them to the blue section, or use a Q-tip to dot them on. Add a ribbon at the top to hang it.
Honest tip: Do this in stages, blue first, let it dry, then red, let it dry, then white. Rushing the layers turns everything into a brown-purple mess.
7. Paper Roll Flag
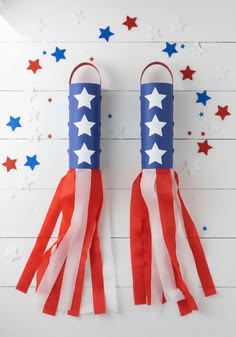
Photo credit: @ U
Ages: 4–8 | Time: 20 minutes | Mess level: Low
Save your paper towel or toilet paper rolls. Flattened and painted, they become the perfect compact flag canvas — and the finished result is genuinely sturdy.
What you need: A cardboard paper roll (flattened); red, white, and blue paint; star stickers; a craft stick.
How to make it: Flatten the roll. Paint horizontal red and white stripes across the body and a blue rectangle in the top left corner. Add star stickers. Tape or glue to a craft stick as a handle once dry.
Honest tip: Flatten the roll completely and let it sit under a heavy book for a few minutes before painting, it’s much easier to work on a flat surface.
2: Crafts That Become Keepsakes
Display-worthy. Memory-making.
These are the crafts you find again in a box ten years later and actually smile about. They take a little more time and intention, which is exactly what makes them worth it.
8. Rustic Twig Flag
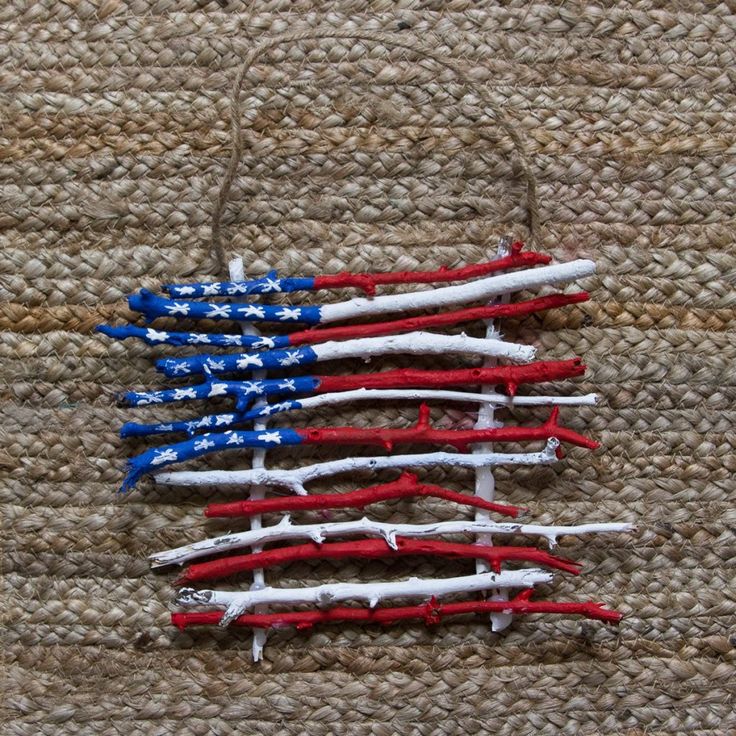
Ages: 7–12 | Time: 45 minutes | Mess level: Low
This is the craft that earns the most compliments when it’s displayed. It looks handmade in the best possible way, because it literally is, from materials gathered outside.
What you need: 10–12 straight sticks from the garden; red, white, and blue paint; white paint for stars; craft glue or a low-temp glue gun; two backing sticks.
How to make it: Gather ten sticks and break them to the same length. Paint them to look like the American flag, alternating red and white sections with a blue corner.
Once the paint dries, use white paint to add stars to the blue section (dots work perfectly for younger kids, actual star shapes for older ones). Use two sticks at the back to glue the painted sticks together.
Honest tip: Break the sticks a few at a time and lay them on a flat surface to check they’re even before you start painting. Uneven lengths are forgivable in the finished product, but dramatically uneven breaks will bother you.
9. Popsicle Stick Flag
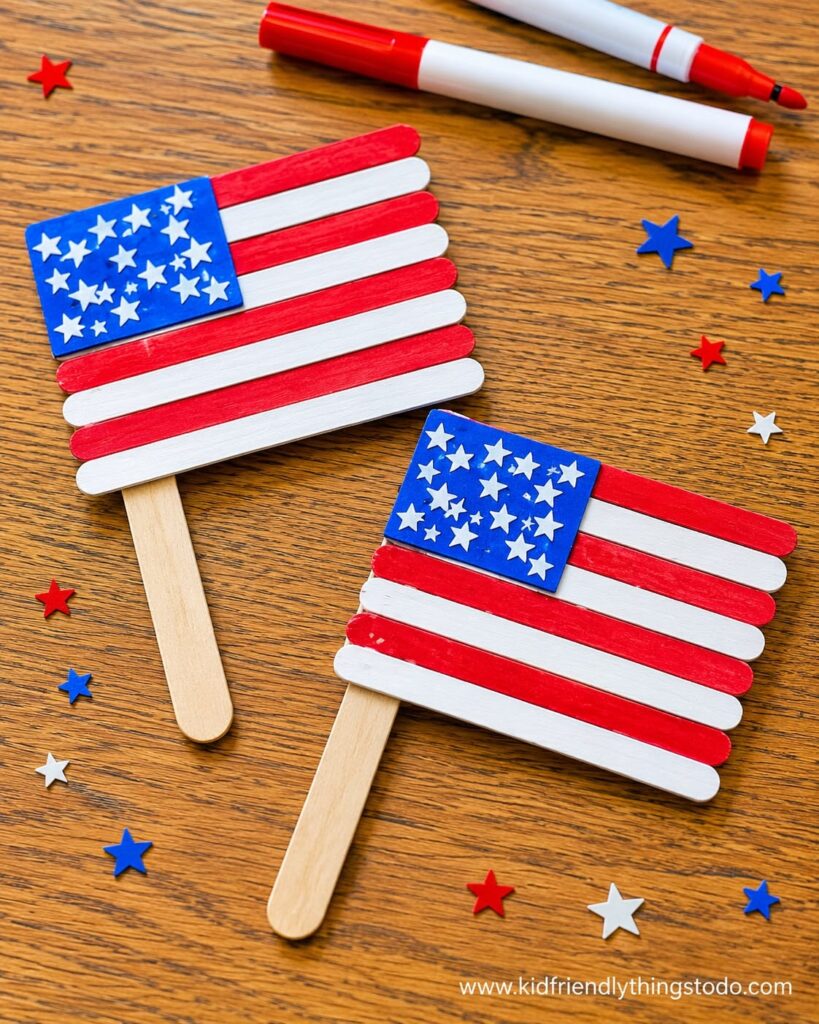
Ages: 5–10 | Time: 35 minutes (plus drying time) | Mess level: Low
The classic. Done well, it looks genuinely polished, and it can be displayed in a flower pot as a centerpiece, hung with ribbon as a decoration, or turned into a fridge magnet by attaching a magnet to the back.
What you need: 7 jumbo craft sticks; 2 mini craft sticks for backing; red, white, and blue paint; white star stickers or a star hole punch; craft glue.
How to make it: Paint 4 craft sticks red and 3 white. Let dry. Lay them side by side in alternating order on a flat surface.
Flip over and glue two mini sticks horizontally across the back to hold them together. Flip back to the front and glue on the blue section in the top left corner. Add white stars.
Honest tip: Let each paint layer dry completely before assembling. The most common reason popsicle stick flags fall apart is rushing the glue step on top of wet paint.
10. Painted Rock Flag
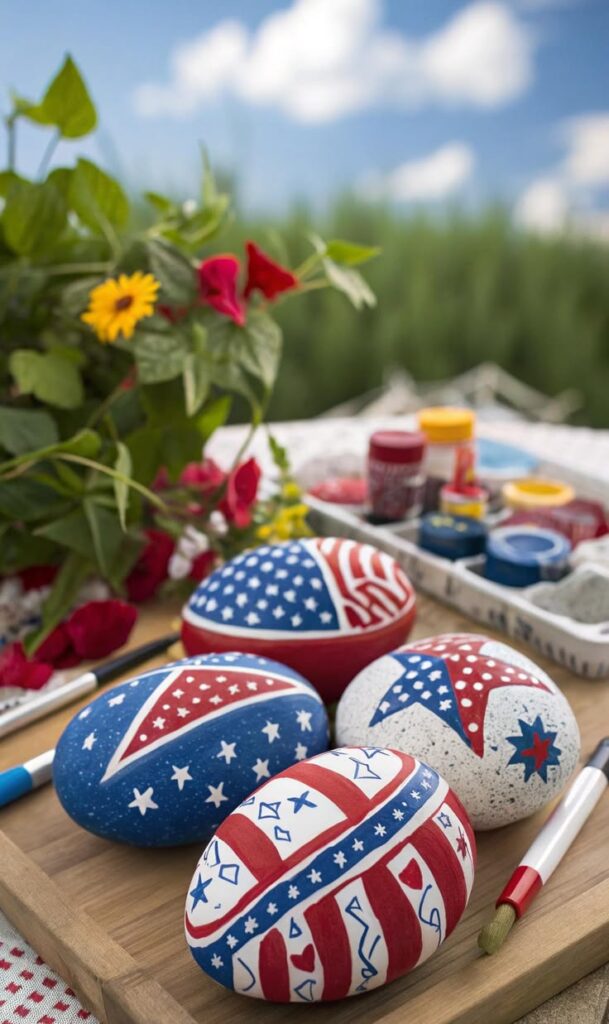
Ages: 6–12 | Time: 40 minutes | Mess level: Low
A smooth, flat rock from the garden becomes a permanent decoration that can live on a windowsill, a porch step, or a garden border. Kids who love detailed work absolutely thrive with this one.
What you need: Smooth flat rocks; acrylic paint in red, white, and blue; a fine brush for detail work; clear sealant spray (optional but recommended).
How to make it: Paint the rock white as a base coat.
Let dry. Add 13 alternating red and white horizontal stripes across the body. Paint a blue rectangle in the top left corner. Use a fine brush or the tip of a toothpick to add white star dots or small stars.
Honest tip: The white base coat is not optional, skipping it means the red and blue won’t stay vibrant on a dark rock. Two thin base coats are better than one thick one.
11. Pony Bead Flag Magnet
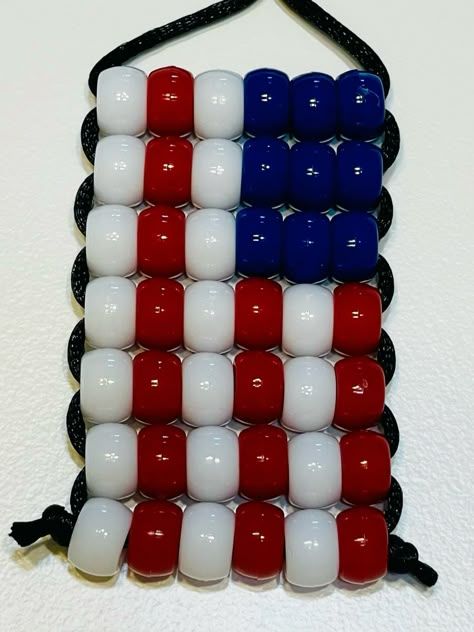
Ages: 7–12 | Time: 40 minutes | Mess level: Low
A pony bead American flag that can be turned into a cute fridge magnet in honor of the Fourth of July. The finished result is surprisingly detailed and kids feel genuinely accomplished when it comes together.
What you need: Red, white, and blue pony beads; a beading board or pegboard; craft glue; a strong magnet.
How to make it: Lay out beads in the flag pattern on a flat surface, alternating red and white rows with a blue section of beads in the top left corner. Once arranged, carefully glue them together. Let dry flat overnight, then attach a magnet to the back.
Honest tip: Lay the full design out before gluing a single bead. Adjusting the layout is easy when nothing is stuck down yet, nearly impossible afterwards.
Rustic decor instantly adds warmth and charm to holiday spaces, and 21 Creative 4th of July Wood Craft Ideas for Rustic Patriotic Decor shares handmade projects that feel both timeless and festive
12. Fabric Scrap Flag
Ages: 8–12 | Time: 45 minutes | Mess level: Low
This is the most tactile keepsake on the list. Using real fabric instead of paper makes the finished flag feel substantial, something worth framing or displaying on the wall.
What you need: White canvas or burlap rectangle; strips of red fabric; blue fabric for the corner; fabric glue; white star stickers or white fabric paint.
How to make it: Cut white linen or burlap into rectangles. Glue strips of red fabric horizontally to form the stripes. Cut and glue a blue rectangle in the top left corner. Add white star stickers or paint on stars.
Honest tip: Fray the edges of the fabric strips slightly before gluing, it gives the finished flag a weathered, rustic look that looks intentional and beautiful.
13. Handprint Flag on Canvas
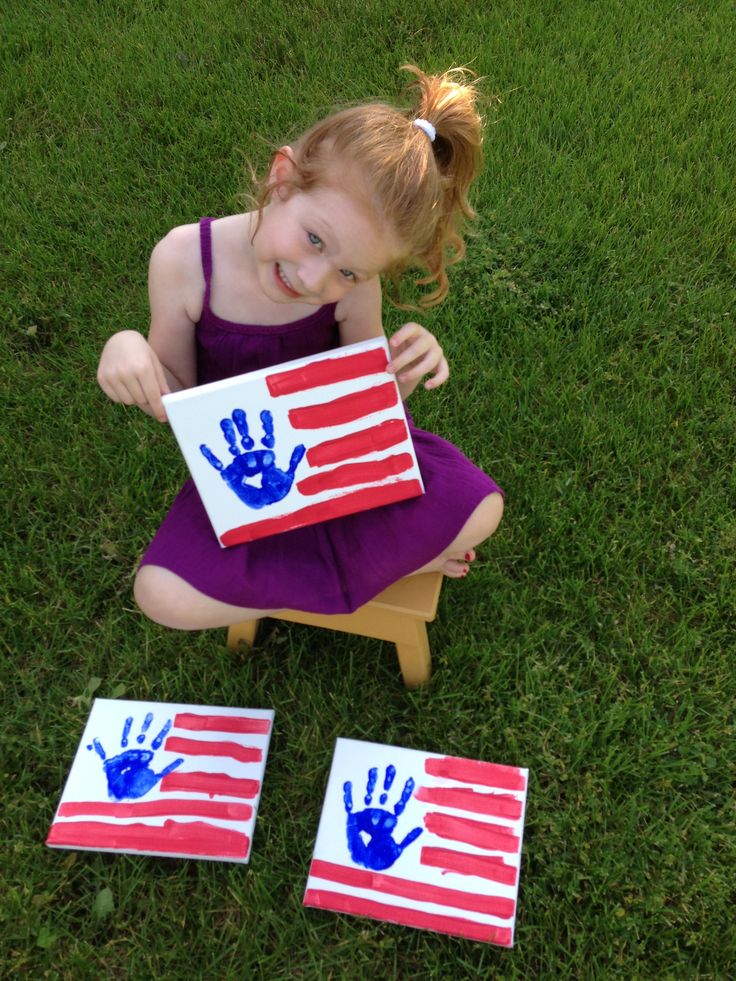
Photo credit: @ U
Ages: 3–12 | Time: 30 minutes | Mess level: Medium
The canvas version of the classic handprint flag, except this one is worth framing.
Use a canvas and paint to create a US flag with your child’s handprint serving as the blue canton, and use oil pastels for the stripes for a striking finish. Older kids can really take pride in a keepsake canvas you’ll probably bring out to display every summer.
What you need: Small canvas; washable paint or acrylic; oil pastels or markers for stripes.
Honest tip: Write the child’s name and the year on the back before you start. You will thank yourself for this in about five years.
BUCKET 3: Wearable Flag Crafts
Perfect for the parade. Things they’ll actually put on.
These crafts don’t sit on a shelf, they walk out the door and down the street at the parade. Every single one of these is a conversation starter.
14. Painted Flag T-Shirt
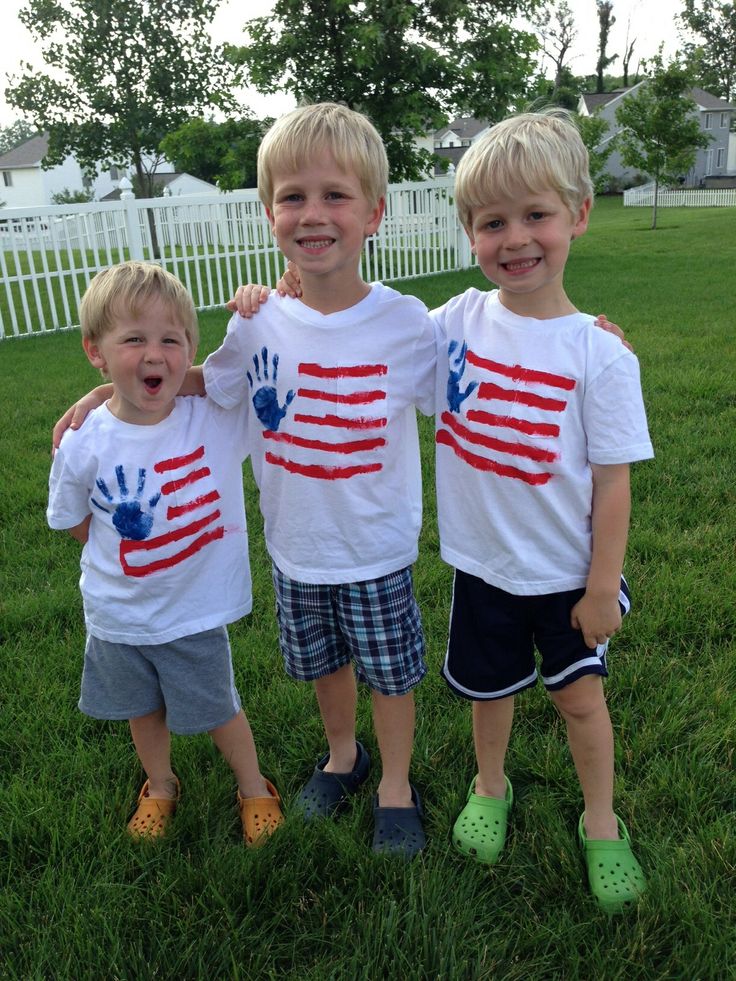
Photo credit: @ U
Ages: 6–12 | Time: 45 minutes | Mess level: Medium
The most iconic wearable flag craft for kids. When it’s done well, it looks genuinely impressive, and kids wear these for years.
What you need: White cotton t-shirt; masking tape; red, white, and blue fabric paint; a craft sponge; cardboard to slip inside the shirt; star stickers.
How to make it: Place a piece of cardboard inside the shirt to stop paint bleeding through. Use masking tape to section off the star area and to create the white stripes. Use a craft sponge to dab the red stripes on.
Once dry, remove the tape and re-tape around the star section. Fill the star section with star stickers, dab blue paint over them, wait for it to dry, then peel off the stickers to reveal the white stars underneath.
Honest tip: Dab the paint, don’t brush it. Brushing smears under the tape. Dabbing with a sponge gives you clean, crisp edges every time.
15. Tie-Dye Red, White & Blue Flag Shirt
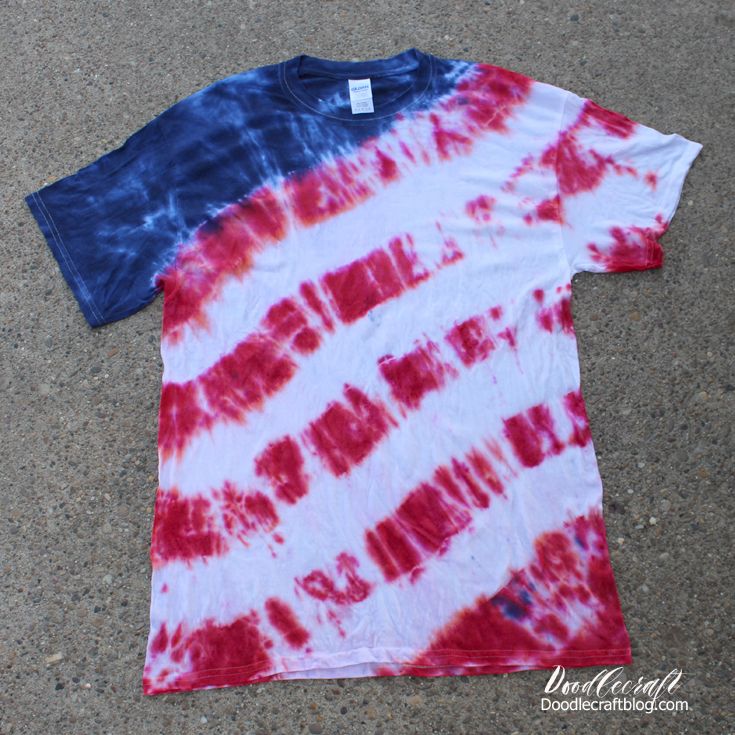
Ages: 8–12 (with adult help for the dye) | Time: 30 minutes active, 4–6 hours setting | Mess level: High do this outside
A step up in commitment from the painted shirt, and a step up in the wow factor too. This project is better suited to older children, recommended for age 8 and up, as younger kids tend to enjoy squirting the dye on but get very impatient with the long wait for the dye to set.
What you need: White cotton t-shirt; red and blue fabric dye; rubber bands; gloves; plastic bags; a flat outdoor surface.
How to make it: Dampen the shirt, then rubber band it in sections. Apply red dye to the top third and blue to the bottom third, leaving the middle section white. Wrap in plastic and let the dye set for at least 4–6 hours. Rinse until the water runs clear, then wash and dry.
Honest tip: Do this project outside. Cut a plastic party tablecloth into sections and use them to line your work surface, then they can double as plastic wrap while the dye sets overnight.
16. Sharpie Flag Shirt
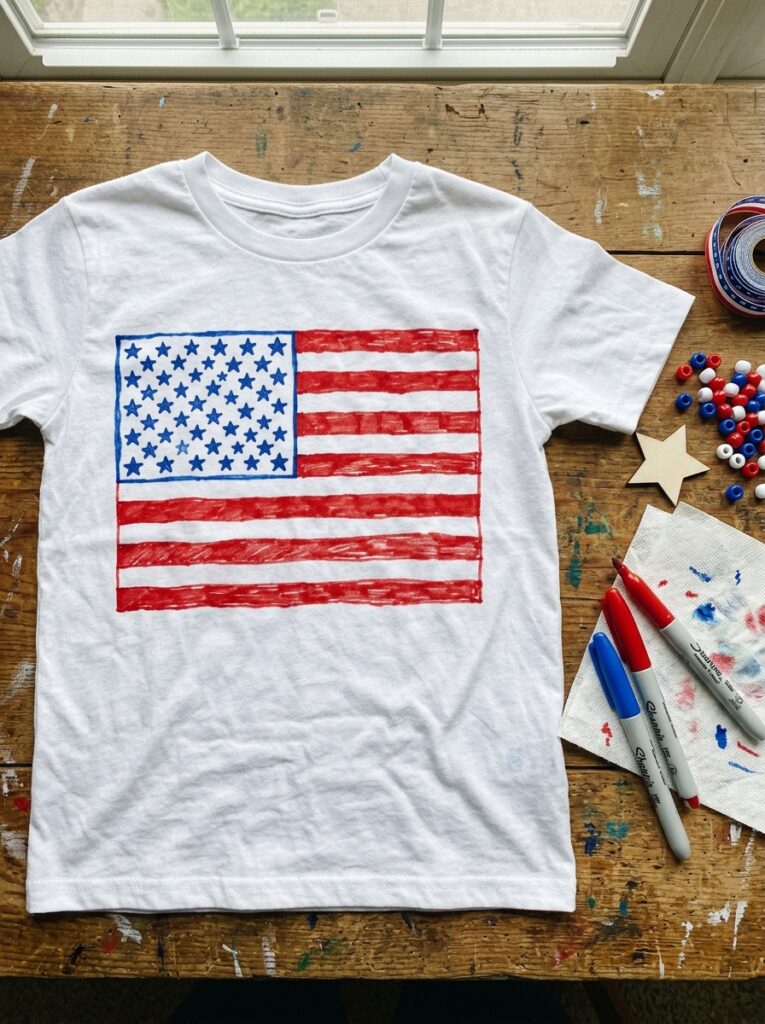
Ages: 6–12 | Time: 25 minutes | Mess level: Low
The lowest-prep wearable flag craft on the list, no fabric paint, no waiting for dye. Just Sharpies, rubbing alcohol, and a satisfying result.
What you need: White cotton t-shirt; red and blue Sharpie markers; rubbing alcohol in a spray bottle; cardboard for inside the shirt.
How to make it: Place cardboard inside the shirt to separate the front and back. Use Sharpie pens to draw flag-inspired designs, stripes, stars, and fireworks.
Leave space between designs so the colors don’t run into each other. Spray rubbing alcohol generously over the design, the ink will begin to spread and bloom into a tie-dye effect.
Honest tip: Less alcohol gives a subtle spread; more gives a dramatic bloom. Test on a scrap piece of fabric first if this is your child’s favourite shirt.
17. Pom-Pom Painted Patriotic Shirt
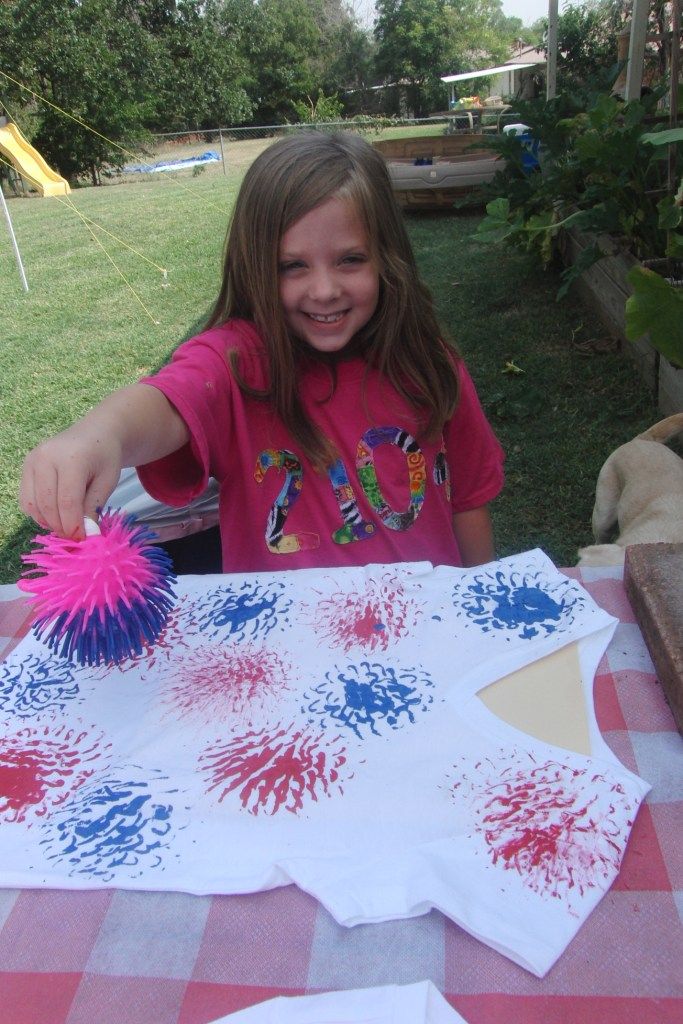
Ages: 4–9 | Time: 30 minutes | Mess level: Medium
A wonderful option for younger kids who want to make a wearable craft but aren’t ready for the precision of the taped shirt. Pom-poms dipped in paint and pressed onto fabric make excellent stars and stripe texture.
What you need: White t-shirt; red, white, and blue fabric paint; pom-poms of different sizes; cardboard for inside shirt; star stencil (optional).
How to make it: Slip cardboard inside the shirt. Dip large pom-poms in red paint and press across the shirt in horizontal lines for stripes.
Use a smaller pom-pom dipped in blue to fill in a corner rectangle. Use a tiny pom-pom dipped in white to stamp stars on the blue section.
Honest tip: Use fabric paint, not regular acrylic, it stays flexible when the shirt is worn and washed, instead of cracking off after the first wash.
18. Flag Bandana
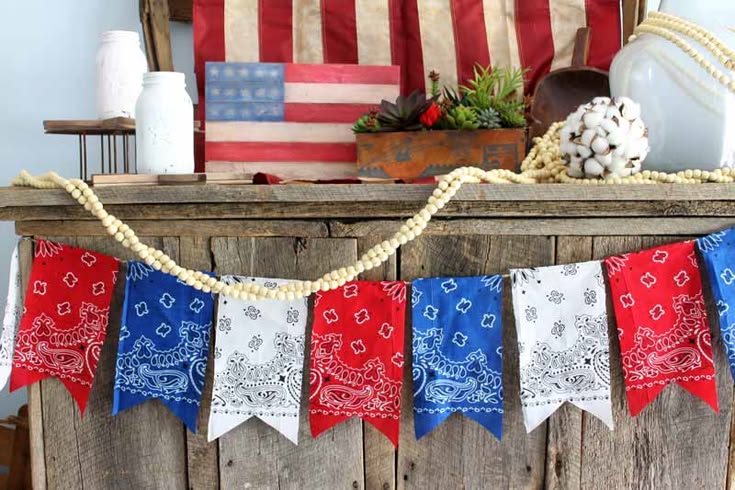
Ages: 5–10 | Time: 20 minutes | Mess level: Low
Quicker than a full shirt and just as wearable. A white cotton bandana becomes a parade-ready accessory with a little fabric paint and star stickers.
What you need: White cotton bandana; red and blue fabric paint; sponge; white star stickers or white paint marker.
How to make it: Lay the bandana flat on protected surface. Sponge red horizontal stripes across the lower two-thirds. Paint a blue rectangle in the top left corner once the red dries. Add white stars to the blue section with a paint marker or white star stickers.
Honest tip: Tie the bandana around the head, neck, or wrist after the paint is fully dry, at least two hours. Wearing it before it sets means paint in the hair, which is a specific type of holiday morning crisis no one needs.
19. Flag Paper Crown
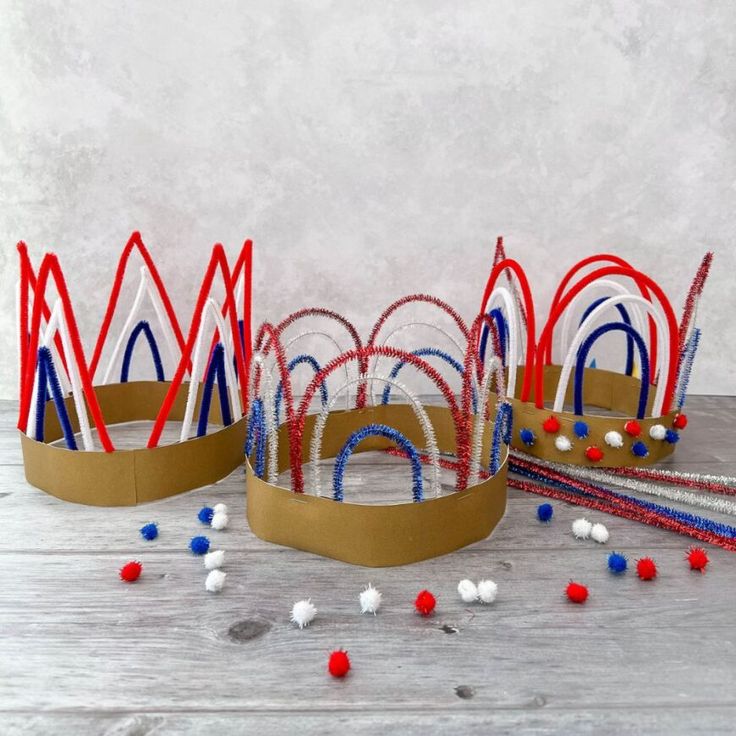
Ages: 3–8 | Time: 15 minutes | Mess level: Low
The fastest wearable on the list and the one toddlers are most delighted by. They’ll wear it to the parade, to the cookout, and possibly to bed.
What you need: Red, white, and blue construction paper; scissors; tape or a stapler; star stickers.
How to make it: Cut a long strip of white construction paper wide enough to fit around a child’s head.
Add red paper strips horizontally for stripes. Cut a blue rectangle and glue to the left end. Decorate with star stickers. Measure to the child’s head and tape or staple together at the back.
Honest tip: Measure before you cut. Nothing deflates a child’s excitement faster than a crown that sits on their nose.
BUCKET 4: Crafts That Double as Decorations
They make it, they display it. Your holiday decor is sorted.
The magic of this bucket is that the craft becomes part of the celebration itself. Kids don’t just make something, they walk around placing it, hanging it, lighting it.
That sense of ownership over the party space is genuinely special.
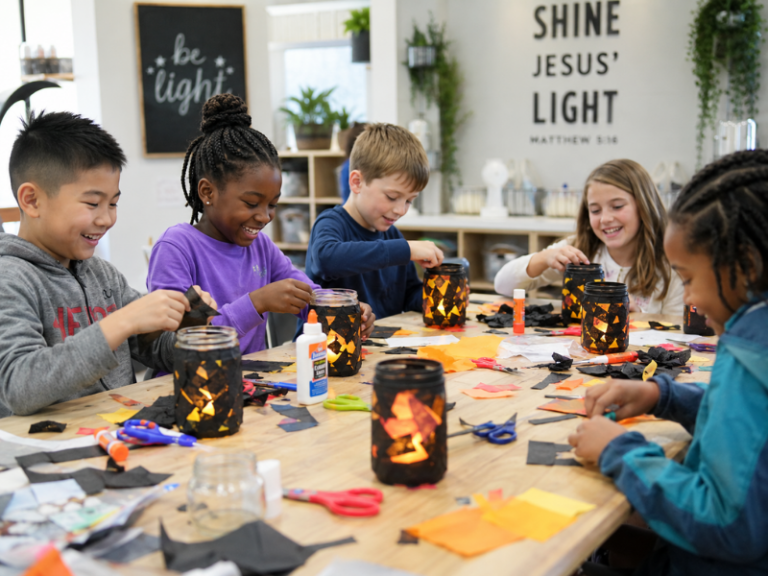
20. Mason Jar Flag Luminary
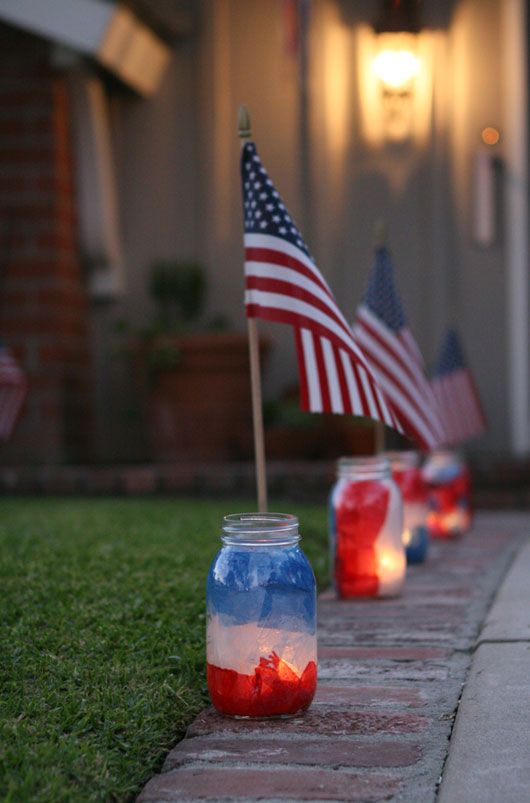
Ages: 6–12 (adult handles the candle) | Time: 30 minutes | Mess level: Low
Apply red, white, and blue acrylic paint to glass jars to create patriotic candle holders, then arrange them in a row to form an American flag.
It’s a craft that works for both kids and adults and can be made in 30 minutes or less. At night, with a flameless tealight inside, the effect is genuinely beautiful.
What you need: 3–6 mason jars; red, white, and blue acrylic paint; foam brush; star stickers; flameless tealight candles.
How to make it: Clean jars with soap and water. Paint each jar a solid colour, red, white, or blue. Add star stickers to the blue jar before painting for a resist effect, then peel them off once the paint dries to reveal white stars. Place a flameless tealight inside each jar and arrange on the table or line a walkway.
Honest tip: Use flameless tealights with kids, not real candles. The light effect is identical and the anxiety level is considerably lower.
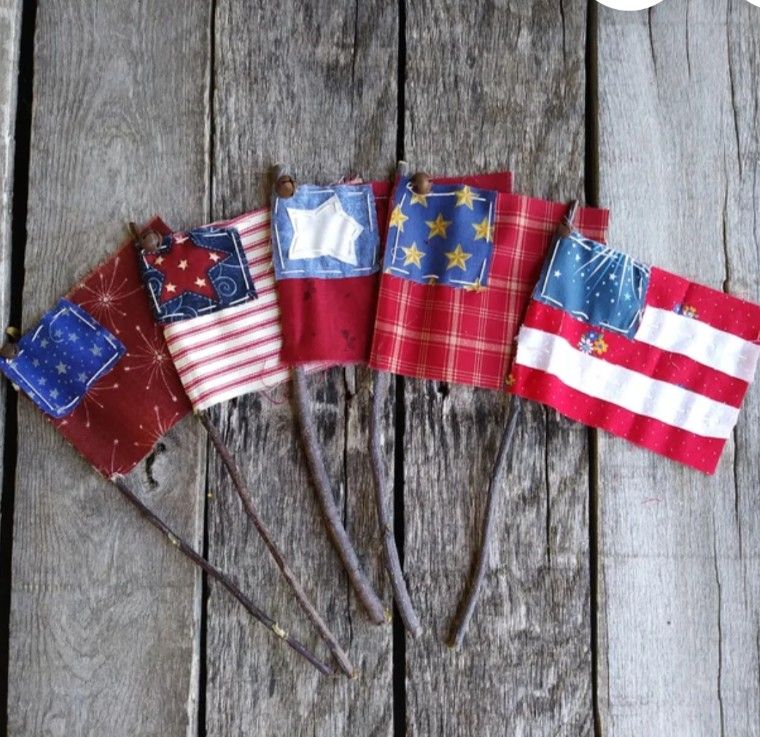
21. Mini Flag Magnets
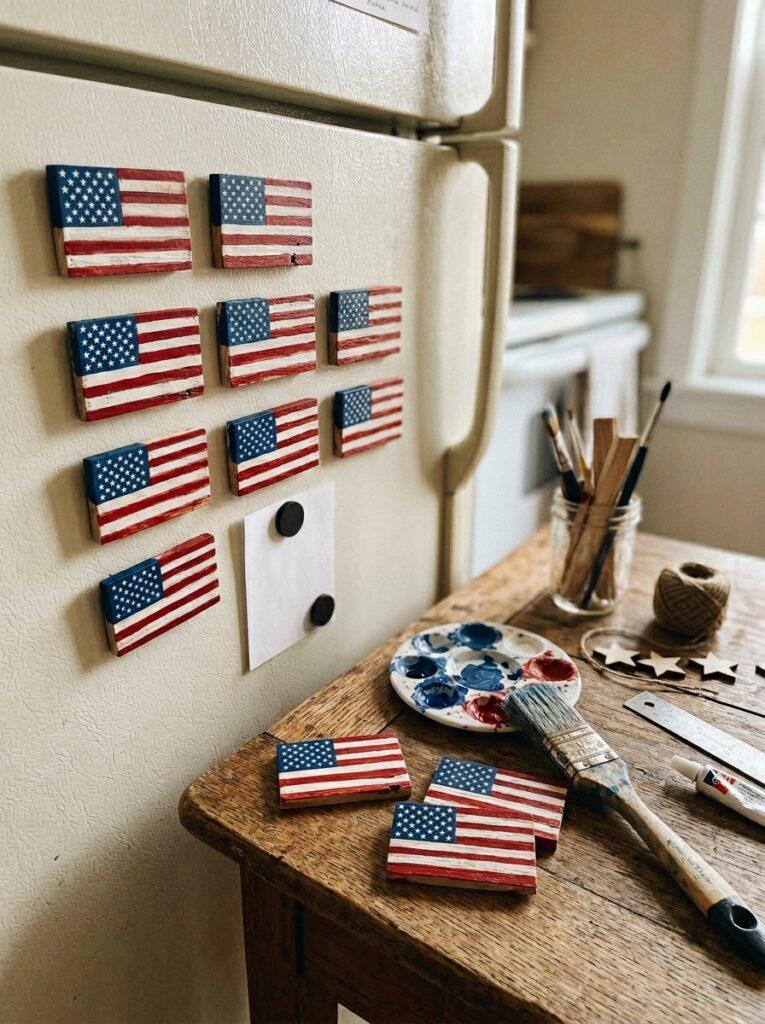
Ages: 7–12 | Time: 40 minutes
These mini American flag magnets are made to decorate a front door or mailboxes in the neighbourhood, and kids love the idea that their craft will be seen by people walking past.
What you need: White fabric (linen works well) cut into small rectangles; popsicle sticks; red and blue paint or markers; white star stickers; strong adhesive magnets.
How to make it: Paint or draw the flag design onto the fabric rectangle. Let dry. Glue to a flat popsicle stick base. Attach a strong magnet to the back. Display on the fridge, the front door if it’s metal, or give to neighbours as a small holiday gift.
Honest tip: Strong rare-earth magnets hold far better than the thin craft magnets, worth the small upgrade if you want these to actually stay on the door.
22. Paper Chain Flag Garland
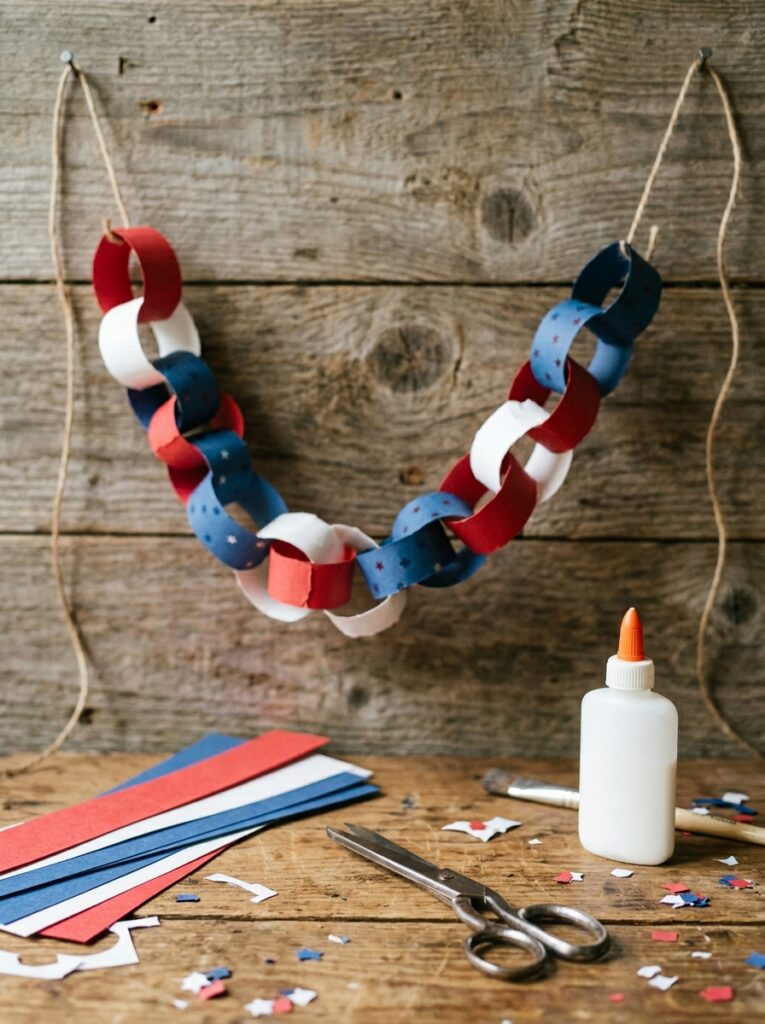
Ages: 4–10 | Time: 30 minutes
Paper, star stickers, and yarn are all you need to make an American flag decoration for the 4th. Kids can make a paper chain entirely on their own and hang it across a mantle, window, or fence for instant party decor.
What you need: Red, white, and blue construction paper; scissors; glue stick or tape; star stickers.
How to make it: Cut strips of construction paper approximately 2 cm wide. Loop and connect them alternating red, white, and blue to form a chain. Every 3–4 links, attach a small white star sticker. Hang across windows, fences, or above the picnic table.
Honest tip: Pre-cut the strips if you’re doing this with kids under 6, the cutting takes longer than the chaining, and the waiting is where the enthusiasm evaporates.
23. Paper Lantern Flag

Ages: 6–12 | Time: 30 minutes
The final craft on the list, and one that genuinely transforms a space. A simple paper cylinder decorated like the American flag, lit from inside with a flameless tealight, becomes a centrepiece that looks like it took more effort than it did.
What you need: White cardstock; red and blue paint or markers; star stickers; scissors; tape; a flameless tealight.
How to make it: Decorate a sheet of white cardstock with flag colours, red horizontal stripes across the body, a blue rectangle with stars in the top left corner. Roll into a cylinder and tape the edges closed. Cut slits partway up from the bottom to create a lantern flare at the base. Place a flameless tealight inside.
Honest tip: Score the paper lightly with a ruler and craft knife (adult step) before rolling, it makes a much neater cylinder and the seam sits flush. Kids do all the decorating; you do the rolling and sealing.
Small details often make parties feel unforgettable, which is exactly why 21 Creative 4th of July Party Favours Your Guests Will Actually Love focuses on festive favors guests will genuinely enjoy taking home.
WHAT TO DO WITH THE CRAFTS AFTER
Most craft posts end the moment the last glue dries.
Here’s the thing: that’s actually where the best part starts.
The 4th of July flag crafts for kids on this list weren’t made to sit in a pile on the kitchen table until someone quietly moves them to the recycling bin on July 5th.
They were made to do something, to be seen, used, gifted, displayed, and in some cases, brought back out next summer and the summer after that.
Here’s exactly how to give every finished craft a life beyond the making.
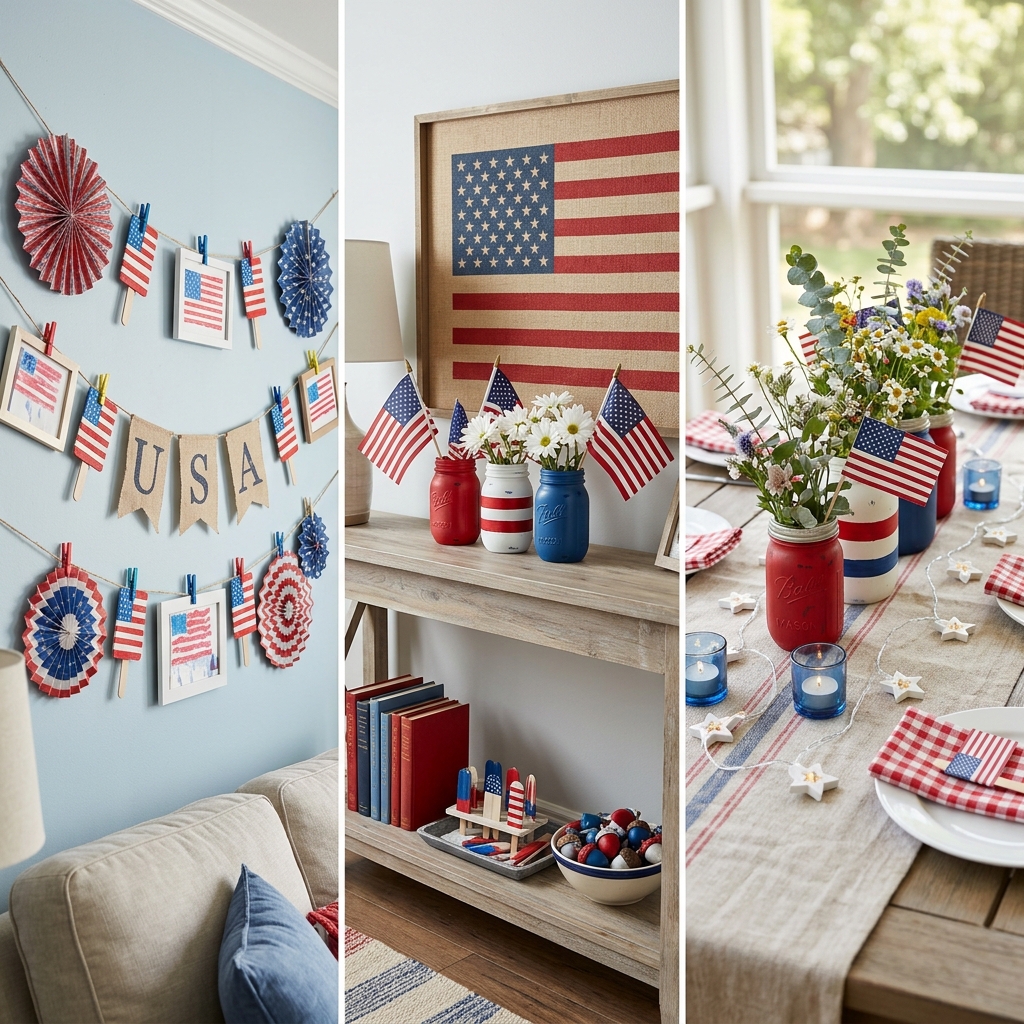
✔ Hang It, Display It, Make It Part of the Day
The simplest thing you can do with a finished flag craft is put it somewhere it can be seen, and let the child be the one who decides where it goes.
Hang paper chains across the fence, display flag paintings on the wall, and let kids wear their paper crowns and wands for a backyard parade.
That last one matters more than it sounds. A child who made their own crown and then wears it to march around the backyard has had a completely different holiday experience than one who just watched the neighbourhood parade from the kerb. They were in it. They made it happen.
Specific ideas by craft type:
- Paper chain garlands — string across the porch railing, the back fence, or above the picnic table. Takes two minutes and the effect is genuinely festive.
- Mason jar luminaries — line the walkway from the front door to the backyard before guests arrive, or use them as centrepieces on the picnic table. When it gets dark and the flameless tealights come on, the reaction from every person who walks past is worth the 30 minutes it took to make them.
- Paper plate flags and tissue paper flags — tape these to windows facing the street. From outside, they look like the house is actually decorated. From inside, the light coming through the colours at dusk is beautiful.
- Twig flags and fabric flags — prop these in a flower pot or mason jar on the front step or porch table. They hold their own as outdoor decor and look entirely intentional displayed there.
- Popsicle stick flags — stand them upright in a small vase or pot filled with dried beans or sand. Instant centrepiece. Takes about 45 seconds to arrange.
- Painted rock flags — place these along the edge of the garden, the front path, or the windowsill. Painted rocks weather surprisingly well outdoors and last through the summer.
✔ Give Them Away
This is the idea that consistently surprises parents, and delights kids.
Children who make things with their hands often feel an instinctive pull to share what they’ve made.
If you ask a child whether they’d like to give their flag magnet to a neighbour or deliver their paper lantern to a grandparent, a large proportion of them will say yes without hesitation. They want the work seen. They want it to matter to someone else.
Mini American flag magnets are made specifically for this, attaching them to mailboxes throughout the neighbourhood so people walking past can see them.
That idea can extend to almost any craft on this list. A popsicle stick flag slipped into a neighbour’s letterbox. A painted rock left on a front step. A paper chain looped around the gate of an elderly neighbour who doesn’t have kids at home to decorate for them.
This turns a 4th of July flag crafts for kids activity into something bigger than a craft. It becomes a lesson in generosity, one that happens entirely naturally, without a single lecture, because the child thought of it themselves or said yes when offered the chance.
✔ Use Them as Part of the Table
The July 4th table doesn’t need store-bought decorations when you’ve spent the morning making them.
Line the middle of the picnic table with the mason jar luminaries. Stand the popsicle stick flags in small pots between dishes.
Lay the paper chain garland across the centre as a runner. Place painted rocks at each setting as natural place markers. Tape the paper plate flags to the backs of chairs.
When guests arrive and ask where the decorations came from, the child who made them gets to say: I did that. That moment, that specific moment of quiet pride in front of other people, is one of the better gifts a holiday morning can produce.
CLOSING
The flag your kid makes today with popsicle sticks and glitter glue won’t look perfect.
The stripes will be uneven. The stars will be dots. The blue corner will bleed slightly into the white. And when they hold it up to show you, they will be completely, genuinely proud of it.
That’s not a consolation prize. That’s the whole point.
The 4th of July flag crafts for kids on this list were never about producing a flawless replica of the American flag. They were about giving a child something real to do with their hands on a day that matters, and letting the making teach what words can’t.
The flag on your porch has been redesigned 27 times. It has been carried, contested, and changed to welcome every new state that joined, remember it was never finished, but been worked on always being worked on by people who cared enough to keep showing up.
Your kid made one today. That counts.