This post contains affiliate links. This means I may earn a small commission if you purchase through my links at no extra cost to you.
Give simple gifts a special touch with 19 DIY Christmas wrapping ideas using everyday materials to create beautiful, thoughtful packages without overspending.
Have you ever had a lovely gift to give but found yourself stuck with plain wrapping paper and nothing to make it stand out? Christmas wrapping does not have to mean buying expensive paper, matching ribbons, and fancy bows. Sometimes, a few materials already sitting in your cupboard can do the job.
These 19 DIY Christmas wrapping ideas will show you how to turn everyday materials into thoughtful gift packaging, from reusing old boxes to making your own paper decorations and fabric wraps. You may already have some of what you need at home.
Show appreciation for the people who provide care and support throughout the year with these 17 Christmas Gifts for Caregivers That Show Real Appreciation.
Small Wrapping Details That Make a Noticeable Difference
A gift does not need elaborate decorations to look well wrapped. The way you cut the paper, fold the edges and attach the finishing touches can make a simple package look much neater.
Keep these details in mind as you work through the DIY Christmas wrapping ideas below.
-
Measure the paper before cutting:
Place the gift on the paper and wrap the sheet around it to check the coverage. Leave enough for the edges to overlap and the ends to fold over the gift. Too little paper leaves gaps, while too much creates bulky corners that are difficult to fold neatly.
-
Put the paper seam underneath the gift:
When wrapping a box, position the main overlapping seam on the bottom rather than across the most visible face. Fold the edge of the top layer inward before taping it down for a cleaner finish.
-
Choose decorations that suit the size of the package:
A large paper bow can overwhelm a tiny jewellery box, while a small tag may get lost on a large present. Try placing the decoration on the package before attaching it. A narrow paper band, for example, may suit a small book better than a bulky bow.
-
Secure the decoration where it will stay in place:
Tape can hold paper embellishments flat, while ribbon or string can secure a tag around a box. For gifts that will be carried or posted, check that loose ends and decorations will not snag or fall off. Avoid relying on glue that has not dried fully.
-
Think about who will open the gift:
For young children, avoid sharp decorative pins, breakable embellishments and small detachable pieces that could pose a choking risk.
Keep scissors and other sharp tools away from children during wrapping, and remove discarded ribbons and packaging promptly after gifts are opened.
These small adjustments help the wrapping look intentional without requiring extra decorations or expensive supplies. Now, let’s look at the different ways you can put that into practice.
Bring some Christmas cheer to residents and staff with these 20 Nursing Home Christmas Door Decorating Ideas That Spread Cheer, featuring festive ways to brighten nursing home spaces.
DIY Christmas Wrapping Ideas
1. Turn an Old Delivery Box Into a Christmas Gift Box
Have an old delivery box that is still in good condition? You can reuse it to wrap a Christmas gift instead of buying a new box. This works well for books, scarves, accessories and small household gifts that fit neatly inside.
Start by removing the shipping labels, barcodes and any delivery documents. If a label leaves a rough patch or refuses to come off, cover it with plain paper.
Check that the box is clean, dry and strong enough to hold the gift. Avoid boxes with damp patches, stains or badly crushed corners.
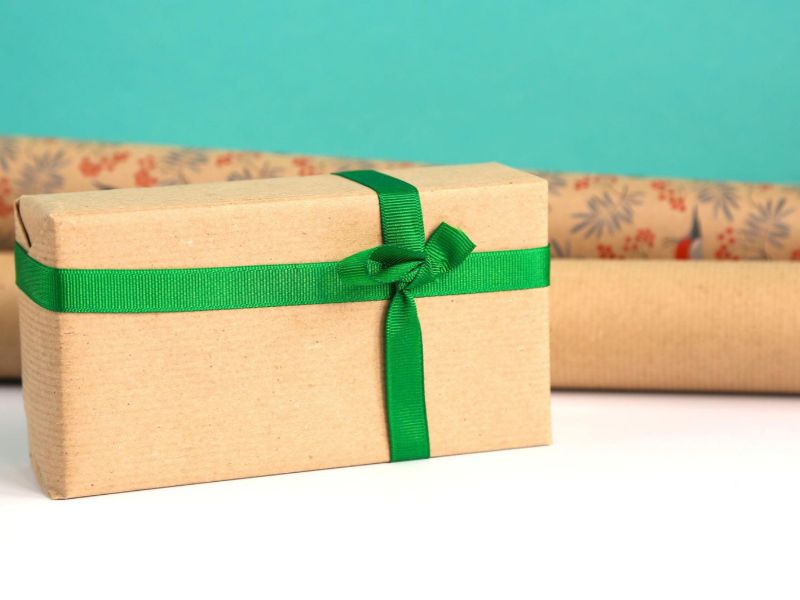
To make the box look more suitable for Christmas, wrap a strip of coloured paper around its middle. You can use leftover wrapping paper, kraft paper or cardstock.
Cut the strip to fit around the box, join the ends underneath and secure them with double-sided tape. Add a handwritten gift tag to finish it.
Here is a detail worth trying: Choose a paper colour that contrasts with the cardboard. For example, a dark green band on brown cardboard creates a simple Christmas look without needing a bow or several decorations.
If the gift is fragile, protect it inside the box with suitable cushioning before wrapping the outside. A reused box should still protect its contents, not just make them look presentable.
2. Use a Paper Belly Band Instead of Wrapping the Whole Gift
Not every gift needs to be covered from edge to edge. A paper belly band is a simple way to dress up a plain box or a book while using less decorative paper.
It is especially useful when you have a small amount of Christmas wrapping paper left over from another project.
Cut a wide strip of paper and wrap it around the middle of the gift. Bring the ends together underneath and secure them with double-sided tape. You can use a contrasting colour to make the band stand out or choose a matching colour for a quieter look.
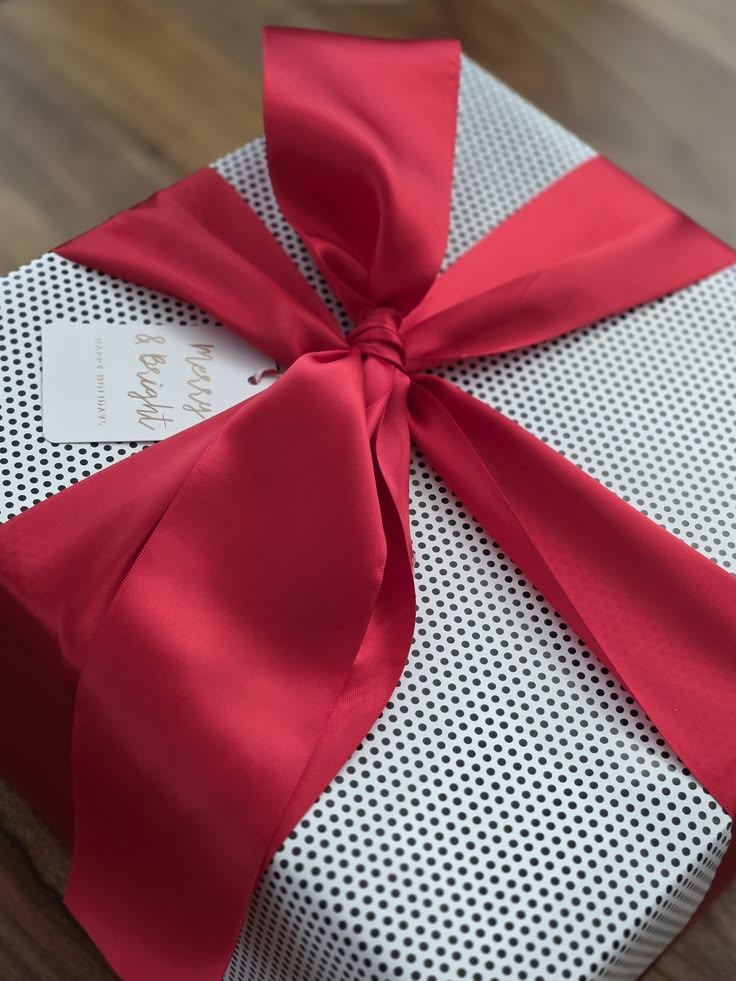
For example, a cream paper band around a brown cardboard box can make a simple present look neat without needing a ribbon or bow. You can also write the recipient’s name on the band instead of attaching a separate gift tag.
A useful tip: Measure around the gift before cutting the strip, and make sure the band fits snugly without bending the corners of a book or box.
This DIY Christmas wrapping idea works best when the uncovered parts of the gift already look presentable.
3. Weave Paper Strips to Make Your Own Gift-Wrap Design
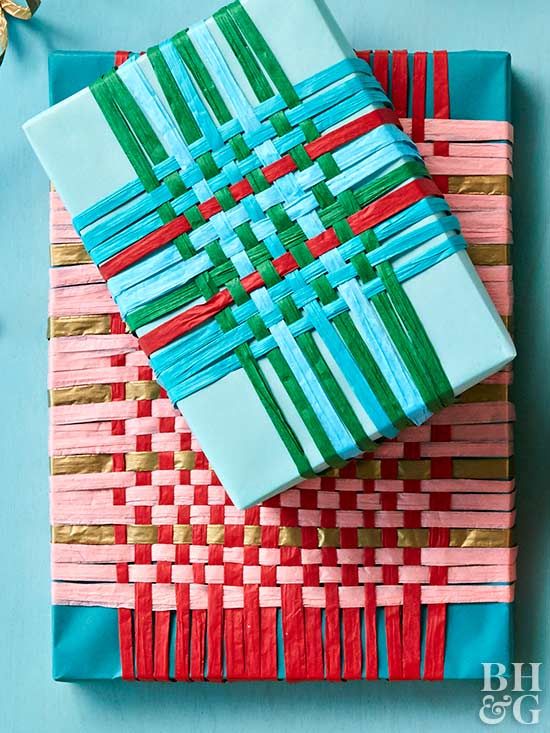
Have scraps of coloured paper that are too small to wrap a gift on their own? Weave them together to create a patterned panel for a plain gift box. This gives leftover paper a purpose and creates a design you will not find on ordinary wrapping paper.
Cut strips of two colours to the same width. Lay several strips side by side, then weave the remaining strips across them, passing each one over and under the strips in turn. Continue until you have a piece large enough to decorate the top of your box.
Tape the ends on the back of the woven panel to hold the pattern in place. Attach it to the box with double-sided tape, keeping the edges flat so they do not catch when the gift is handled.
For a Christmas look, combine two colours such as red and cream or green and gold. You do not need to cover the entire box; a woven panel on the lid can be enough.
A useful tip: Use paper that bends without cracking, and cut the strips evenly. Thick card can be difficult to weave, while very thin paper may tear as you pass the strips over and under one another.
4. Wrap a Gift in Fabric With a Furoshiki-Style Knot
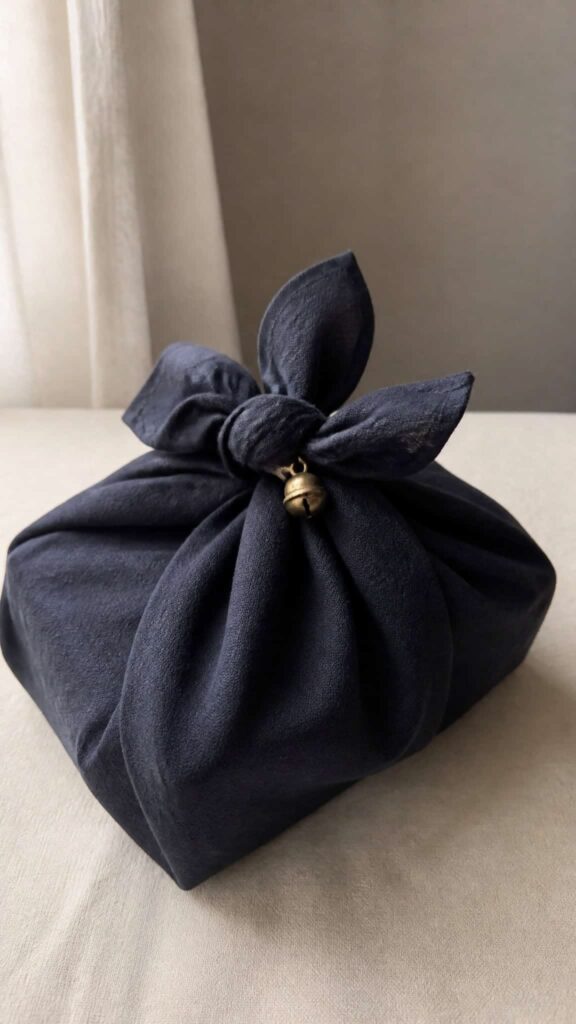
If you have a suitable scarf or a piece of fabric left over from sewing, you can use it instead of disposable wrapping paper. This method is inspired by furoshiki, the Japanese practice of wrapping and carrying items in cloth.
Place the gift in the centre of a square piece of fabric. Bring two opposite corners over the gift and tie them together. Take the remaining two corners and tie them securely, adjusting the fabric so that the gift is covered and the knots sit neatly on top.
Choose a fabric with a pattern that suits the occasion, or use a plain cloth with a contrasting knot. A lightweight cotton fabric is often easier to fold than thick, stiff material.
A useful tip: The fabric needs to be large enough to cover the gift and leave enough material for the knots. Test the size before wrapping, especially when using a scarf. For fragile items, place the gift in a protective box first because fabric wrapping alone does not prevent breakage.
One advantage of this Christmas gift-wrapping idea is that the recipient can reuse the fabric as a scarf, sewing material or another gift wrap, provided it is suitable for that purpose.
5. Use a Tea Towel to Wrap a Kitchen Gift
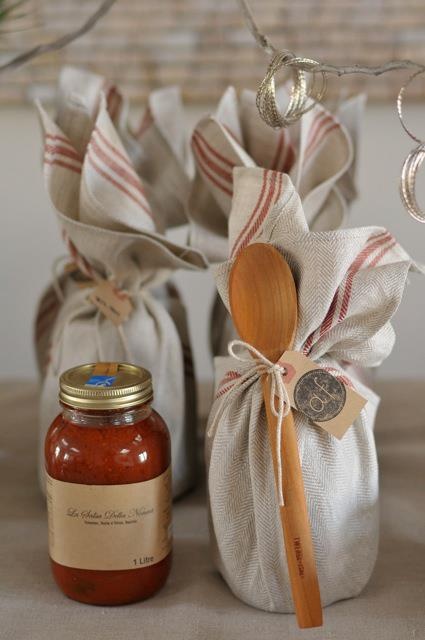
A tea towel can do more than decorate a kitchen gift. It can also become part of the present, making this a useful choice for someone moving into a new home or someone who enjoys cooking.
Lay a clean tea towel flat and place a suitable gift in the centre. Fold the sides over the item, then bring the remaining edges together and tie them with ribbon or reusable string.
You can also place the gift in a small box first and wrap the towel around the box for a neater shape.
This works well for gifts such as wooden spoons, measuring cups, kitchen accessories or a small cookbook. Choose a towel in a colour or pattern that suits the recipient’s kitchen, rather than relying on extra decorations.
A useful tip: A tea towel is not a substitute for protective packaging. If you are giving a mug, glass jar or another breakable item, secure it inside a suitable box with cushioning before adding the towel.
Make sure the towel is clean and dry, especially if it will be used with food.
This is one of the more practical DIY Christmas wrapping ideas because the recipient gets something useful even after the gift has been opened.
6. Turn Magazine Pages Into Colourful Christmas Gift Wrap
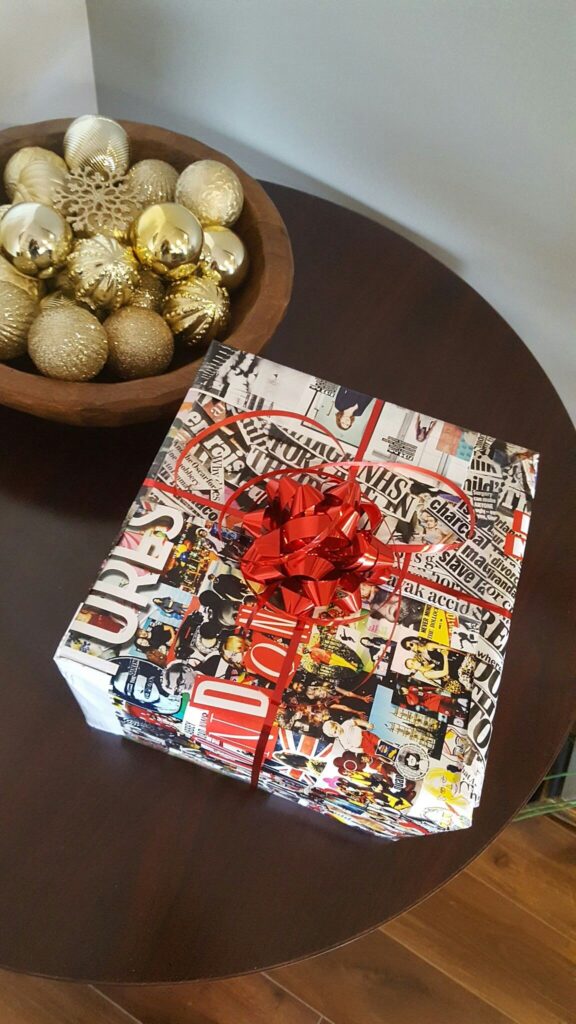
Old magazines can provide attractive wrapping paper when you choose the pages carefully.
The key is to look for colours and pictures that work together, rather than joining random pages and hoping they look good.
Start by selecting pages with a similar colour scheme. For example, you might combine pages with red and white details or use different shades of blue for a cooler look.
Remove the pages carefully, then place them side by side and join the edges with tape on the reverse.
Once you have a large enough sheet, wrap a small box or another gift with a smooth surface. Fold the paper gently, as magazine pages are usually thinner and more likely to tear than standard gift wrap.
A useful tip: Check the size of the pages before you begin. Several small pages may be needed to cover one gift, and the joins can make the paper harder to fold neatly.
A small box is usually easier to wrap than a large present using this method.
Avoid pages with personal information, and remember that glossy or coated magazine paper may not be accepted in your local paper recycling collection.
Reusing it gives the pages another purpose, but it does not guarantee that the wrapping can be recycled afterwards.
Fill a teenager’s stocking with gifts they will enjoy using beyond Christmas morning with these 20 DIY Christmas Stocking Stuffers For Teenagers They’ll Actually Want To Keep.
7. Use Old Calendar Pages to Wrap Small Gifts
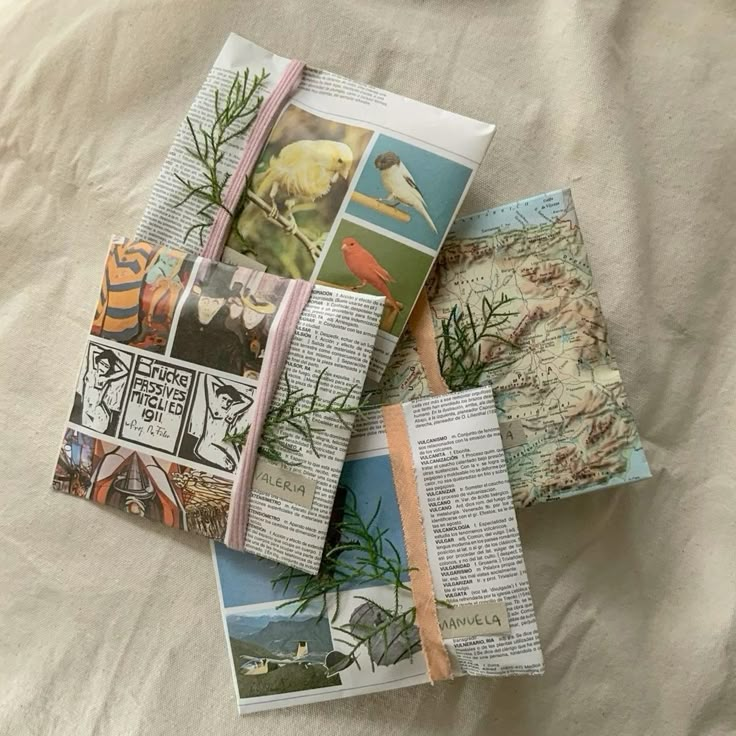
Old calendars often contain pictures, illustrations or photographs that are attractive enough to become part of a gift’s presentation.
Instead of throwing away the pages at the end of the year, save the ones that are large enough to wrap a small present.
Choose a page with an image that will look good on the front of the gift. Place the gift on the reverse side of the paper, position the image where you want it to appear, and fold the edges around the package. Secure the overlap underneath with tape.
For example, a page showing flowers, a landscape or an illustration can make a thoughtful covering for a book, journal or small boxed gift.
You can leave the picture as the main decoration rather than adding a large bow that hides it.
A useful tip: Check that the page is large enough before cutting it. Calendar pages with thick coatings or stiff finishes may not fold as easily as ordinary paper, so test a corner first.
Remove any calendar section that shows private notes, appointments or personal information before using the page.
This is a simple way to make your DIY Christmas wrapping ideas more personal while using something you already have at home.
8. Draw a Design That Matches the Person Receiving the Gift
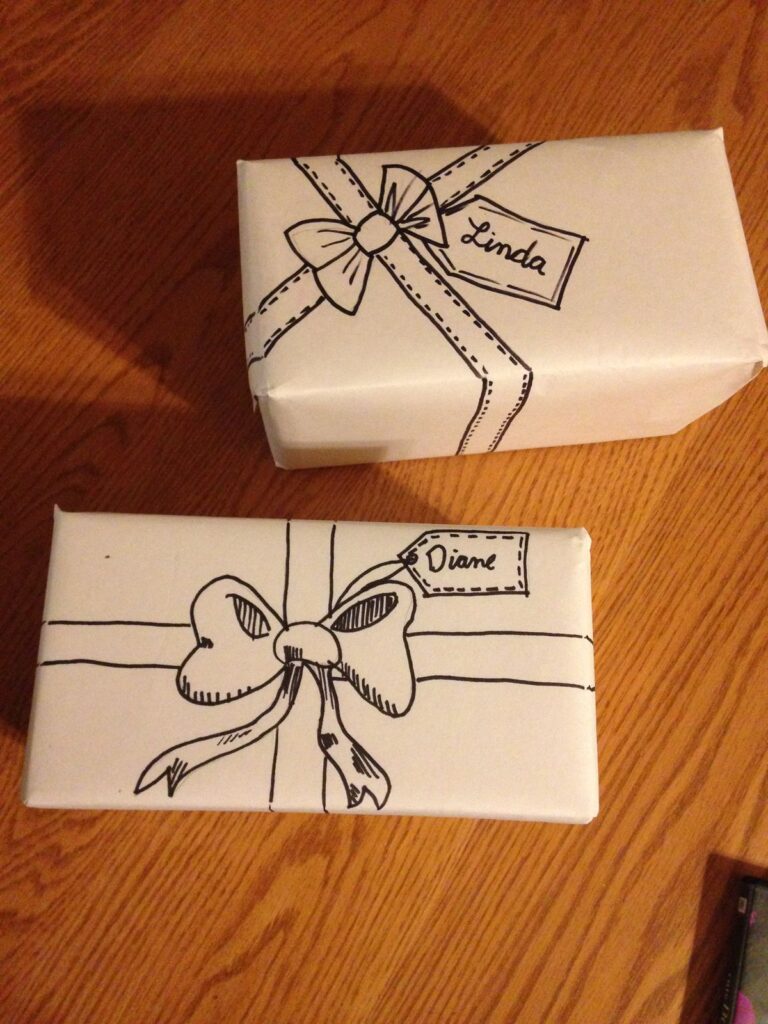
Plain wrapping paper gives you room to make a gift personal without buying printed paper. Instead of drawing Christmas trees all over it, think about something the recipient enjoys.
A person who loves gardening might appreciate small drawings of flowers and leaves, while a book lover might enjoy tiny books, glasses or pencils scattered across the paper.
Start with plain white, cream or brown paper. Use a pencil to mark where you want the drawings to go, then trace over them with a suitable pen or marker.
You could repeat one small design across the paper or draw a larger picture in the centre and leave the rest plain.
For a child’s gift, for example, you could draw their favourite animal alongside a few stars. For a friend who sews, small scissors, buttons and spools of thread could make the wrapping feel personal.
One thing to check before you begin: Test your pen or marker on a scrap of the same paper. Some inks spread through thin paper or take time to dry.
Let the design dry completely before folding the paper around the gift to avoid smudges.
This idea works particularly well when the gift itself is simple. The personal detail on the outside can show that you considered the recipient before they even open it.
9. Decorate Plain Wrapping Paper With Cut-Out Shapes
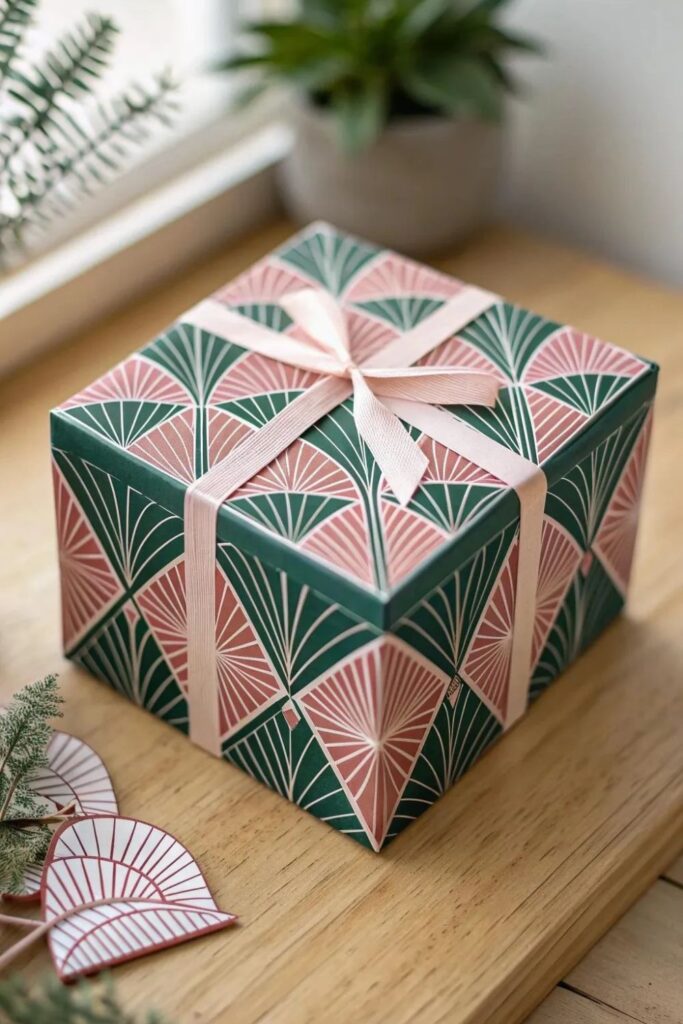
Leftover coloured paper can help you decorate a plain gift without covering it in extra layers of wrapping. This is useful when you have small scraps that are too short or narrow to wrap a present on their own.
Cut out shapes such as stars, circles, Christmas trees or simple snowflakes. Arrange them on the wrapped gift before attaching them so you can see how the colours and spacing look together.
You might place a few stars in one corner or make a row of trees along the bottom edge.
For example, wrap a small box in brown paper, then add three green paper trees and a few small red circles. The limited colour palette keeps the design clear without needing a bow or ribbon.
A useful tip: Make sure the shapes lie flat before securing them with double-sided tape or paper glue.
Too much glue can wrinkle thin wrapping paper, and shapes placed near the edges may peel off when the package is handled. Keep the decorations away from the main folds where possible.
You can also use the same shape and colour combination on several presents to make them look like a matching set.
Welcome a new mom to the Christmas season with thoughtful presents from these 20 DIY Christmas Gifts for New Moms That Are Thoughtful, Useful and Easy to Make.
10. Make a Paper Bow From Leftover Wrapping Paper
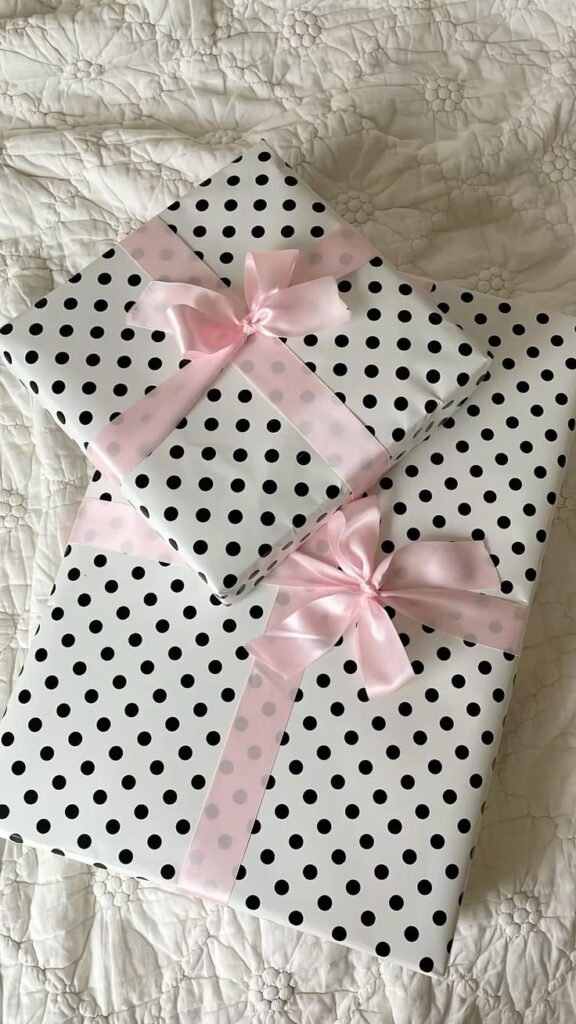
A bow can finish a gift neatly, but buying a separate pack of bows is not always necessary. You can make one from leftover wrapping paper and match it to the gift.
Cut several strips of paper to the same length. Form each strip into a loop and secure the ends with a small piece of tape.
Arrange the loops in layers, attaching them at the centre, then add a short strip around the middle to hide the joins. Attach the finished bow to the gift with tape suitable for the wrapping surface.
For a coordinated look, use the same paper as the gift. If the wrapping is plain, choose a contrasting colour for the bow so it stands out.
The paper you choose matters. Very thin paper can tear when you form the loops, while thick cardstock may be too stiff to bend neatly.
Ordinary wrapping paper or lightweight craft paper is often easier to work with. Test one loop first to check whether it holds its shape.
If you are making bows for several gifts, cut all the strips before assembling them. This helps keep the bows similar in size and saves time.
11. Use a Paper-Chain Garland Instead of Ribbon
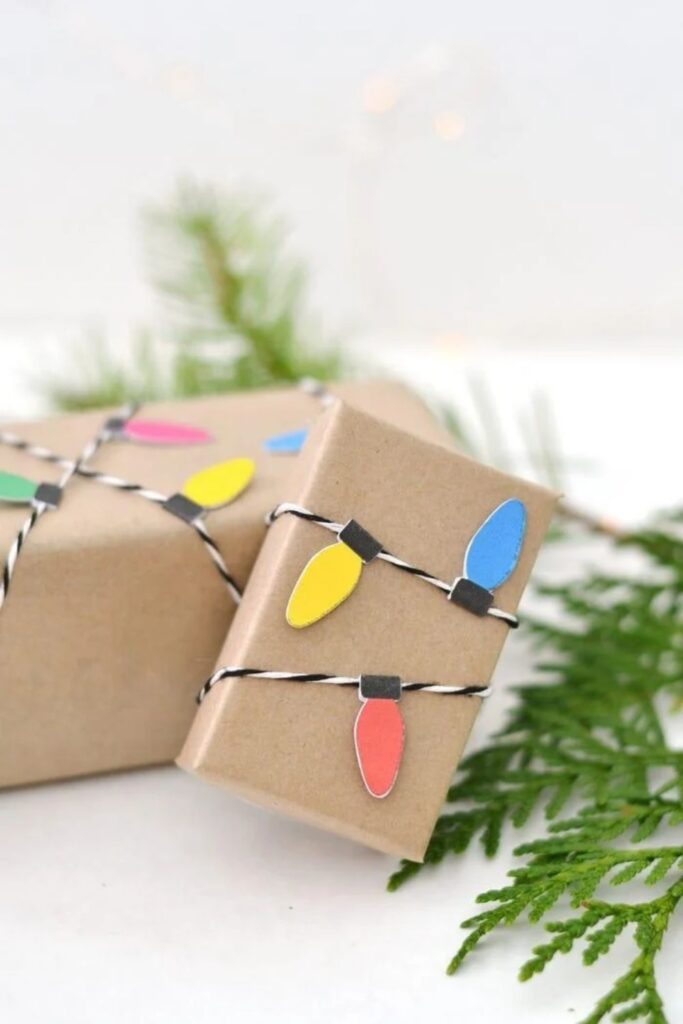
Photo credit: @ goodhousekeeping.com
Paper chains are often used as decorations, but a short chain can also finish a wrapped gift. This is a useful option when you have coloured paper scraps but no ribbon to match your wrapping.
Cut the paper into narrow strips of equal length. Bend the first strip into a loop and tape or glue the ends together.
Thread the next strip through the first loop before joining its ends, then continue until the chain is long enough to decorate the gift.
You can use two alternating colours or keep the chain in one colour to match the wrapping. Place it across the top of a box or around the middle, securing it loosely so it does not slide off.
Keep the chain short enough to stay in place. Paper loops can stretch or tear if pulled tightly, so avoid using the chain to hold the package closed.
Wrap and secure the gift first, then attach the chain as a separate decoration.
This works best on lightweight gifts that will not be handled roughly. For presents that need to travel a long distance, a flat paper band may be less likely to snag.
12. Make a Matching Gift Tag From Leftover Paper
A gift tag does more than display a name. It can also bring the colours of the wrapping together and help identify presents when several are placed under the Christmas tree.
Cut a small rectangle, circle or other simple shape from leftover wrapping paper or light card. If you use thin paper, stick it to a piece of card first so it does not bend easily. Add the recipient’s name and, if you like, a short message.
To make the tag stand out, place it over a slightly larger piece of contrasting paper. For example, a cream tag layered on green card will be easy to read against brown wrapping paper.
Punch a hole near the top and thread ribbon or string through it, or attach the tag directly to a paper band.
Leave enough space for the name to be read clearly. A tag covered in decorations may look attractive but can be difficult to use. If you are wrapping gifts for several people, write the names before attaching the tags so you do not mix them up.
You do not need to buy matching tags for every present. Using the same paper as the wrapping is a simple way to create a coordinated finish while making use of scraps that might otherwise be discarded.
For colleagues you want to appreciate without choosing something awkward or impersonal, browse these 25 Christmas Gifts For Co workers That Don’t Feel Cheap Or Weird.
13. Turn Fabric Scraps Into a Decorative Gift Band
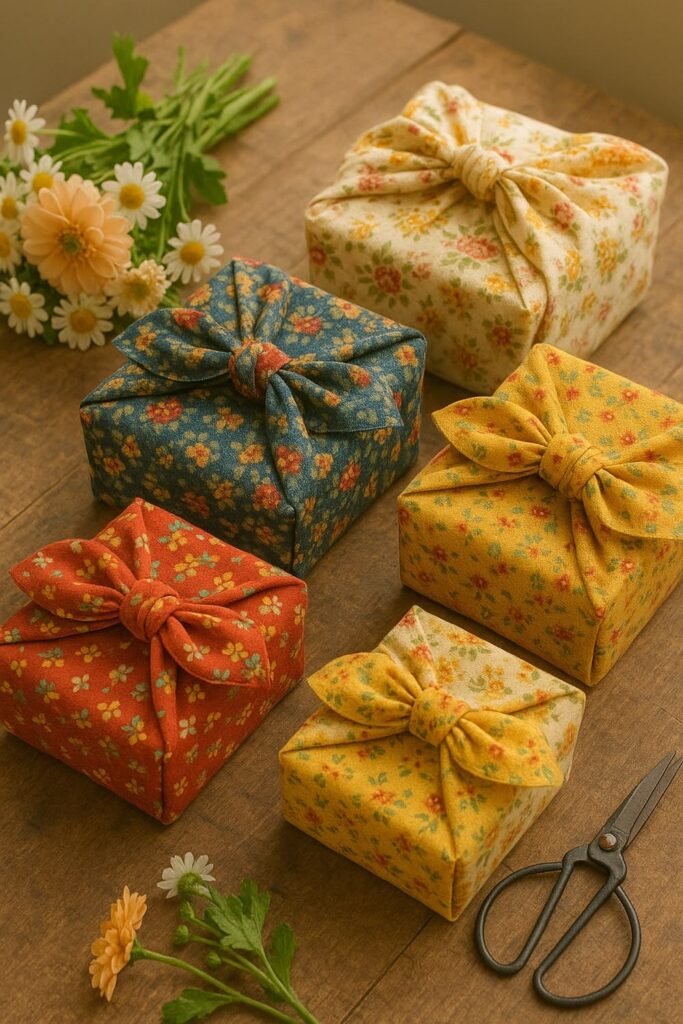
Have leftover fabric from a sewing project? Turn those small pieces into a decorative band for a Christmas gift instead of trying to find enough fabric to wrap the whole box.
This idea works particularly well for sewing enthusiasts and handmade presents.
Choose two or three fabric scraps that complement each other. Cut them into strips of a similar width, then sew the pieces together end to end to create a band long enough to go around the package.
You can also layer smaller pieces over a plain fabric strip to create a patchwork design. Wrap the finished band around the gift and secure the ends underneath with a few stitches or fabric-safe adhesive.
For example, red and green cotton scraps can add a Christmas touch to a box wrapped in plain brown paper.
You could also use leftover floral or patterned fabric for a gift that does not follow traditional Christmas colours.
One detail worth checking: Fabric edges can fray, especially when the band is handled. Fold the raw edges under and stitch them, or use fabric with finished edges.
Make the band snug enough to stay in place without bending the box or damaging the wrapping.
14. Finish the Package With a Reusable Brooch or Pin
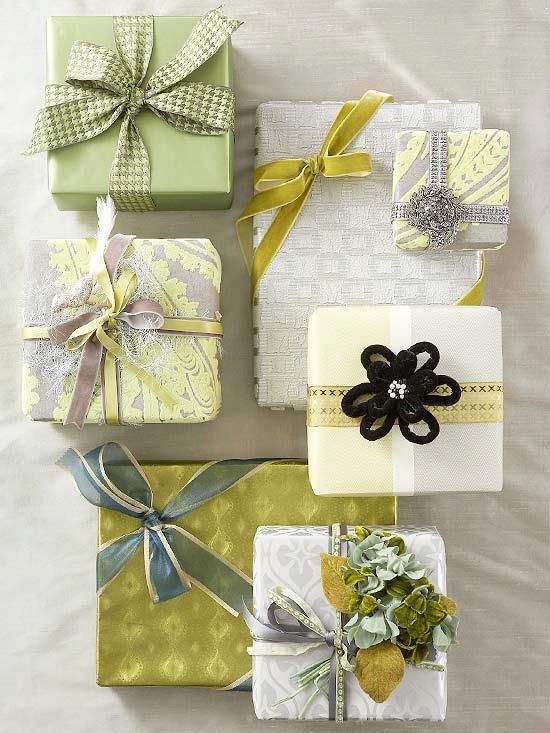
A brooch can take the place of a disposable gift bow and give the recipient an extra present to keep. This works best for adults who wear brooches or appreciate decorative accessories.
First, wrap the gift and secure it with a ribbon or a fabric band. Choose a brooch that suits the recipient’s style, then attach it to the ribbon or fabric rather than pinning it directly through delicate wrapping paper.
A decorative pin can also be fastened to a sturdy gift tag, provided the tag can support its weight.
For instance, a simple cream box with a dark green ribbon could be finished with a small gold-tone brooch. The accessory becomes part of the presentation without requiring several extra decorations.
Before using this idea, consider whether the recipient would enjoy the accessory.
A brooch that suits one person’s taste may not suit another, and a loose pin can scratch someone or fall off during transport. Secure it properly and avoid this method for gifts intended for young children.
15. Turn a Cardboard Tube Into a Wrap for Small Awkward Gifts
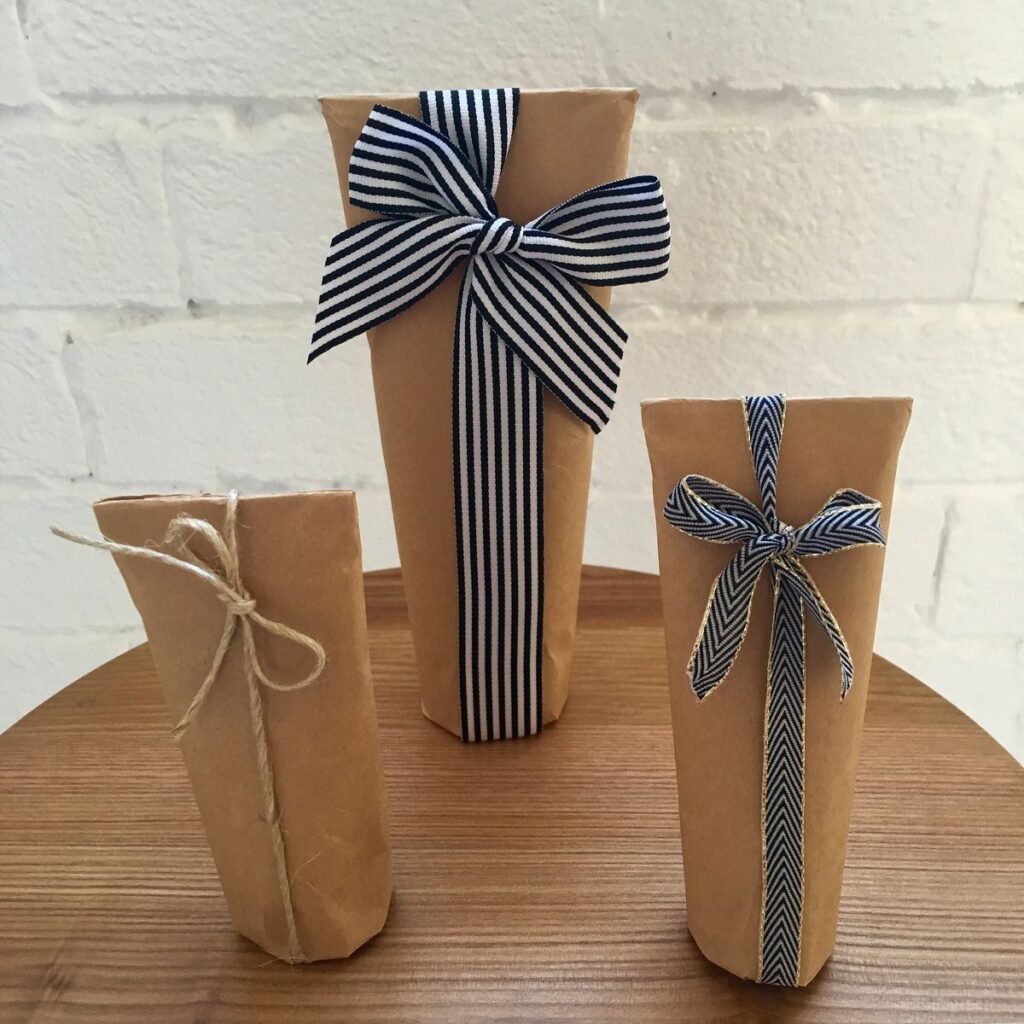
Long, narrow gifts can be difficult to wrap neatly. A sturdy cardboard tube can provide a simple container for suitable items, such as rolled drawings, small craft projects or lightweight accessories that fit inside.
Choose a clean tube that is long and wide enough to hold the gift without bending or crushing it. Place the item inside, adding suitable protection if necessary.
Cover the tube with wrapping paper or fabric, then secure the covering neatly. You can close the ends with fitted cardboard circles, folded paper or suitable end caps, depending on the tube’s design.
For a child who enjoys drawing, for example, you could place a rolled piece of artwork inside a tube covered in Christmas paper. Add a tag at one end so the recipient knows whose gift it is.
Choose the tube carefully. A thin tube may collapse under pressure, and an open-ended tube will not protect its contents from falling out.
This method is best for lightweight gifts that are not easily damaged. Fragile items need more suitable packaging and cushioning.
16. Dress Up a Jar With a Fabric Lid Cover
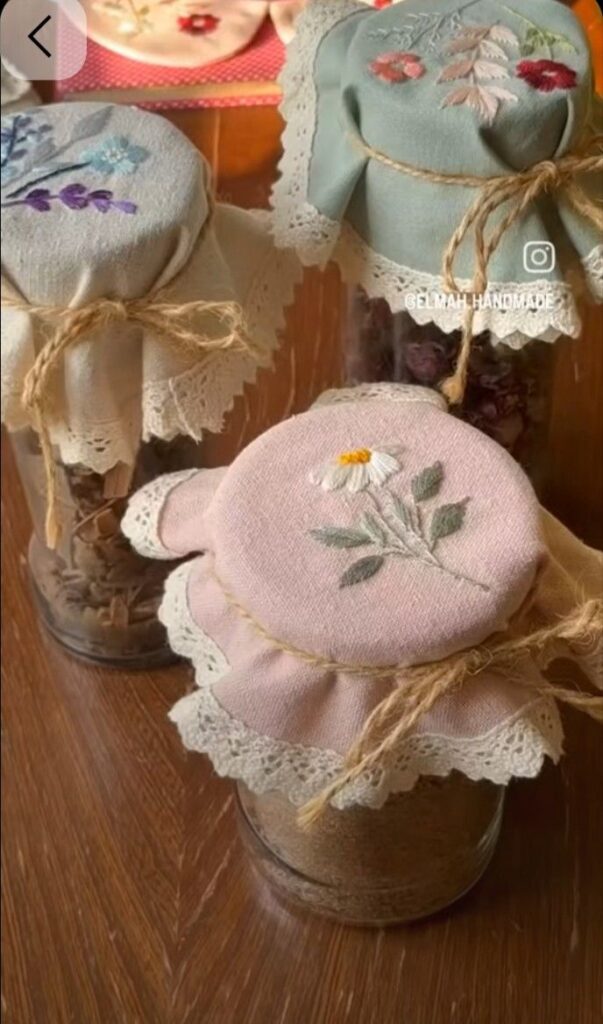
A clean jar can make a homemade gift look more presentable, particularly when it contains sweets, biscuits or another suitable treat. A small fabric cover adds colour without hiding the jar’s contents.
Cut a fabric circle larger than the lid so that it extends over the sides. Place it over the outside of the closed lid and tie string or ribbon around the neck of the jar to hold the fabric in place.
Leave enough fabric around the edges for a soft, gathered finish. Add a small tag with the recipient’s name or the contents of the jar.
For example, a jar of homemade biscuits could have a red-and-white fabric cover and a simple handwritten tag.
For a gift containing dry ingredients, a label listing the contents can also help the recipient identify what is inside.
Keep the fabric outside the lid’s sealing surface so it does not interfere with closing the jar. If you are gifting food, use a clean, suitable container and follow appropriate food-safety and storage practices.
A decorative lid cover does not make food safe for long-term storage. For homemade preserves or other foods requiring specific preservation methods, use the correct tested process and container.
Put together a personal Christmas surprise for your husband without overspending with these 25 DIY Christmas Gift Basket for Husband on a Budget That Don’t Feel Cheap.
17. Sew Simple Drawstring Gift Bags From Fabric Remnants
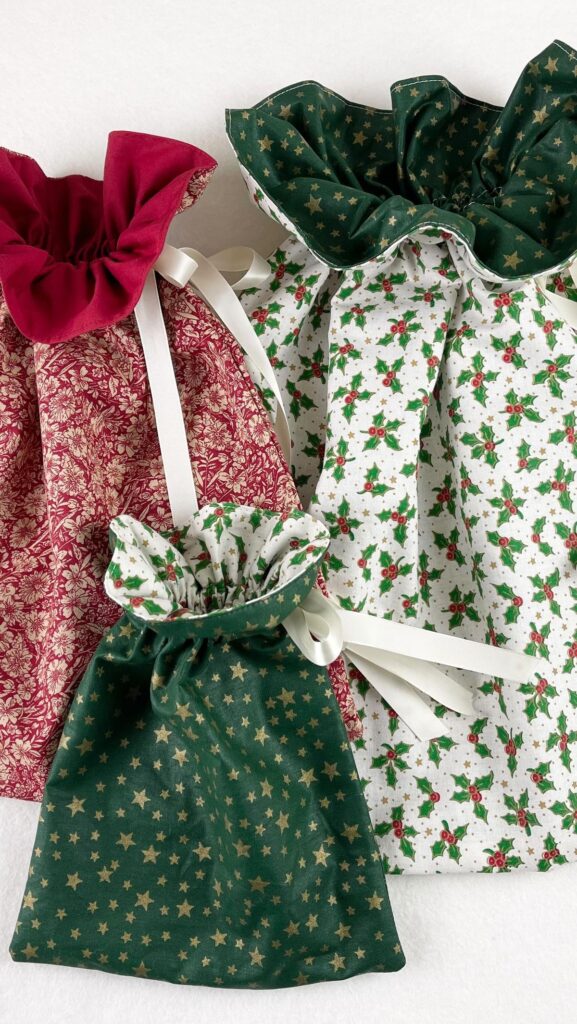
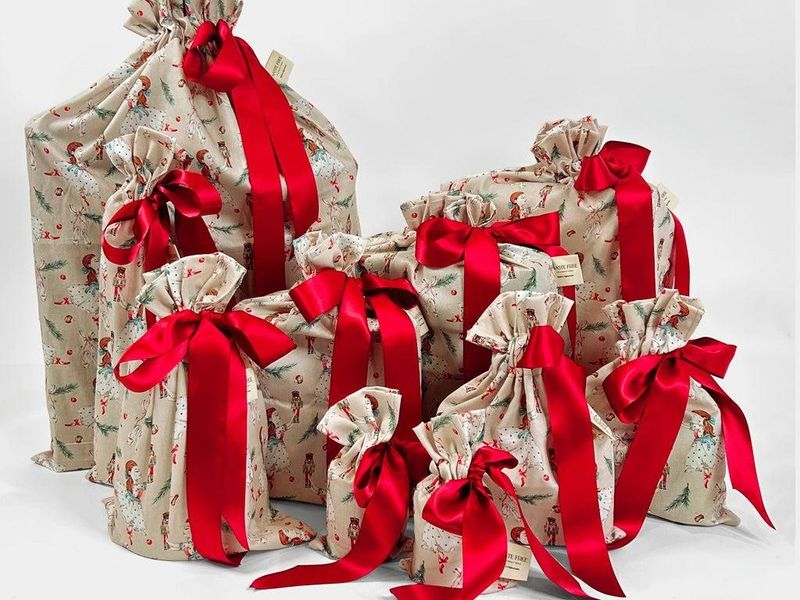
A drawstring gift bag is a practical alternative to disposable wrapping paper, especially for small gifts you give every Christmas. The recipient can reuse the bag for accessories, craft supplies or another present.
To make one, cut two matching rectangles of fabric, allowing extra width and length for the seams and the drawstring channel.
Place the pieces together with the right sides facing inward, then sew the sides and bottom. At the top, fold the fabric over to create a channel wide enough for your chosen cord, leaving an opening for threading it through.
Turn the bag right side out, thread the cord through the channel and knot the ends.
For a jewellery box, for example, choose a soft fabric bag that is slightly larger than the box. A simple cotton print can work well, while thicker fabric may be more suitable for a heavier item.
Measure the gift before cutting the fabric. Remember that the seams and folded channel reduce the finished bag’s usable size.
You can make the pouch by hand if you do not have a sewing machine, although it may take longer. Choose a fabric that is clean and strong enough for the gift, and avoid using a bag that is too small to close comfortably.
18. Attach a Tiny Message Envelope to the Gift
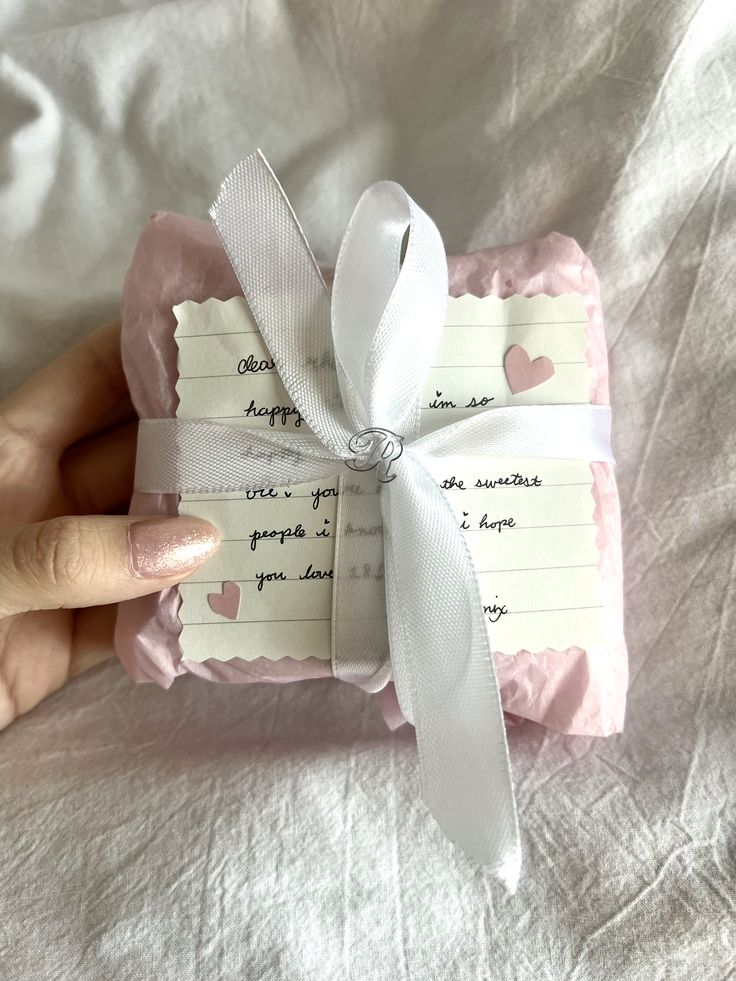
Sometimes the wrapping can carry a personal message as well as the gift itself. A small envelope attached to the package gives you space to write something meaningful without crowding the gift tag.
Cut a small piece of paper into a shape that can be folded into an envelope, or use a small ready-made envelope you already have.
Write a short message, fold it inside and seal the flap. Attach the envelope to the wrapped present using a paper band, string or a small piece of double-sided tape.
The message could explain why you chose the gift, include a favourite memory or offer a clue about what is inside. For a colleague, you might write a brief note of appreciation. For a family member, you could mention a shared moment from the year.
Choose paper that complements the wrapping, but make sure the envelope is easy to notice and open.
If the gift comes with care instructions, assembly directions or other important information, keep those separate so the recipient does not mistake them for a personal note.
This is one of the simpler DIY Christmas wrapping ideas, but it can make an ordinary package feel more thoughtful without adding much cost.
19. Arrange Several Wrapped Gifts Into One Display
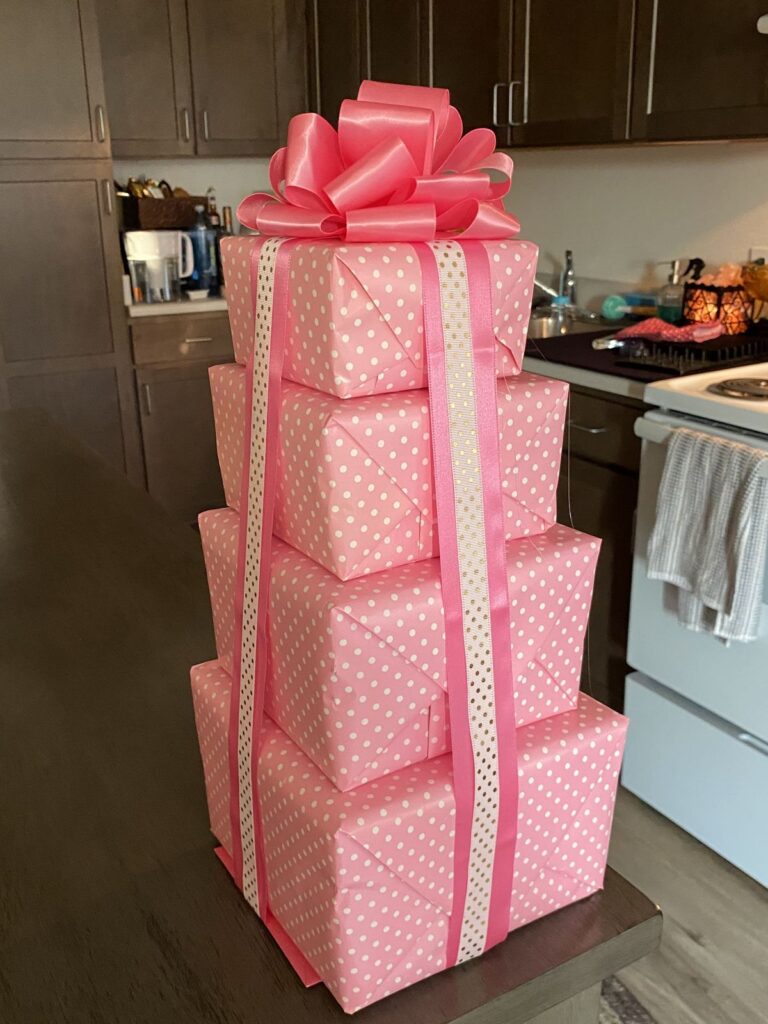
When several presents are going to the same family or household, wrapping them in complementary colours can make them look like a coordinated collection.
You can take this a step further by arranging the wrapped gifts into a Christmas-themed display.
Start by wrapping each gift separately so the contents remain protected and easy to identify. Choose two or three colours that work together, such as white, green and red, or brown paper with cream and gold accents.
Arrange the boxes by size, placing larger, stable boxes at the bottom and smaller ones above.
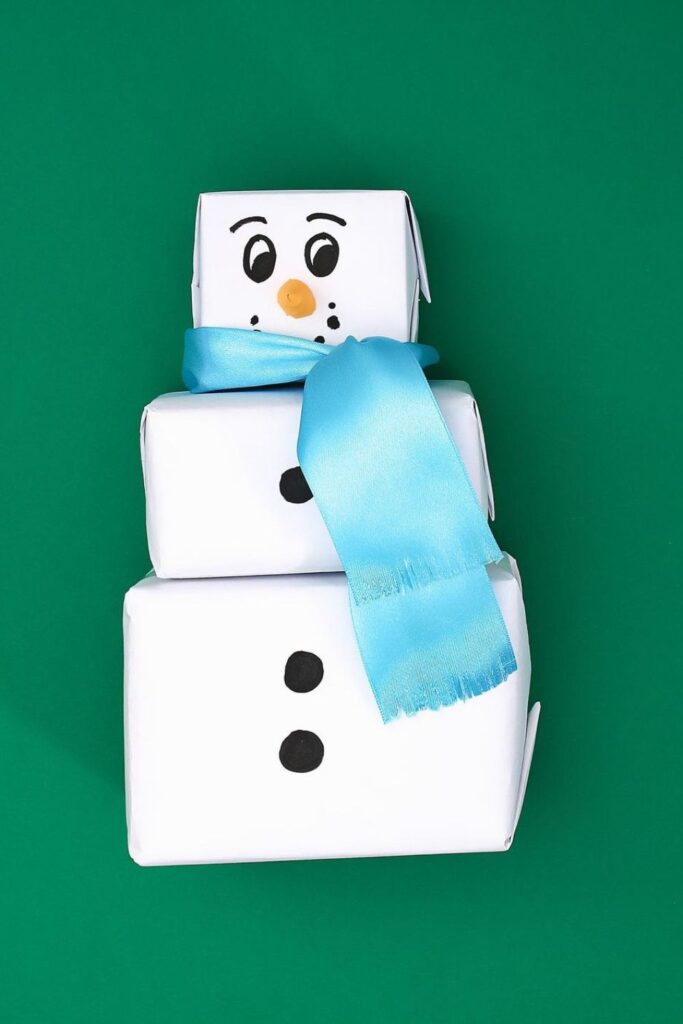
For a snowman-inspired display, stack three stable boxes of decreasing sizes and add simple paper decorations to suggest the eyes, buttons and scarf.
Keep the decorations flat and lightweight so they do not make the boxes unstable. You could also arrange several presents like a small Christmas tree, provided the boxes can sit securely.
The important part is stability. Do not stack heavy gifts on top of fragile packages, and avoid building a tall display where it could be knocked over.
If the presents will be transported, dismantle the arrangement and pack the gifts securely.
This approach is especially useful when several presents will be displayed together under the tree.
The coordinated colours make the collection look intentional, while each gift remains individually wrapped and ready to give.
Looking for a present that will stand out at the office Christmas party? These Office Christmas Party White Elephant Gift Ideas That Actually Get Picked Every Single Time offer inspiration for choosing a fun exchange gift.
Tools and Supplies That Make DIY Christmas Wrapping Easier
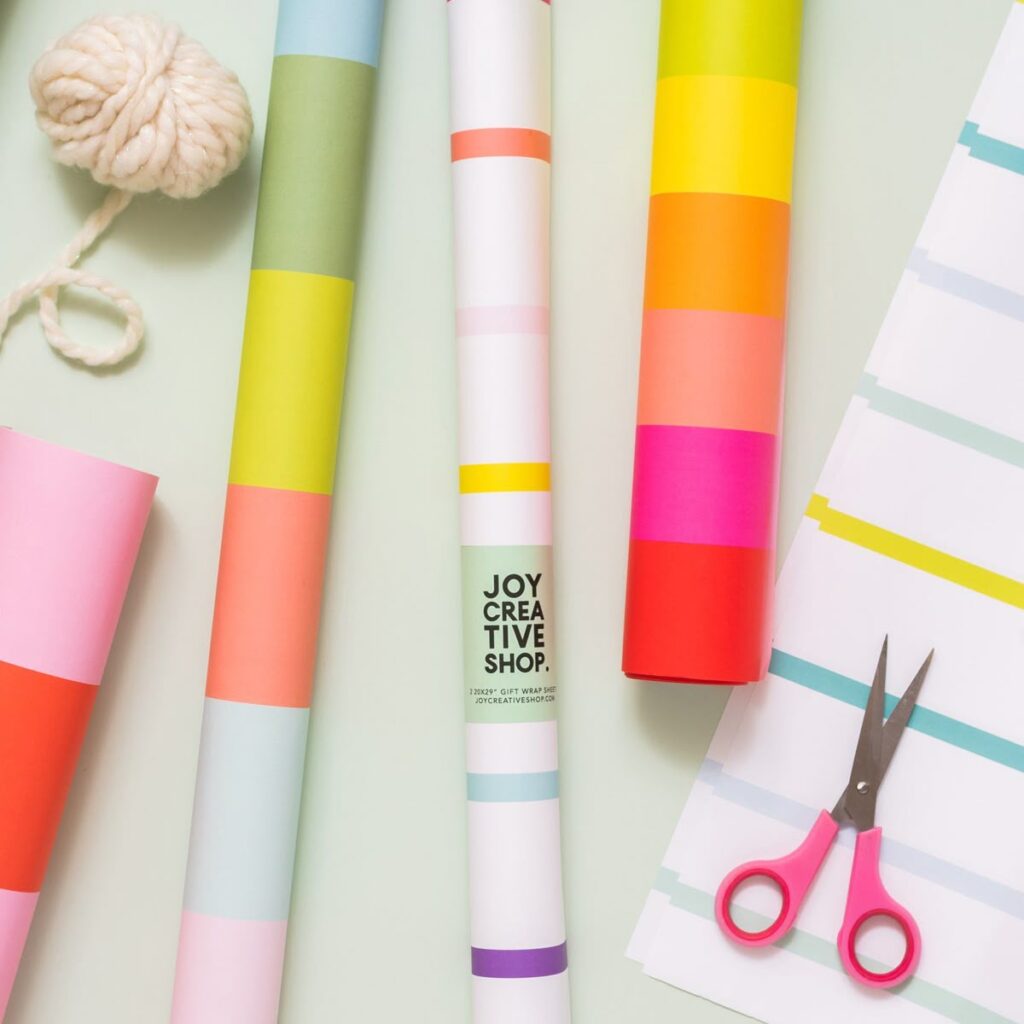
You do not need to buy a separate set of supplies for every project. Many DIY Christmas wrapping ideas can be completed with scissors, leftover paper, adhesive and materials already at home.
A few basic tools can make cutting neater, attaching decorations easier and reusable fabric wraps simpler to assemble.
Craft scissors, a ruler and a cutting mat: These help you cut straight paper bands, even strips for paper bows and paper chains, and neatly shaped gift tags.
A ruler is particularly useful when making several matching decorations. A cutting mat protects your work surface when cutting with a craft knife, which should be used carefully and kept away from children.
Double-sided tape or suitable paper adhesive: Use double-sided tape to hide joins beneath paper bands and attach lightweight paper shapes.
Paper glue can also work, but too much may wrinkle thin wrapping paper. Test the adhesive on a scrap first, especially when using glossy paper or delicate materials.
Cardstock and paper offcuts: Keep leftover card and coloured paper for sturdy gift tags, layered decorations, small envelopes and paper bows.
Cardstock holds its shape better than very thin paper, although it may be too stiff for tightly curved bow loops. Before buying a large pack, check what you can reuse from previous craft projects.
Basic sewing supplies: A needle, thread, measuring tape and fabric scissors are useful for making fabric gift bands and drawstring pouches.
If you already sew, leftover fabric may be all you need. Choose thread and fabric suitable for the project, and measure carefully to allow for seams and folded edges.
Before shopping, check what each project requires. For example, paper decorations may only need scissors and tape, while reusable fabric bags require sewing supplies.
Buying only the tools that help you complete the projects you have chosen can keep the cost of your Christmas wrapping under control.
Make festive decorations while reusing materials you already have with these DIY Christmas Crafts From Recycled Materials.
Conclusion
Beautiful Christmas wrapping does not have to cost much. A leftover fabric scrap, an old delivery box or a few pieces of coloured paper can turn a simple present into something that feels more personal.
The key is to choose a wrapping method that suits the gift, keeps it secure and gives it a neat finish.
Start with materials you already have at home, then pick one or two DIY Christmas wrapping ideas that fit the presents you are giving. You do not need to make every package elaborate; even a small, thoughtful detail can make a difference.
Which of these wrapping ideas will you try this Christmas? Save this list for your holiday preparations or share your favourite idea in the comments!