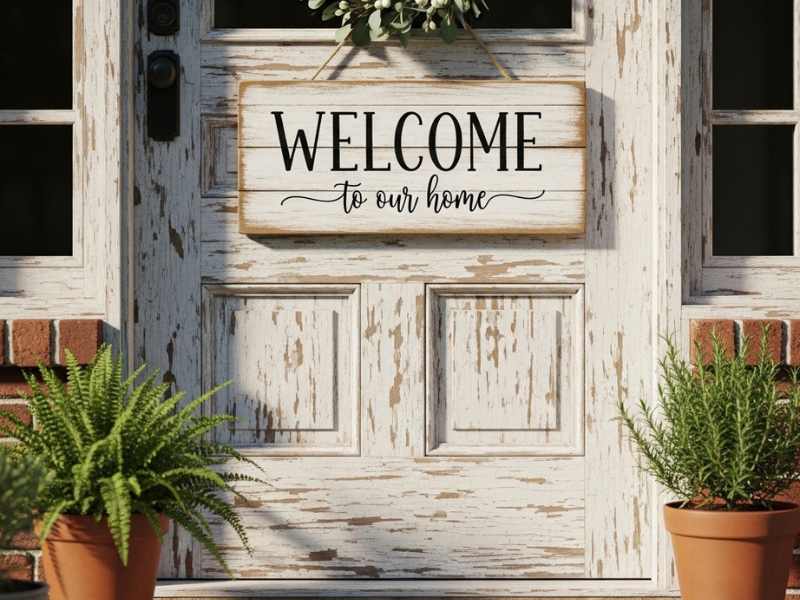
Want your porch to wow instantly? The best DIY farmhouse welcome signs that make your front door instantly inviting show how to combine textures, finishes, and personalization for lasting look.
When you walk up to someone’s house and see a small, simple sign on the front door, it can make you feel instantly welcome. It’s that little touch that says, “You’re invited here,” even before you knock.
Making your own farmhouse welcome sign lets you give your home that same feeling. These signs don’t have to be complicated or expensive.
With a few easy steps, simple materials, and some creativity, you can make a sign that feels personal, warm, and inviting, something that truly reflects your home.
Get inspired for your next entryway project by checking out 25 Stunning Welcome Sign Ideas for Every Event Theme, packed with creative concepts that go beyond ordinary designs.
Table of Contents
- 1 Choosing the Right Materials for a Durable Farmhouse Sign
- 2 Wood Options:
- 3 Font and Lettering for Farmhouse Style
- 4 Unique DIY Techniques That Elevate Your Sign
- 5 Creative Shapes and Layouts Beyond the Rectangle
- 6 Hanging and Displaying Your Sign
- 7 Personalization That Makes It Truly Yours
- 8 Common Mistakes to Avoid
- 9 Conclusion
- 10 Related
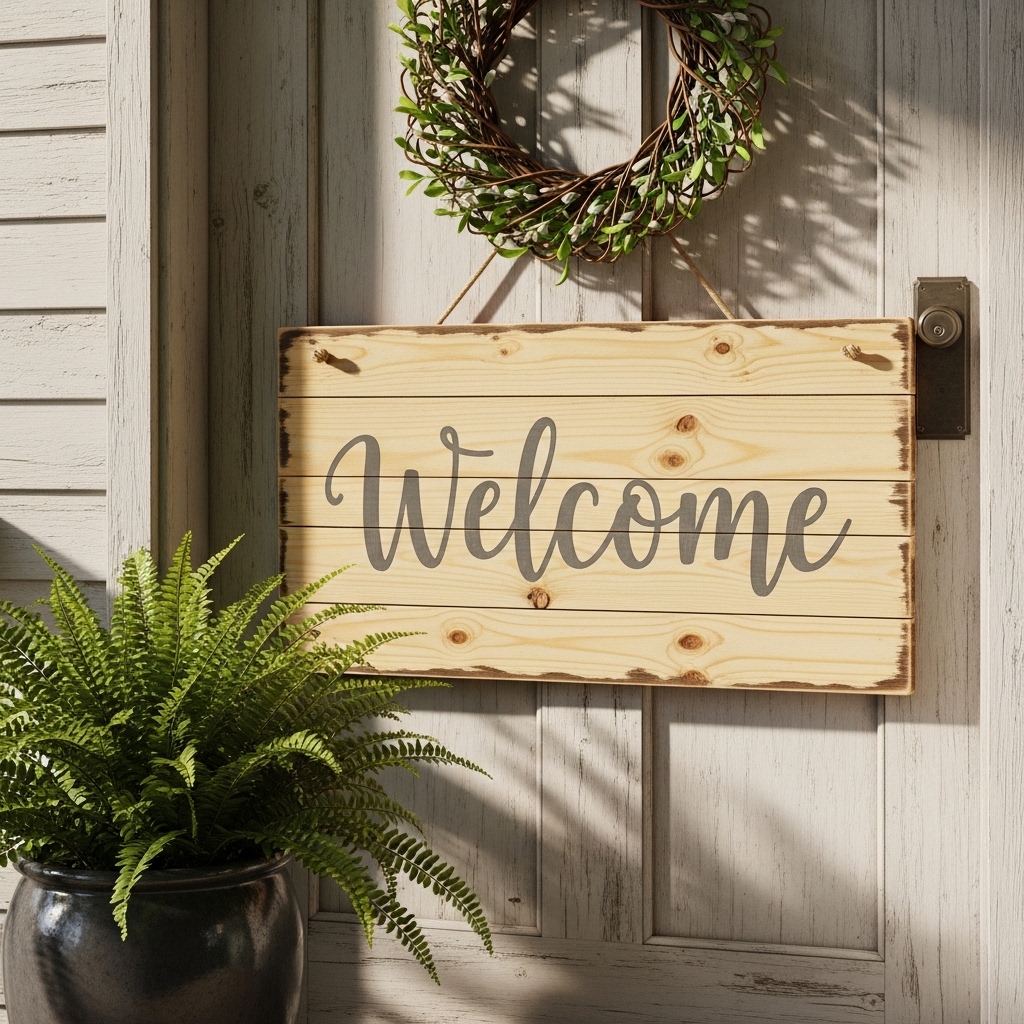
Choosing the Right Materials for a Durable Farmhouse Sign
-
Wood Options:
-
- Reclaimed wood – rustic, sturdy, and weather-friendly if sealed.
- MDF (weather-resistant) – smooth, easy to paint, holds up outdoors.
- Accents:
- Metal pieces – add durability and farmhouse charm.
- Finishing Tips:
- Outdoor paint or stain protects from sun and rain.
- Certain finishes age gracefully, giving an authentic, worn-in look over time.
- Affordable Sourcing Ideas:
- Thrift stores or salvage yards for wood and metal scraps.
- Upcycle old boards, cabinet doors, or leftover materials from other projects.
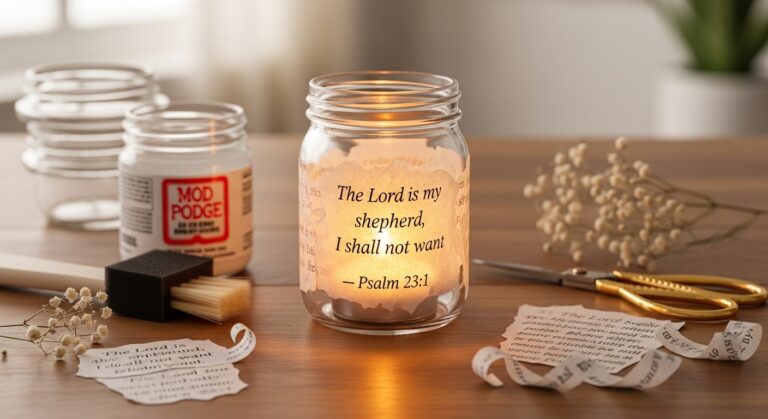
See how simple thrift finds can look luxurious with 15 Thrift Store Furniture Makeovers That Look Like They Cost a Fortune, perfect if you love adding rustic charm to your home décor.
Font and Lettering for Farmhouse Style

- How Typography Shapes the Feel of Your Sign
- The font you choose sets the mood instantly. Cursive or script fonts make a sign feel warm, cozy, and personal, perfect if you want a friendly, inviting vibe.
- Bold serif fonts feel more rustic and classic, giving your sign a strong farmhouse charm. Understanding this helps you match your sign to the personality of your home.
- Mixing Techniques for a Polished Look
- Combine hand-painted letters with vinyl stencils. Start with stencils to get perfect spacing and alignment, then hand-paint over them to add a personal, human touch. This method gives a professional look without needing expensive tools or fancy brushes.
- Spacing, Alignment, and Readability
- Letters that are too close together or uneven can make a sign hard to read. Measure and lightly mark spacing on the wood first. Step back frequently to check how it looks from a distance, the goal is for the sign to be readable from the street, without feeling crowded or commercial.
- Test your chosen size on a scrap piece of wood before painting the final sign. This small step avoids frustration and ensures your letters are balanced and visually appealing.
- Extra Tip for Personality
- Don’t be afraid to mix fonts subtly, one font for “Welcome” and another for a smaller family name or phrase can add depth without looking messy.
Make crafting a rejuvenating experience with How to Host a Cozy Self-Care Craft Night for Busy Women, a guide to relaxing, productive evenings with friends or solo.
Unique DIY Techniques That Elevate Your Sign

When making DIY farmhouse welcome signs, small creative techniques can make your project feel truly special and stand out.
- Layering Textures:
- Combine materials like wood, metal, rope, or burlap to give your sign dimension and interest. For example, a simple wooden base with a thin rope border or metal accent letters can instantly make the sign feel more handcrafted and rustic. These layers catch the eye and give your sign a professional look without needing complicated tools.
- Distressing Techniques:
- Giving your sign a slightly worn or aged finish creates that authentic farmhouse charm. Try sanding edges lightly, whitewashing the wood, or using paint in multiple thin layers and lightly removing some with sandpaper. These soft touches make your DIY farmhouse welcome signs feel lived-in and warm, rather than flat or factory-made.
- Seasonal Adaptability:
- Think ahead: design a base sign that works all year, then add removable elements for holidays or seasons. A small wreath, seasonal ribbon, or painted accent can change the look without needing a new sign. This way, your sign stays fresh and relevant, while still keeping its farmhouse charm.
Creative Shapes and Layouts Beyond the Rectangle
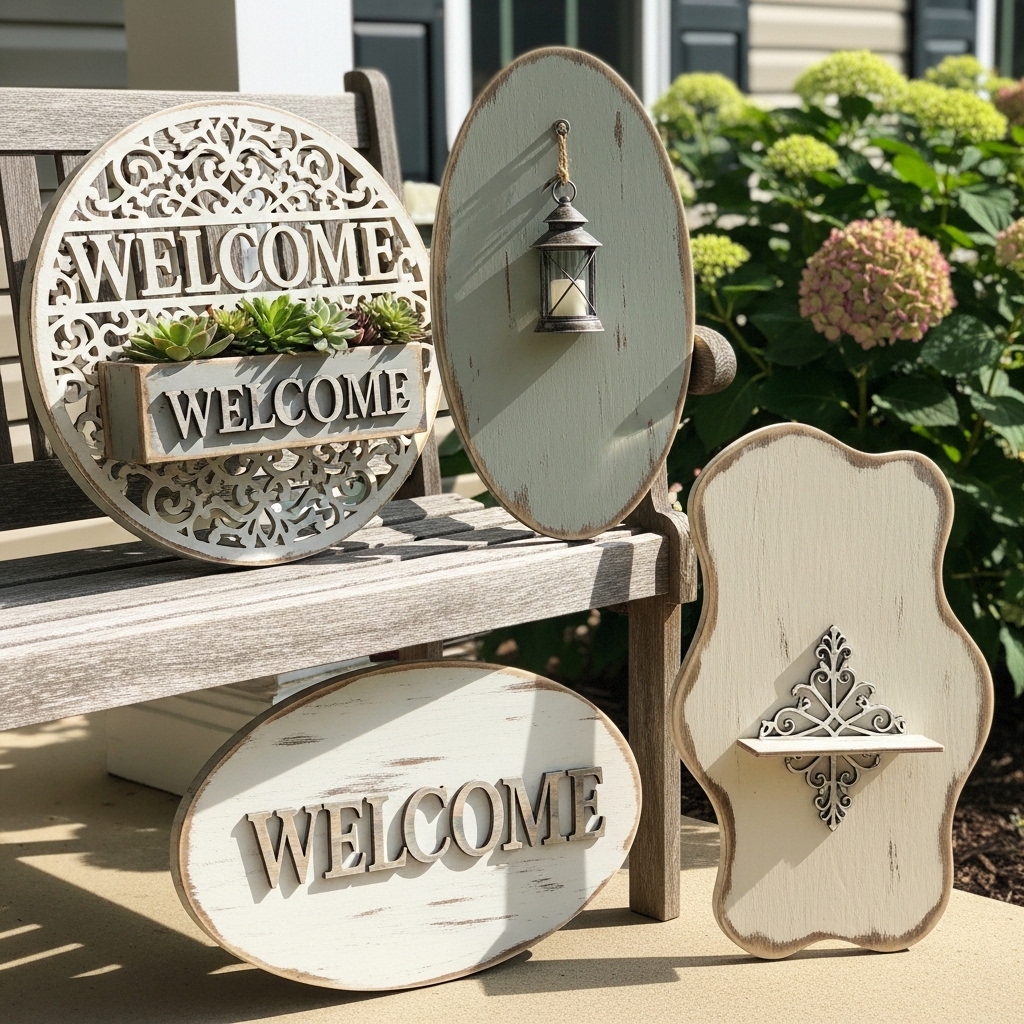
When making DIY farmhouse welcome signs, thinking beyond the standard rectangle can make your sign stand out and feel truly unique.
- Experiment with Shapes:
- Oval, circular, or freeform designs immediately catch the eye. A rounded sign can feel softer and more inviting, while a freeform shape can echo natural elements like leaves or farm animals. Choosing a shape that complements your doorway or porch makes the sign feel intentional rather than generic.
- Add Functional Elements:
- Consider including a chalkboard section for seasonal messages, hooks for keys or mail, or a small planter area. These touches are not only practical but also add personality. For instance, a tiny planter box at the bottom can hold flowers or greenery that change with the season, enhancing the farmhouse feel.
- Play with Negative Space and Cutouts:
- Negative space is when parts of the sign are intentionally left open or carved out. This could mean cutting letters out of the wood, leaving a gap around a word, or adding small decorative shapes. It gives your sign depth and visual interest. A simple heart, star, or leaf cutout can make the design more engaging without overwhelming the message.
- Tip:
- Start with a sketch on paper before cutting or painting. This helps you visualize spacing, shapes, and functionality so your final DIY farmhouse welcome sign looks balanced and polished.
Equip your craft space with the essentials highlighted in 10 Must-Have Crafts Tools For DIY, helping you complete projects efficiently without frustration or wasted effort.
Hanging and Displaying Your Sign
How you display your sign affects both how welcoming it looks and how long it lasts. A poorly mounted sign can warp, fall, or fade quickly, while a thoughtfully hung sign becomes a centerpiece of your entryway. Here’s how to do it right:
- Choose the Right Hardware for Longevity:
- Outdoor signs face wind, rain, and sun, so pick hooks, brackets, or hidden supports that can handle the weight and weather. Metal hooks or brackets with rust-resistant coatings work best. If your sign is heavier than it seems, consider anchoring it into a wall stud rather than just drywall for extra security.
- Think About Placement and Height:
- Eye-level placement works best for visibility. Too high and it’s hard to read; too low and it feels unbalanced. Center it on the door or wall, and use a level to keep it straight. Step back and view it from the street, this helps you see how it will look to anyone approaching.
- Pay Attention to Symmetry and Balance:
- If you have other decorations like porch lights, wreaths, or house numbers, make sure your sign feels visually balanced among them. Symmetry isn’t required, but your sign should feel intentionally placed, not like it’s floating awkwardly.
- Add Subtle Enhancements for Impact:
- Greenery, seasonal wreaths, or soft outdoor lighting can make the sign feel more inviting. For example, small fairy lights or lanterns can highlight the sign in the evening. Use these accents sparingly so they complement rather than distract from your sign.
- Tip – Protect Your Sign From the Elements:
- Even with the right placement and hardware, exposure to sun and rain can damage paint or wood over time. Apply a clear outdoor sealer to the sign’s surface and edges. Reapply once a year to maintain color and durability.
Understanding why placement, mounting, and protection matter, your sign will not only look welcoming but also last for years. This turns your DIY project into a lasting, functional piece of farmhouse charm.
Equip your craft space with the essentials highlighted in 10 Must-Have Crafts Tools For DIY, helping you complete projects efficiently without frustration or wasted effort.
Personalization That Makes It Truly Yours
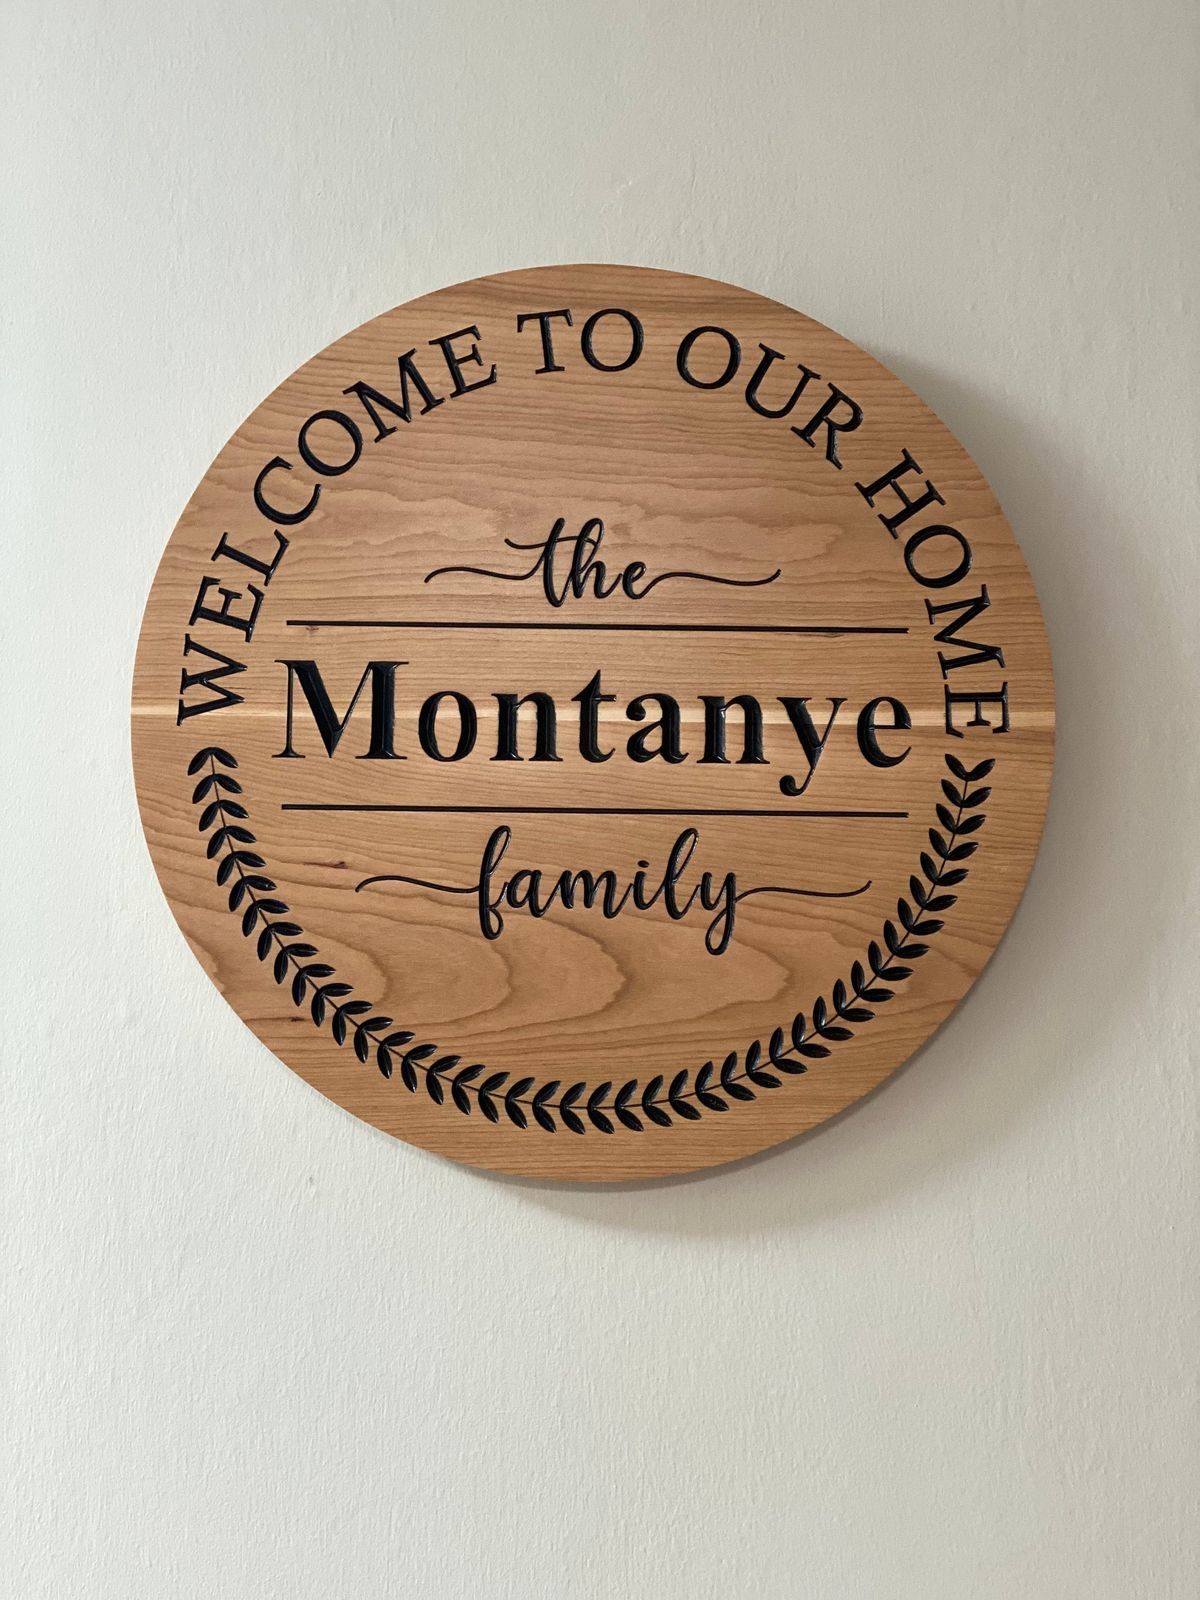
Adding your personal touch is what transforms a simple project into a meaningful statement. With DIY farmhouse welcome signs, small choices make a big difference in style and uniqueness.
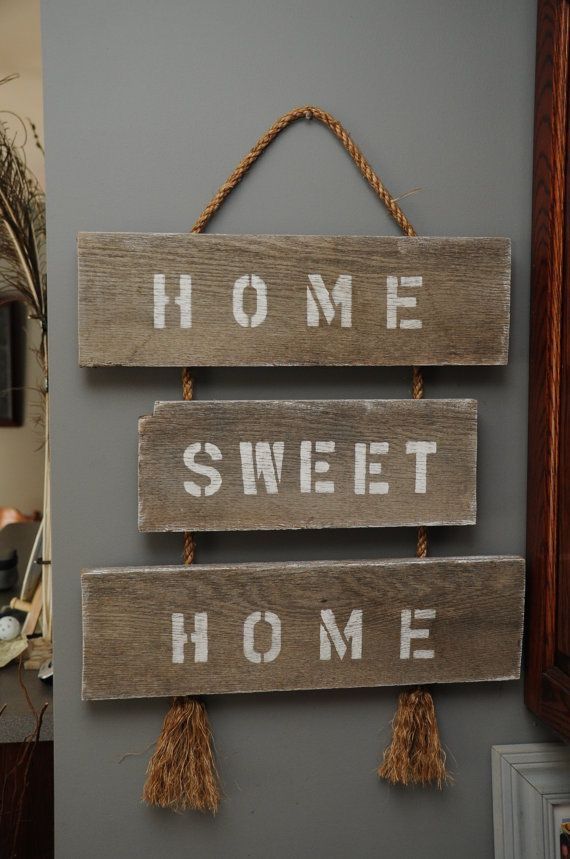
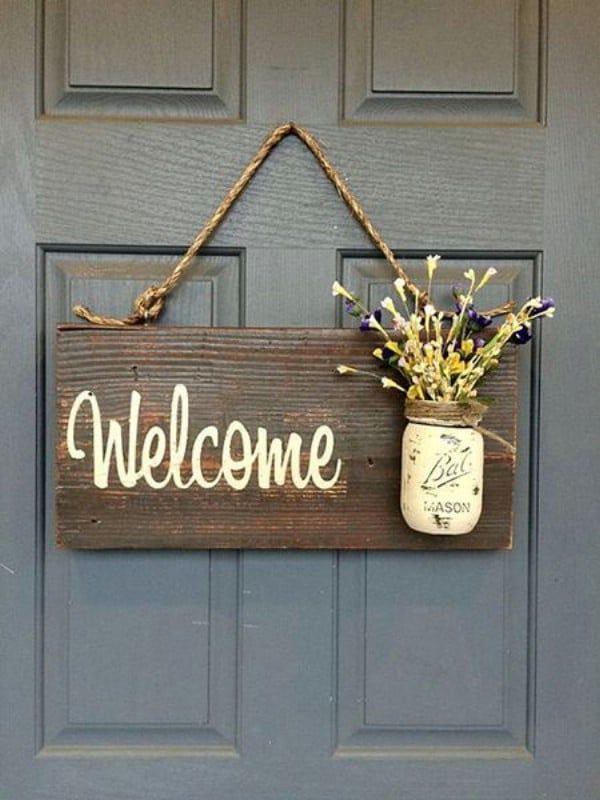
- Add Names or Custom Greetings:
- Including your family name, initials, or a short greeting makes the sign feel personal and inviting. Even a small phrase like “Home Sweet Home” or “The Johnsons” can instantly warm up your entryway. Consider using stencils or hand-painted letters to balance neatness with a handcrafted feel.
- Layer Textures and Color:
- Combining wood, paint finishes, and natural elements creates depth. For example, lightly sanding painted letters for a distressed effect, or adding a burlap ribbon accent, adds dimension and makes the sign feel like it belongs in a farmhouse setting. Choose colors that complement your door or porch so the sign stands out without clashing.
- Add Unexpected Farmhouse Elements:
- Rope handles, tin accents, or natural branches can elevate the rustic charm. A rope hanger not only looks authentic but also supports the sign’s weight. Tin letters or small metal accents give a subtle farmhouse industrial feel. Even small branches or greenery tucked along the edges can tie the design together naturally.
- Tip for Balance:
- Don’t overdo it, pick one or two personal elements to highlight. Too many textures or accents can overwhelm the sign and reduce readability.
Carefully personalizing your DIY farmhouse welcome signs, you create a project that reflects your style, feels welcoming, and becomes a lasting piece of your home’s entrance.
Avoid common pitfalls and improve your skills fast with The Most Common Crafting Mistakes Beginners Make, so your projects come out looking polished every time.
Common Mistakes to Avoid
Knowing what not to do can save time, frustration, and ensure your sign looks polished and lasts.
- Signs That Are Too Small or Cluttered:
- A sign that’s too small can get lost on your porch, and too many words or decorations make it hard to read. Keep your message short and your layout clean so it’s inviting from a distance.
- Using the Wrong Paints or Finishes:
- Cheap or indoor-only paints can peel or fade quickly when exposed to sun and rain. Choose outdoor-grade paints and sealers, and apply a protective topcoat to maintain color and durability over time.
- Overcomplicating the Design:
- Adding too many textures, fonts, or decorative elements can overwhelm the sign and distract from the message. Simplicity often reads as elegance. Focus on one or two standout features to make the design feel intentional and professional.
Freshen up your living space with seasonal elegance by reading 5 Gentle Ways to Style a Spring Mantel That Feels Fresh and Cozy , ideal for adding a warm touch alongside your DIY farmhouse welcome signs.
Conclusion
Creating DIY farmhouse welcome signs is more than a craft, it’s a way to make your front door feel warm, personal, and inviting.
Even small touches, like layering textures, choosing the right finishes, or adding a custom greeting, can completely transform the first impression your home gives.
Take what you’ve learned and try a mini project today. Experiment with paint, distressing techniques, or unexpected accents to see what fits your style.
Share your finished DIY farmhouse welcome signs with friends or family, and don’t be afraid to adjust and improve as you go, the process is just as enjoyable as the result.