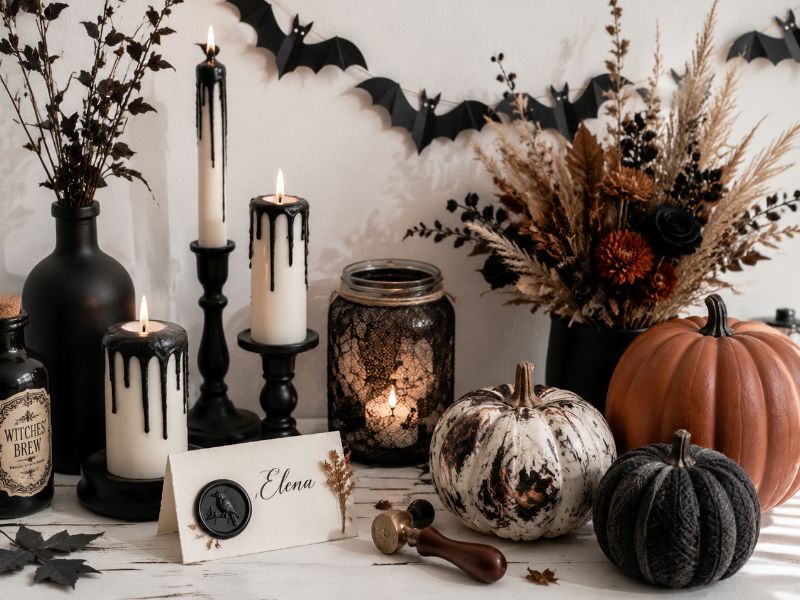
No time for complicated projects? This easy Halloween crafts for adults come together fast without looking rushed.
October shows up, and so does a specific kind of tired, the kind where you want the house to feel like Halloween, but sitting down with construction paper and glue like it’s a second-grade art class isn’t happening.
Life is busier than that now. What’s wanted is something that actually belongs in an adult’s home, not something a child made with love and a parent proudly displayed.
That’s really the whole difference between a “kid craft” and a grown-up one, it’s rarely about skill.
It usually comes down to two or three small choices: a color swapped for something quieter, a shiny finish traded for something matte, a plastic piece replaced with something that feels like it’s actually made of something. The steps stay just as simple.
What changes is the eye behind them.
The fifteen crafts below are built with that in mind. Nothing here needs a special trip to the craft store or a steady artist’s hand, just the right small choices, made on purpose instead of by accident.
Host a memorable celebration with Adult Birthday Craft Night Party: Themes, Ideas, and How to Pull It Off, filled with creative activities, decorations, and planning tips for a fun-filled evening.
Why Adult Halloween Crafting Has Actually Grown

Halloween crafting isn’t just a kids’ activity anymore, and that shift didn’t happen by accident.
Adult craft nights, paint-and-sip events, and DIY Halloween décor content have grown steadily in recent years, largely because Halloween carries none of the pressure other holidays do, no gifts to buy, no family politics to navigate, no obligation beyond showing up and having fun.
That’s part of why easy Halloween crafts for adults have found such a steady following: the appeal isn’t really about the finished decoration.
It’s the hour or two of hands-on, low-stakes focus that a lot of adults don’t get elsewhere, something closer to stress relief than a to-do list item.
A craft night with friends, or even an hour alone with a hot glue gun, fills a different need than scrolling through pre-made décor online.
None of that means every craft needs to be complicated to be worth doing. If anything, it’s the opposite, the simplest projects are usually the ones that actually get finished in one sitting instead of half-abandoned on a table for two weeks.
Easy Halloween Crafts For Adults
Gather your friends for Paint and Sip Craft Night Ideas That Are Way Better Than a Studio, where you’ll find fun painting projects that are easy to recreate at home.
Quick Wins (Under 30 Minutes)
These are the projects worth reaching for on a weeknight, minimal setup, minimal cleanup, and nothing that needs to dry overnight before it’s usable.
1. Black Paper Bat Garland

Cutting a string of bats from black paper is one of those crafts people did as kids without thinking twice, and it turns out the grown-up version isn’t really different in steps, just in a few small choices that keep it from looking like it was made by a ten-year-old.
What you’ll need: black cardstock, a bat template or scissors, black thread or thin twine, a needle
How to make it:
- Cut bat silhouettes in a few different sizes, freehand or using a template, cardstock holds its shape far better than regular paper once it’s hanging
- Thread the needle with black thread or thin twine
- Push the needle through the top center of each bat, spacing them a few inches apart
- Vary the sizes as you string them, rather than repeating the same size over and over, this one detail is what keeps it from looking uniform or machine-cut
- Hang it along a mantel, staircase railing, or window frame
The whole thing takes less time than deciding where to hang it. And that’s really the point of a craft like this, it’s not meant to be impressive, just done, and done in a way that looks like an adult made it on purpose.
2. Dipped Black Wax Candles
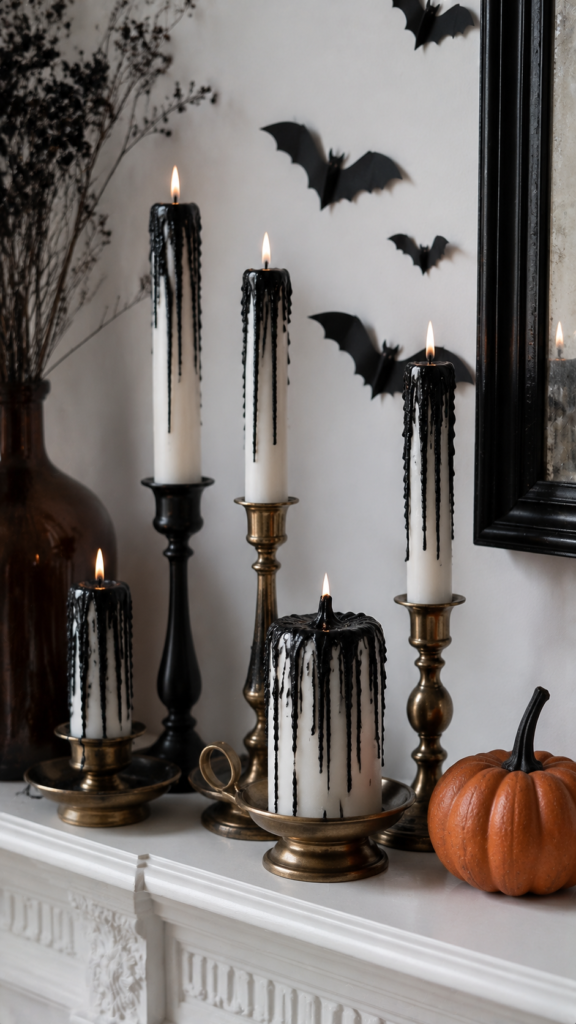
Plain white candles look almost stage-prop plain until the tops get dipped in black wax — a trick borrowed from event stylists, not craft blogs, and it takes barely more effort than lighting the candle itself.
What you’ll need: plain white taper or pillar candles, black candle-dipping wax (not crayon wax, it melts and sets differently), a heat-safe container for melting, tongs or a heat-safe clip
How to make it:
- Melt the black wax in a heat-safe container, following the product’s melting instructions
- Hold the candle by its base, or use tongs or a clip near the bottom
- Dip the top few inches into the melted wax
- Lift it out slowly and let the excess drip and pool naturally down the sides — don’t wipe or smooth it, the uneven drip is what makes it look intentional
- Let it fully harden before handling
- Repeat the dip once or twice if the first layer looks thin
The imperfection is the whole trick here. A dip that comes out too smooth and even actually reads as less finished than one with a bit of natural drip running down the side.
3. Spiderweb Lace Mason Jar Lanterns

An empty jar that’s been sitting in the recycling bin turns into a soft, shadow-casting lantern with one scrap of lace and a tea light. no paint or drying time, no waiting around.
What you’ll need: a plain glass jar, black lace or spiderweb-patterned fabric, hot glue gun, a flameless tea light
How to make it:
- Wrap the fabric loosely around the outside of the jar
- Overlap the ends slightly at the back
- Secure the seam with a small dab of hot glue
- Trim any fabric hanging past the top or bottom edge
- Set the tea light inside and turn it on to check how the shadows fall before deciding where it’ll sit
It’s a small craft, but it’s the kind that quietly does a lot of work in a room once it’s lit, worth making two or three at once rather than just one.
4. Matte-Painted Glass Bottles

An empty wine bottle is trash until it’s not, a single coat of the right paint finish turns it into something that looks bought, not saved from the recycling bin.
What you’ll need: an empty glass bottle with the label removed, matte black or charcoal spray paint, painter’s tape, optional gold or copper paint for the neck
How to make it:
- Wash the bottle and fully remove the label and any leftover adhesive
- Let it dry completely before painting, any moisture affects how the paint sets
- Spray an even, thin coat over the entire bottle, holding the can at the distance listed on the label
- Let it dry, then add a second coat if any spots look uneven
- Once fully dry, tape off a thin band around the neck and paint it gold or copper for contrast
- Remove the tape once that second coat has dried
Matte is the detail that matters most here. A glossy black finish reads cheap and plasticky almost instantly, matte is what makes it look like it belongs on a shelf instead of a party store aisle.
Make something meaningful with Crafts to Make for Friends: Meaningful DIY Gift Ideas They’ll Actually Love, featuring handmade gifts that are thoughtful, practical, and fun to create.
No-Carve Pumpkin Alternatives
Carving isn’t for everyone, the mess, the seeds, the pumpkin rotting a week before Halloween even arrives.
These no-carve pumpkin alternatives solve that problem entirely, using real or faux pumpkins that last the whole season instead of five days.
5. Terracotta-Finish Pumpkins
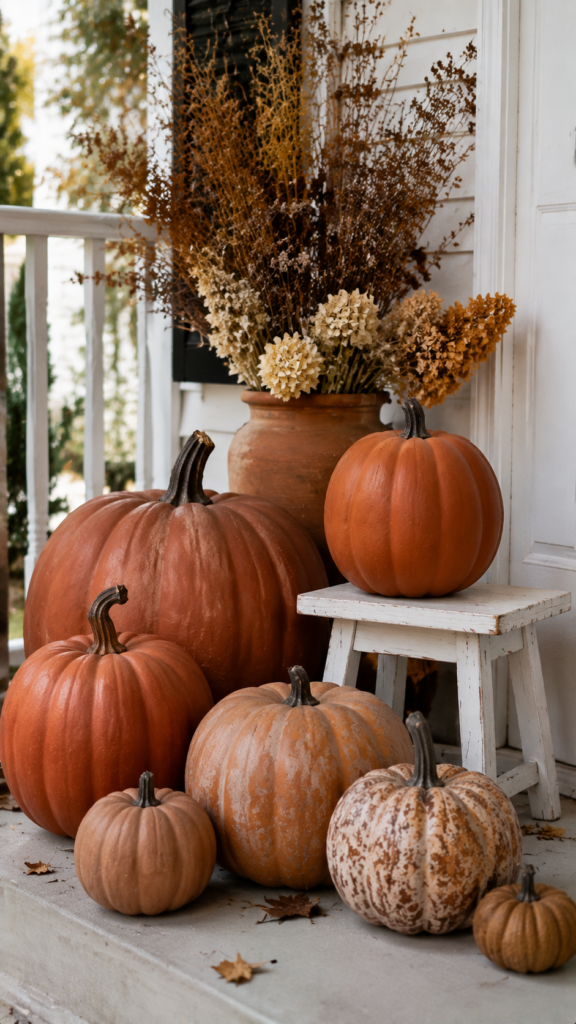
Real orange pumpkins get a full transformation with a coat of paint that mimics aged terracotta pottery, a look that’s been steadily trending because it reads as vintage décor rather than a Halloween prop.
What you’ll need: a real or faux pumpkin, terracotta or burnt-orange matte spray paint, a stem left intact or a dried twig as a substitute
How to make it:
- Wipe the pumpkin clean and let it dry fully
- Spray an even, thin coat of terracotta paint over the entire surface, including the stem if it’s staying on
- Let it dry, then check for any spots the color didn’t reach fully and add a light second coat
- Leave the pumpkin’s natural ridges and texture visible, that texture is what sells the pottery look, so there’s no need to sand or smooth anything first
6. Marbled Nail Polish Pumpkins
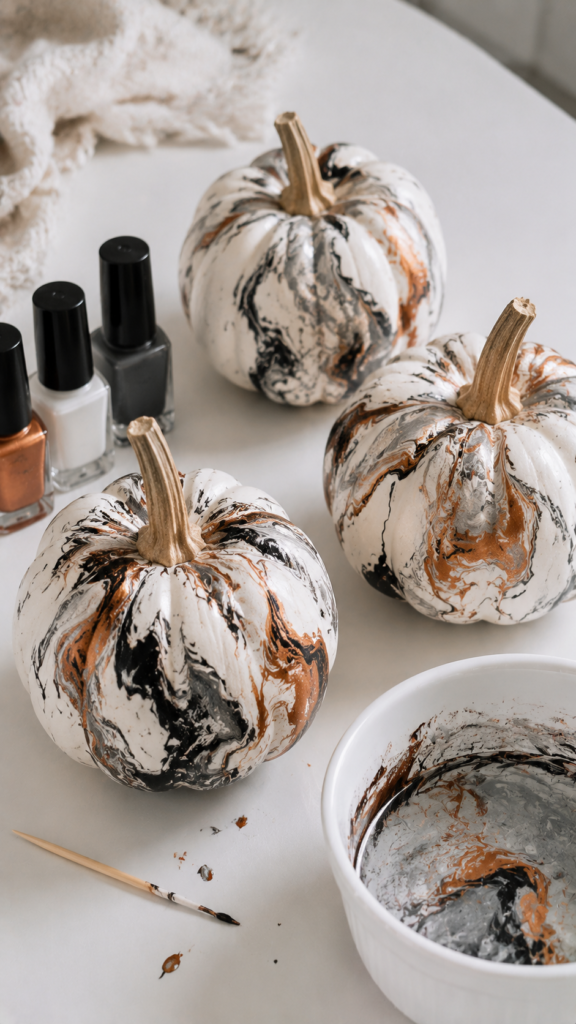
A small or medium white pumpkin gets a swirled, marble-like pattern using nothing more than a bowl of water and a few colors of nail polish, a technique borrowed directly from marbled paper crafting.
What you’ll need: a white or light-colored pumpkin, 2-3 colors of nail polish, a disposable container of room-temperature water, a toothpick, gloves
How to make it:
- Fill the container with water, enough to fully submerge the pumpkin
- Drop a few dots of each nail polish color onto the water’s surface, they’ll spread into thin films almost instantly
- Swirl the colors gently with a toothpick to create a marbled pattern
- Dip the pumpkin into the water in one smooth motion, rolling it slightly so the pattern wraps around the surface
- Lift it out and let it dry completely before setting it down anywhere
Looking for more inspiration? Birthday Craft Night Party Themes, Ideas and Everything in Between shares creative themes, decorations, and DIY activities to make your celebration unforgettable.
7. Yarn-Wrapped Pumpkins
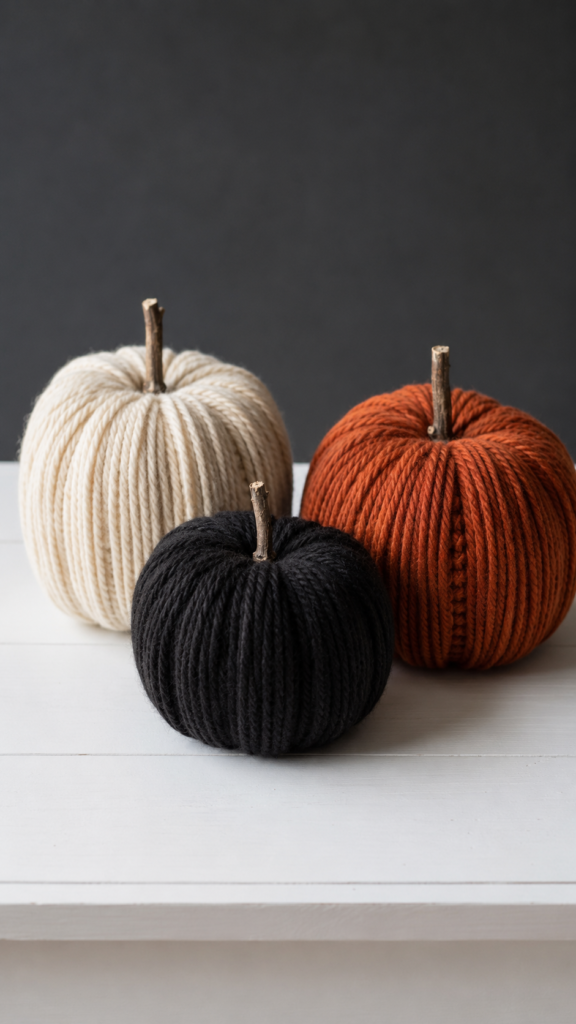
A faux foam pumpkin gets fully wrapped in yarn, turning a plain craft-store shape into something textured and intentional-looking, closer to a knit object than a Halloween decoration.
What you’ll need: a foam pumpkin, yarn in one or two colors, hot glue gun, scissors
How to make it:
- Secure the end of the yarn to the base of the pumpkin with a small dot of hot glue
- Wrap the yarn around the pumpkin from top to bottom, following the natural ridges as a guide
- Keep the wraps snug against each other so no foam shows through underneath
- Add a small dot of glue every few wraps to keep the yarn from loosening later
- Trim and glue down the end once the pumpkin is fully covered
8. Decoupage Pumpkins

Thin paper, dried botanicals, book pages, or patterned tissue paper, gets sealed onto a pumpkin’s surface with Mod Podge, giving it a layered, textured finish that a plain painted pumpkin doesn’t have.
What you’ll need: a real or faux pumpkin, thin paper or dried botanicals, Mod Podge, a foam brush
How to make it:
- Brush a thin layer of Mod Podge directly onto the pumpkin where the first piece will go
- Press the paper or botanical piece onto the wet glue, smoothing out any air bubbles
- Brush another thin layer of Mod Podge over the top of that piece to seal it
- Repeat, slightly overlapping each new piece, until the pumpkin is covered as much or as little as wanted
- Let it dry fully before handling or displaying
Each of these easy Halloween crafts for adults skips the mess of carving entirely, and most of them last well past a single Halloween night, some, like the yarn-wrapped version, can be stored and reused year after year.
9. Black Salt Rimmed Glassware

A dramatic-looking bar cart or drink station, using a rimming technique bartenders already rely on rather than anything Halloween-specific.
What you’ll need: black sanding sugar or activated charcoal salt, a small plate, a lime wedge or corn syrup, glassware
How to make it:
- Pour the black sanding sugar or salt onto a small plate
- Run a lime wedge (or a light coat of corn syrup) around the rim of each glass to create a sticky edge
- Press the rim into the black sugar or salt, rotating the glass so it coats evenly
- Let it set for a minute before pouring anything in
- The technique works whether the drink itself has anything to do with Halloween or not, the glass does the work on its own
10. Fabric-Covered Pumpkins
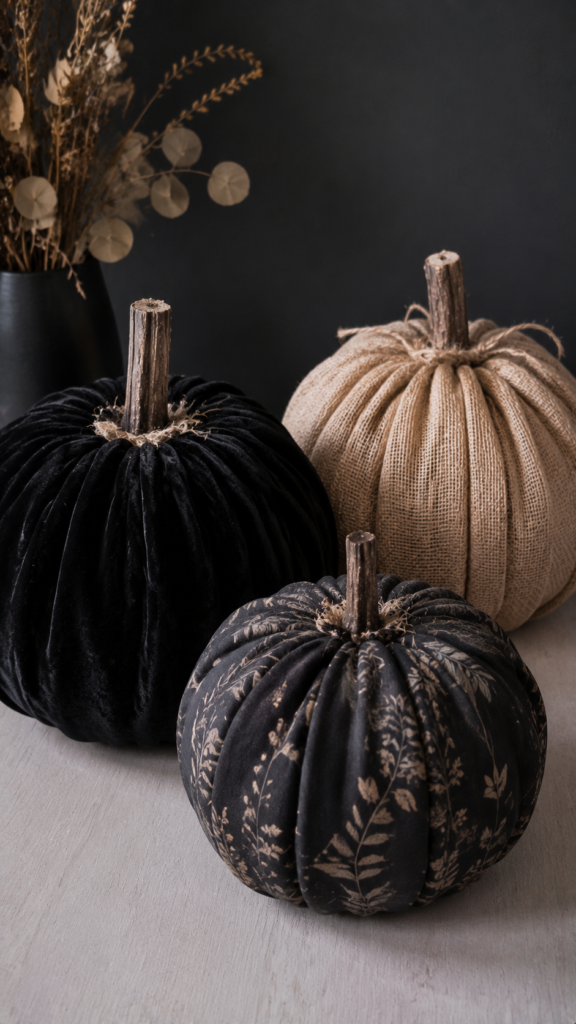
A faux pumpkin wrapped entirely in fabric rather than painted, giving it a soft, textured look that works especially well for a more muted or neutral Halloween display.
What you’ll need: a foam or plastic pumpkin, fabric (burlap, velvet, or a printed cotton all work), hot glue gun, scissors
How to make it:
- Cut the fabric into a rough circle, large enough to cover the entire pumpkin with a few extra inches around the edge
- Center the pumpkin on top of the fabric
- Gather the fabric edges up and around the pumpkin, tucking and pleating as needed to follow its shape
- Secure the gathered fabric at the top, near the stem, with small dots of hot glue
- Trim any excess bulk at the top before glue-covering it with a small fabric scrap or a real/faux stem for a finished look
Tablescape & Entertaining Pieces
These are built for a table people are actually gathering around, a dinner, a party, a night with friends, rather than passive décor sitting on a shelf.
11. Black Feather Halloween Wreath

A door wreath built from black feathers instead of florals, giving it a texture that reads as dramatic rather than the usual pumpkin-and-leaf look.
What you’ll need: a plain wire or foam wreath form, black feathers (craft feathers, sold in bulk by the bag), hot glue gun, black ribbon (optional, for hanging)
How to make it:
- Starting at one point on the wreath form, glue the first feather down with the quill pointing toward the center
- Add the next feather slightly overlapping the first, covering the quill and glue point underneath it
- Continue working around the form in one direction, keeping the overlap consistent so no bare foam or wire shows through
- Vary the feather sizes slightly as you go for a fuller, less uniform look
- Once fully covered, check the back and front for any gaps and fill them in with smaller feather pieces
- Attach a loop of ribbon to the back for hanging
Bring everyone together from anywhere with How to Plan a Virtual Craft Night Party with Friends (DIY Girls Night Guide), packed with ideas for hosting an engaging online craft night.
12. Dried Botanical Centerpiece
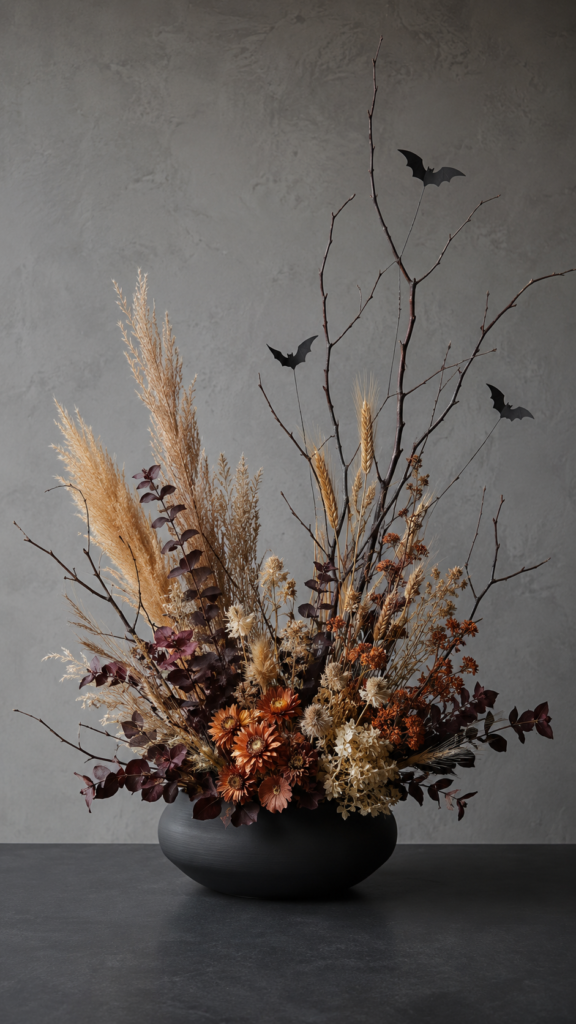
A centerpiece built from dried, not fresh, materials, meaning it holds up through an entire party (or the whole season) instead of wilting by hour two.
What you’ll need: dried flowers, wheat stalks, or pampas grass, a low vase or vessel, floral wire, black or deep-toned ribbon (optional)
How to make it:
- Trim the dried stems to varying lengths before arranging, so the finished piece has some height variation instead of a flat top
- Arrange the tallest pieces first toward the back or center, then fill in shorter pieces around them
- Use floral wire to bundle a few stems together if they need extra support to stay upright in the vase
- Tie a ribbon around the vase or the stem bundle itself, if using one, as the final touch
- Because the materials are already dried, there’s no risk of the arrangement wilting or drooping over the course of the night
13. Taper Candle Wax Seals (Place Card Style)
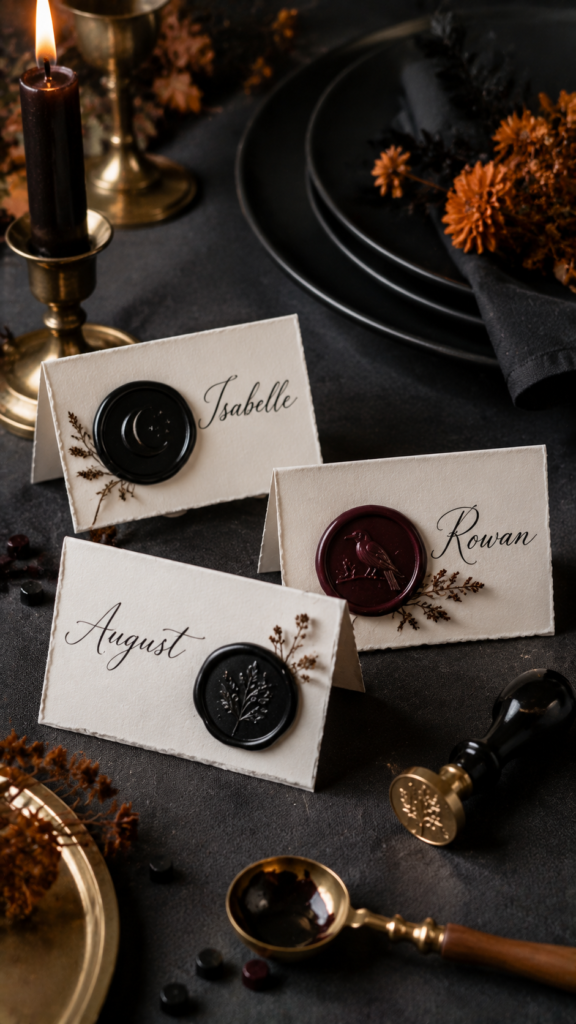
A small, unexpected detail for a place setting, a wax seal pressed directly onto a folded card, using melted candle wax and a metal stamp rather than store-bought stickers.
What you’ll need: a metal wax seal stamp, sealing wax or a spare candle in a dark color, a small spoon or dish for melting, place cards or folded cardstock
How to make it:
- Melt a small amount of wax in a spoon or dish, either over a candle flame or a low stovetop burner
- Pour a small pool of the melted wax directly onto the card where the seal will go
- Press the metal stamp into the wax firmly and hold it for a few seconds
- Lift the stamp straight up once the wax has started to set, rather than at an angle, to avoid smudging the design
- Let it fully harden before moving or stacking the cards
14. Charcuterie Board Graveyard Layout

Not a craft in the traditional sense, but a styling technique, arranging a normal charcuterie spread using shape and placement to create a subtle graveyard theme without a single plastic prop.
What you’ll need: a wooden board, dark-colored crackers or bread, cheese cut into rectangular “headstone” shapes, dark grapes or olives, rosemary sprigs
How to make it:
- Cut a block of firm cheese into a few small rectangular shapes, then trim the top corners at an angle to resemble headstones
- Arrange the cheese “headstones” in a loose cluster toward one side of the board, rather than a perfectly even grid
- Fill in the rest of the board with dark crackers, grapes, and olives around the cheese
- Tuck a few rosemary sprigs upright near the cheese pieces to stand in for overgrown grass or small shrubs
- Keep the color palette dark and muted overall, that’s what sells the theme more than any single element does
Keep everyone entertained with 20 Picnic Games for Ladies That Keep Every Woman Laughing, a collection of easy games perfect for retreats, birthdays, and girls’ get-togethers.
Wearable & Costume Add-Ons
15. Fabric-Wrapped Statement Earrings
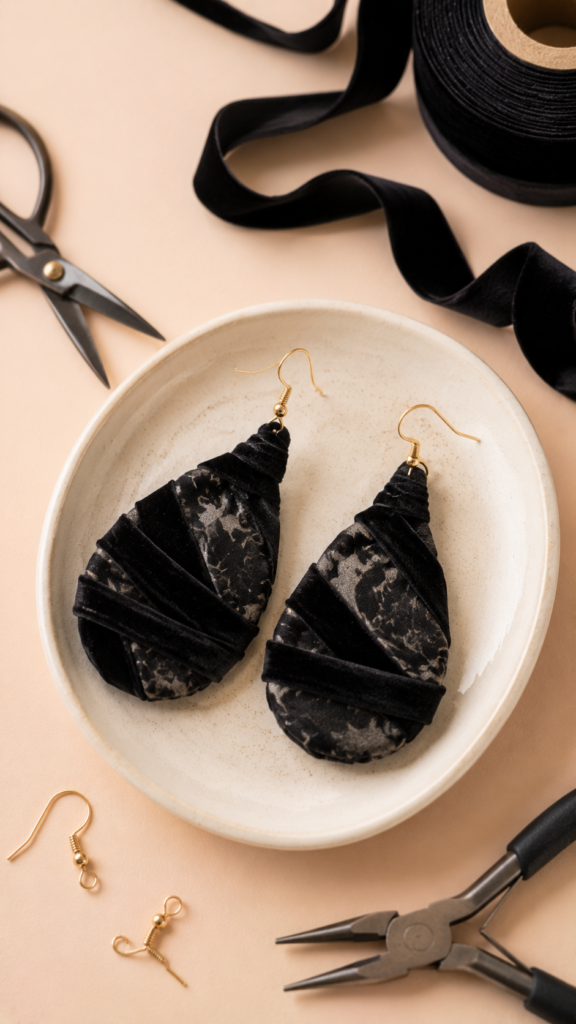
A costume doesn’t need a full sewing project to feel finished, sometimes it just needs one piece jewelry can’t buy pre-made, and this is one of the simplest easy Halloween crafts for adults to pull off in a single sitting.
What you’ll need: plain hoop or teardrop earring bases, thin strips of black or dark-toned fabric ribbon, small fabric scissors, hot glue gun, jewelry pliers (optional)
How to make it:
- Cut the fabric ribbon into thin strips long enough to wrap around the earring base with some overlap
- Starting at one end of the base, secure the ribbon with a small dot of hot glue
- Wrap the ribbon tightly and evenly around the base, overlapping slightly with each pass so no metal shows through
- Add another small dot of glue at the end to secure it, then trim any excess ribbon
- Use pliers to reattach the earring hook if it was removed during wrapping
The finished pair works with a costume, but also without one, nothing about the design reads as “Halloween only,” which is what keeps it from feeling like a costume prop once October ends.
If you enjoyed this idea, you’ll also love How to Host a Cozy Self-Care Craft Night for Busy Women, where you’ll find relaxing DIY projects, calming activities, and easy planning tips for creating a stress-free evening that helps everyone unwind and recharge.
Conclusion
Fifteen ideas, and none of them need much, just a little care in the small choices. A color, finish, material picked over another. That’s the whole difference between a craft that looks rushed and one that looks like it belongs in a home.
None of these need to happen all at once, either. Try two or three that actually fit this week, a candle dipped one evening, a pumpkin painted the next.
Small pockets of time, spent making something with your own hands, add up to a house that actually feels like Halloween instead of one decorated in a rush the night before.
That’s really the heart of easy Halloween crafts for adults, not doing more, just doing it with a little more thought.
If one of these turns into a favorite, save it or come back to it next year. October has a way of sneaking up really fast.
FAQ
-
How do you make Halloween crafts look expensive without spending a lot?
Finish matters more than material cost. Matte black paint, muted or monochrome color choices, and natural textures like wood, dried florals, or fabric consistently read as higher-end than glossy, bright, or plastic finishes, regardless of what the actual materials cost.
-
What’s the best glue for mixing materials like fabric, glass, and paper in one craft?
Hot glue works across most of these, fabric to glass, paper to wood, for anything that won’t be handled roughly or exposed to heat. For glass specifically, a craft glue labeled for glass or multi-surface use holds better long-term than hot glue alone, since hot glue can pop off smooth glass surfaces over time.
-
How do you store Halloween crafts so they last for next year?
Anything made with real pumpkin or fresh botanicals won’t last past the season, but painted, wrapped, or dried-material pieces usually do. Wrapping fragile pieces individually in tissue paper and storing them in a sturdy box, away from direct sunlight and humidity, keeps colors from fading and materials from warping between seasons.
-
Are these crafts apartment- or rental-friendly?
Most of them are, since none require painting walls, drilling, or anything permanent. Spray paint is the one step worth doing outdoors or in a well-ventilated space regardless of living situation, both for the smell and to avoid overspray on furniture or flooring.
-
What can you do with leftover Halloween craft supplies after the season ends?
Craft supplies that aren’t Halloween-specific, dried florals, ribbon, plain jars, paint, usually carry over into Thanksgiving or winter décor projects with only minor changes, like swapping black ribbon for a warmer tone. Leftover paint and glue keep for future projects if sealed properly between uses.
-
Can any of these double as decor for other holidays?
Several can, with small tweaks. Dried botanical centerpieces, wax-sealed place cards, and matte-painted bottles all shift easily into Thanksgiving or general fall décor by swapping out the color palette rather than starting over with new materials.
-
How do you plan a Halloween craft night for a group of adults?
Picking one or two projects from the “quick wins” category works better for a group than something with a long dry time, since everyone can start and finish in the same sitting.
Prepping shared supplies, like pre-cut bat templates or pre-measured wax, ahead of time keeps the night moving instead of everyone waiting on one shared tool.