This post contains affiliate links. This means I may earn a small commission if you purchase through my links at no extra cost to you.
Waiting on the tree but not the toddler? Try these Christmas tree crafts for toddlers, quick projects small hands can finish before it arrives.”
Somewhere between the first frost and the day the tree actually goes up, there’s a stretch where a toddler is already fully in Christmas mode and the house isn’t.
Maybe the tree is waiting on a delivery date. Toddlers don’t run on that timeline. Once they’ve seen tinsel at the shop or heard “Jingle Bells” once too often, waiting feels impossible to them.
That gap is exactly where these fifteen Christmas tree crafts for toddlers come in. None of them need a tree standing in the room to work.
Each one is written around what a toddler can actually manage in one sitting, like a short window of focused attention, hands still learning to tear, glue, and thread with control, so a project that gets started also gets finished, with nothing half-done and abandoned on the table.
A few double as a gentle warm-up for the real tree once it arrives: practicing the hang-an-ornament motion on a paper stand-in, or stringing a garland that ends up on the tree the day it’s finally decorated.
One even carries a small piece of old German ornament folklore, tucked into a keepsake worth keeping past this one December.
Nothing here takes long, and nothing here needs a tree yet. That’s really all it has to do.
Need something quick? Last Minute Christmas Craft In 30 Minutes is packed with festive projects you can make when you’re short on time but still want something handmade.
Before You Start:
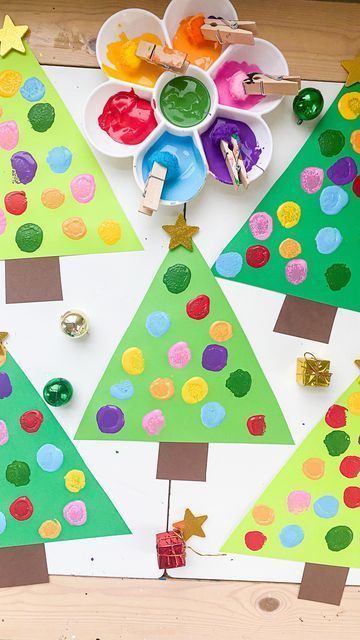
Any toddler under 3 will put things in their mouth at some point, no matter how closely you’re watching, so it’s worth a quick check before the craft supplies come out.
Look for the AP (Approved Product) seal or the words “Conforms to ASTM D-4236” on paint, glue, and markers, that’s the label confirming a toxicologist has actually reviewed the formula.
And hold off on loose small parts like beads, buttons, or pompoms under about 1.75 inches until they’re glued down and fully dry; wet glue plus small hands is how those end up somewhere they shouldn’t.
✅ Tear-and-Glue Crafts
1. Torn Tissue-Paper Mosaic Tree
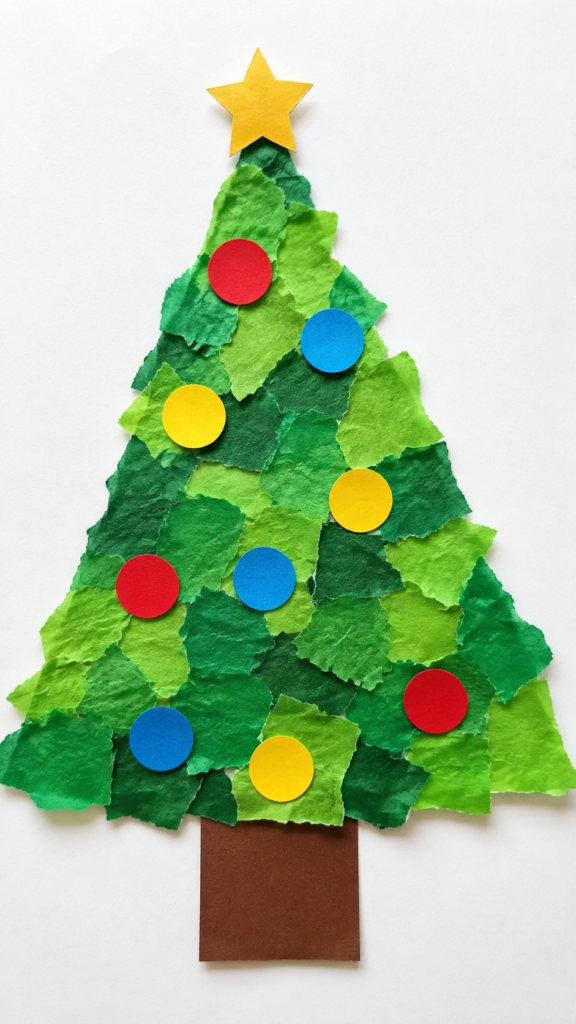
Tearing tissue paper into small pieces is one of the simplest ways to build the pincer grasp toddlers are working on right now, no scissors, no sharp edges, just fingers pulling paper apart.
Gluing the pieces down afterward adds a second skill: placing something with intention instead of just scattering it.
Materials:
- Green tissue paper (a few shades if you have them, for texture)
- A paper or cardboard tree cutout, or a triangle drawn on cardstock
- Washable glue stick or diluted white glue
- A small paintbrush, if using liquid glue
How to make it:
- Tear the tissue paper into rough pieces roughly the size of a coin. Toddlers can do this part themselves, no need for even edges.
- Brush a thin layer of glue onto a section of the tree shape.
- Press tissue pieces onto the glued section, letting them overlap slightly for texture.
- Work in small sections rather than covering the whole shape in glue at once, since toddler pace is slower than the glue dries.
- Let it dry flat for about an hour before hanging or displaying.
2. Torn Construction-Paper Star Ornament
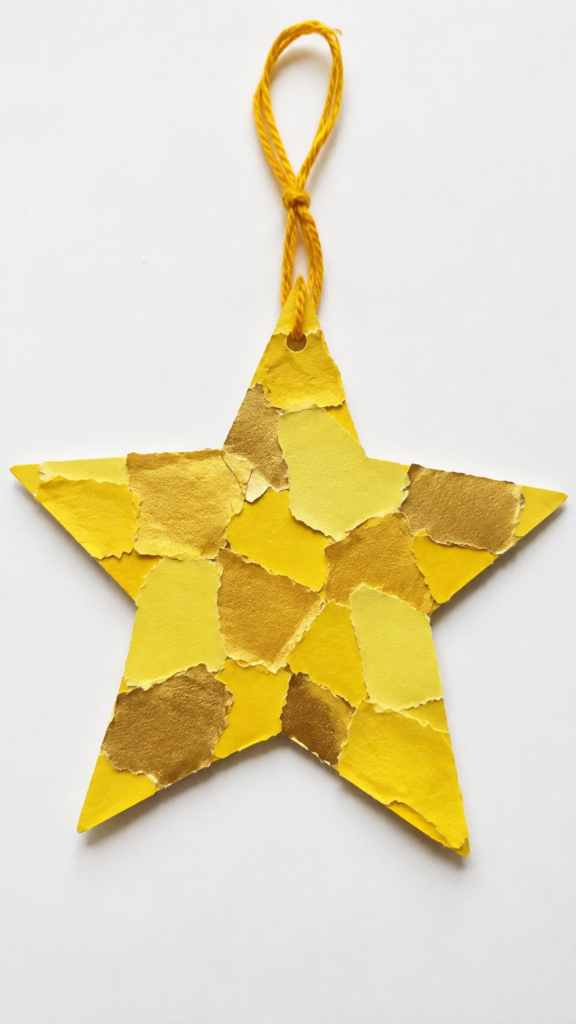
Same tearing motion as the mosaic tree, but the payoff here is a shape a toddler can proudly point to as “their” star, since the torn edges give it a rough, homemade sparkle rather than needing a clean scissor cut.
Materials:
- Yellow or gold construction paper
- A star shape traced or pre-cut from cardstock as a base
- Glue stick
- Hole punch and string or yarn (for hanging)
How to make it:
- Cut or trace a simple star outline onto sturdy cardstock as the base — this part is for the adult, not the toddler.
- Tear yellow or gold paper into small, irregular pieces.
- Glue the pieces onto the star base, covering it edge to edge.
- Punch a hole near one point once the glue has dried.
- Thread string through the hole for hanging.
3. Cotton-Ball Snow Scene Ornament
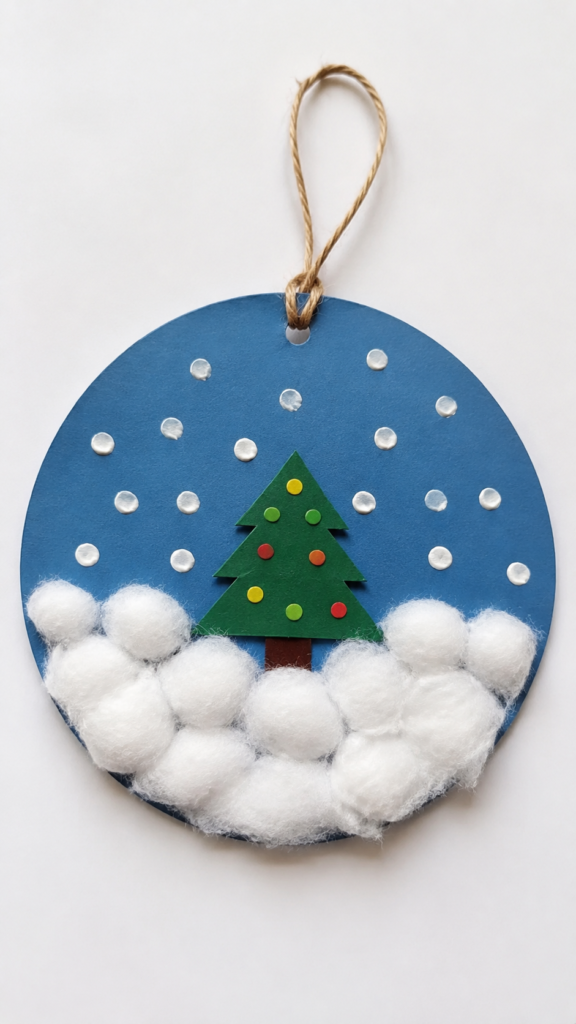
Rolling a cotton ball between fingers before pressing it down is a small but real motor task, a rounder, softer version of the rolling and pinching motions toddlers practice with dough.
This one also gives a natural “snow” texture without paint or mess.
Materials:
- A circle or ornament shape cut from cardstock (blue works well as a “sky” background)
- Cotton balls
- Glue stick or diluted white glue
- Optional: a small pre-cut tree or house shape to glue on first
How to make it:
- If using the optional tree or house shape, glue it onto the lower half of the circle first and let it set.
- Have the toddler pull each cotton ball apart into smaller pieces, rolling them slightly between fingers.
- Dab glue across the top portion of the circle for “sky” and press cotton pieces on as clouds or falling snow.
- Add a few loose pieces along the bottom edge as a snow-covered ground.
- Let dry flat, then punch a hole and add string for hanging.
Turn everyday household items into holiday decorations with DIY Christmas Crafts From Recycled Materials, featuring budget-friendly projects that are fun for both kids and adults.
✅ Threading and Grip-Strength Crafts
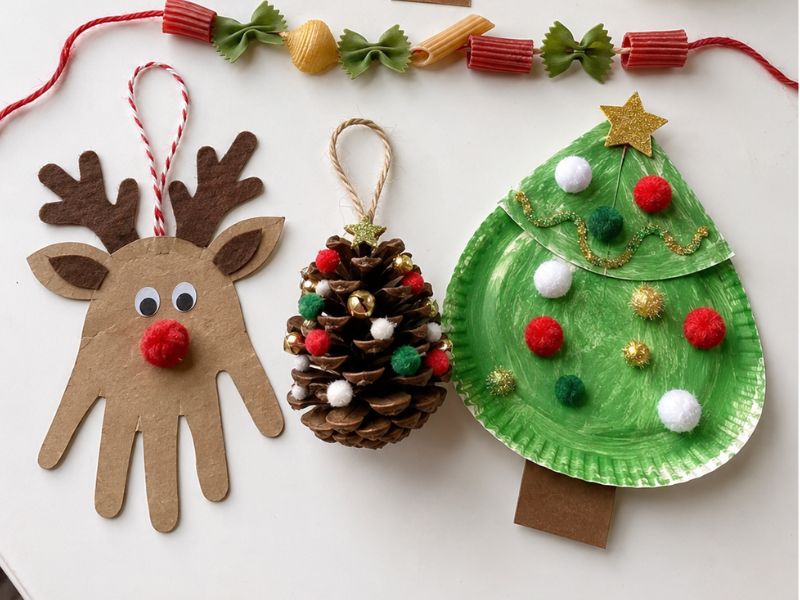
4. Dry Pasta or Cheerio Garland

Threading is one of the more advanced fine motor tasks toddlers take on, since it asks both hands to do two different jobs at once, one holding the string steady, the other guiding the piece onto it.
Of all the Christmas tree crafts for toddlers on this list, this is the one that quietly teaches the most, and it comes with a ready-made snack if fingers get hungry mid-project.
Materials:
- Dry penne, ziti, or wagon-wheel pasta (or Cheerios, for younger toddlers)
- Yarn or thick string, cut to garland length
- Tape (to stiffen one end of the string like a shoelace tip)
How to make it:
- Wrap a small piece of tape tightly around one end of the string to create a firm “needle” tip.
- Knot a single piece of pasta near the other end so nothing slides off while they thread.
- Let the toddler push the taped end through each piece, sliding it down the string.
- Keep going until the garland reaches the length you want, then knot the open end to hold everything in place.
- Drape it over the tree, a doorway, or a shelf once it’s finished.
5. Clothespin Reindeer or Star

Squeezing a spring-loaded clothespin open is a real grip workout, a smaller, more controlled version of the pinching motion used later for scissors and pencils.
It’s a quiet, low-mess option among quick Christmas crafts for toddlers, since there’s no glue or paint drying time to wait through.
Materials:
- Wooden clothespins (the classic clip style, not the peg style)
- Brown or white paint (optional, if pre-coloring the clothespin)
- Wiggle eyes or small paper circles for eyes
- Small red pom-pom for a reindeer nose, or a paper star cut from cardstock
- Glue stick
How to make it:
- If painting the clothespin, do this ahead of time so it’s fully dry before the toddler handles it.
- Glue on the eyes and nose (or attach the paper star shape) to the rounded end of the clothespin.
- Let the toddler practice opening and closing the clothespin a few times before deciding where it clips.
- Clip the finished piece onto a branch, a stocking edge, or a string of garland.
6. Pom-Pom Garland

Stringing pom-poms builds the same threading coordination as the pasta garland, but the softer, larger shape makes it a gentler starting point for a younger or less experienced toddler.
It’s one of the simplest toddler ornaments to make from things already sitting in a craft drawer.
Materials:
- Pom-poms, at least 1.75 inches across (avoid smaller ones with toddlers under 3)
- Yarn or string, cut to garland length
- Tape (to stiffen one end of the string)
How to make it:
- Tape one end of the string to create a firm tip for threading.
- Knot a pom-pom near the other end so the rest have something to stop against.
- Let the toddler push the taped end through the center of each pom-pom, sliding it along the string.
- Continue until the garland is the length you want, then knot the open end.
- Hang it along the tree, a mantel, or a window.
Make the season extra special with DIY Christmas Crafts to Make This Holiday Bright, a collection of creative decorations, gifts, and keepsakes the whole family can enjoy making together.
✅ Keepsake Ornaments
7. Salt Dough Handprint Ornament

A handprint ornament captures something a photo can’t quite manage, the actual size and shape of a toddler’s hand at this exact age, pressed into something that will outlast the season.
Salt dough is soft enough for small hands to press into cleanly, and it hardens into something sturdy enough to keep.
Materials:
- 1 cup flour, 1/2 cup salt, 1/2 cup water (mixed and kneaded into a smooth dough)
- Rolling pin
- A butter knife or straw (for the hanging hole)
- Paint and a sealant, once baked and cooled
How to make it:
- Roll the dough out to about half an inch thick on a floured surface.
- Press the toddler’s hand firmly and evenly into the dough, then lift straight up without dragging.
- Trim around the print with a knife, leaving a small border.
- Use a straw to punch a hole near the top edge for hanging later.
- Bake at a low oven temperature (around 200–250°F / 95–120°C) for 2–3 hours until fully hardened, then cool completely.
- Paint once cooled, and seal with a clear coat if you want it to last multiple seasons.
8. Painted Handprint Reindeer
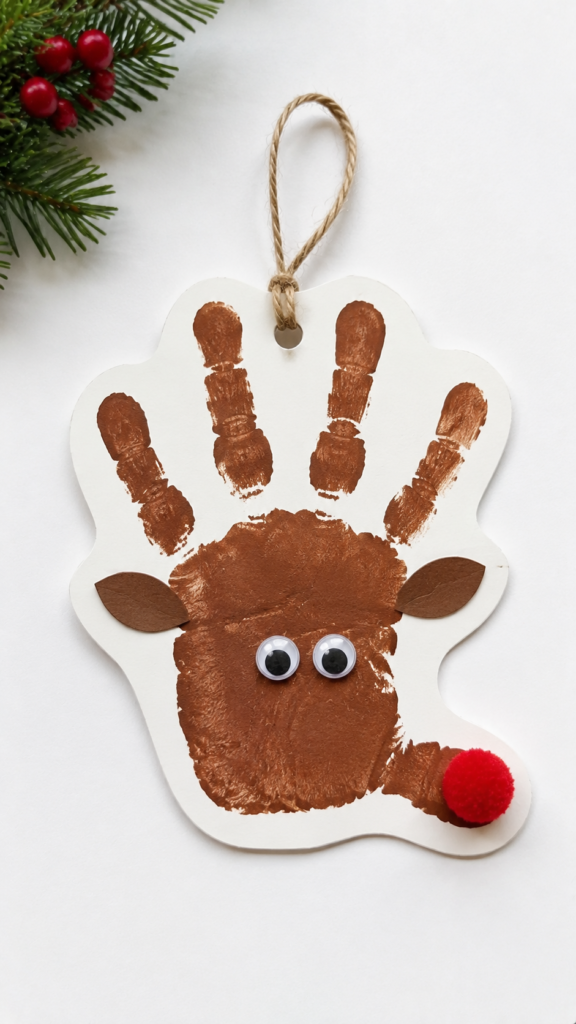
The same handprint, turned a different direction, becomes a reindeer almost by accident, the fingers become antlers and the palm becomes the face, which is part of why this one tends to be a favorite for grandparents.
It’s a nice one to place next to the salt dough print from the year before, since the size difference year to year says something the ornament itself can’t.
Materials:
- Brown paint
- Cardstock or a wooden ornament blank
- Small wiggle eyes and a red pom-pom
- Paintbrush
- Fine-tip marker (for the adult to add small details after)
How to make it:
- Paint the toddler’s palm and fingers brown, keeping the fingers spread so they read as antlers.
- Press the hand down firmly onto the cardstock or ornament blank, palm first.
- Lift straight up and let it dry completely before adding anything on top.
- Glue on wiggle eyes above where the thumb print sits, and a red pom-pom at the tip of the thumb for the nose.
- Once fully dry, add a hole punch and string for hanging.
9. DIY Bird’s Nest Ornament
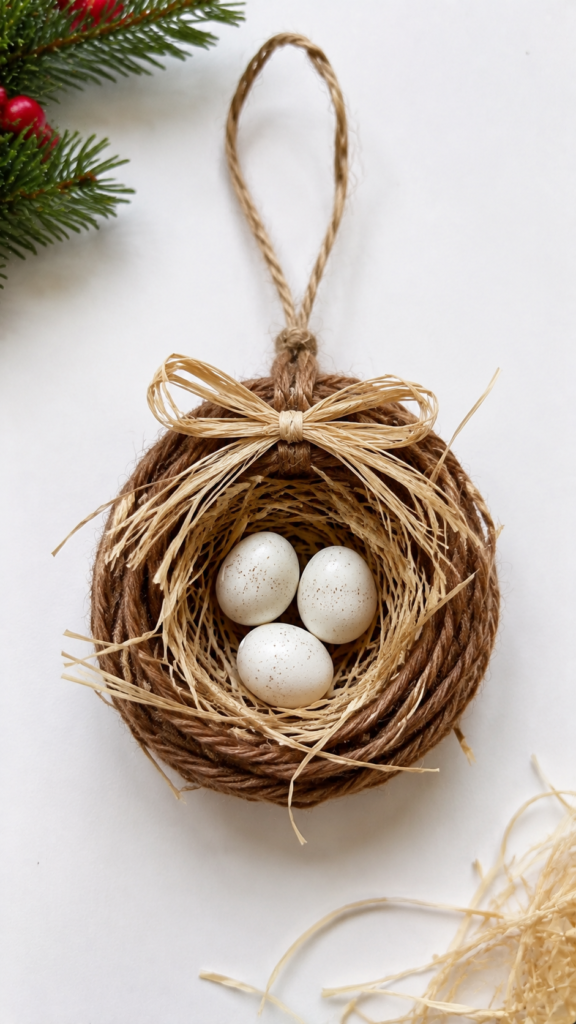
This one carries a small piece of real history. The bird’s nest ornament traces back to German glassblowing families, where it was passed down as a symbol of home, a nest built with care, standing for the effort it takes to hold a family together.
The folklore that came with it held that a nest tucked into the branches of a tree brought good luck to the household for the year ahead.
It’s a nice thing to hand a toddler-made version of, since the meaning behind it says more than the craft itself does.
Materials:
- A handful of thin brown yarn, raffia, or dried grass
- A small plastic or wooden egg (or 2–3 small pom-poms as eggs)
- Glue
- A small paper or cardboard circle as a base
How to make it:
- Let the toddler wrap and loosely bundle the yarn or raffia into a loose circular shape, it doesn’t need to be neat, since a slightly messy nest looks more authentic.
- Glue the bundle onto the cardboard circle to hold its shape.
- Once the glue has set, nestle the small egg or pom-poms into the center.
- Let everything dry fully before handling.
- Attach a loop of string or wire to the back for hanging on the tree.
Looking for a heartfelt gift? 15 Handprint Flower Bouquet Crafts for Grandparents Day (Toddler to Tween Friendly) shares easy keepsake projects that grandparents will treasure for years.
✅ Practice-for-the-tree crafts
10. Paper Christmas Tree Wall Practice Board
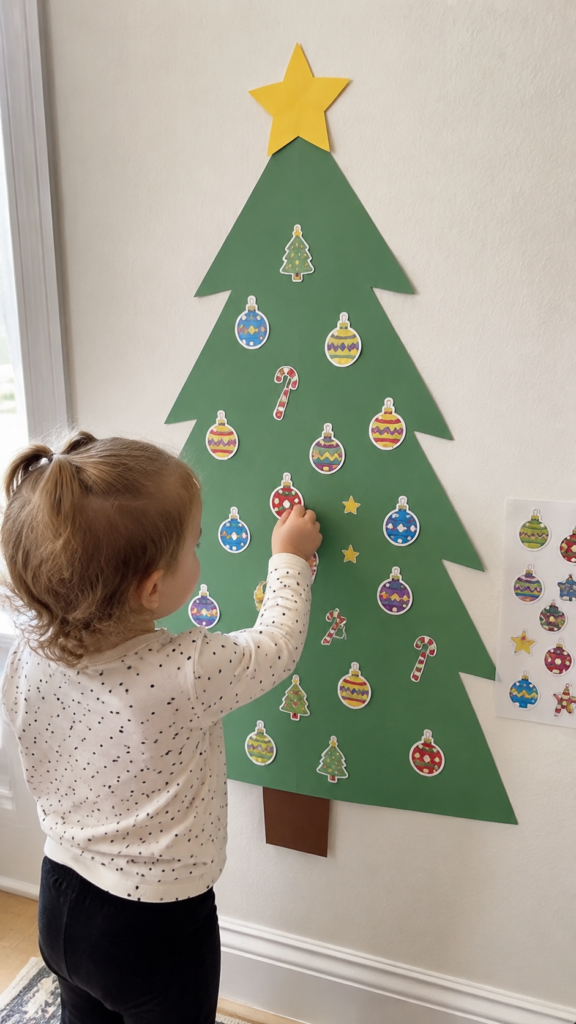
This is where these Christmas tree crafts for toddlers earn their name even without a real tree in the house yet.
A large paper tree taped to a wall or fridge gives a toddler somewhere to actually decorate, which matters more than it sounds, the urge to “do Christmas” doesn’t wait for the tree to arrive, and this gives it somewhere to go in the meantime.
Materials:
- A large sheet of green craft paper or poster board, cut into a triangle
- Painter’s tape or removable adhesive (safe for walls)
- Stickers, torn paper scraps, or crayons for decorating
How to make it:
- Cut or fold the paper into a simple tree triangle, as large as the space allows.
- Tape it securely to a wall or fridge at toddler height.
- Let the toddler decorate it with stickers, torn paper, or drawings, adding to it over several days if they want.
- Leave it up until the real tree goes up, then take it down, or keep both up side by side for a while.
11. Cardboard Tree with Dot-Sticker Ornaments
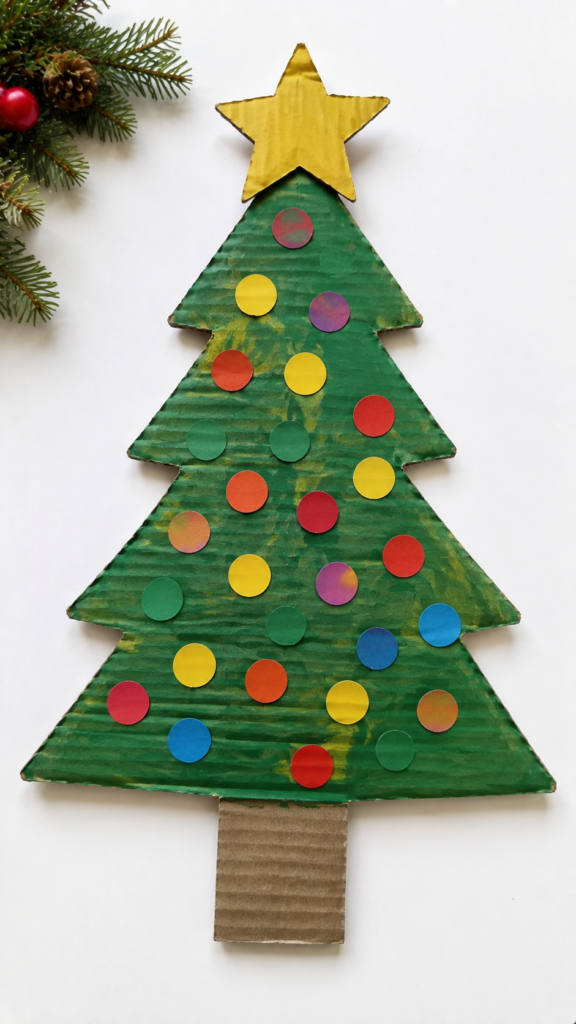
Hanging an actual ornament on a real tree takes more coordination than it looks like from the outside, lining up a hook, judging branch spacing, not knocking off the ornament next to it.
A cardboard stand-in lets a toddler practice that exact motion first, with nothing breakable on the line.
Materials:
- A large cardboard tree cutout
- Round dot stickers in a few colors
- Markers (optional, for adding branch lines)
How to make it:
- Cut a simple tree shape out of a flattened cardboard box.
- Optionally draw a few branch lines across it as placement guides.
- Hand the toddler a sheet of dot stickers and let them peel and place each one on the tree.
- Encourage spacing them out rather than clustering, gently modeling where an ornament might go on a real branch.
- Keep the finished board up as a warm-up piece until the real tree arrives.
12. Paper Chain Countdown Garland
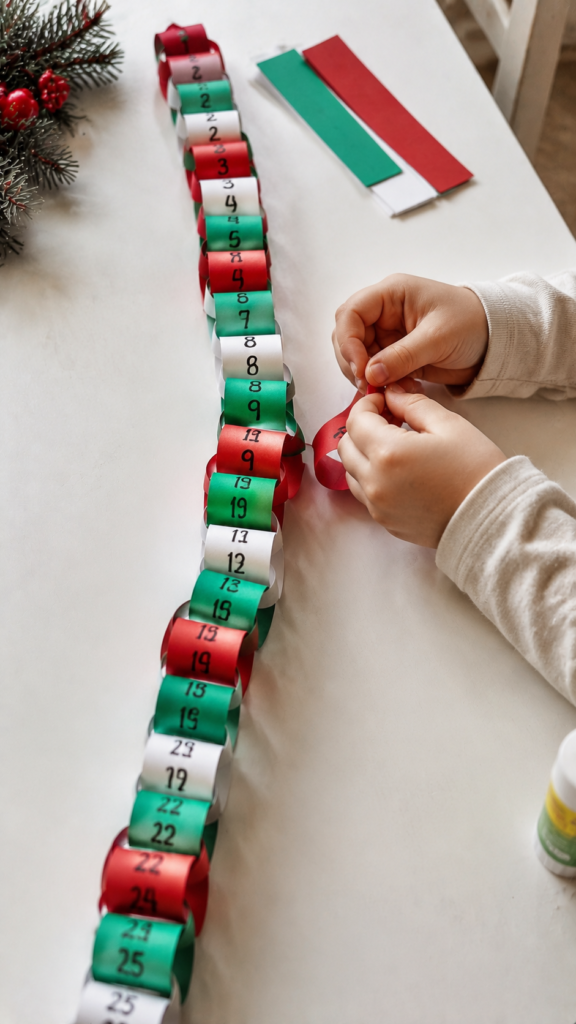
A paper chain gives a toddler something a calendar can’t, a physical, shrinking thing they can see and touch each day, which makes “the tree is coming soon” feel real instead of abstract.
Among Christmas tree crafts for toddlers, this is also one of the few that works over several days instead of one sitting, since a link a day keeps it interesting without asking for much patience at once.
Materials:
- Strips of colored construction paper (about 1 inch wide, 6 inches long)
- Glue stick or tape
- Scissors (for the adult, to pre-cut strips)
How to make it:
- Pre-cut enough strips for the number of days until the tree goes up.
- Loop the first strip into a ring and glue or tape the ends together.
- Thread the next strip through that loop before sealing it into its own ring, continuing the chain.
- Let the toddler help glue and press each new link, even if the adult does the threading.
- Tear or cut off one link each day, counting down toward the day the tree finally goes up.
Keep little hands busy with 15 Candy Corn Crafts Toddlers Can Finish Before Snack, featuring simple, colorful fall activities designed especially for young children.
✅ Nature and Recycled Crafts
13. Painted Pinecone Ornaments

Pinecones bring texture a toddler doesn’t get from paper or dough, rough, uneven, and a little different in every hand they pick up, which makes this one of the better crafts for a toddler who’s drawn to touching things before anything else.
It also doubles as a small nature walk before the craft even starts, if there’s a yard or park nearby to collect from.
Materials:
- Pinecones (collected or store-bought, cleaned and dried)
- Washable paint in a few colors
- A paper plate for paint
- String or wire, for hanging
How to make it:
- If collected outdoors, let pinecones dry fully for a few days before using them, since damp ones won’t hold paint well.
- Pour a small amount of paint onto a paper plate for easier dipping.
- Let the toddler dip the pinecone into the paint or brush color onto the tips of each scale.
- Set on wax paper or newspaper to dry fully, which can take several hours given the shape.
- Tie a loop of string or wire around the top for hanging once dry.
14. Toilet-Roll Tree Stamp Painting
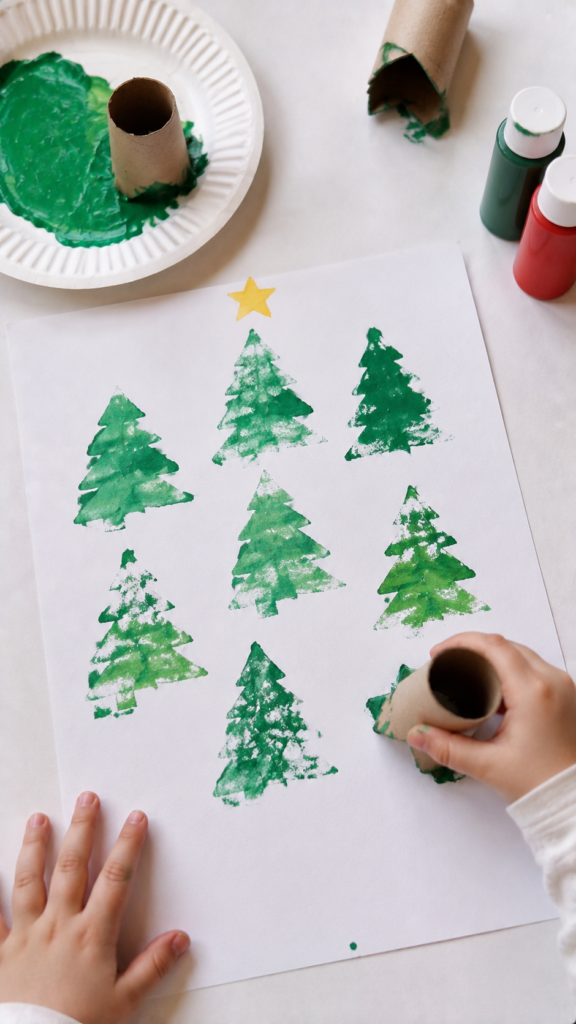
A cardboard tube cut and folded the right way makes a surprisingly clean tree-shaped stamp, and stamping is a gentler, more forgiving motion for a toddler than trying to paint a shape freehand.
This one tends to hold a toddler’s attention because the shape appears almost like magic each time the tube lifts off the paper.
Materials:
- An empty toilet paper roll
- Scissors (for the adult)
- Green washable paint
- A paper plate for paint
- Plain paper or cardstock
How to make it:
- Flatten the tube and cut small notches or a zigzag pattern along one end so it prints a tree-like shape when stamped.
- Pour a thin layer of green paint onto the paper plate.
- Show the toddler how to dip the notched end into the paint and press it firmly onto paper.
- Let them repeat the stamp several times, lifting straight up rather than dragging.
- Let the paper dry flat before displaying or trimming into individual ornament shapes.
15. Paper-Plate Wreath or Tree
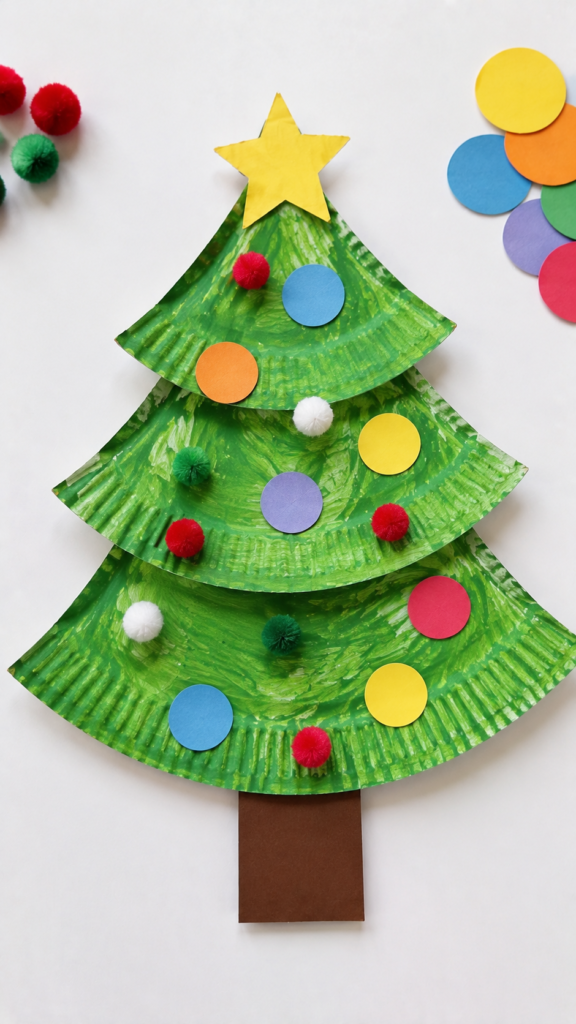
A paper plate gives a sturdy, ready-made base, which takes one whole step out of the project and leaves more of the actual craft time for the toddler rather than setup. Cut into a ring it becomes a wreath; left whole and trimmed into a triangle it becomes a sim
ple tree, either way, it’s a good closing project since it pulls together skills from earlier on the list, like tearing paper or dabbing paint, into one finished piece.
Materials:
- A sturdy paper plate
- Scissors (for the adult, to cut the center out for a wreath, or trim into a tree shape)
- Green paint or torn green paper scraps
- Small pom-poms or buttons for decoration (glued down and dry before handling)
- Hole punch and ribbon, for hanging
How to make it:
- Cut the center out of the plate for a wreath shape, or trim the edge into a rough triangle for a tree.
- Let the toddler paint the plate green, or glue on torn green paper scraps to cover it.
- Once dry, glue on a few pom-poms or buttons as ornaments, pressing firmly and letting them set fully.
- Punch a hole at the top and thread ribbon through for hanging.
Turn dried corn husks into fun, budget-friendly fall projects with 10 Corn Husk Crafts for Kids Without a Trip to Michaels.
Hanging These Once the Real Tree Finally Goes Up

Once the tree is standing, a few small choices help these ornaments last the season instead of getting quietly packed away early.
- Use ribbon or yarn instead of a metal hook. A loop tied through the hole holds just as securely and won’t scratch a small hand reaching for it, this is one of the most common pieces of advice in toddler tree-safety guidance, and it’s an easy swap for anything handmade.
- Hang handmade pieces on the lower third of the tree. That’s the height a toddler can actually see. It turns the ornament into something they can point to and check on, rather than something they only hear about because it’s near the top.
- Give the more delicate keepsakes a little extra height. The salt dough handprint and the bird’s-nest ornament are worth placing slightly higher, or on a mantel instead, especially in the first year or two while a toddler is still learning what “look, don’t touch” means.
- Add a gate or soft barrier around the base if needed, not instead of the ornaments. A toddler-proofed tree and a tree full of handmade ornaments aren’t in conflict, the barrier just adds a little distance while everything else stays exactly where it is.
Create adorable autumn keepsakes with 18 Handprint Fall Deer Crafts Kids Will Love Making, where little handprints become charming fall deer.
Before the Tree Goes Up, Something Else Already Has
By the time the tree finally stands in the corner, a toddler who’s worked through even a handful of these projects has already built the patience to finish something small, the coordination to place a piece exactly where it’s meant to go, and a few pieces of their own to point to once the real decorating starts.
That’s the quiet win in doing Christmas tree crafts for toddlers early, the waiting stops being empty time and starts being the part of the season a toddler actually remembers.
Pick two or three to start with this week. Save the rest for the next quiet afternoon before the tree arrives.