This post contains affiliate links. This means I may earn a small commission if you purchase through my links at no extra cost to you.
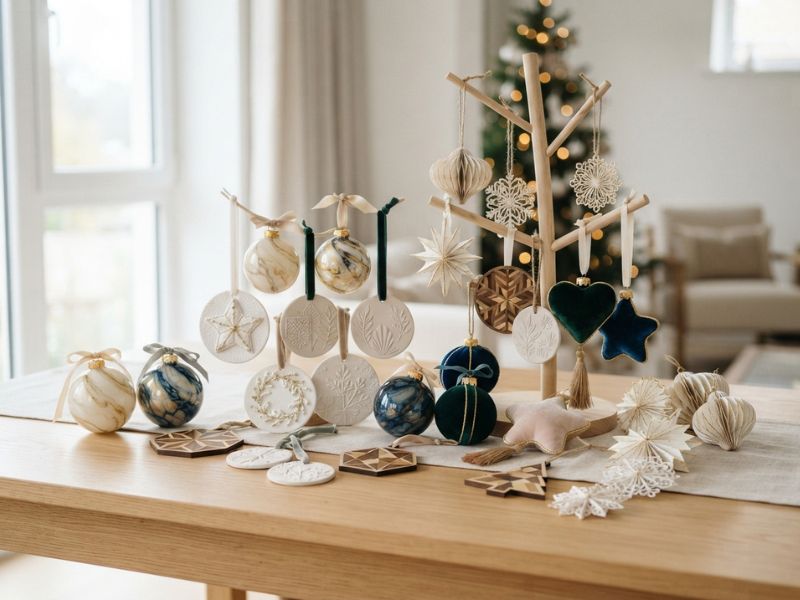
Handmade doesn’t have to look crafty. These DIY Christmas ornaments crafts for adults show how simple materials can become polished decorations you’d actually want on your Christmas tree.
Ever notice how two handmade decorations can use almost the same materials, yet one looks like something you’d happily pick up in a boutique while the other still looks like a craft project?
The difference often comes down to details that are easy to overlook: the thickness of the material, how cleanly the edges are finished, whether the colours work together, how the surface catches light and even what is used to hang the finished piece.
That matters when you’re making decorations for an adult Christmas tree. You may want something personal and handmade without ending up with a collection that looks mismatched or overly crafty.
These DIY Christmas ornaments crafts for adults focus on that middle ground.
The ideas use materials such as glass, clay, paper, fabric and wood, but the real focus is on the techniques and finishing choices that make a handmade piece look considered rather than homemade for the sake of it.
Want a Christmas tree that feels a little less predictable? Try 25 Christmas Tree Ideas That Aren’t Another Traditional Red and Green Setup.
What Makes a Handmade Ornament Look Store-Bought?

The polished look usually comes from control rather than expensive materials. A simple ornament can look convincing when its shape, surface, colour and finishing details are handled carefully.
1. Surface quality comes first
Uneven paint, rough clay edges, dried glue and frayed fabric are easy to notice once the ornament is hanging at eye level. Smooth the parts that need smoothing, trim fabric cleanly and remove excess adhesive before it dries. The material doesn’t have to be expensive; it needs to look properly finished.
2. Repetition makes separate pieces feel like a set
Three handmade ornaments don’t need to be identical, but repeating something—such as the same shape, colour, pattern or finish, creates a visual connection. This is particularly useful when you want several DIY pieces to look like one collection.
3. Don’t treat the hanger as an afterthought
The cord, ribbon, hook or ornament cap is visible once the piece is on the tree. Choose one that suits the material and weight of the ornament, and make sure the attachment is secure and neatly concealed where possible.
4. Match the finish to the material
Gloss isn’t automatically more polished. Glass can benefit from its natural shine, while clay may look better with a matte or satin surface.
Wood, fabric and metal also have their own visual qualities, so the finish should support rather than hide the material.
5. Keep the scale under control
A larger ornament isn’t automatically more impressive. A smaller piece with a clean silhouette and well-finished surface can look far more considered than an oversized design covered in embellishments.
The size should suit both the ornament’s weight and the branches supporting it.
Keep toddlers busy with their own little Christmas project using 15 Christmas Tree Crafts for Toddlers Can Finish Before the Real Tree Goes Up.
DIY Christmas Ornaments Crafts for Adults That Actually Look Store-Bought
1. Marbled Glass Baubles

Clear glass gives this craft an advantage because the ornament itself becomes part of the design.
Rather than covering it with layers of embellishment, use two or three compatible acrylic colours, such as ivory, taupe and soft gold, and let them form irregular veins across the surface.
Adding too many colours or swirling them excessively can muddy the pattern, so work with small amounts and rotate the bauble gently.
For a more store-bought finish, keep the cap and ribbon simple. A cap in gold, silver or another metal already present in the colour scheme will look more cohesive, while a narrow velvet, satin or quality cord hanger keeps the focus on the glass.
After marbling, place the ornament upside down in a cup so excess paint can drain, then allow it to dry fully before replacing the cap.
Depending on the amount and type of paint used, drying can take 24 hours or longer, so don’t rush this stage.
The finished ornament should have enough clear glass and variation in the marbling to resemble a deliberate stone-like pattern rather than a solid ball of mixed paint.
2. Embroidered Clay Ornaments

A thin clay ornament becomes more interesting when the decoration is built into the surface rather than simply painted on top.
Roll air-dry clay to an even thickness, cut simple shapes such as circles, arches or leaves, and make evenly spaced holes before the clay dries. Once fully dry, thread embroidery floss through the holes to create small geometric, botanical or linear patterns.
The contrast between the matte clay and the thread gives the ornament texture without relying on glitter or a heavy layer of decoration.
Keep the stitching pattern simple and repeat the same thread colours across several ornaments if you want them to look like a coordinated set.
Embroidered air-dry clay ornaments are an established craft technique, with thread and small beads sometimes used as additional details.
For the polished finish this post is aiming for, sand the clay edges once completely dry and remove any loose clay dust before adding the thread.
Use a fine embroidery needle that can pass comfortably through the holes, and choose floss in two or three colours that work with the rest of your tree rather than adding a new colour for every ornament.
Amazon-friendly supplies: air-dry clay, embroidery floss, embroidery needles, clay rolling guides, small round cutters and fine sanding sponges.
3. Textured Clay Medallions

Instead of painting a Christmas picture onto clay, let the texture itself become the decoration.
Roll out a smooth sheet of clay, press a lace scrap, botanical stamp, textured fabric or suitable embossing tool into the surface, then cut clean round or oval medallions from the patterned section.
Once the texture is set, you can leave the ornament in one colour or lightly highlight the raised areas with a second shade.
The key is restraint: when the surface already has a strong pattern, adding several colours and embellishments can hide the detail that makes the piece interesting.
The type of clay matters here. Air-dry clay hardens through drying, while polymer clay cures when heated according to the manufacturer’s instructions, so they should not be treated as interchangeable materials.
Polymer clay also does not automatically need a sealer after proper curing; add a compatible finish only when you specifically want to change or protect the surface.
For a store-bought appearance, concentrate on the basics: an even clay thickness, clean edges, a clearly defined texture and a simple hanging loop.
A satin or matte surface can work particularly well when you want the relief pattern to remain the main feature.
4. Decoupage Botanical Glass Ornaments

Photo credit: @ Cindy Kaye
Decoupage can give a clear glass ornament the look of a printed decorative object rather than a typical Christmas craft.
For DIY Christmas ornaments crafts for adults, choose thin botanical, architectural or vintage-style paper and use a small section of the design rather than covering the entire bauble with overlapping pieces.
Place the paper carefully and smooth it from the centre outward so wrinkles and trapped air don’t become part of the finished design. Small scissors and a soft brush help when working around curved glass.
A few leaves, a delicate flower or part of an architectural illustration can be enough; the clear glass provides visual space around the design.
Allow the decoupage medium to dry fully before adding another coat or replacing the ornament cap. A narrow satin or velvet ribbon in a colour taken from the paper can finish the piece without competing with the artwork.
Amazon-friendly supplies: clear glass ornaments, decoupage medium, precision scissors, fine soft brushes and decorative paper.
Turn tiny handprints into a keepsake with 15 Santa Handprint Crafts You Will Want to Keep Forever.
5. Painted Glass Ornaments With a Reverse-Image Effect

Photo credit: @ Margaret Podmore
Instead of putting the entire design on the outside of the bauble, place the artwork inside the clear glass.
A simple botanical silhouette, star, initial or geometric shape can look surprisingly dimensional because the glass sits between the viewer and the painted surface.
This technique works best with a simple motif and a paint that is suitable for the intended surface.
Keep the design relatively bold rather than filling the inside with tiny details that become difficult to see through the glass. The transparent space around the motif is part of the design, so don’t feel the need to fill it.
Once the paint has dried according to the manufacturer’s instructions, replace the cap and use a restrained hanger.
The depth created by the glass does more for this ornament than extra embellishments, which is why keeping the outside clean helps it look more like a finished decorative piece.
6. Velvet-Wrapped Ornament Forms

Photo credit: @ Tatár Szilvia
Velvet can make a simple ornament feel substantial, but the fabric alone isn’t what gives it a polished appearance.
The construction needs to be neat. Start with a lightweight, firm base that can hold its shape, then cut the velvet with enough allowance to wrap it without creating bulky folds.
Keep seams on the least visible part of the ornament and secure the fabric with an adhesive appropriate for both materials. Avoid saturating the velvet with glue because it can leave dark or stiff patches that remain visible after drying.
A small ribbon or cord loop can provide the hanger, with the attachment positioned where it doesn’t interrupt the clean silhouette.
Choose one velvet colour or a closely related pair rather than several bright shades. The combination of a clean shape, controlled fabric and concealed joins is what makes this type of ornament look finished.
Amazon-friendly supplies: velvet fabric, fabric scissors, suitable craft adhesive, lightweight ornament forms, upholstery pins and narrow ribbon.
7. Paper-Cut Shadow Ornaments

Layered paper can create surprisingly good depth without adding glitter, beads or metallic paint.
Cut two or three versions of the same silhouette in related shades, then separate the layers slightly so the lower shapes create a visible shadow behind the top design.
The important part is precision. Uneven cuts become much more obvious when one layer sits directly behind another, so use a sharp craft knife, a firm cutting surface and a metal ruler for straight sections.
Keep the design fairly simple too; delicate arches, geometric shapes, stars or botanical forms are easier to cut cleanly than a complicated illustration.
You can use cream with warm white, two shades of blue, or kraft paper with ivory, depending on the look you want. The layers themselves provide the contrast, so the finished ornament doesn’t need much else.
Amazon-friendly supplies: precision craft knife, self-healing cutting mat, heavyweight cardstock and metal ruler.
8. Hand-Stamped Ceramic-Style Ornaments

Repeated patterns can make a simple clay ornament resemble a small piece of decorated ceramic.
Start with air-dry clay or properly cured polymer clay, then press a consistent botanical or geometric stamp into the surface while the clay is workable.
The useful part is the repetition. One clearly defined pattern used across several ornaments can look more intentional than covering each piece with different painted designs. Keep the impressions evenly spaced and avoid pressing so deeply that the clay distorts around the edges.
For the colour, a single muted shade can work well, particularly when you want the stamped relief to remain visible.
You can also lightly highlight the raised areas after the clay has cured, but heavy paint can fill the recesses and hide the pattern you’re trying to show.
9. Brass-Tone Wire and Bead Ornaments

Wire ornaments can look refined when the shape comes before the decoration. Instead of winding wire into a loose mass and adding beads wherever they fit, form a simple structure such as an arch, diamond, star or geometric loop.
Choose a wire that is strong enough to hold its shape but still workable with jewellery pliers.
Then add beads selectively, keeping the spacing reasonably consistent. Too many beads can hide the wire framework and make the ornament look busy.
Symmetry isn’t essential for every design, but intentional spacing is. A few glass, crystal or metallic beads positioned along a clean brass-tone frame can give you more visual impact than a much larger collection of beads.
Amazon-friendly supplies: jewellery pliers, flush cutters, craft wire, glass or crystal beads and jump rings.
Christmas crafting can also be adapted for older adults with 20 Christmas Crafts for Seniors in Nursing Homes That Work Even With Advanced Dementia.
10. Faux Mercury-Glass Style Ornaments

Photo credit: @ Wendy
Mercury glass has a distinctive silvery, uneven reflective appearance, which is why modern decorations often imitate its aged surface rather than trying to make ordinary glass perfectly shiny.
For a DIY version, use suitable clear ornaments and a decorative faux-mercury-glass technique that creates variation instead of an even metallic coating.
That unevenness is important. Small areas of transparency and darker patches help create the aged appearance, while covering the entire surface uniformly can make it look more like ordinary metallic paint.
There is also a useful distinction to make here: faux mercury glass is a decorative imitation; antique mercury glass is an actual historical glassware material. Don’t describe a modern craft finish as containing mercury.
Older mercury-containing products can also present different handling concerns, so the two shouldn’t be treated as interchangeable.
Keep the rest of the ornament simple—a plain metal cap and narrow ribbon are enough. The mottled reflective surface should remain the main feature.
11. Minimalist Wooden Inlay-Style Ornaments

Photo credit: @ DIY | Home Decor | Home Improvement
Wood already has enough visual character that it doesn’t need layers of paint to become interesting.
For DIY Christmas ornaments crafts for adults, use a thin unfinished wood blank as the base and add one contrasting material, such as a small veneer shape, carefully cut paper insert or another compatible thin layer—to create an inlay-style design.
The important part is the fit. Cut the inset so it sits neatly within the wooden shape rather than leaving obvious gaps around it.
Sand the wood edges before assembling the pieces, then use a suitable adhesive sparingly so it doesn’t squeeze out onto the visible surface.
Keep the design simple: a crescent inside a circle, a geometric line through a star or a small botanical shape can be enough.
A light wood paired with walnut-toned veneer, for example, gives you contrast without needing bright colours. A matte or satin protective finish can be used on the wood when appropriate for the material and adhesive.
Amazon-friendly supplies: unfinished wood blanks, fine-grit sanding sponges, precision craft knife, suitable wood adhesive and thin veneer sheets.
12. Embossed Metallic Paper Ornaments

Photo credit: @ Studio Creatista
Embossing changes paper from a flat sheet into a surface with raised and recessed detail, which can make a simple ornament look much more substantial.
Use heavyweight cardstock and emboss a restrained pattern, such as a geometric repeat, snowflake structure or botanical design, before adding a light metallic treatment.
Don’t cover the entire surface with glitter or thick metallic paint.
A subtle gold, silver or bronze highlight across the raised areas allows the shadows created by the embossing to remain visible. This is what gives the ornament dimension rather than simply making the paper shiny.
For cleaner results, score and fold any required sections before embossing, and use a sharp cutting tool for the final silhouette. Heavy cardstock also holds its shape better than thin paper when the ornament is hanging.
Amazon-friendly supplies: heavyweight cardstock, embossing folders, scoring tools, metallic paper or ink and an embossing machine.
13. Fabric Heirloom Ornaments With a Tailored Finish

Photo credit: @ Charmed Gatherings
Fabric ornaments can look more like small decorative keepsakes when they have a clean silhouette instead of being heavily stuffed.
Linen, velvet, wool or another substantial fabric can work well for simple stars, circles, diamonds or other uncomplicated shapes.
Cut matching pieces accurately, sew or join them with an even seam, and add enough filling to give the ornament body without making it bulge. Overstuffing can distort sharp points and curves, while too little filling can leave the ornament looking limp.
The hanging loop deserves the same attention as the rest of the construction. A narrow ribbon or matching cord attached securely at the top will look more intentional than a loose piece of string.
Keep embellishment limited, a small embroidered detail, button or bead can be enough when the fabric and construction are already doing the work.
That balance is what separates an adult fabric ornament from a basic stuffed decoration: the shape stays controlled, the materials have some weight, and the finishing details are neat.
14. Hand-Painted Porcelain-Style Clay Ornaments

Photo credit: @ Sintique
The appeal here is the painted surface, not a complicated shape. Start with a smooth, pale clay base and add small botanical sprigs, fine leaves, simple flowers or restrained linework.
Think of the decoration you might see on a small porcelain dish rather than trying to paint a detailed Christmas scene.
Leave plenty of the clay visible between the painted areas. That negative space keeps the pattern from becoming crowded and makes a few carefully placed lines look more deliberate.
Water-based acrylic paint is suitable for painting cured polymer clay, but it is sensible to test the paint on a scrap first because clay and paint combinations can behave differently.
The finishing stage depends on the clay. Cured polymer clay does not require a sealer for durability, although a compatible satin or gloss finish can change its appearance or protect surface treatments. Air-dry clay is different because it remains more porous after drying and can benefit from an appropriate protective finish.
Need something quick before the holiday gets too busy? Last Minute Christmas Craft In 30 Minutes has projects you can finish in a short session.
15. Layered Wood-and-Paper Ornaments

Photo credit: @ Bubblerelief
A thin wooden shape paired with one precisely cut paper layer can create the appearance of a small piece of inlaid decoration without requiring advanced woodworking.
Start with a smooth wood blank, then choose a paper motif that contrasts with the grain rather than fighting it.
The important part is alignment. A slightly oversized paper layer or uneven edge can make the ornament look like something simply glued onto a craft blank.
Cut the paper accurately, lightly sand any rough wood edges before assembly and use adhesive sparingly so it doesn’t squeeze around the edges.
You can also let the wood remain largely visible. A small botanical silhouette, arch or geometric insert against pale wood is often enough to create dimension without additional paint, glitter or embellishment.
Useful supplies: unfinished wood blanks, heavyweight decorative paper, precision scissors, craft knife, fine-grit sandpaper and a suitable adhesive for wood and paper.
16. Beaded Fringe Ornament

Photo credit: @ Ne_Vesta
A beaded ornament can look much more refined when the beads form a deliberate silhouette instead of simply hanging in loose strands.
Start with a small wooden or metal ring as the structure, then attach several beaded strands underneath it. Keep the strands the same length for a clean geometric edge, or graduate them gradually so the centre hangs lower than the sides.
The bead choice changes the character of the finished piece. Clear glass or crystal-style beads give you a lighter, reflective look, while wood creates something warmer and more natural.
Pearls or metallic beads can work for a dressier tree, but using several unrelated bead types can make the ornament look busy.
Pay attention to the spacing between strands. Leaving small, consistent gaps allows the individual strands to remain visible and lets the tree lights pass through them. Secure the strands properly at the ring and keep the finished ornament light enough for the branch supporting it.
For DIY Christmas ornaments crafts for adults that look store-bought, the structure is what makes this idea work.
The beads don’t need to be expensive when the spacing, proportions and hanging shape are carefully controlled.
17. Monochrome Relief Ornaments
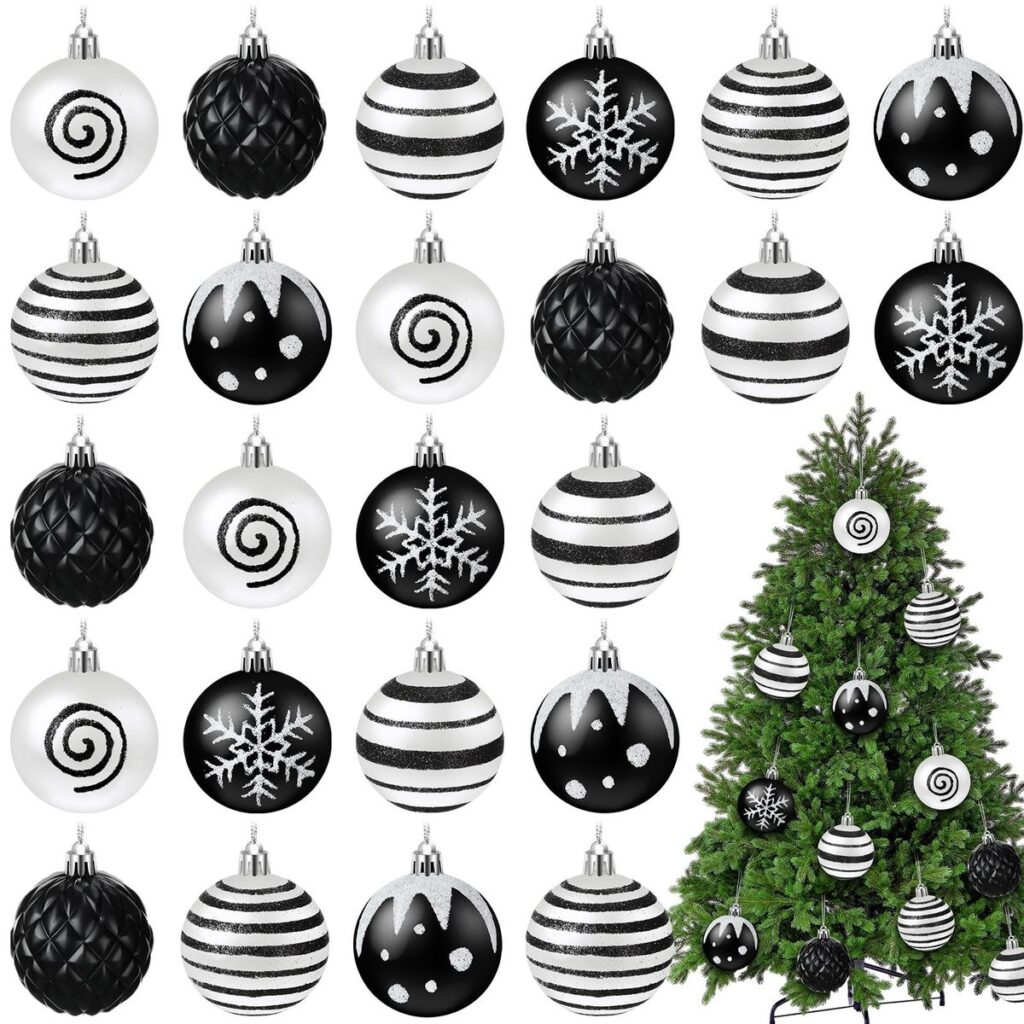
Photo credit: @ Amazon
A single-colour ornament can have more depth than a multicoloured one when the surface itself carries the design. Start with one colour of clay and press a botanical stamp, lace, geometric tool or other textured object into the surface before the material cures or dries.
Once the ornament is ready, resist the temptation to paint every raised section. Keeping the colour consistent allows the light and shadow created by the relief to provide the contrast.
A satin ivory surface with deeper matte recesses, for example, can show much more detail when light hits the raised pattern.
You can also create subtle variation by changing the sheen rather than the colour. Just make sure any varnish or sealer is compatible with the clay you are using.
Polymer clay and air-dry clay have different curing and finishing requirements, so follow the manufacturer’s instructions for the specific material.
This works particularly well when the rest of the tree already has a strong colour scheme. Your DIY Christmas ornaments crafts for adults can then add texture and detail without introducing another competing colour.
18. Vintage-Inspired Box Ornaments
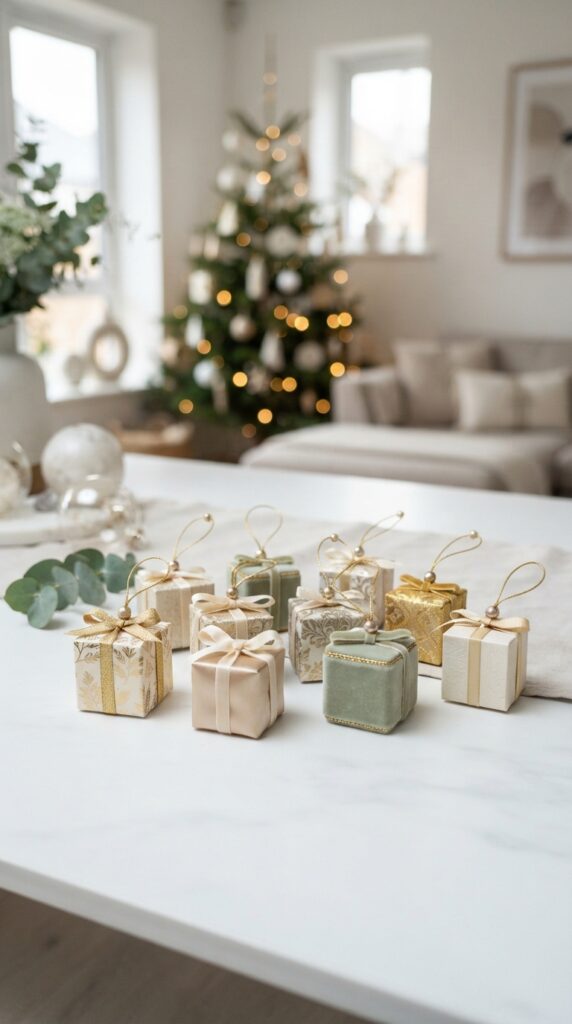
A small box gives you something a flat ornament cannot: corners, edges and several visible surfaces. That makes it possible to create a tiny decorative object rather than another round decoration.
Start with a firm small box or construct one from heavyweight board. Cover it with decorative paper, fabric or paint, keeping the corners neat.
A single ribbon running around the box or across the lid can provide enough decoration; too many ribbons can make it resemble gift wrapping rather than a Christmas ornament.
The material covering the box also affects the finished appearance. Paper gives you sharper edges and printed patterns, while fabric adds softness but requires more care around corners. Whatever you choose, trim it precisely and avoid bulky layers where the surfaces meet.
Attach a narrow hanging loop securely to the back or top, depending on how you want the box to sit on the tree.
Martha Stewart has featured box-shaped Christmas ornaments decorated with ribbon, so this isn’t simply a theoretical ornament format.
For a polished result, proportion matters more than embellishment. A small, well-covered box with clean corners can look far more finished than one covered in several competing decorations.
19. Architectural Paper Ornaments

Photo credit: @ Mrs.B🐝
Paper can take on a surprisingly refined look when you treat it more like a miniature building material than a sheet for drawing on.
Think small arches, windows, domes, houses or geometric structures made from heavyweight cardstock.
The interesting part is the use of layers and openings. Cut a window or arch into the front panel, then place a second piece of slightly darker or contrasting cardstock behind it.
The opening creates depth and shadow, so the ornament gets its detail from its construction rather than extra embellishments.
For a three-dimensional design, build the shape from several measured panels instead of forcing one sheet into an awkward form. Score fold lines before bending the cardstock so the edges stay crisp, and use a small amount of adhesive along the joins to avoid visible glue marks.
Keep the colour palette restrained. Cream with taupe, white with soft grey, or kraft with ivory can make the architectural shape stand out without needing glitter or busy patterns.
What gives this style its polished appearance is depth and proportion. Clean layers, deliberate openings and subtle contrast can make ordinary cardstock look far more considered.
20. Personalized Ornament With a Gallery-Style Finish

Personalization doesn’t have to mean putting a full name across a wooden circle. A more considered approach is to treat the personal detail like a small piece of artwork.
Start with a simple, well-finished base such as a smooth clay medallion, clear glass ornament or heavyweight paper shape.
Choose one detail with a specific connection to the person or occasion: an initial, a meaningful year, the coordinates of a memorable place, a small botanical illustration, or a short phrase.
Keep that detail relatively small and leave generous empty space around it. For example, a cream clay medallion could carry a single dark green initial near the centre, while a clear glass bauble might contain a tiny illustration of a flower associated with a particular person or place.
The restraint matters. Adding a border, several colours, glitter, beads and multiple lines of text can turn a personal design into a crowded one.
When the base is already smooth and the personal element has enough space around it, the ornament can feel more like a small decorative object than a labelled craft.
Pay attention to scale too. Text needs to remain readable at the ornament’s actual size, while small illustrations need enough visual weight to remain recognisable. Test the design on paper first, especially when working with lettering or a detailed image.
Finish with a simple hanger that relates to the ornament rather than competing with it. A narrow ribbon, fine cord or understated metal loop is usually enough.
Give the meaningful detail room to breathe. The less competing around it, the more personal the ornament feels.
Give everyday packaging and household scraps a second life with DIY Christmas Crafts From Recycled Materials.
The Finishing Steps That Make the Biggest Difference

A good design can still look homemade in the wrong way when the edges are rough, the finish is uneven or the hanger looks like an afterthought.
These small checks make a bigger difference than adding more decoration.
Smooth only where it helps
Sand rough clay edges or unfinished wood before decorating, but don’t sand textured areas you want to keep. With polymer clay, sanding and buffing can create a smoother finish, while textured surfaces may lose their detail if you overwork them.
Let each layer finish properly
“Dry to the touch” isn’t always the same as ready for the next step. Paint, decoupage medium, varnish and air-dry clay all need their own drying times. Follow the product instructions before painting, sealing or assembling another layer.
Build the finish gradually
A thin coat gives you more control than one heavy application. This is especially useful with compatible clay sealers and varnishes, where several thin coats can produce a more even result than trying to cover everything at once.
Don’t overlook the hanger
A narrow ribbon, neat cord or simple metal loop can make the finished ornament look much more deliberate. Match its weight and style to the ornament instead of treating it as something added at the very end.
Deal with glue before it becomes part of the design
Glue showing around a paper edge or dried across a visible surface is difficult to disguise later. Use less adhesive, keep it away from exposed edges and clean any squeeze-out according to the adhesive instructions.
The goal isn’t to make the ornament more decorated. It is to make every visible part look intentional.
Mistakes That Make DIY Ornaments Look Homemade in the Wrong Way
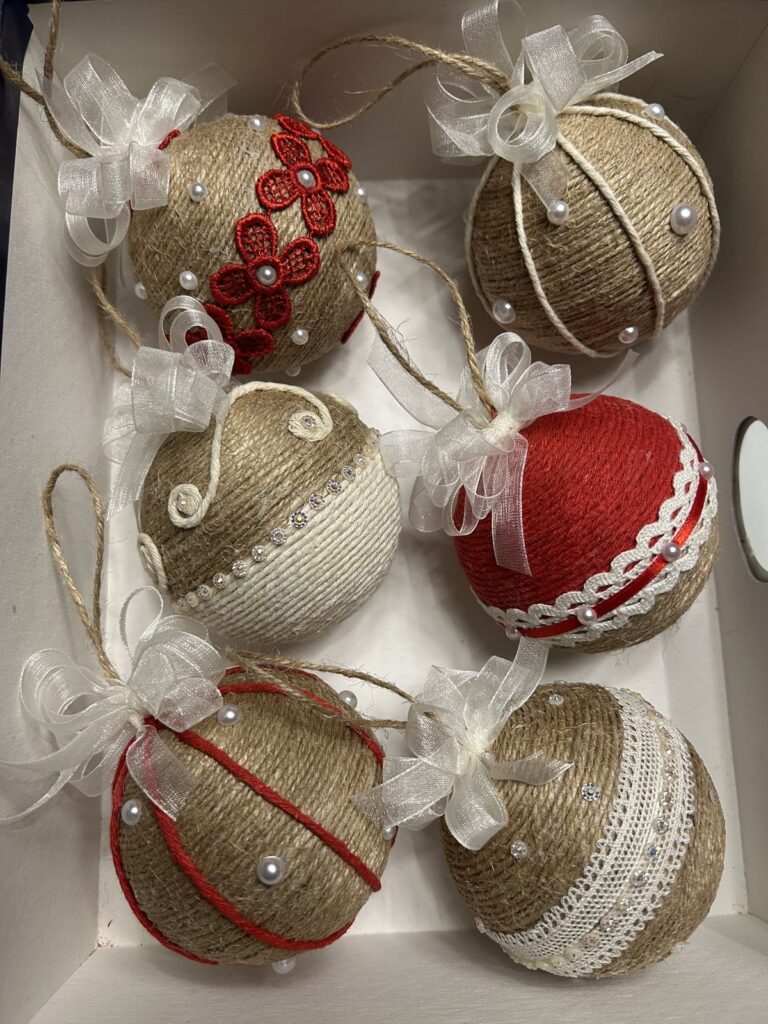
The polished look usually disappears through small construction mistakes, not because the idea itself is bad. These are worth checking before adding another decorative detail.
Too many colours competing
When every ornament uses several unrelated colours, the tree can start looking like a collection of craft materials. Pick a small palette and repeat it. Repetition makes different designs feel like they belong together.
Making everything glossy
Gloss can highlight fingerprints, brush marks and uneven surfaces just as easily as it can highlight a good finish. Glass may suit a high-shine surface, while clay, paper or fabric can look better with a matte or satin finish.
Leaving raw edges
Rough clay, fuzzy fabric edges and untrimmed paper corners make the construction obvious. Check the edges before decorating because embellishments rarely hide them convincingly.
Using decoration to cover poor construction
Extra beads, glitter or ribbon cannot correct a crooked shape, uneven layers or visible glue. Fix the structure first, then decide whether the ornament needs anything else.
Making every ornament completely different
Twenty unrelated designs can make a handmade tree feel scattered. Repeat a few shapes, colours, textures or finishes across different ornaments instead. The individual pieces can vary while the collection still feels connected.
Choosing adhesive by habit
Glue needs to suit the materials being joined. An adhesive that works well for paper may not be appropriate for glass, fabric, wood or metal. Check the manufacturer’s recommended surfaces, drying time and flexibility before assembling the ornament.
Before calling an ornament finished, look at it from a distance. If the first thing you notice is the glue, uneven edge or random colour, more decoration probably isn’t the answer. Fix the distracting detail instead.
For even more festive projects to make at home, DIY Christmas Crafts to Make This Holiday Bright has plenty of ideas to try.
Conclusion
The best handmade ornaments don’t need to imitate every detail of something from a shop. What makes them convincing is having a clear point of view and knowing when the design has done enough.
That gives DIY Christmas ornaments crafts for adults a different advantage: you can choose the materials, colours and personal details around the tree you already have instead of starting from whatever happens to be in a craft box.
Pick two or three ideas from this list, repeat a few colours or finishes, and let the materials do some of the visual work. You might find that the simplest ornament becomes the one that looks most at home among your existing decorations.
Start with one design, make a small batch, and see how it looks on the tree before making all 20. That small test can save you from creating a whole collection that doesn’t quite work together.