DIY Halloween party decorations on a budget are proof that the most memorable parties are never about how much you spent.
They are about how intentional you were.
Every October the same thing happens. Someone decides to throw a Halloween party.
They open Amazon, open Spirit Halloween. They quietly close both tabs when they see the prices.
Here is what they did not know the decorations that get photographed most at Halloween parties are almost never the expensive ones.
They are the ones that look handmade. The ones that feel personal. The ones where someone stood in a Dollar Tree aisle for twenty minutes and came out with everything they needed for under $30.
This post gives you 25 DIY Halloween party decorations on a budget that work for family parties, friend gatherings, and everything in between.
Every idea includes exactly what you need and exactly how to make it no guessing, no vague instructions, no supplies you cannot find at a regular craft or dollar store.
If you are also planning a photo booth corner for your party these DIY photo booth ideas for birthdays pair beautifully with everything on this list.
Everything in this guide to DIY Halloween party decorations on a budget has been chosen specifically because it works in the real world so also Halloween Crafts for Seniors
Before You Decorate —Three Rules That Save You Money and Time
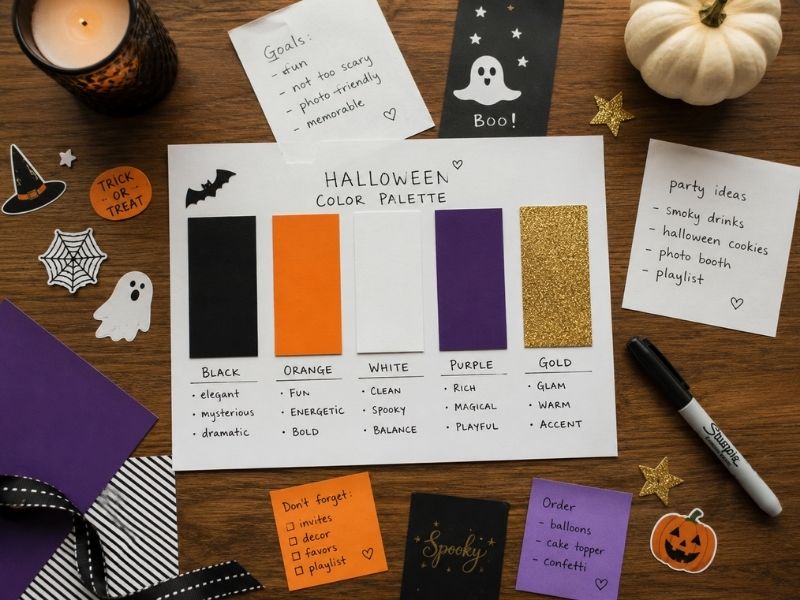
Buy in your color palette only. Choose three colors before you buy anything. Classic orange black and white. Purple gold and black. Sage green cream and burnt orange for a more elevated look.
Every supply you pick up should fit those three colors. This one rule prevents the scattered chaotic look that makes budget decorations look cheap.
Focus on three statement pieces. One backdrop. One table setup. One entrance moment. Everything else fills in around them.
Trying to decorate every surface spreads your budget thin and makes the space feel busy rather than intentional.
Shop Dollar Tree first. Before ordering anything online walk through Dollar Tree. Streamers balloons tissue paper plastic spiders fake cobwebs skulls and candles most of what you need is there for a dollar each.
That is the foundation of every successful DIY Halloween party decoration on a budget — know where to shop before you know what to buy.
For more budget friendly party planning ideas that prove beautiful celebrations never require big spending check out these DIY baby shower decorations on a budget — the same intentional approach works for every occasion.
The 25 DIY Halloween Party Decorations
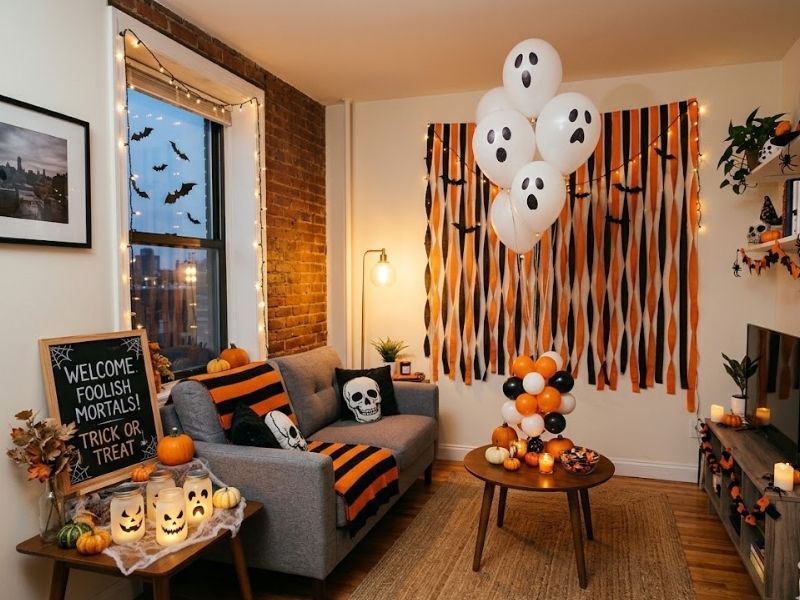
Crepe Paper Streamer Backdrop
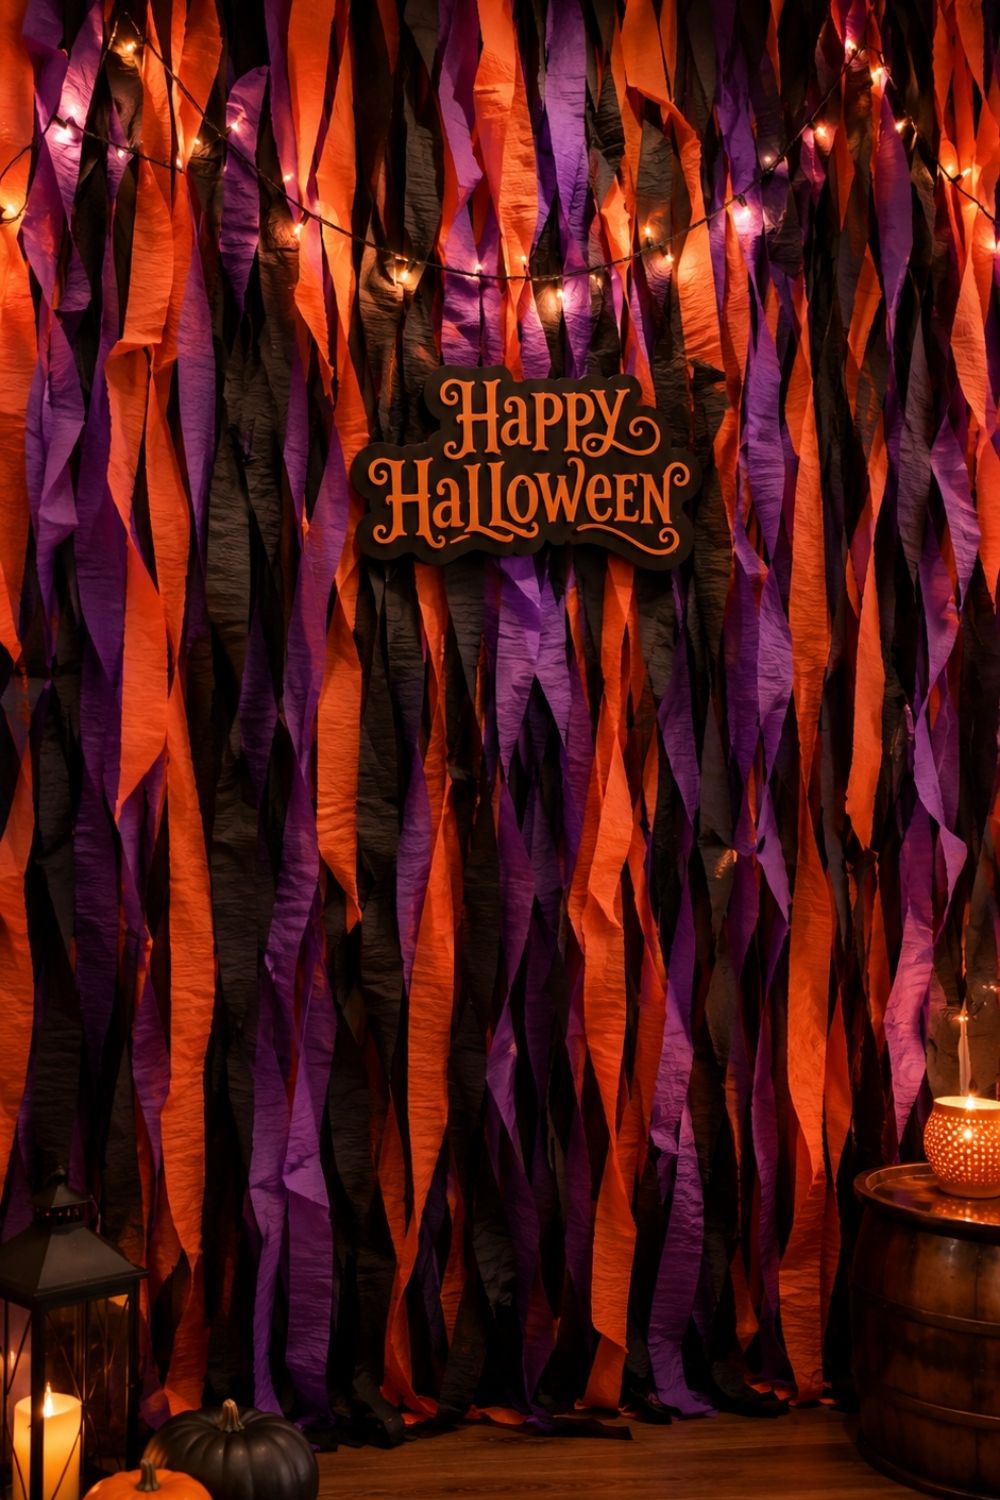
What it is — A dramatic wall of hanging streamers in your party colors that serves as the main photo spot and visual anchor of the entire party.
What you need — Crepe paper streamers in two or three colors, tape or command strips
How to do it: Cut streamers into equal lengths about six feet each. Tape them horizontally across the wall in alternating colors.
Layer them tightly enough that no wall shows through. Gather the bottom of each strip loosely and tape to the wall at different heights for a layered effect.
Pro tip — Add a simple “Happy Halloween” sign in the center of the streamer wall and it instantly becomes the most photographed spot at the party and the most impressive DIY Halloween party decoration on a budget you will make all season.
Dollar Tree carries streamers balloons fake cobweb plastic spiders skulls candles mason jars witch hats and tissue paper in every Halloween color walk through before ordering anything online.
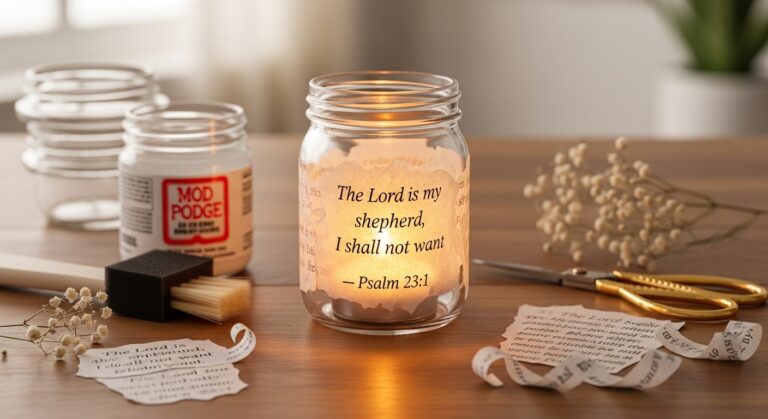
Mason Jar Luminaries
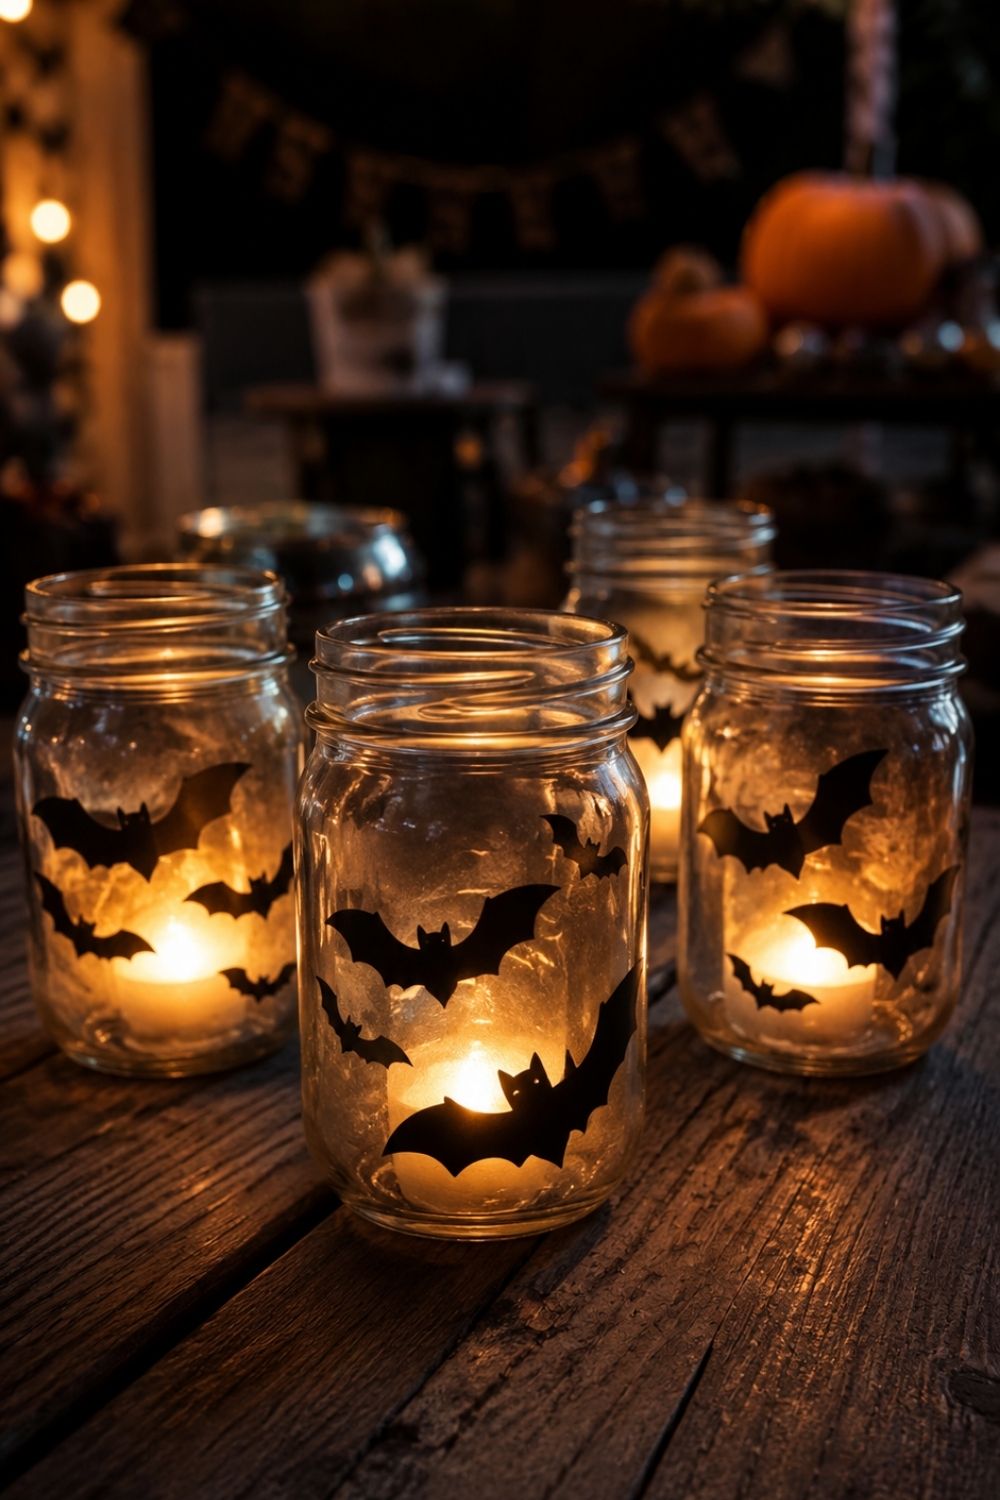
What it is — Glass jars filled with battery tea lights and decorated with Halloween silhouettes that glow dramatically in low light.
What you need — Mason jars, black cardstock, battery tea lights, scissors, tape
How to do it
Cut Halloween shapes from black cardstock , bats, cats, pumpkins, haunted houses.
Tape the silhouettes to the inside of the jar. Place a battery tea light inside. Line several along a table or windowsill.
Mason jar luminaries are one of the most underrated DIY Halloween party decorations on a budget because they look expensive and cost almost nothing.
Pro tip — Use jars of different heights grouped in odd numbers — three or five together always looks more intentional than two or four.
Balloon Cluster Centerpieces
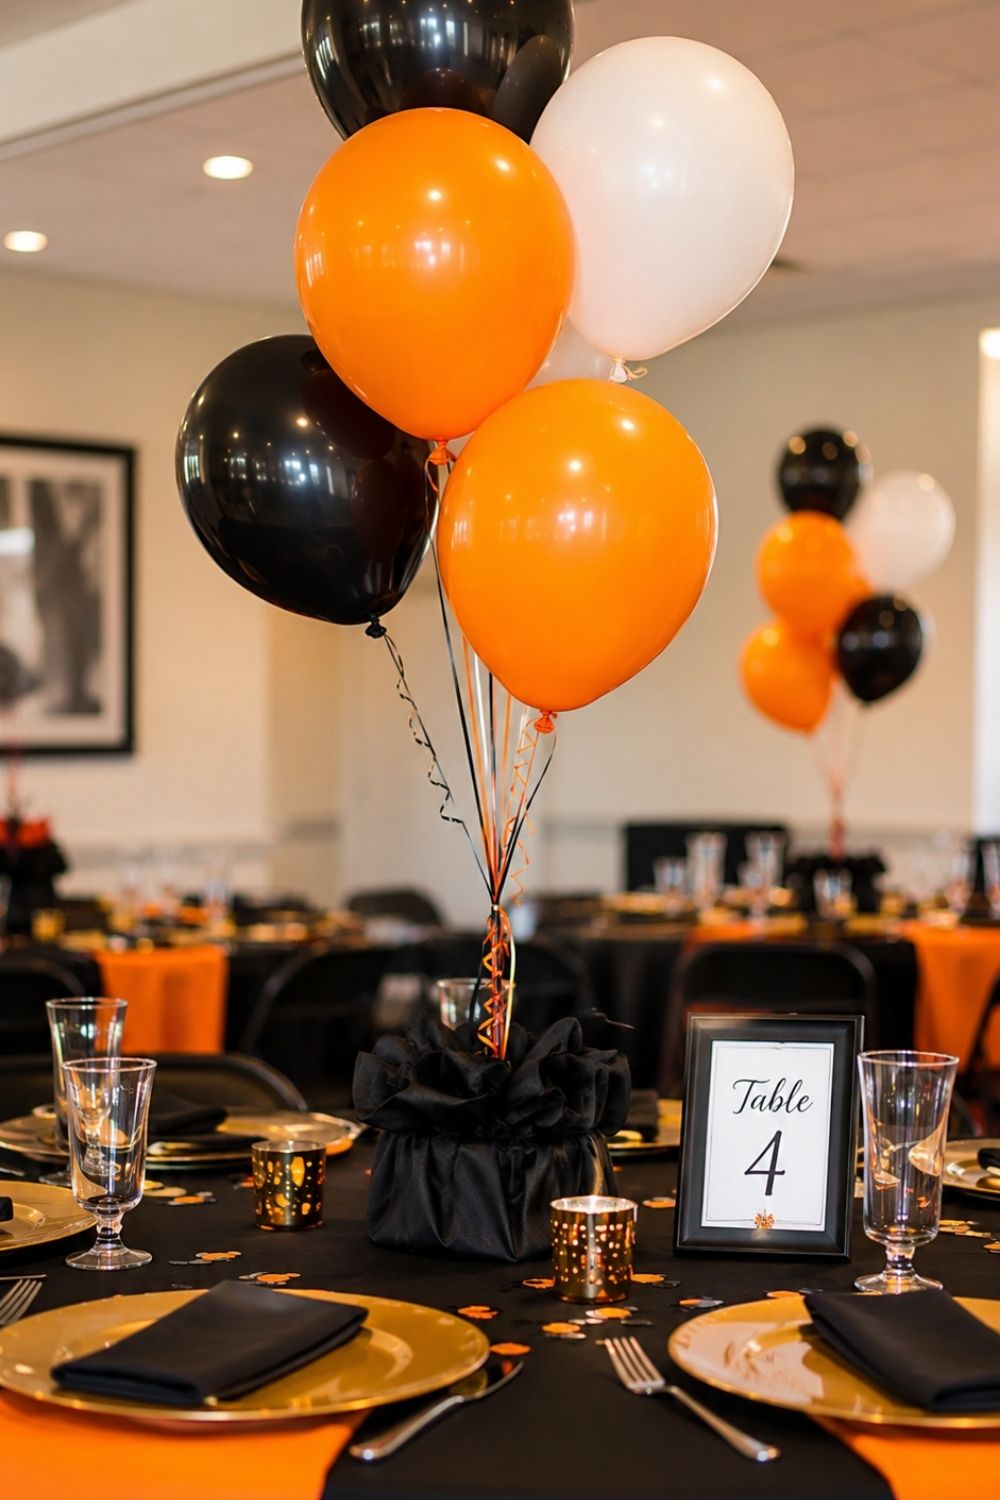
What it is — Clusters of orange black and white balloons weighted at the base and arranged as table centerpieces.
What you need — Balloons in party colors, ribbon, small weights or filled water bottles as bases
How to do it Inflate three to five balloons per cluster in varying sizes. Tie with ribbon at the base. Wrap ribbon around a small weight — a water bottle filled with sand works perfectly. Space one cluster per table.
Pro tip — Mix matte and metallic balloons in the same cluster for a more expensive looking result.
Paper Bag Luminaries
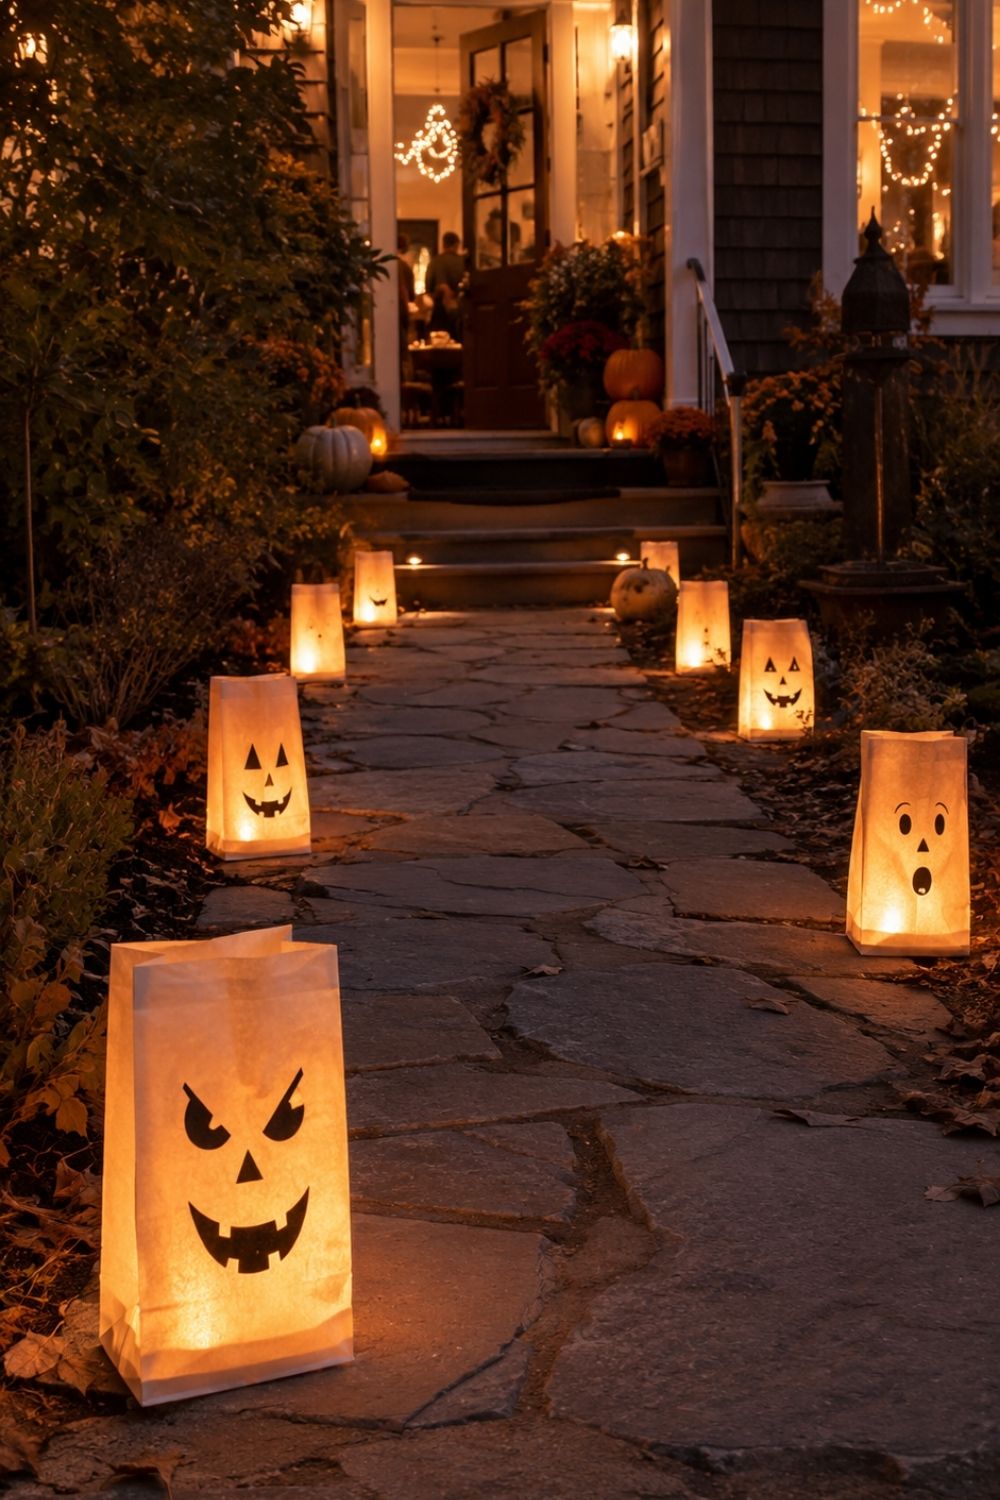
What it is — Brown paper lunch bags weighted with sand and lit from inside with battery tea lights creating a warm glowing path.
What you need — Brown paper lunch bags, sand or cat litter, battery tea lights, black marker or Halloween stamps
How to do it
Draw or stamp Halloween images on the outside of each bag. Fill the bottom third with sand. Place a battery tea light inside. Line them along a walkway path or down the center of a table.
Pro tip — These work beautifully as a front door path for arriving guests the entrance moment that sets the tone for the whole party before anyone walks inside.
Cobweb Table Runner
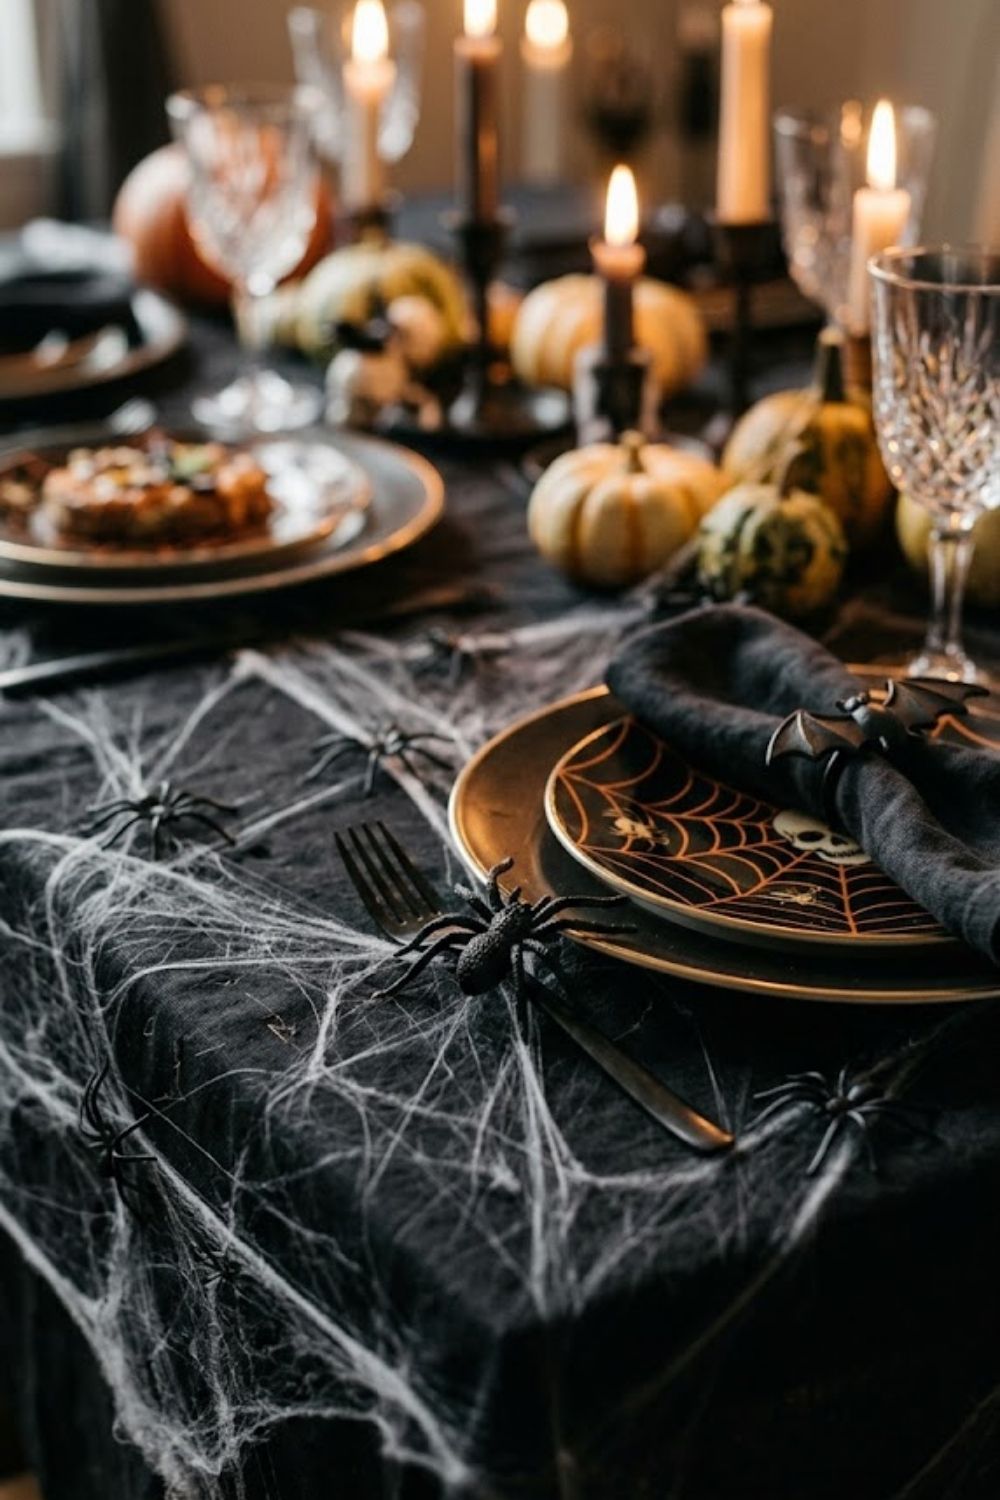
What it is — Stretched fake cobweb across the length of a table with plastic spiders pressed into it creating a spooky table runner effect.
What you need — Bag of fake cobweb from Dollar Tree, plastic spiders, tape
How to do it Stretch the cobweb lengthwise down the center of the table.
Pull it wide and thin so it looks like a real web rather than a cotton ball. Press plastic spiders into the web at random intervals.
Pro tip — Layer the cobweb over a black tablecloth for maximum visual contrast.
Balloon Arch Entrance
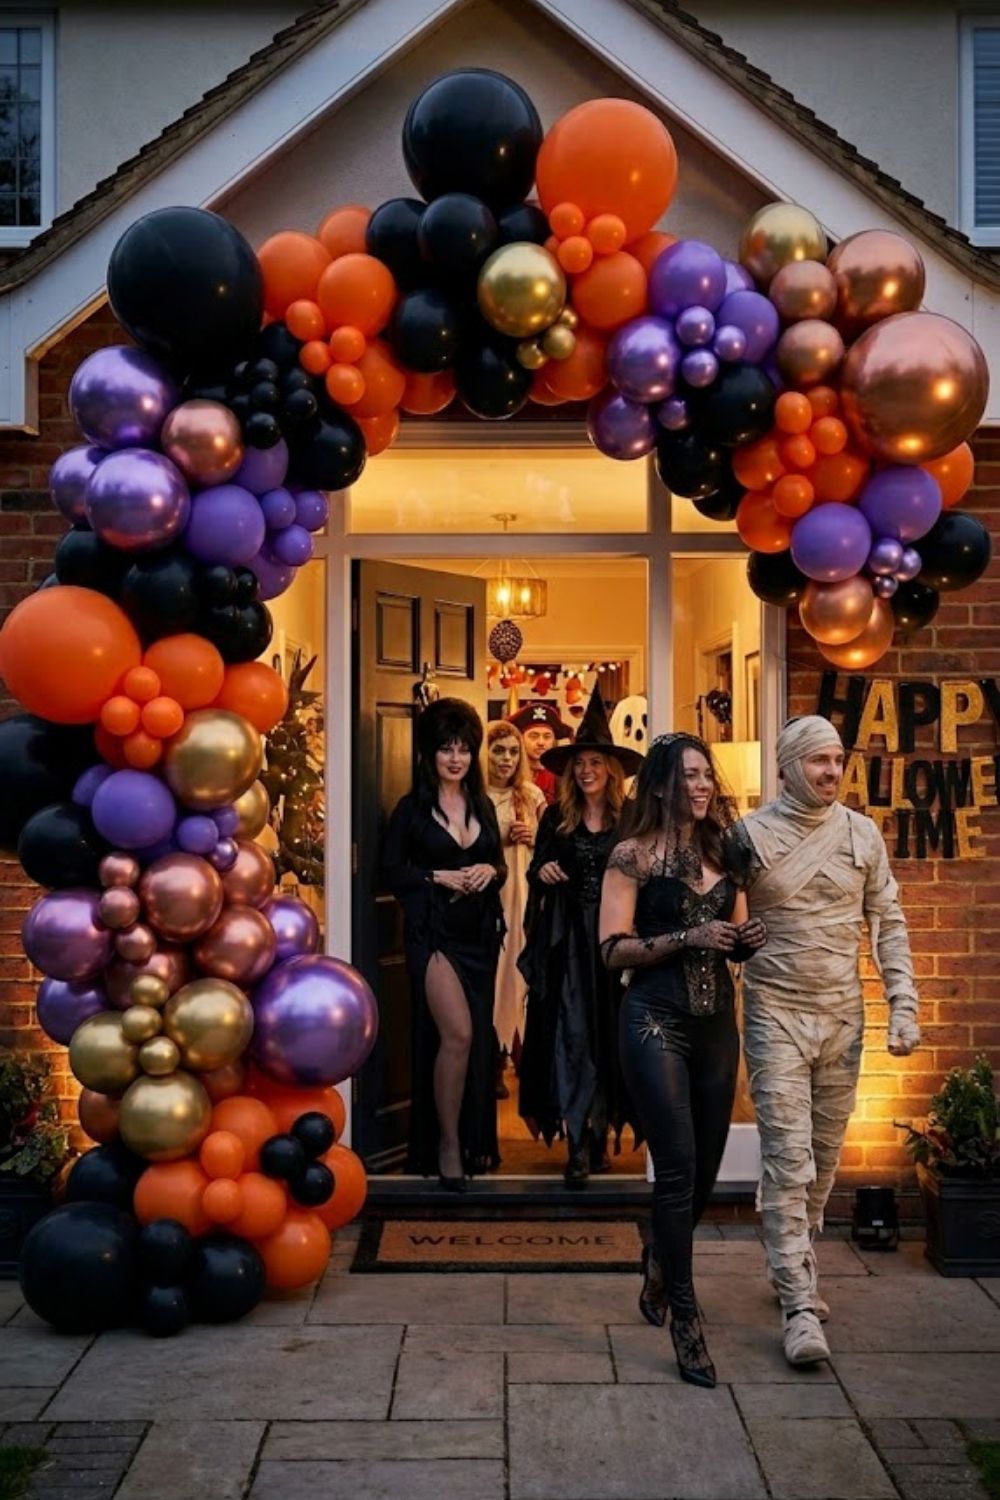
What it is — A simple balloon arch framing the entrance to the party space made entirely from orange black and purple balloons.
What you need — Balloon garland strip, balloons in party colors, command hooks
How to do it
Thread inflated balloons of varying sizes onto the garland strip. Mount command hooks on either side of the doorframe. Hang the garland strip across the top of the door. Fill in gaps with extra balloons.
Pro tip — Add one metallic gold or silver balloon per every five standard balloons for a polished high end look on a low budget.
A balloon arch entrance is the DIY Halloween party decoration on a budget that makes guests feel like they have arrived somewhere worth being.
For more balloon decoration ideas that create a dramatic entrance moment check out these DIY bridal shower decorations that look expensive on a budget — the balloon arch techniques work perfectly for any celebration.
A complete balloon garland kit on Amazon runs $15 to $25 and comes with everything you need including the strip pump and glue dots.
Tissue Paper Pom Pom Ceiling Decor
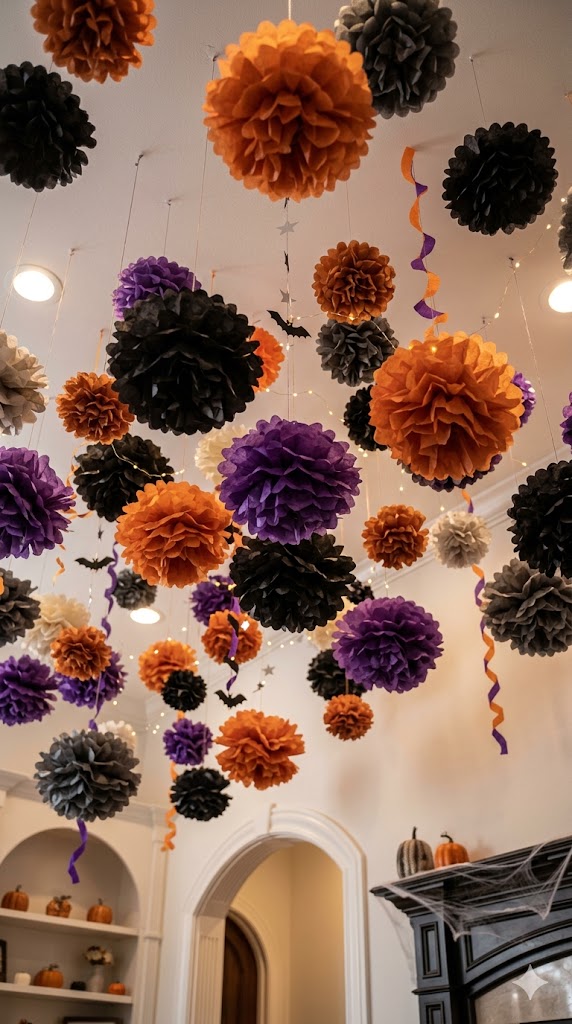
What it is — Tissue paper pom poms hung from the ceiling in Halloween colors creating a festive overhead canopy effect.
What you need — Tissue paper in Halloween colors, fishing line or clear string, tape
How to do it
Stack eight sheets of tissue paper. Fold accordion style. Tie fishing line around the center. Fan each side outward into a full pom pom shape. Hang at varying heights from the ceiling using clear tape.
Pro tip — Group three pom poms together at different heights rather than spacing them evenly across the ceiling — clustering looks more styled and less like a school gym.
Chalkboard Welcome Sign
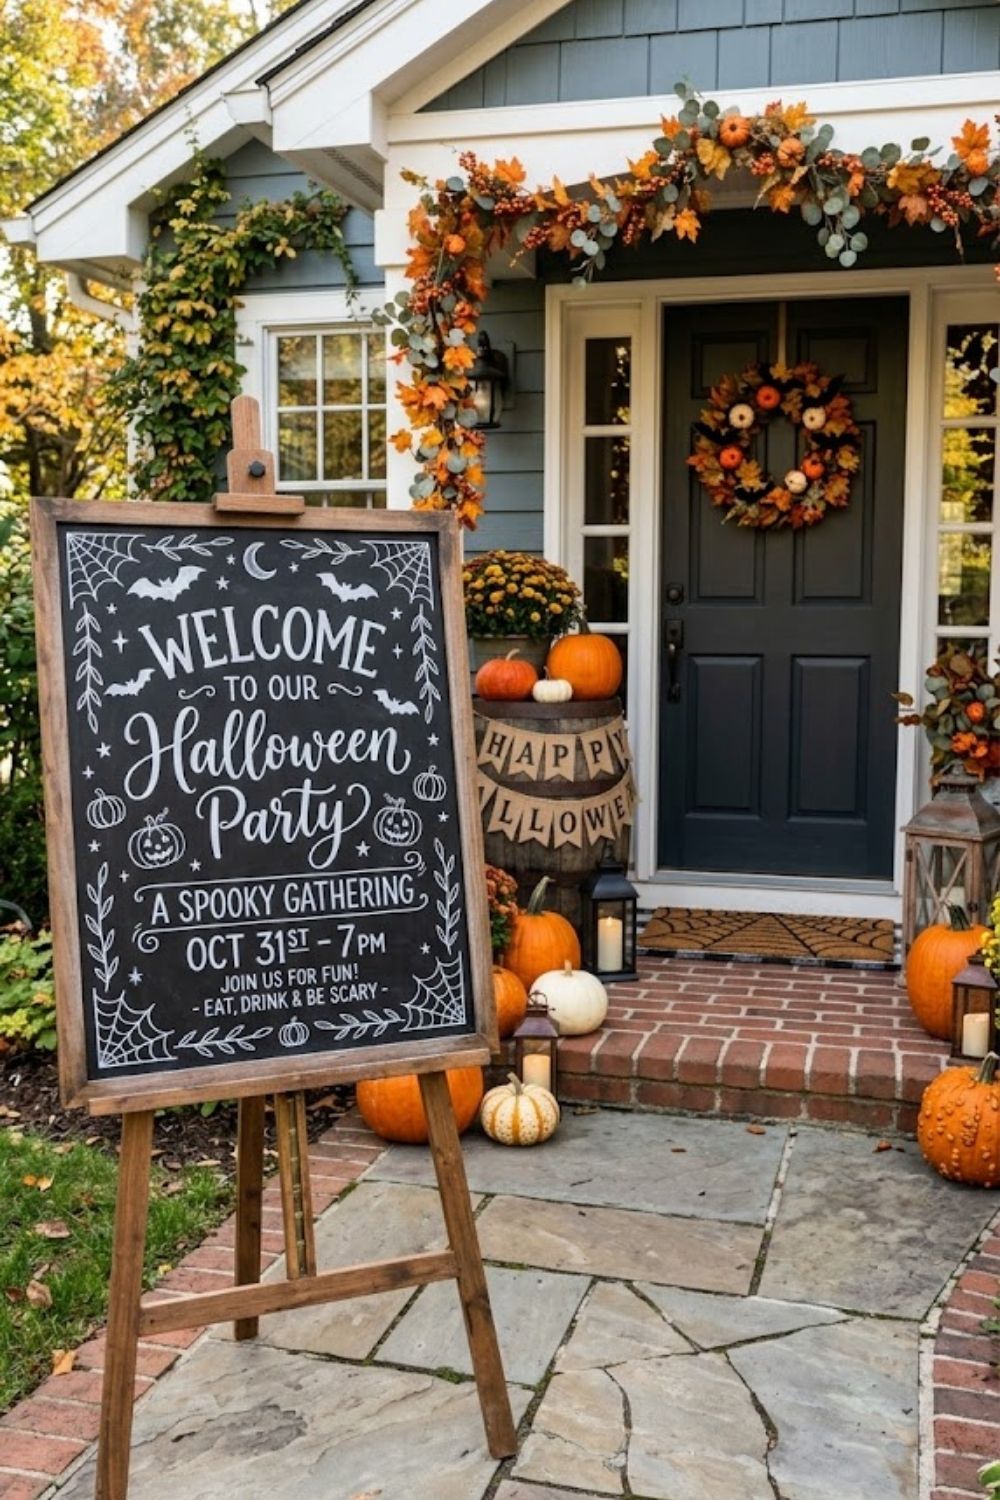
What it is — A chalkboard sign at the entrance welcoming guests to the party with Halloween themed lettering and simple illustrations.
What you need — Chalkboard or dark cardboard, chalk markers
How to do it
Write the party welcome message in large lettering. Add simple Halloween illustrations in the corners — bats moons stars. Prop on an easel or lean against the front door.
Pro tip — Chalk markers give a far cleaner more professional result than regular chalk and will not smear when guests brush past.
For more welcome sign inspiration that works across every event style and theme check out these 25 stunning welcome sign ideas for every event theme — perfect alongside any Halloween party entrance.
Floating Ghost Balloons

What it is — White balloons with drawn ghost faces attached to trailing black ribbon streamers creating the illusion of floating ghosts.
What you need — White balloons, black marker, black ribbon or crepe paper, helium optional
How to do it
Inflate white balloons. Draw simple ghost faces with black marker —two dots for eyes and a small open mouth.
Attach several strips of black ribbon or crepe paper to the tied end of each balloon. Hang from the ceiling or let float with helium.
Pro tip — Without helium tape the ribbon to the ceiling and let the balloon hang down it reads as floating from across a room and costs nothing extra.
For more outdoor party setup ideas that make a stunning first impression before guests even walk in check out these DIY gender reveal party ideas — the outdoor entrance and atmosphere tips apply beautifully here.
Pumpkin Centerpiece Trio
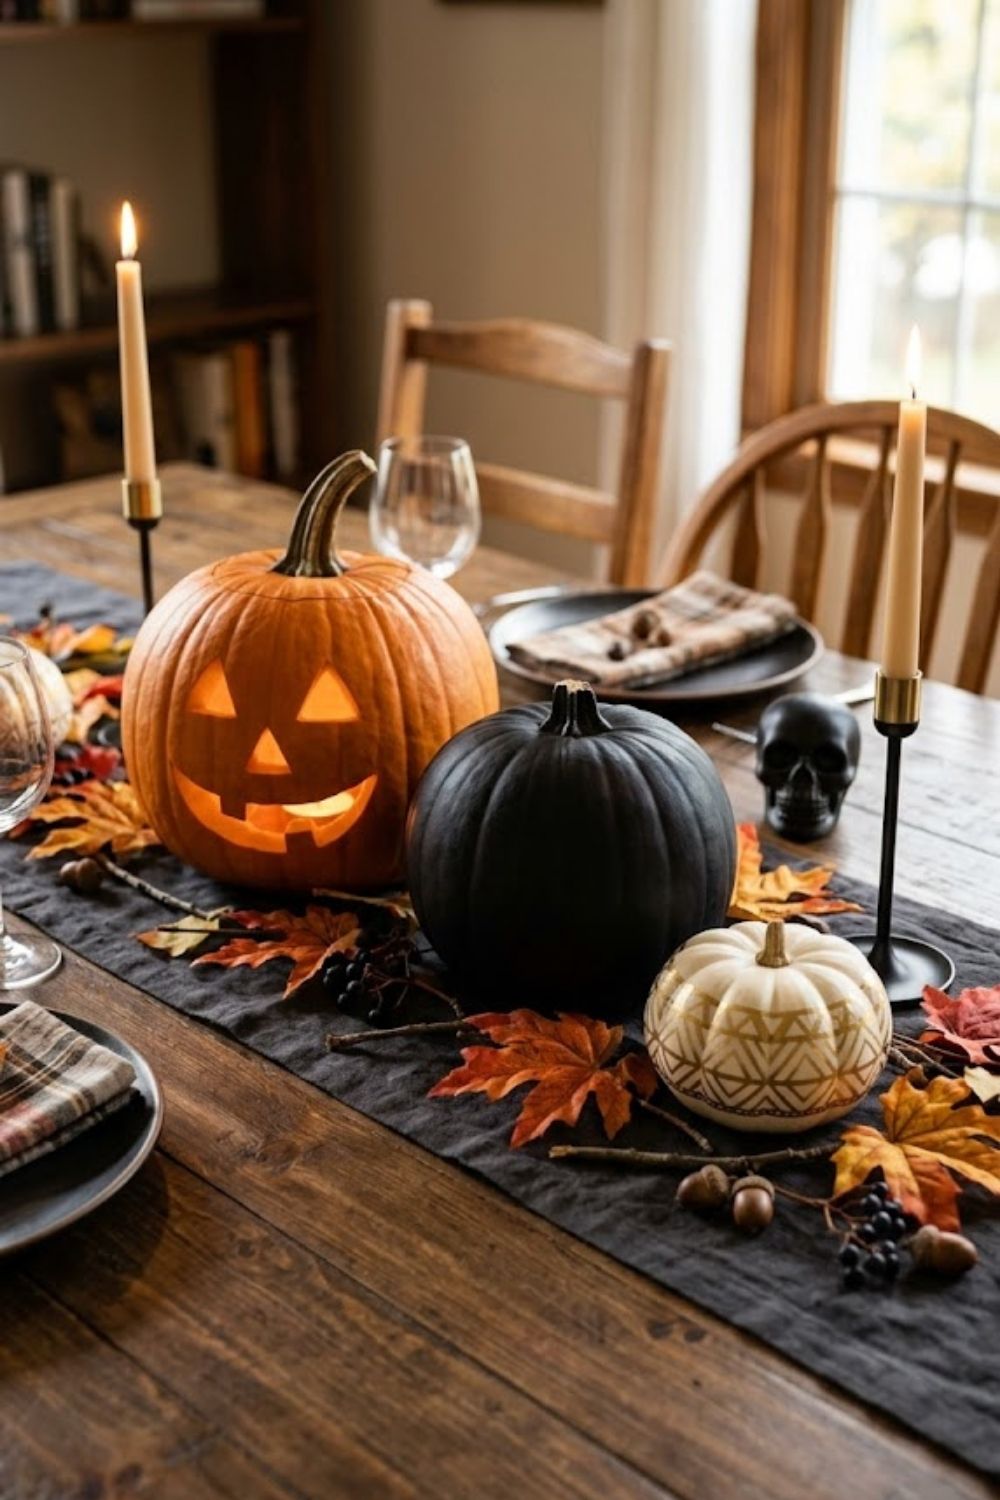
What it is — Three pumpkins of different sizes arranged together as a centerpiece ,one carved one painted one decorated with washi tape.
What you need — Three pumpkins in graduating sizes, acrylic paint, washi tape, optional carving tools
How to do it
Place the largest pumpkin at the back. Medium in the middle. Small at the front. Carve a simple face on one. Paint another in a solid contrasting color.
Wrap the third with washi tape in geometric patterns. No two should look alike.
Pro tip — Painting pumpkins in matte black and adding gold washi tape creates an elevated modern Halloween aesthetic that photographs exceptionally well.
For more creative centerpiece ideas that make a big impact on a small budget check out these DIY baby shower centerpieces under $20 — the same trio arrangement principle applies beautifully here.
DIY Potion Bottles
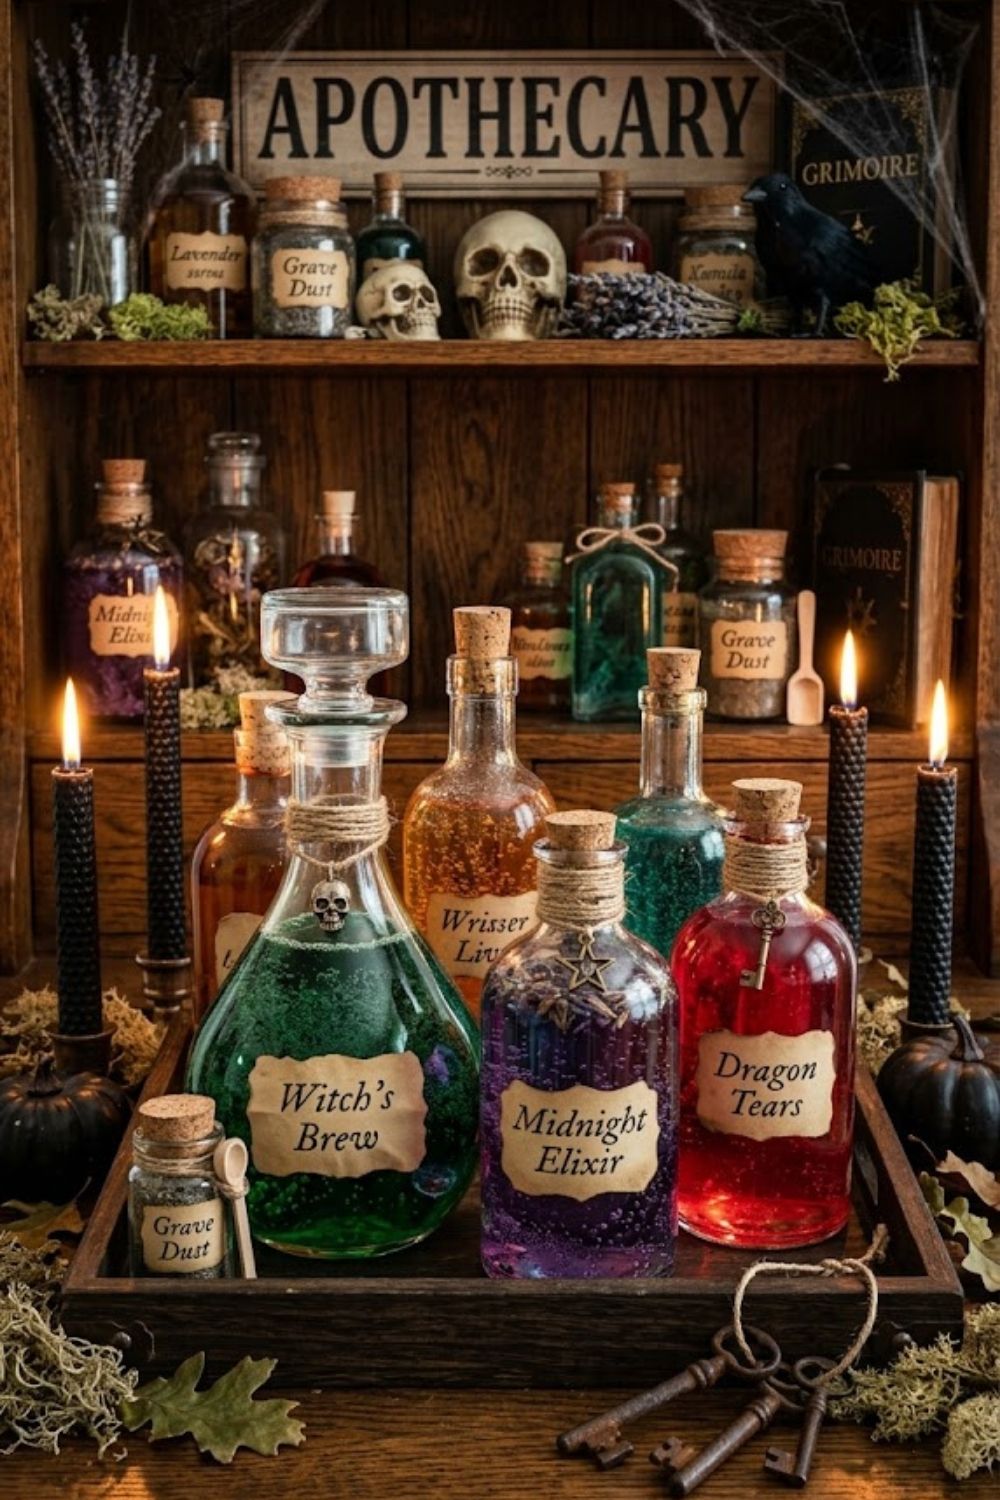
What it is — Old glass bottles and jars filled with colored water and labeled with handwritten potion names creating a witchy apothecary display.
What you need — Glass bottles and jars in various shapes, food coloring, water, twine, cardstock labels, pen
How to do it
Fill each bottle with water tinted with food coloring — green purple orange red. Cut small cardstock labels. Write names like “Witch’s Brew” “Dragon Tears” “Midnight Elixir” in handwriting.
Tie around the neck of each bottle with twine. Arrange together on a tray or shelf.
Pro tip — Add a few drops of dish soap to the water and shake gently the bubbles make the potions look actively brewing when guests arrive.
Potion bottles are the DIY Halloween party decoration on a budget that impresses the most adults at any gathering.
For more creative craft ideas that use simple materials to make something genuinely beautiful check out these crafts to make for friends — the potion bottle concept makes a stunning handmade gift too.
Spider Web Window Decor
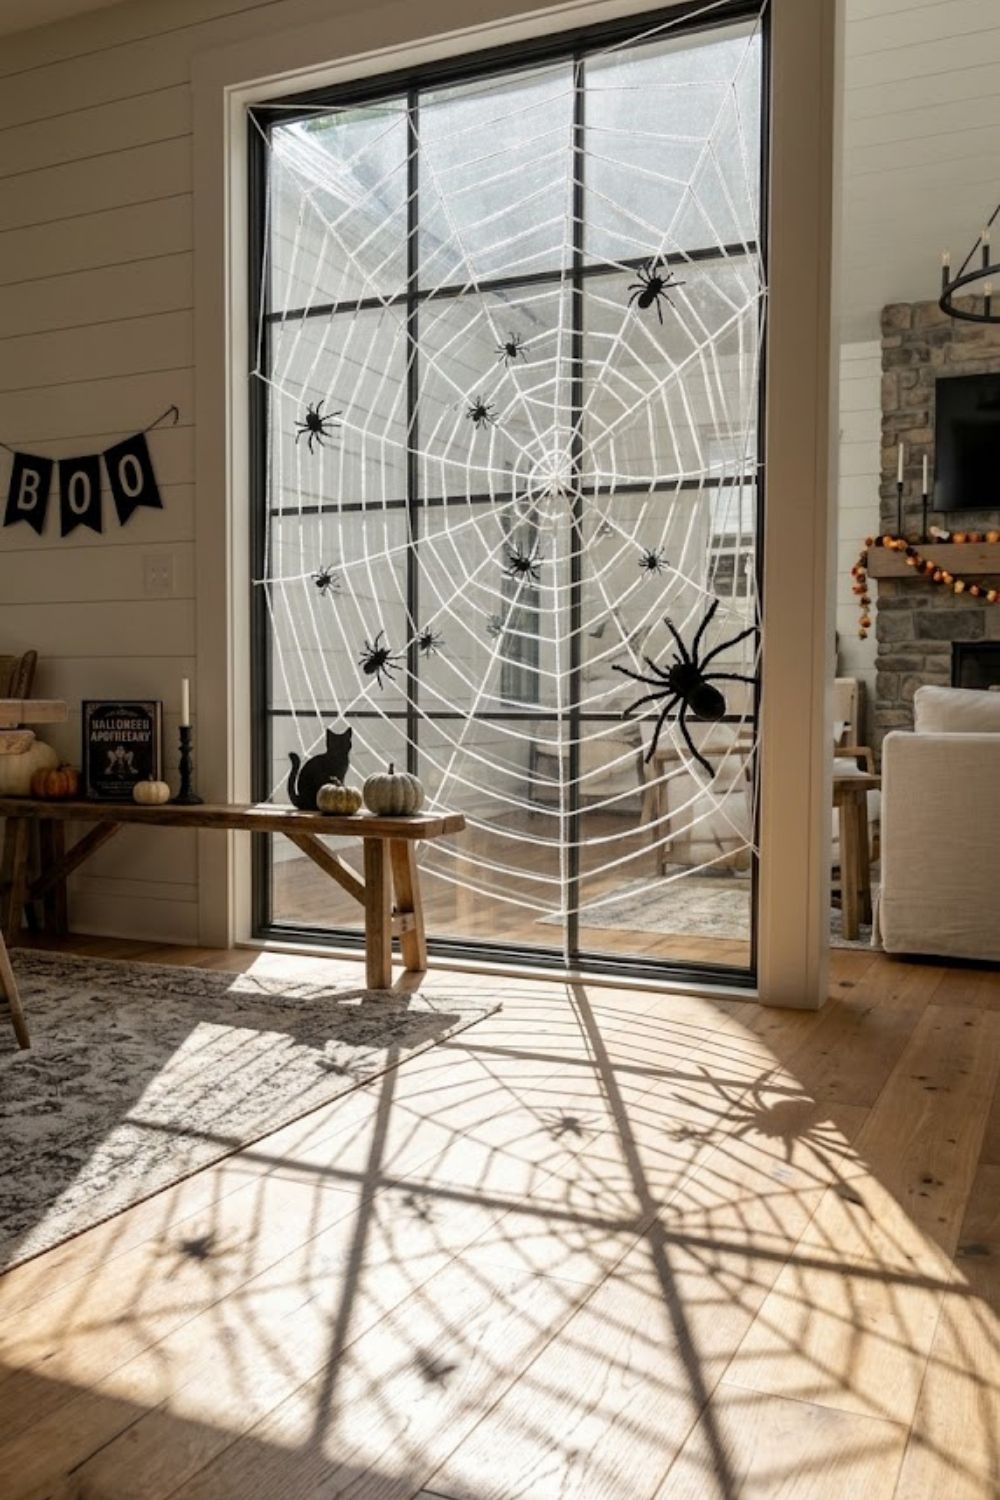
What it is — White yarn stretched across a window frame in a web pattern with plastic spiders positioned in the strands.
What you need — White or gray yarn, small nails or push pins, plastic spiders
How to do it
Press push pins around the window frame at irregular intervals. Wrap yarn from pin to pin creating a web pattern — there is no wrong way to do this. Press plastic spiders onto the strands where they naturally catch.
Pro tip — This works beautifully on interior windows lit from behind — the web casts a shadow onto the floor that looks genuinely atmospheric.
Candy Corn Balloon Garland
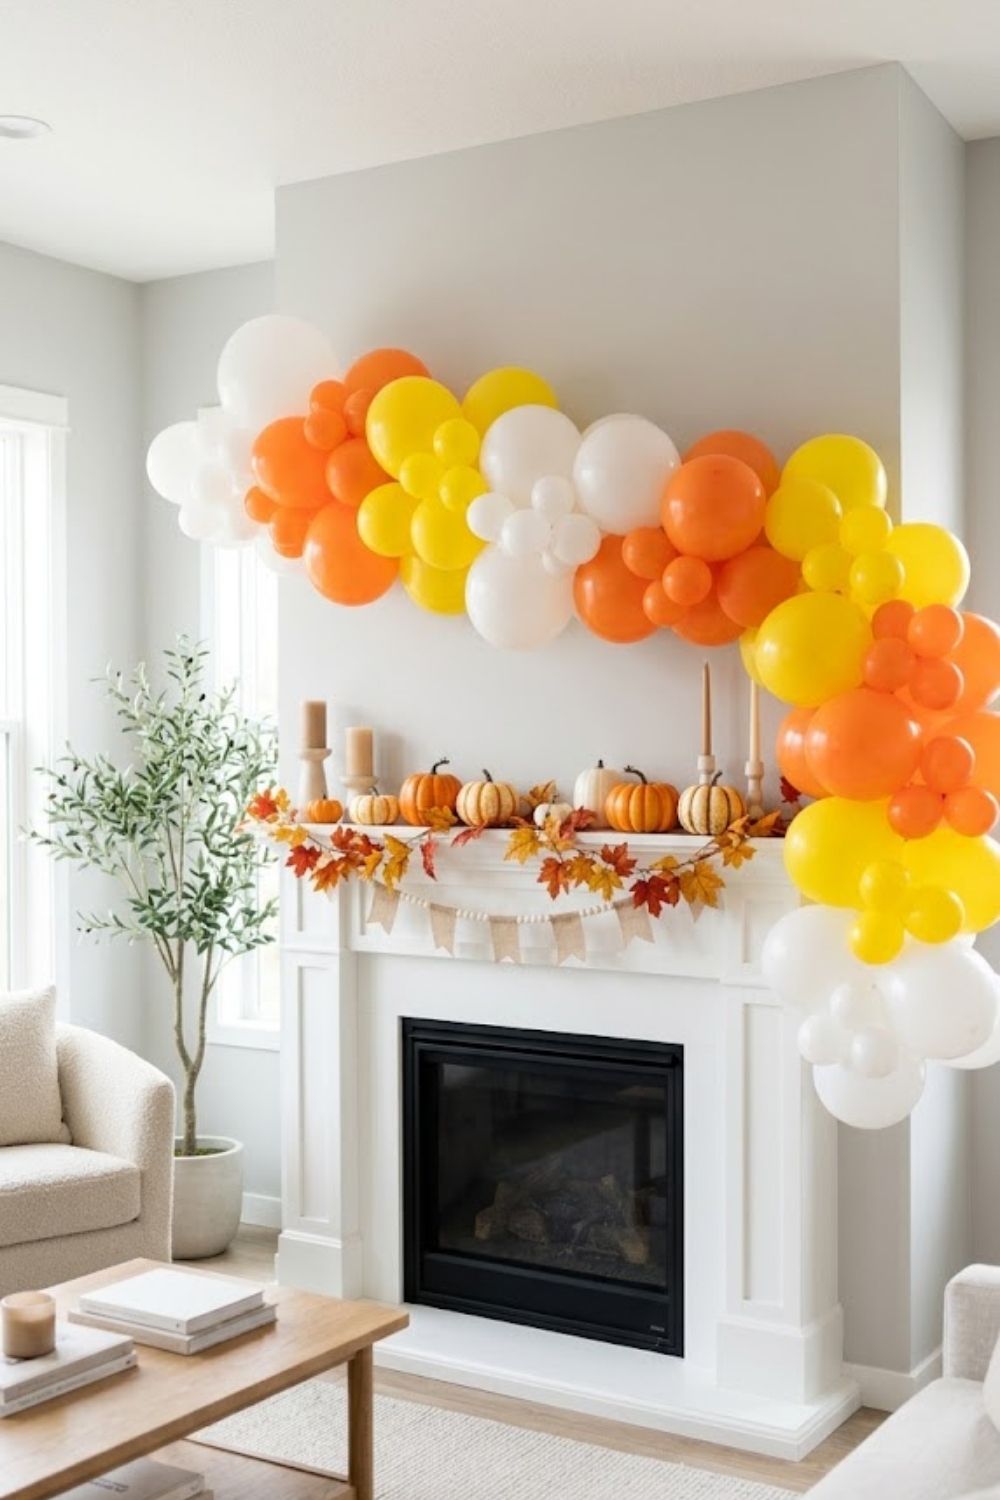
What it is — A balloon garland using only white orange and yellow balloons arranged in the striped pattern of a candy corn.
What you need — White orange and yellow balloons, balloon garland strip, command hooks
How to do it
Thread balloons onto the garland strip in sections a cluster of white then orange then yellow then repeat. Mount across a mantle table edge or doorframe.
Pro tip This is the most immediately recognizable Halloween garland pattern and performs exceptionally well as a Pinterest pin because the color combination is so distinctive.
Mummy Mason Jars
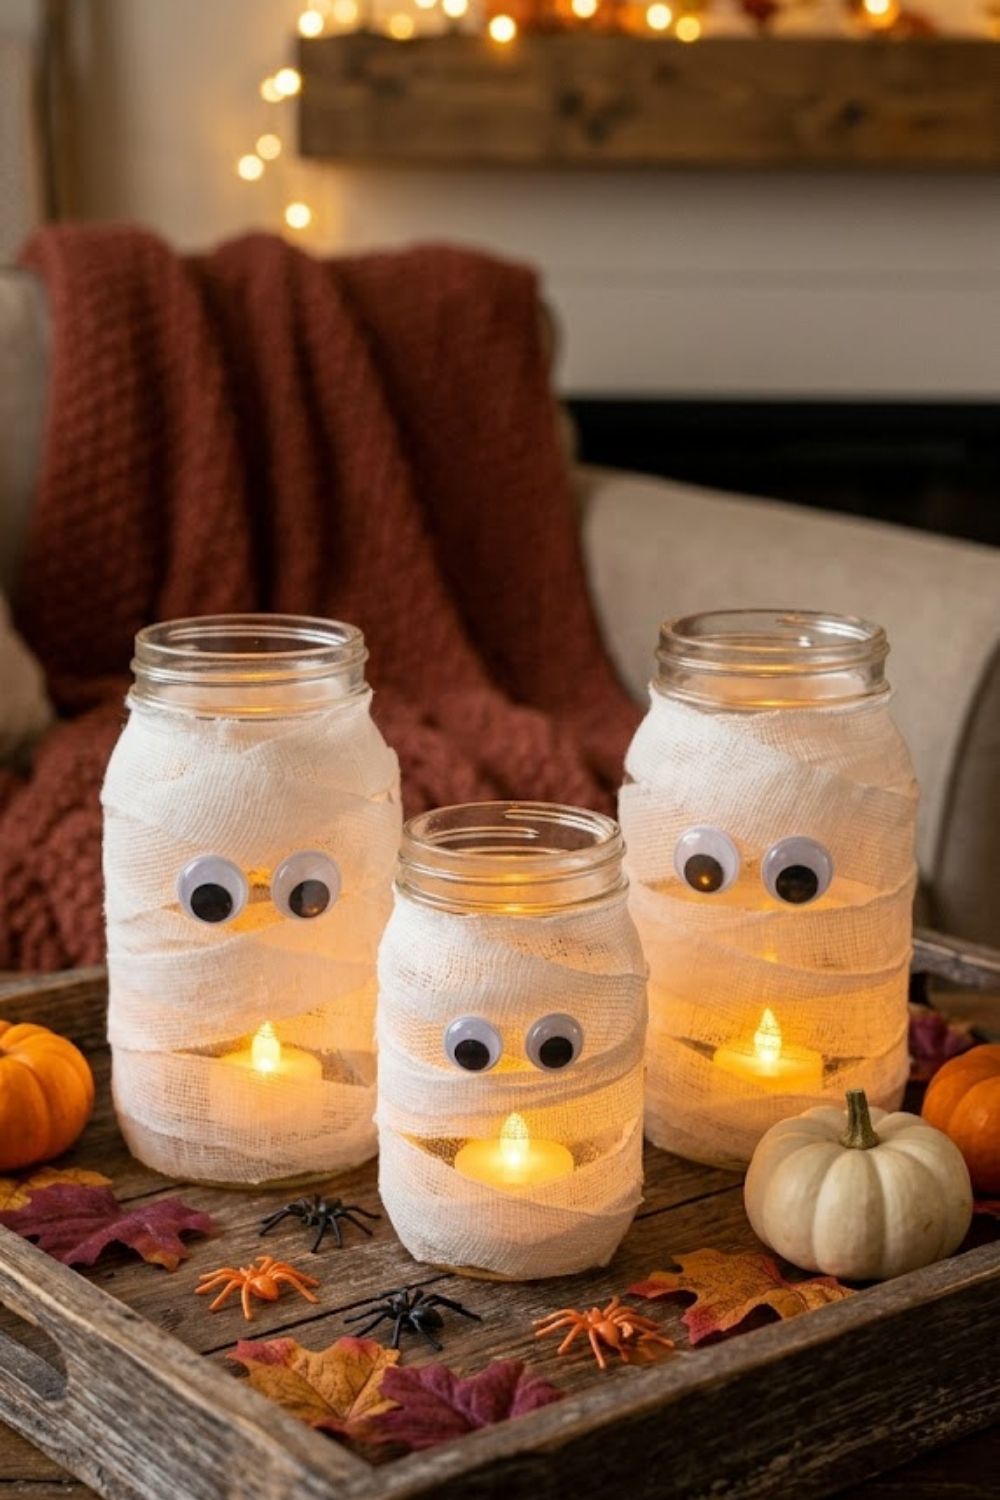
What it is — Mason jars wrapped in white gauze with googly eyes attached transforming them into mummy luminaries.
What you need — Mason jars, white gauze or white fabric strips, googly eyes, glue, battery tea lights
How to do it Wrap the jar loosely with white gauze leaving gaps so the light shows through. Secure with a small amount of glue at the top and bottom. Press two googly eyes onto the front. Place a battery tea light inside.
Pro tip — Group three mummy jars of different sizes together on a tray with a few plastic spiders scattered around the base.
Black Tablecloth Ghost Bunting
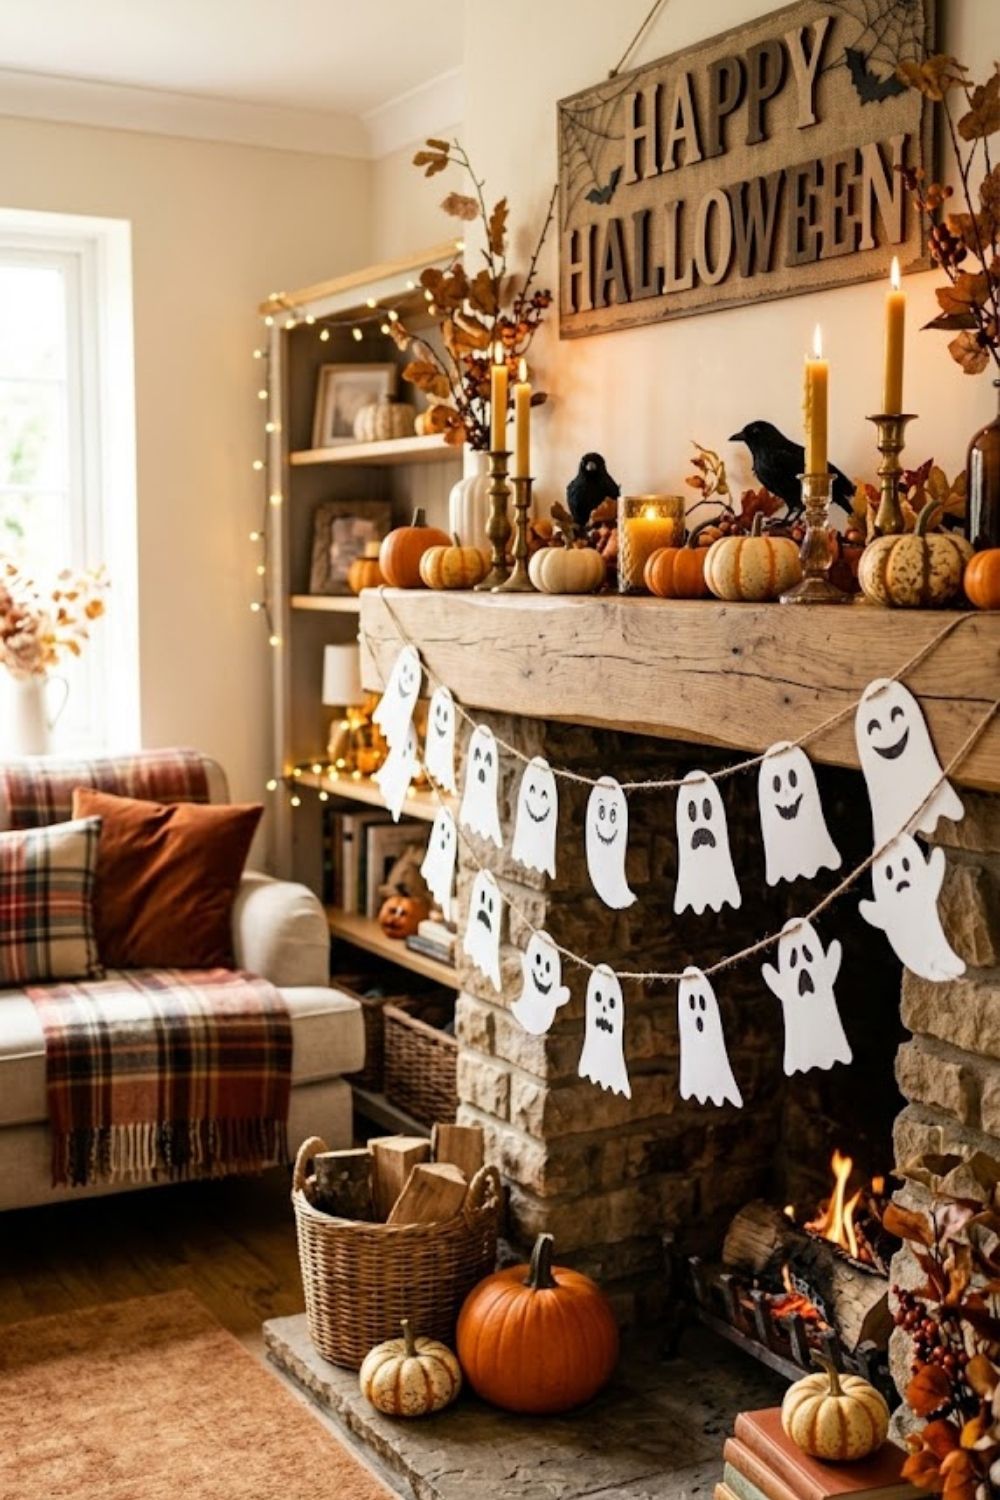
What it is — Simple ghost shapes cut from white cardstock and strung together as bunting across a table or wall.
What you need — White cardstock, black marker, twine, hole punch
How to do it
Cut ghost shapes from white cardstock a rounded top tapering to a wavy bottom. Draw simple faces with black marker.
Punch a hole in each side of the ghost at the top. Thread twine through all the holes. Hang across a table edge mantle or window.
Pro tip — Varying the ghost sizes and making each face slightly different gives the bunting a handmade charm that printed versions cannot replicate.
Cauldron Centerpiece
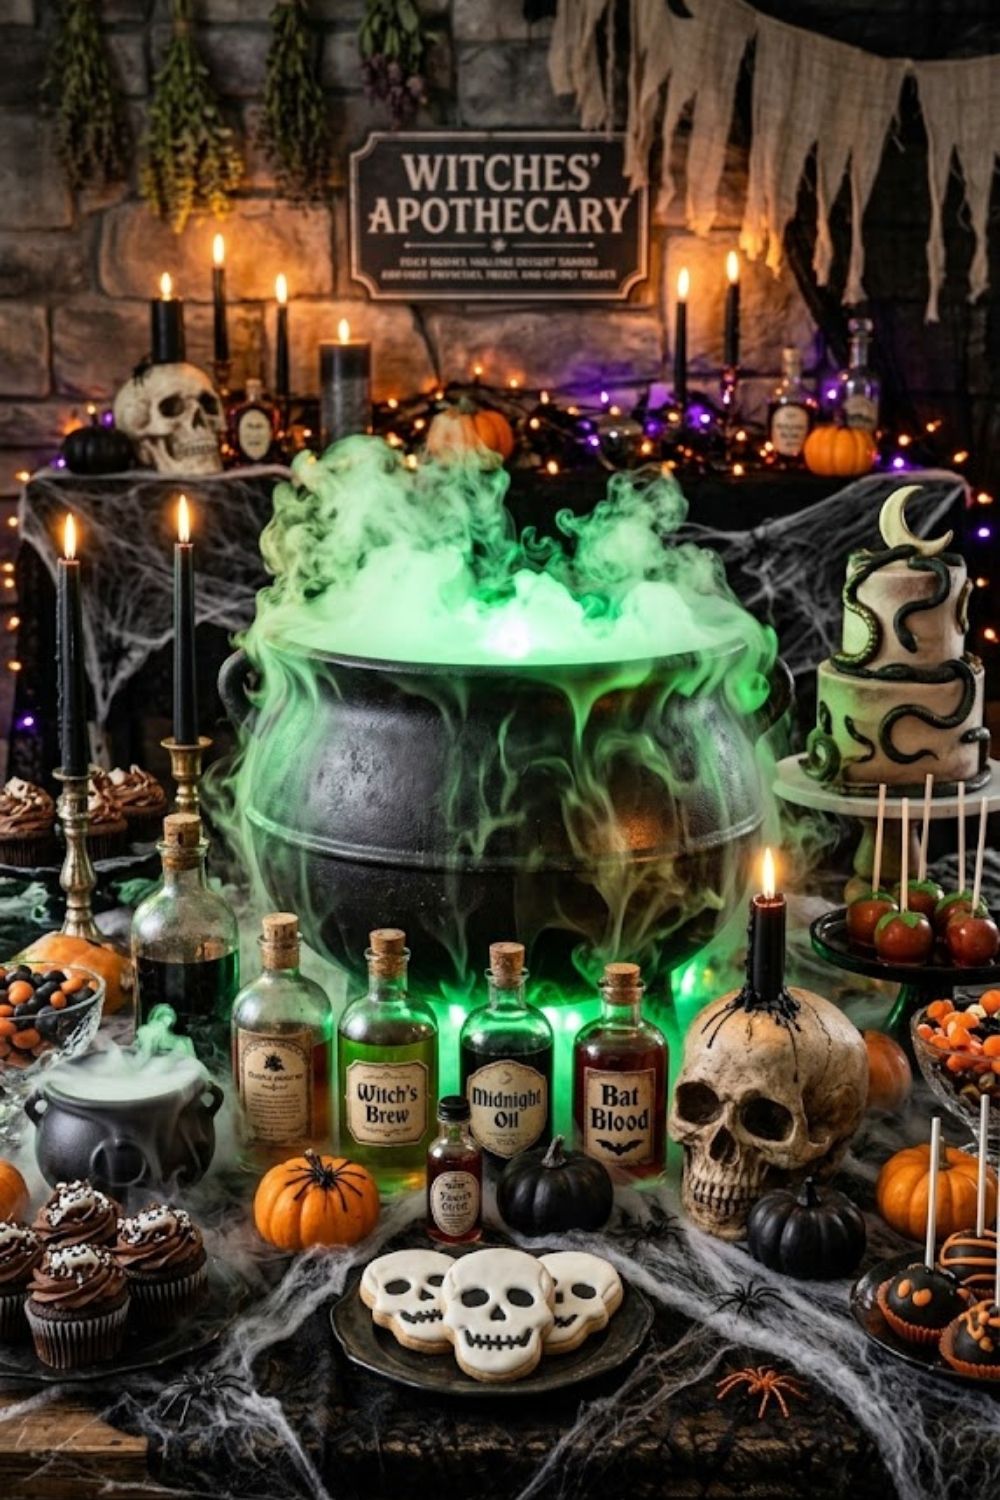
What it is — A black pot or bowl filled with dry ice or cotton batting and surrounded by potion bottles and Halloween props creating a bubbling cauldron focal point.
What you need — Black pot or large dark bowl, dry ice optional, cotton batting, green food coloring, Halloween props
How to do it
Place the cauldron at the center of the dessert table. Fill with cotton batting pulled loose to look like steam.
If using dry ice add it directly to water in the pot for a genuine bubbling smoke effect. Surround with potion bottles skulls and fake spiders.
Pro tip — Without dry ice a small battery operated fan placed behind the cauldron blows the cotton batting gently creating a moving smoke effect for almost no cost.
The cauldron centerpiece is the DIY Halloween party decoration on a budget that gets the most questions from guests — nobody believes it cost almost nothing.
Silhouette Window Panels
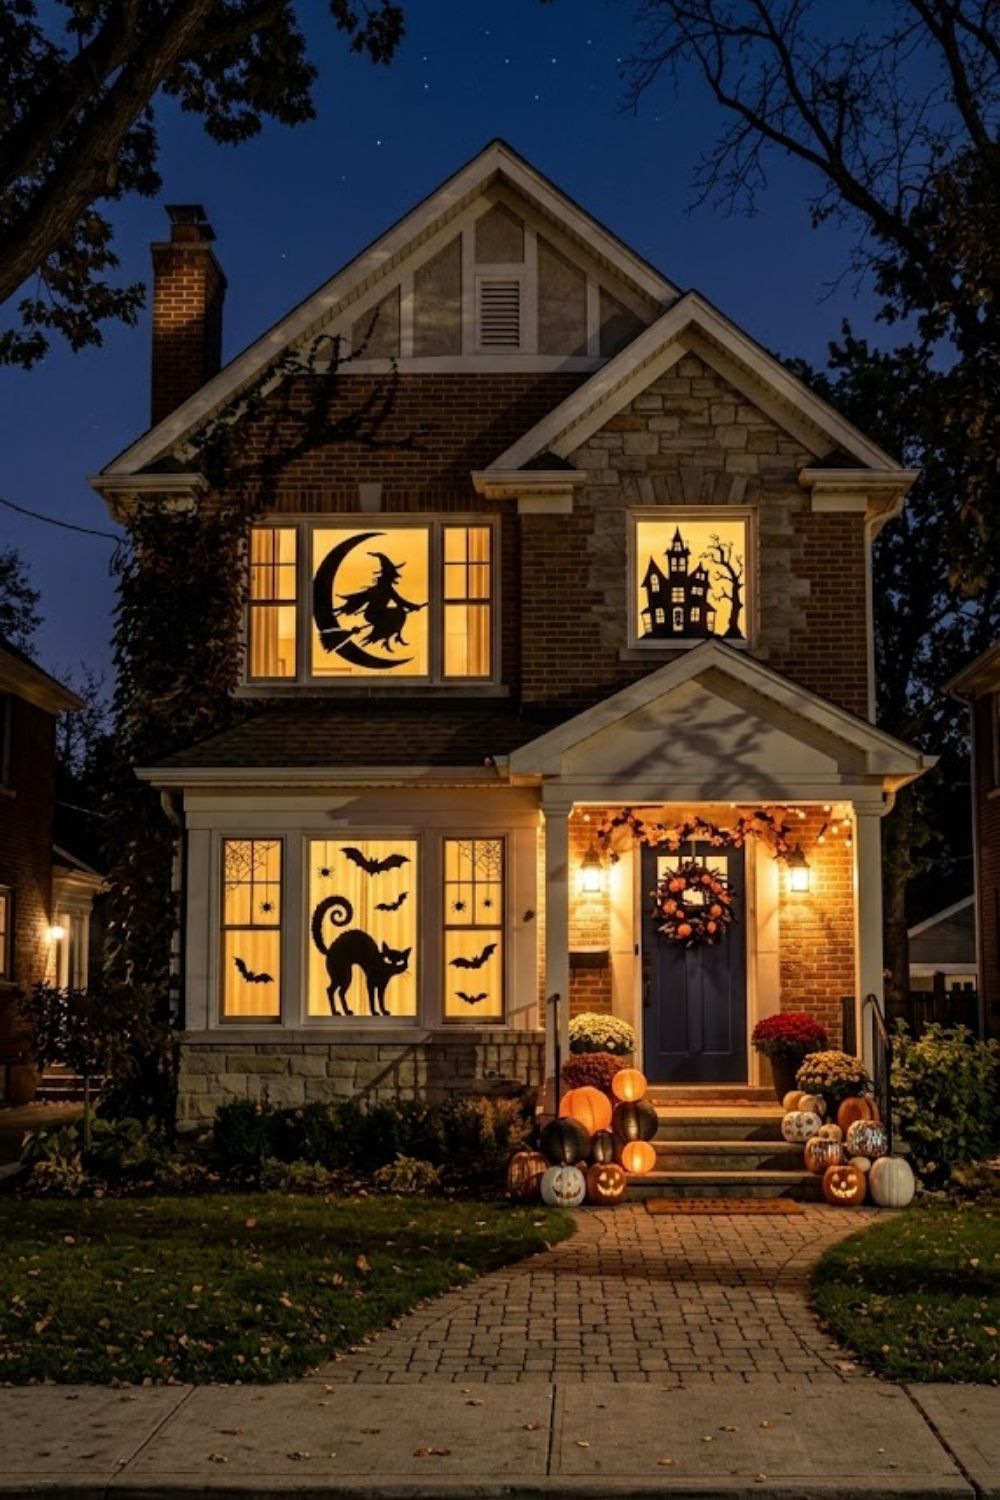
What it is — Black paper silhouettes of Halloween figures taped to the inside of windows so they appear as dramatic shadow shapes from outside.
What you need — Black cardstock or black garbage bags, scissors, tape
How to do it
Cut large Halloween silhouettes a witch on a broomstick a haunted house a cat a flying bat. Tape to the inside of windows facing outward. When lit from inside at night the shapes read as dramatic shadows from the street.
Pro tip — This is the single most impactful exterior decoration you can make for free using materials you likely already have at home.
Newspaper Ghost Garland
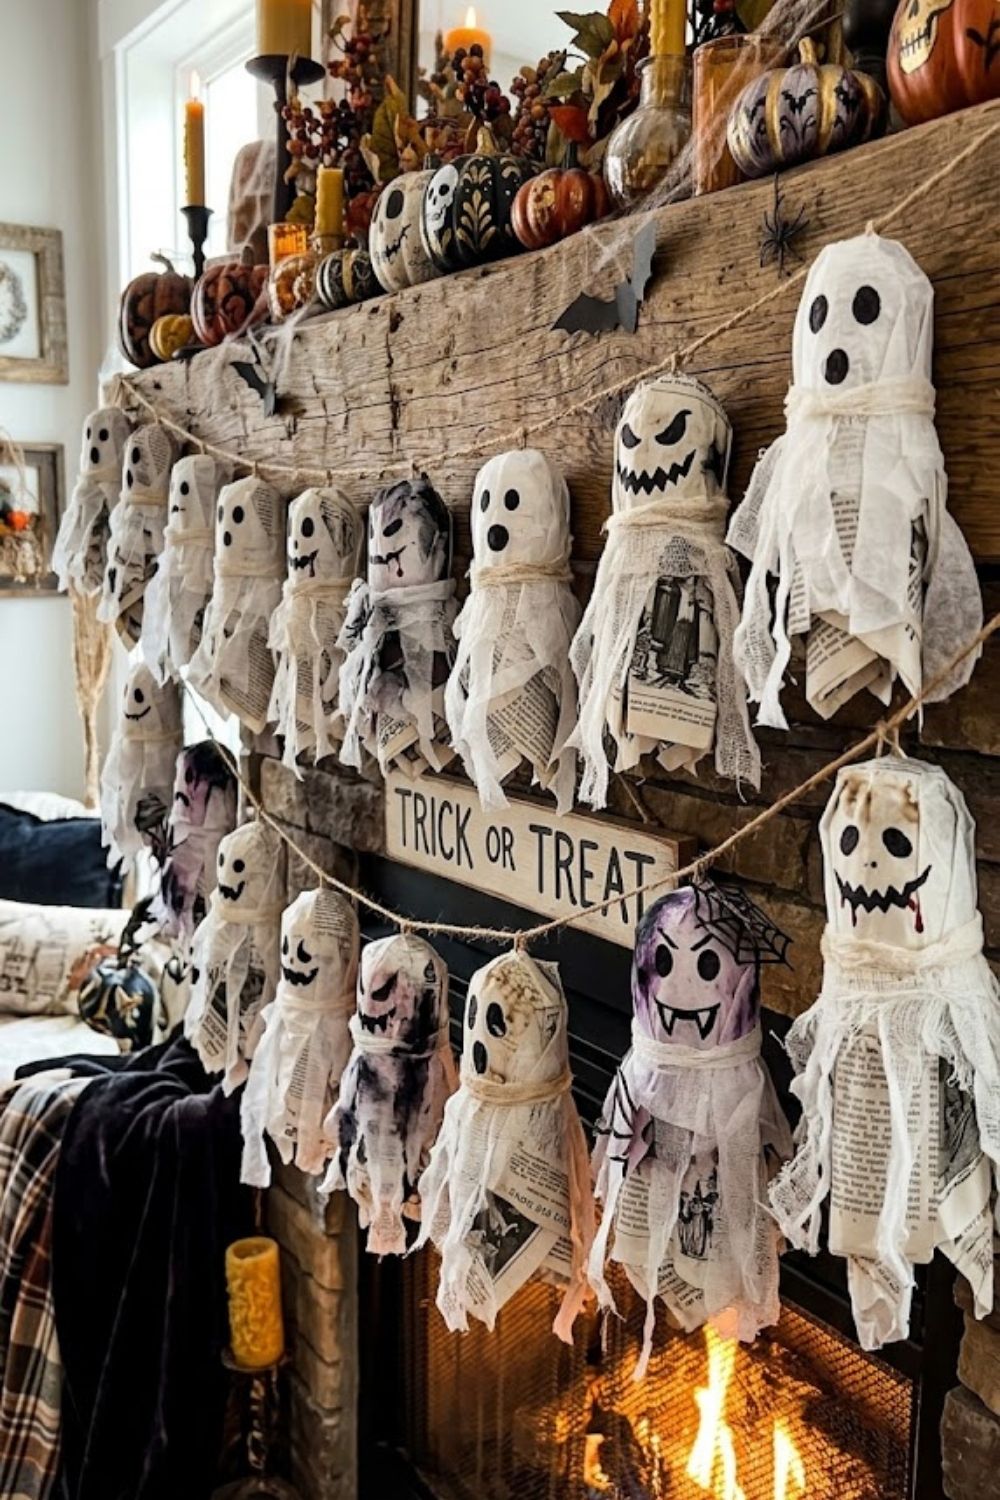
What it is — Ghosts made from crumpled newspaper wrapped in white tissue paper and strung together as a garland.
What you need — Newspaper, white tissue paper, rubber bands, black marker, twine
How to do it
Crumple a sheet of newspaper into a ball. Place a sheet of white tissue paper over the ball. Gather beneath the ball and secure with a rubber band.
Draw a ghost face with black marker. Tie each ghost onto a length of twine spaced evenly apart.
Pro tip — These are the easiest and cheapest decoration on this list and they look genuinely lovely hanging across a porch or fireplace mantle.
Halloween Photo Booth Corner
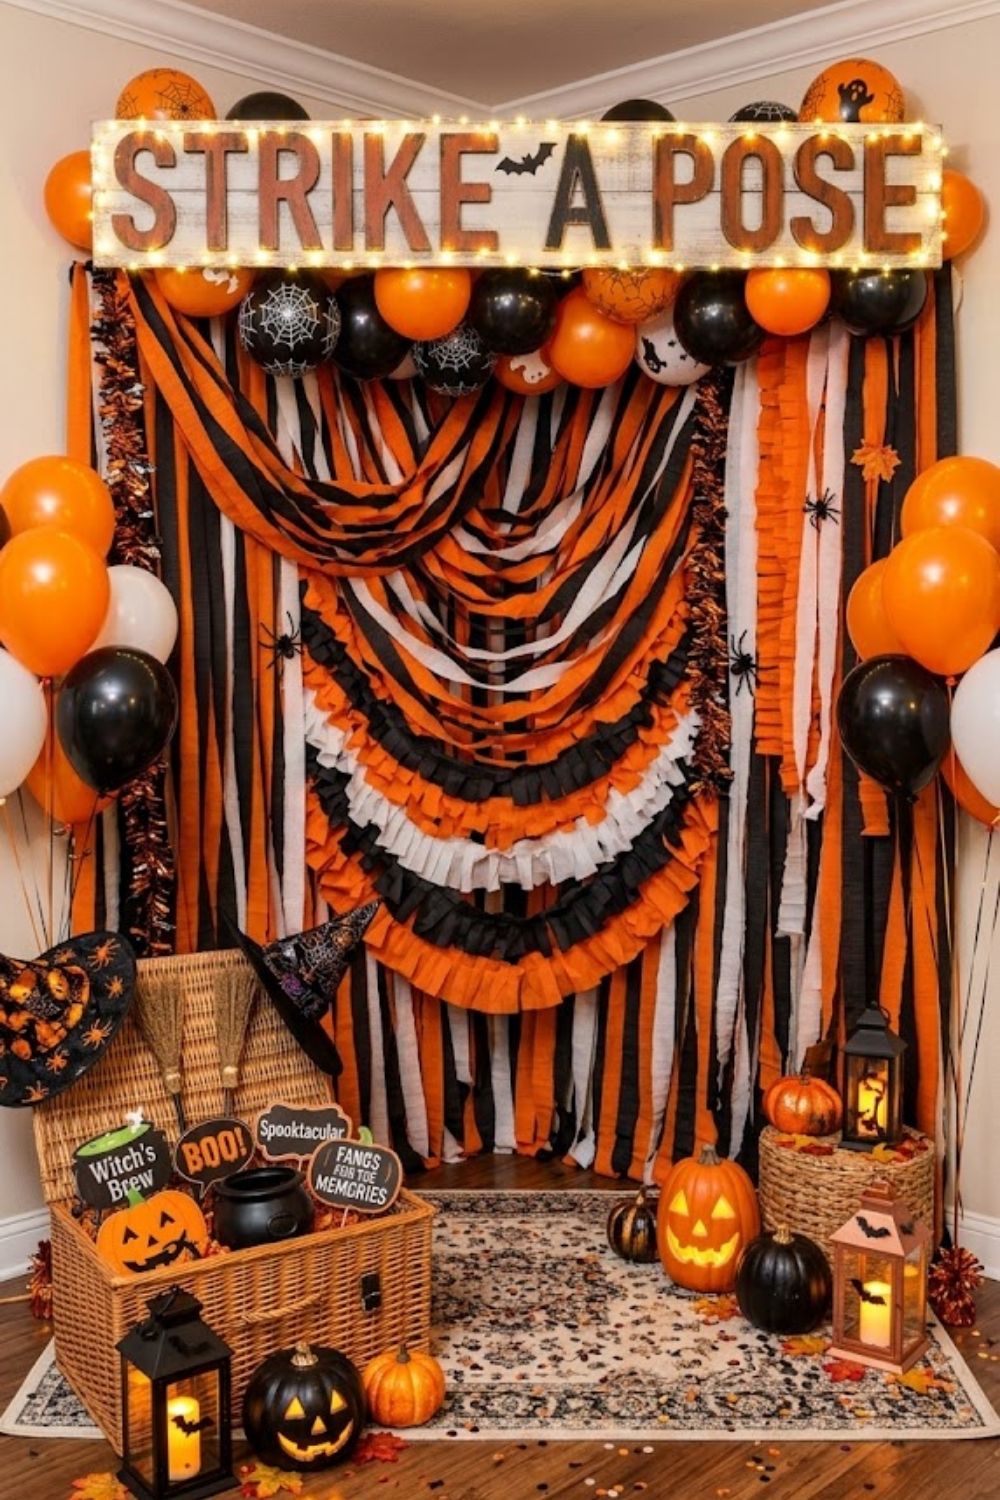
What it is — A dedicated photo spot combining a backdrop with props and a simple sign creating the most used corner of any Halloween party.
What you need — Streamer backdrop, Halloween props, wooden dowels, cardstock, markers
How to do it
Build a simple streamer backdrop against one wall. Print or hand draw photo booth props on cardstock witch hats broomsticks cat ears RIP signs.
Attach to wooden dowels. Place a sign reading “Strike a Pose” above the backdrop.
Pro tip — A photo booth corner generates more tagged social media content from your party than any other single decoration worth spending an extra fifteen minutes on setup .
A photo booth corner is the DIY Halloween party decoration on a budget with the longest social media life of everything on this list.
For more photo booth ideas that get every single guest taking pictures check out this backyard movie night setup ideas post — the outdoor photo spot and lighting tips translate beautifully into Halloween party setups.
Painted Pumpkin Doorstep Display
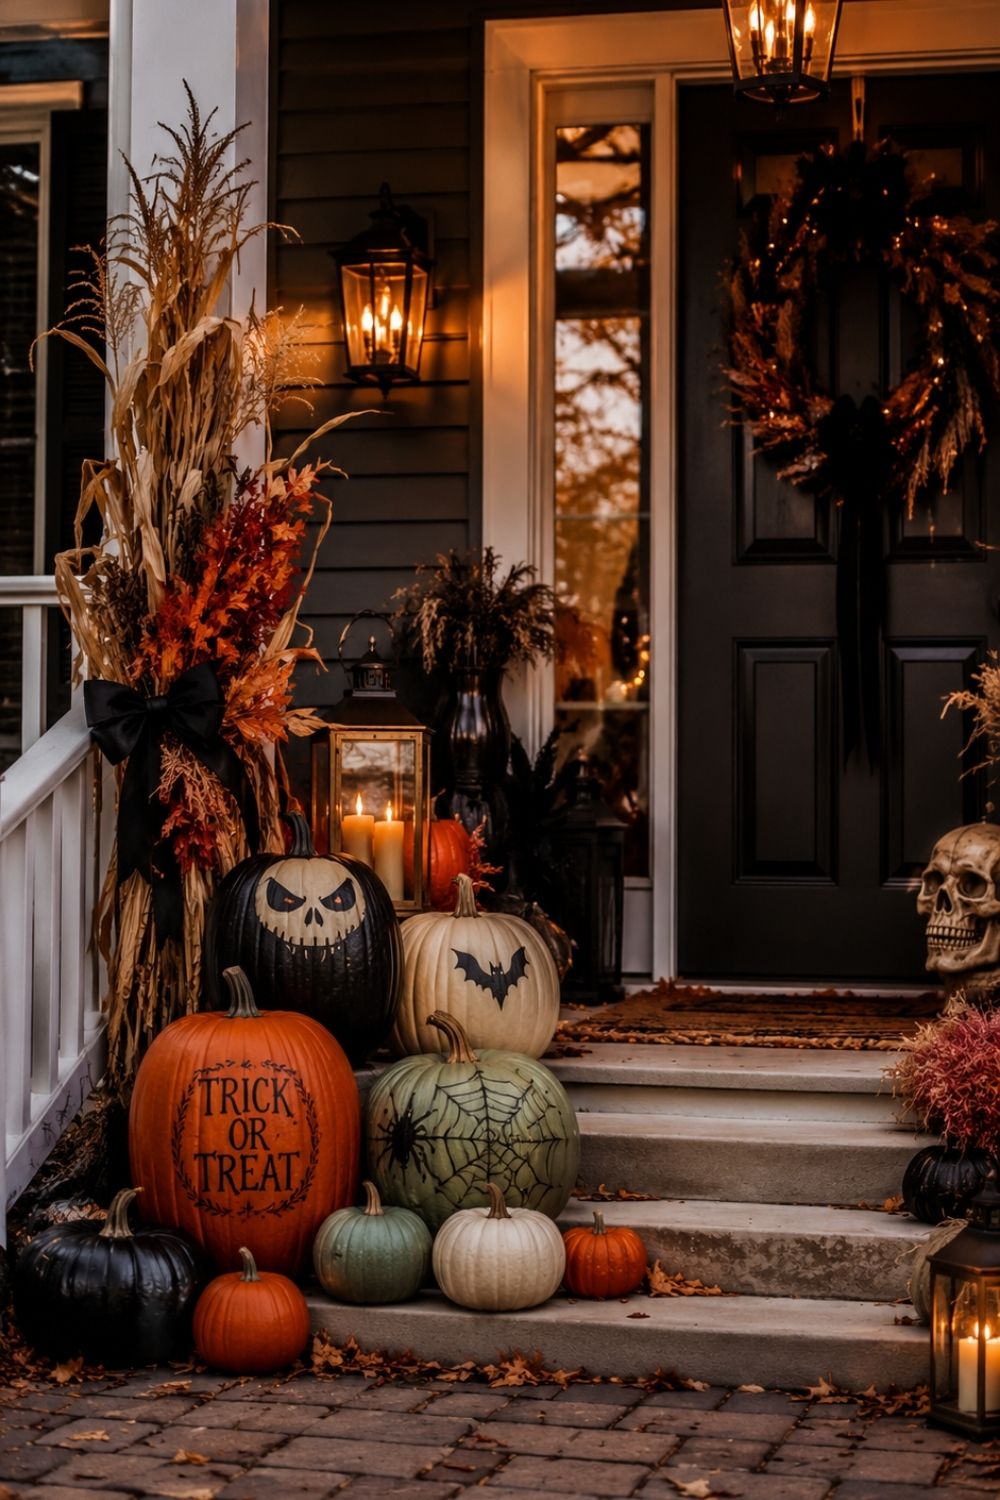
What it is — A grouping of painted pumpkins arranged at the front door in varying sizes and colors creating an intentional entrance moment.
What you need — Pumpkins in three sizes, acrylic paint, foam brushes, optional battery lantern
How to do it
Paint each pumpkin a different color from your palette. Allow to dry. Arrange largest to smallest from back to front. Place a battery lantern behind the grouping for a warm glow effect at night.
Pro tip — Add a small bundle of dried corn stalks or fall foliage behind the pumpkins to give the display height and a finished layered look.
Witch Hat Centerpieces
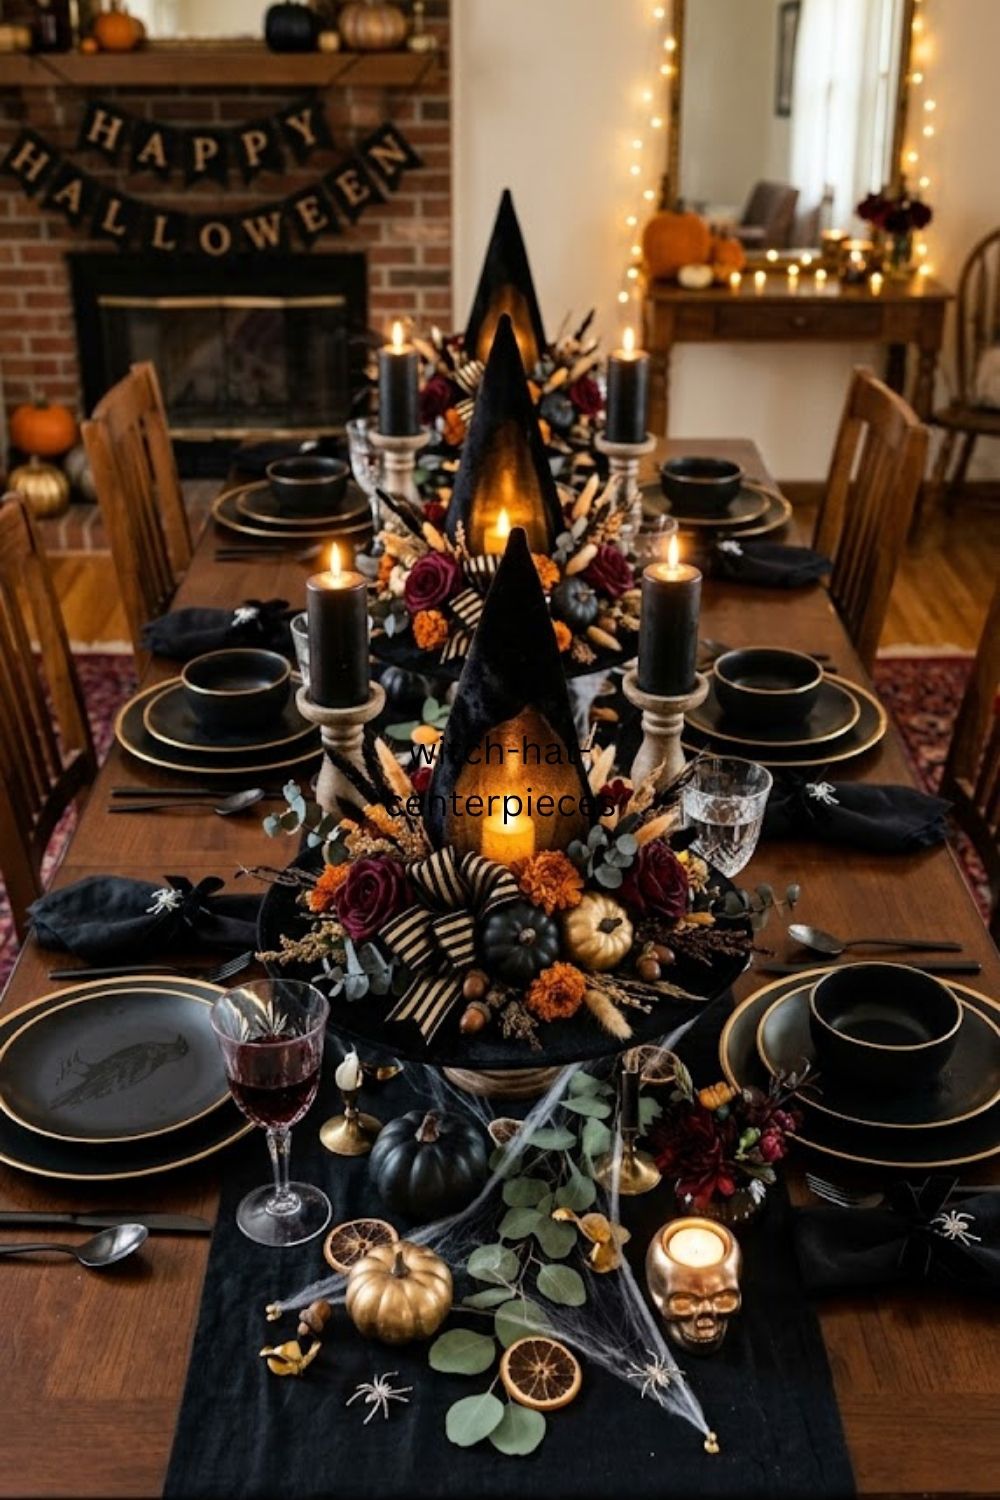
What it is — Black witch hats used as centerpieces with ribbon flowers and a battery tea light glowing underneath creating a warm festive table moment.
What you need — Black witch hats from Dollar Tree, ribbon flowers or artificial flowers, battery tea lights
How to do it
Place a battery tea light on the table. Set the witch hat over it so the light glows through the fabric. Attach ribbon flowers or small artificial blooms around the brim with a glue gun.
Pro tip — Three witch hat centerpieces down the center of a long table look dramatically styled for almost no money this is one of the most shared Halloween table setups on Pinterest every year.
For more creative centerpiece ideas that use dollar store supplies to create something genuinely beautiful check out these DIY housewarming baskets for new homeowners — the same intentional styling approach applies perfectly here.
Hanging Bat Ceiling Decor
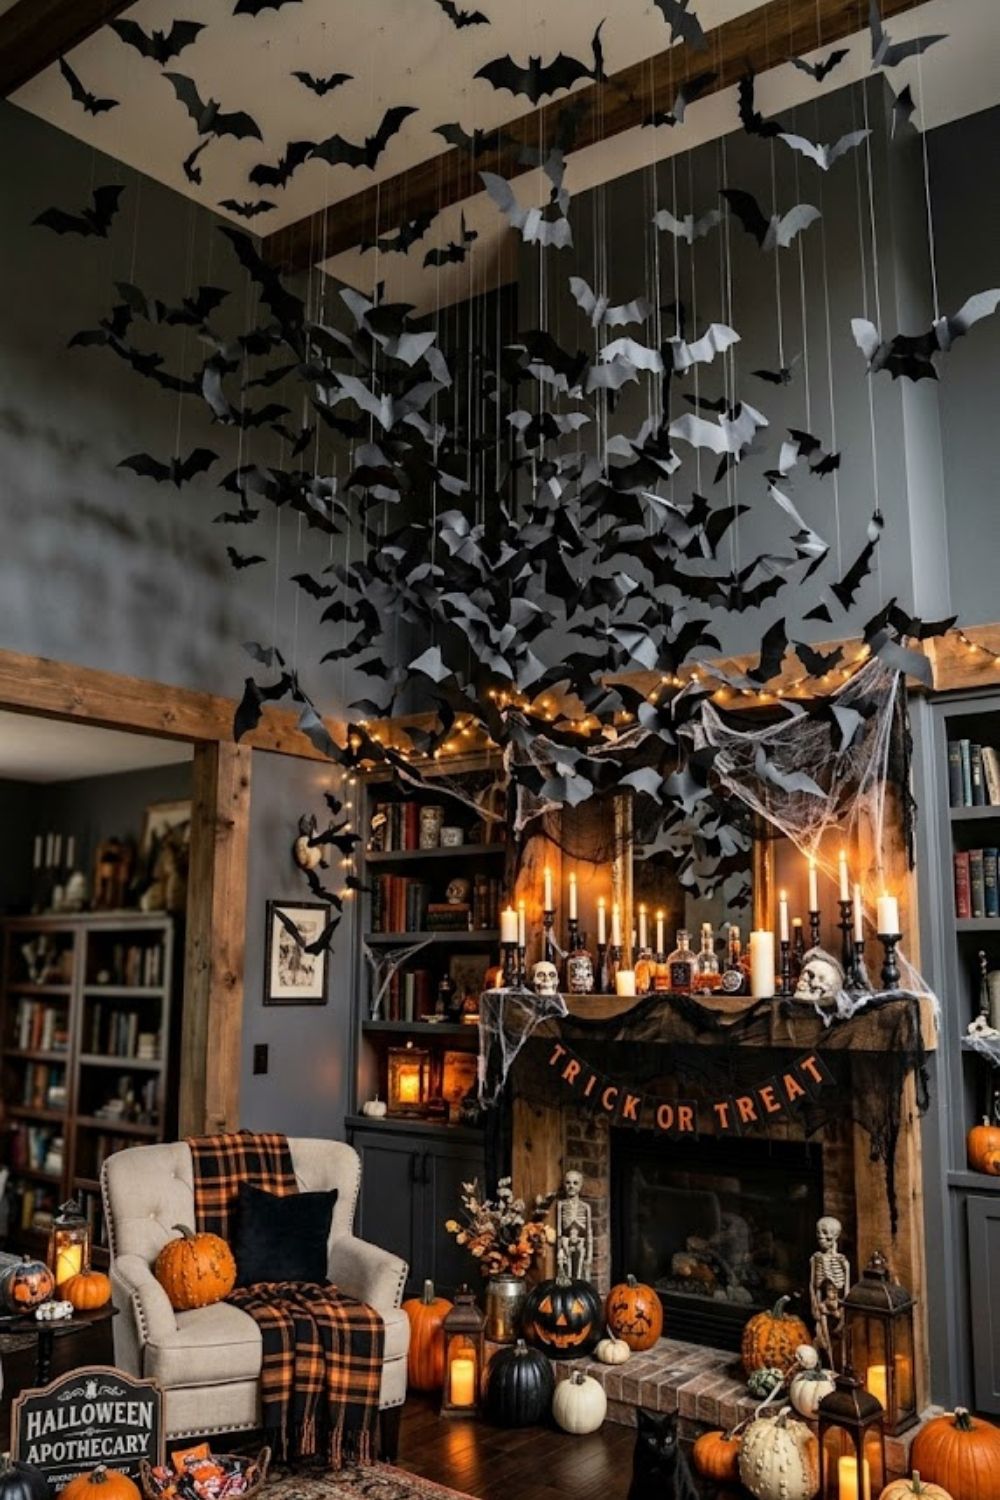
What it is — Black paper bats in varying sizes hung from the ceiling at different heights creating a swooping bat colony effect.
What you need — Black cardstock, scissors, fishing line, tape
How to do it
Fold black cardstock in half. Draw a bat wing shape against the fold and cut out. Open to reveal a symmetrical bat.
Score the center lightly and bend the wings upward slightly for dimension. Attach fishing line to the center back. Hang from ceiling at varying heights.
Pro tip — Cut thirty bats of different sizes and cluster them in one corner of the ceiling rather than spreading them evenly a dense colony looks far more dramatic than individual scattered bats.
Candy Bar Display
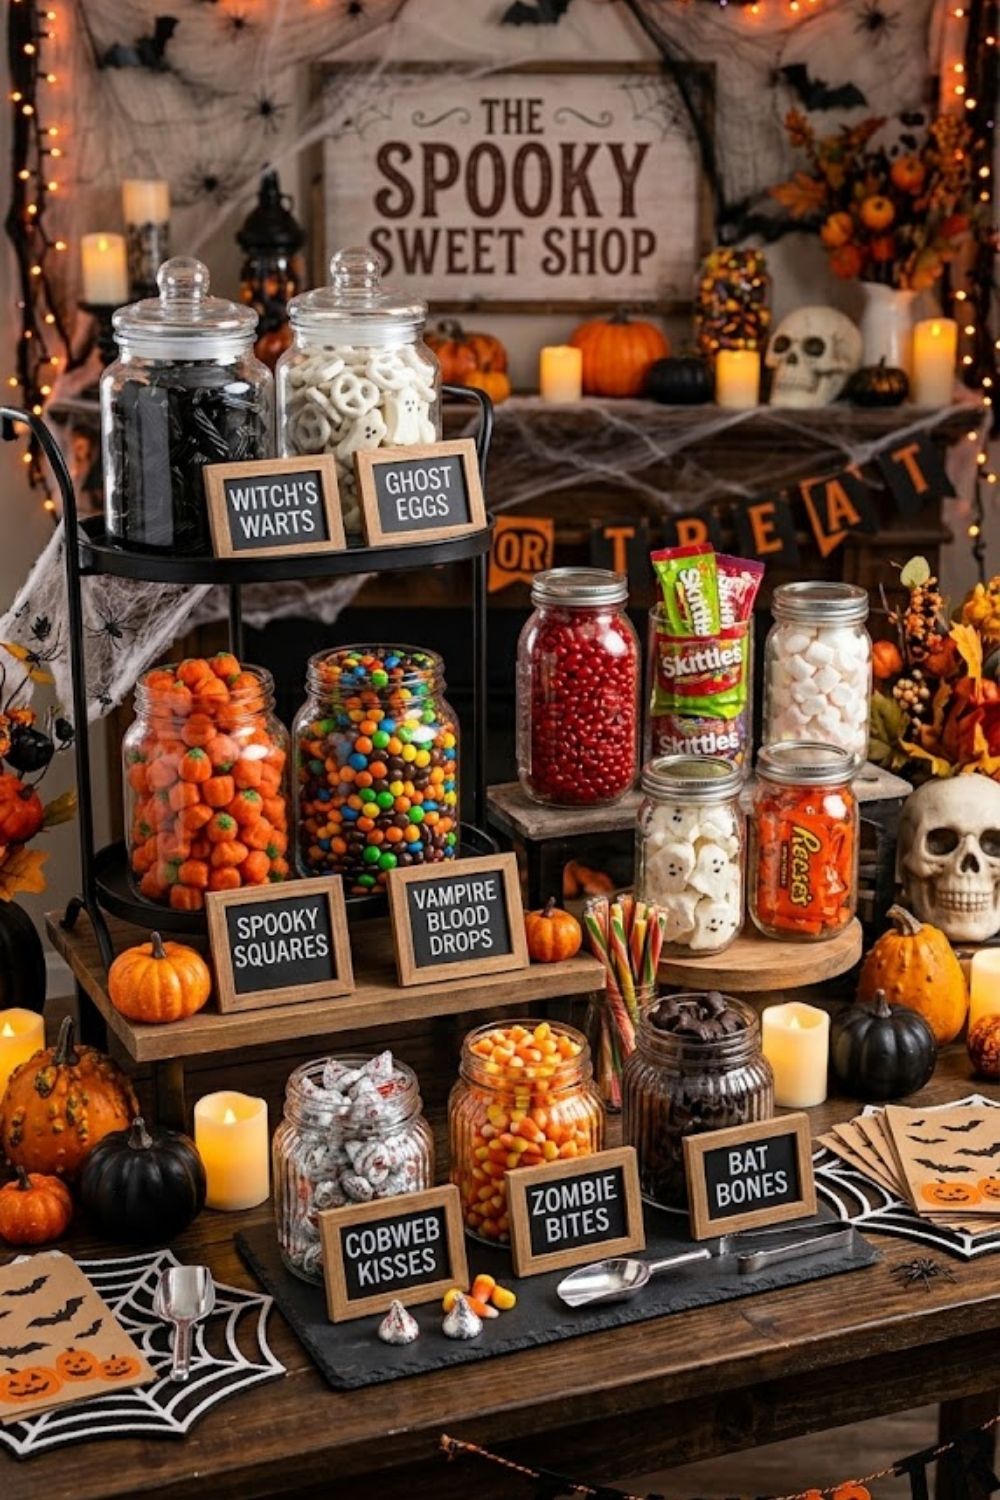
What it is — A styled candy station using Halloween colors, labeled jars, and tiered stands that doubles as both decoration and entertainment.
What you need — Glass jars in varying sizes, Halloween candy, small chalkboard labels, tiered stand optional
How to do it
Fill glass jars with candy sorted by color orange candy in one jar black licorice in another white chocolate in another.
Label each jar with a spooky name on a small chalkboard tag. Arrange on a tiered stand or wooden board at varying heights.
Pro tip — Sorting candy by color rather than by type transforms a candy bowl into a styled decoration. The visual impact costs nothing extra.
For more dessert and food display ideas that look professionally styled check out this easy chin chin recipe with milk for parties — packaged in Halloween colors it makes a stunning addition to any candy bar display.
Caution Tape Party Zone Marker
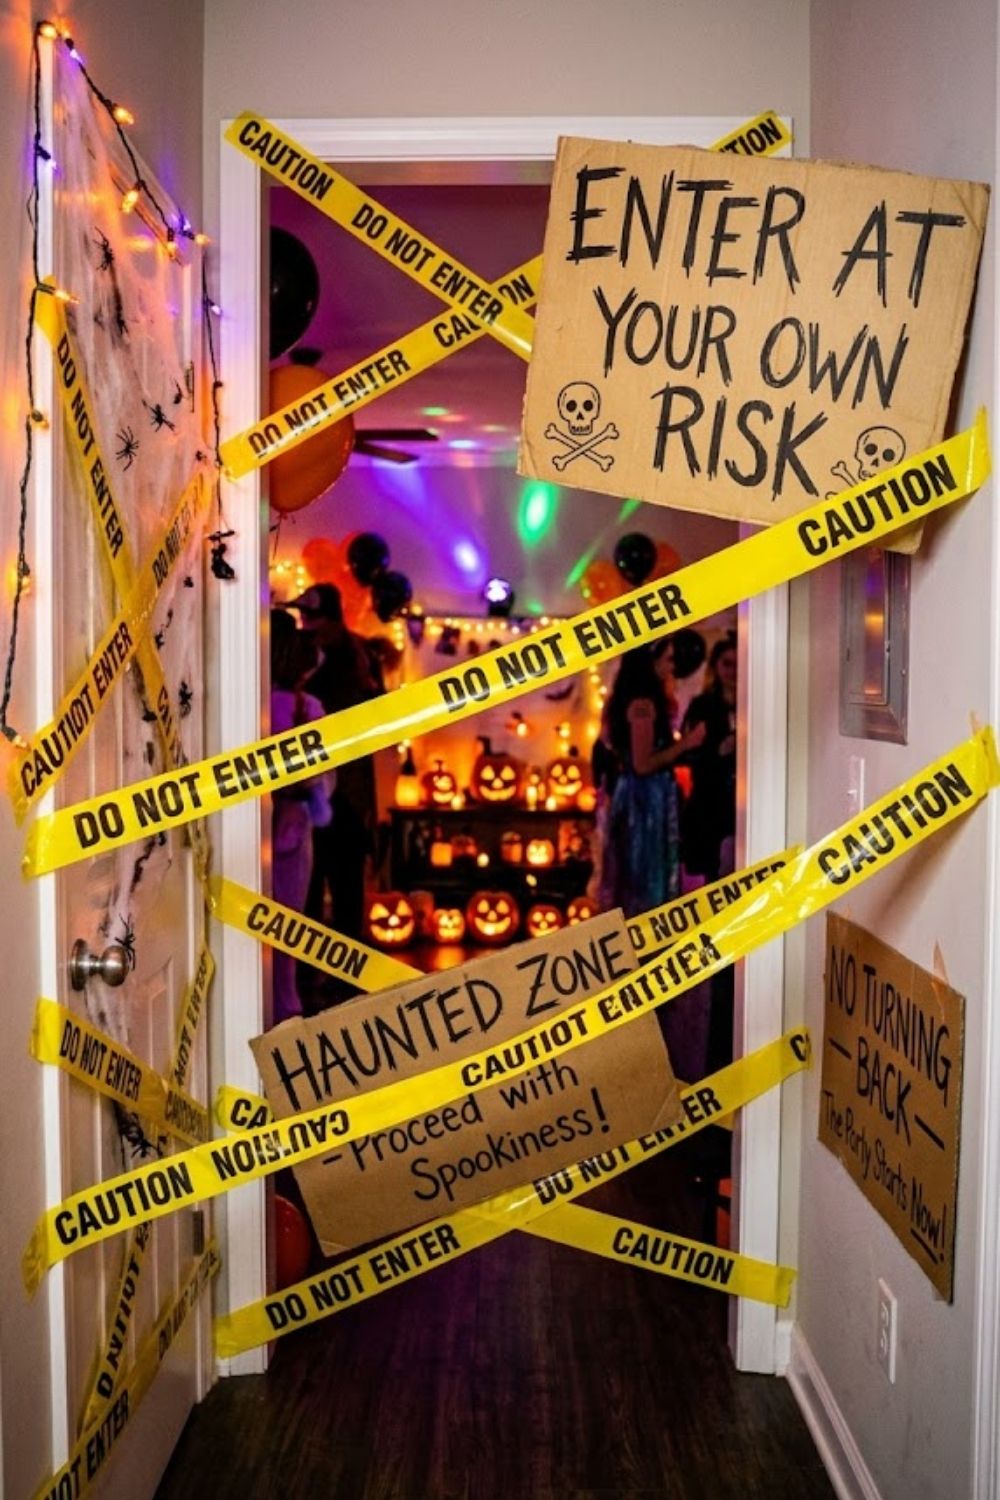
What it is — Yellow caution tape strung across doorframes or along walls with handwritten Halloween warnings creating a crime scene party atmosphere.
What you need — Yellow caution tape or yellow crepe paper, black marker
How to do it
Write Halloween warnings along lengths of yellow crepe paper or actual caution tape “Enter at Your Own Risk” “Beware” “No Turning Back” “Haunted Zone.” String across doorframes windows and walls.
Pro tip — This works especially well as an entrance corridor from the front door to the main party space — guests walk through the warning zone before arriving at the party.
DIY Spell Book Stack
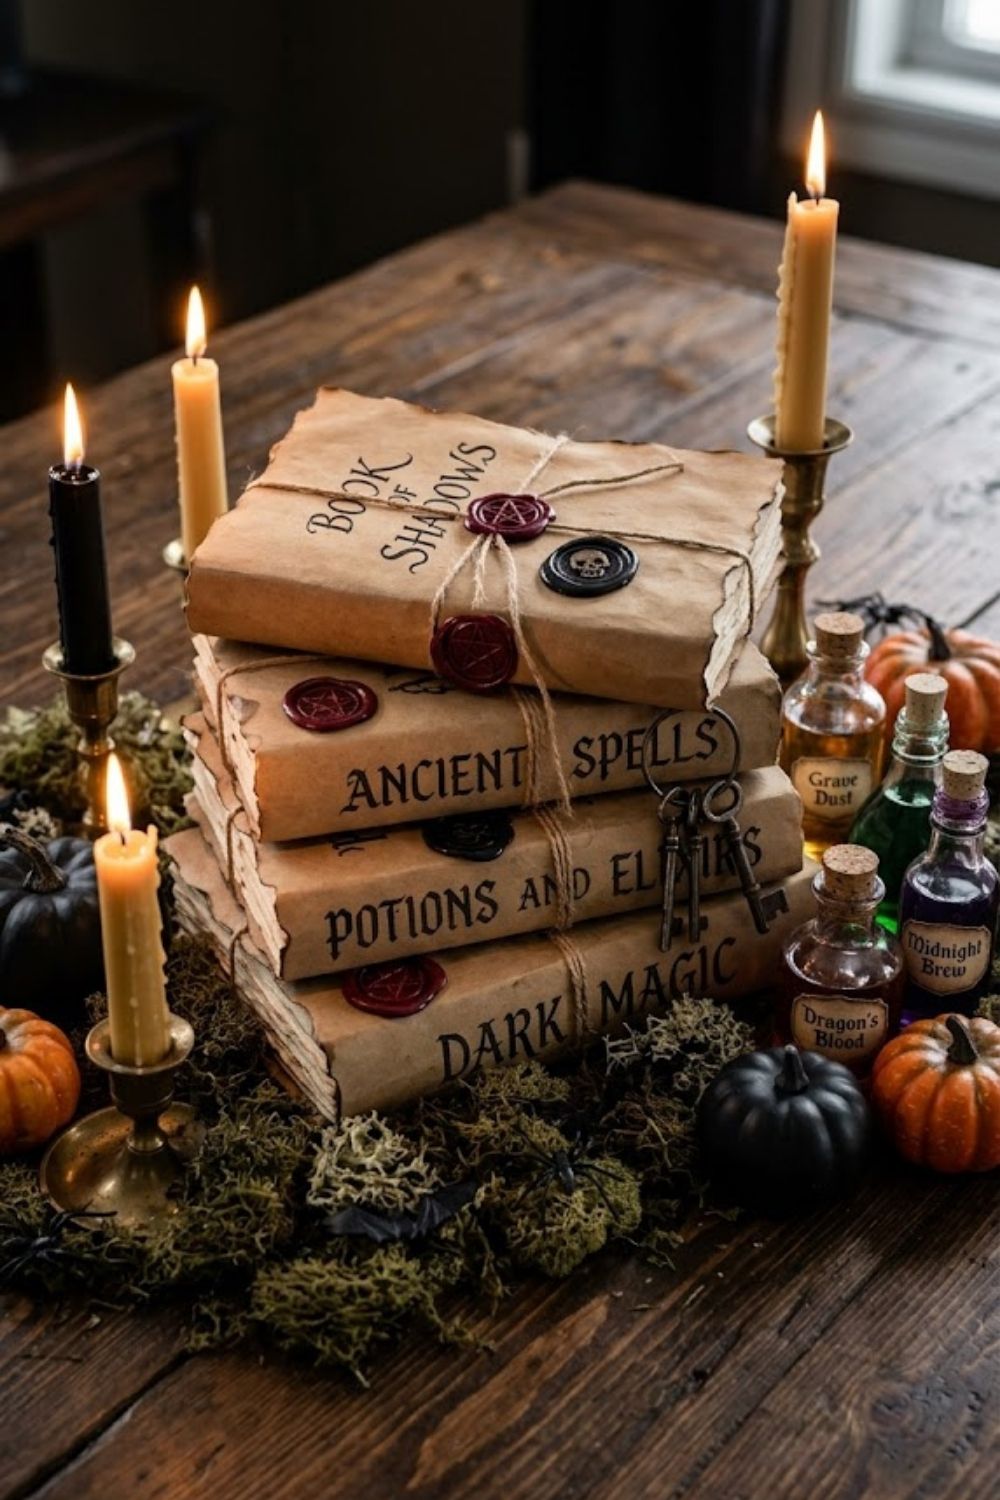
What it is — Old hardcover books wrapped in brown paper and decorated to look like ancient spell books stacked as a decorative centerpiece.
What you need — Old hardcover books, brown paper bags or kraft paper, twine, markers, wax seal sticker optional
How to do it
Wrap each book in brown kraft paper. Write spell book titles on the spines and covers in marker — “Book of Shadows” “Potions and Elixirs” “Ancient Spells” “Dark Magic.” Tie twine around each book. Stack in a pile of three or four on a table.
Pro tip Lightly burn the edges of the paper with a lighter before wrapping for an aged look this single detail transforms craft paper into something that looks genuinely old and mysterious.
For more small space party decoration ideas that make a big impact check out these DIY bachelorette party decorations — the same three focal point strategy works beautifully in any size space.
How to Put It All Together
You do not need all 25. You need the right combination for your space. Every combination listed below proves that DIY Halloween party decorations on a budget are about intentional choices not expensive ones.
For a small apartment — mason jar luminaries, balloon cluster centerpieces, streamer backdrop, floating ghost balloons, chalkboard welcome sign. Five decorations. One hundred percent transformed.
For a larger home — add the balloon arch entrance, cauldron centerpiece, witch hat table centerpieces, hanging bat ceiling decor, and the photo booth corner. Ten decorations total covering every zone of the space.
Ten DIY Halloween party decorations on a budget covering every zone of the space that is all you need.
For outdoor spaces — paper bag luminaries along the path, painted pumpkin doorstep display, silhouette window panels visible from outside, caution tape party zone marker at the entrance. Everything visible before guests even walk in.
The goal is never to decorate everything. The goal is to decorate the right things the entrance, the main table, and the photo spot. Those three zones carry the entire party.
For more party decoration inspiration that works across every celebration check out these DIY birthday party backdrop ideas the backdrop techniques translate directly into Halloween party setups.
And if you are feeding a crowd alongside your decorations these DIY grazing board ideas for parties style beautifully in Halloween colors and look like you hired a caterer.
DIY Halloween Party Decorations FAQs
How Much Should I Budget for DIY Halloween Party Decorations?
A complete DIY Halloween party decoration setup for a medium sized gathering can be achieved for $30 to $75. Dollar Tree covers the majority of your supplies.
Focus your remaining budget on two or three statement pieces a balloon garland kit, a set of mason jars, and a chalkboard sign cover almost everything else.
What Are the Most Important Halloween Party Decorations?
Your backdrop, your table centerpiece, and your entrance moment are the three most important DIY Halloween party decorations on a budget.
These three elements appear in every photo and set the tone of the entire party before anyone sits down.
Can I Make Beautiful Halloween Decorations From the Dollar Store?
Absolutely. Dollar Tree carries streamers, balloons, fake cobweb, plastic spiders, skulls, candles, mason jars, witch hats, and tissue paper in every Halloween color.
Walk through before ordering anything online you will find eighty percent of what you need for under $20 total.
What Is the Easiest DIY Halloween Party Decoration to Make?
The crepe paper streamer backdrop is the easiest and most impactful DIY Halloween party decoration on a budget you can make.
It costs under $10, takes about thirty minutes, and photographs better than most store bought alternatives.
How Far in Advance Should I Make DIY Halloween Party Decorations?
Start two weeks before the party. Order any supplies online at least ten days out. Assemble your backdrop and centerpieces the day before so your morning is free for final touches and being present for your guests.