This post contains affiliate links. This means I may earn a small commission if you purchase through my links at no extra cost to you.
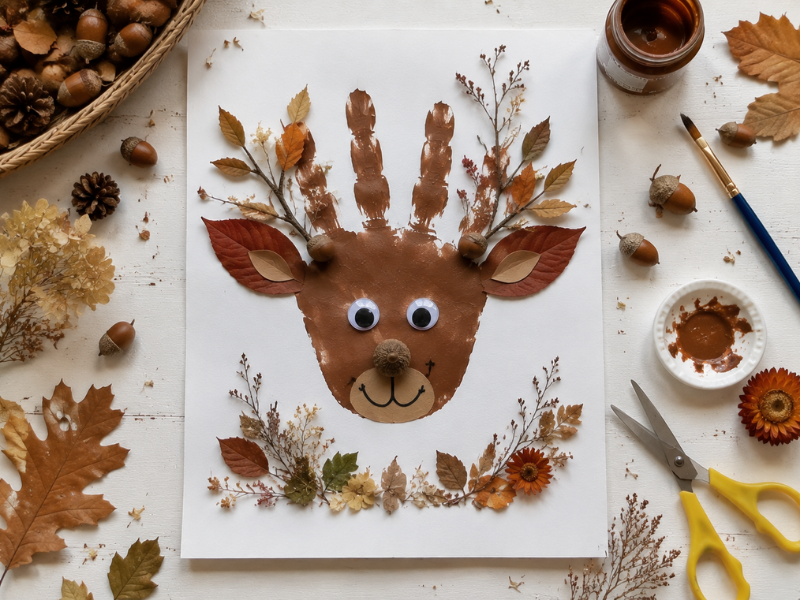
There’s something about a tiny painted hand pressed onto paper that makes grown adults go completely soft. Add antlers and a little pom-pom nose? Forget it. Handprint fall deer crafts turn a regular Tuesday afternoon into the kind of keepsake moment that ends up framed on the living room wall for years.
And honestly? These aren’t complicated. Most of them need brown paint, some paper, and whatever fall extras you have lying around leaves, buttons, tissue paper, acorn caps.
The kind of supplies that live in a junk drawer or a Dollar Tree bag. So whether your kids are two or ten, there’s a handprint fall deer craft here that fits their hands, their attention span, and your mess tolerance.
Here are 18 of the best ones and every single one actually turns out cute.
Why Handprint Crafts Matter More Than You Think
It’s easy to dismiss handprint fall deer crafts as “just a kid activity.” But the thing nobody talks about is what happens five years later.
When you open a drawer and find a handprint that barely covers your palm now. When the brown paint is faded and the googly eye is hanging on by a thread and somehow that makes it even better.
These aren’t just crafts. They’re measurements. They capture a version of your child that doesn’t exist anymore by the following September. That’s worth twenty minutes and a little brown paint.
According to the CDC’s developmental milestones resources, creative activities like painting and crafting support key developmental skills including fine motor control, sensory processing, and emotional expression.
So while your kid is pressing paint onto paper and giggling about pom-pom noses, their brain is doing real work.
If you want more ideas for kids’ crafts that are genuinely creative without being overwhelming, or if you’re looking for activities grandparents and grandkids can do together, those guides are full of options that follow the same easy, meaningful approach.
15 Handprint Fall Deer Crafts For Kids
1. Handprint Reindeer with Fall Leaf Antlers
This one is the perfect excuse to go on a leaf walk first.
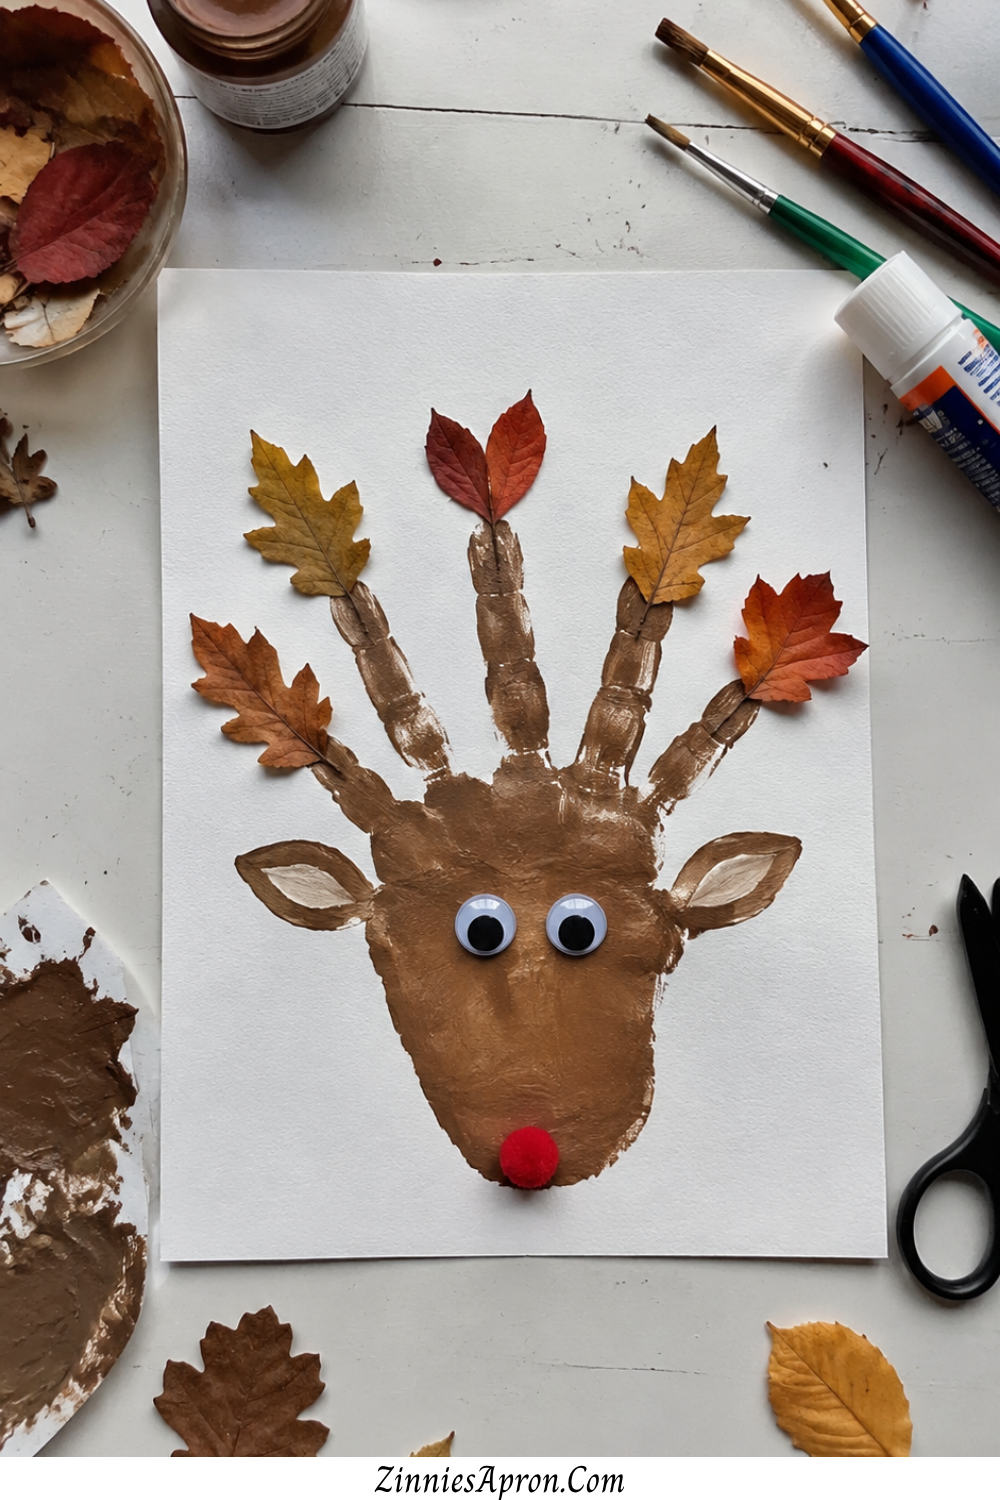
Press a handprint in brown paint on cardstock, let it dry, and then glue real pressed fall leaves as the antlers. Googly eyes and a red pom-pom nose finish it off.
The leaves make it look ten times more special than a typical handprint craft. Because the antlers are different every time depending on what you find outside no two ever look the same.
That’s the kind of thing kids notice and feel proud about.
If you’re looking for more easy crafts kids can do with simple supplies, you’ll love how this one sets the tone for the whole list.
What You’ll Need
Brown washable paint, white or cream cardstock, pressed fall leaves (collect them a day or two ahead so they’re flat), googly eyes, a small red pom-pom, and glue. That’s it.
Tips to Make It Work
Press the leaves between heavy books for at least 24 hours before crafting. Fresh leaves curl and won’t glue flat. Also, use a thick layer of glue on the leaf stems that’s where they like to pop off.
2. Handprint Deer Family Portrait
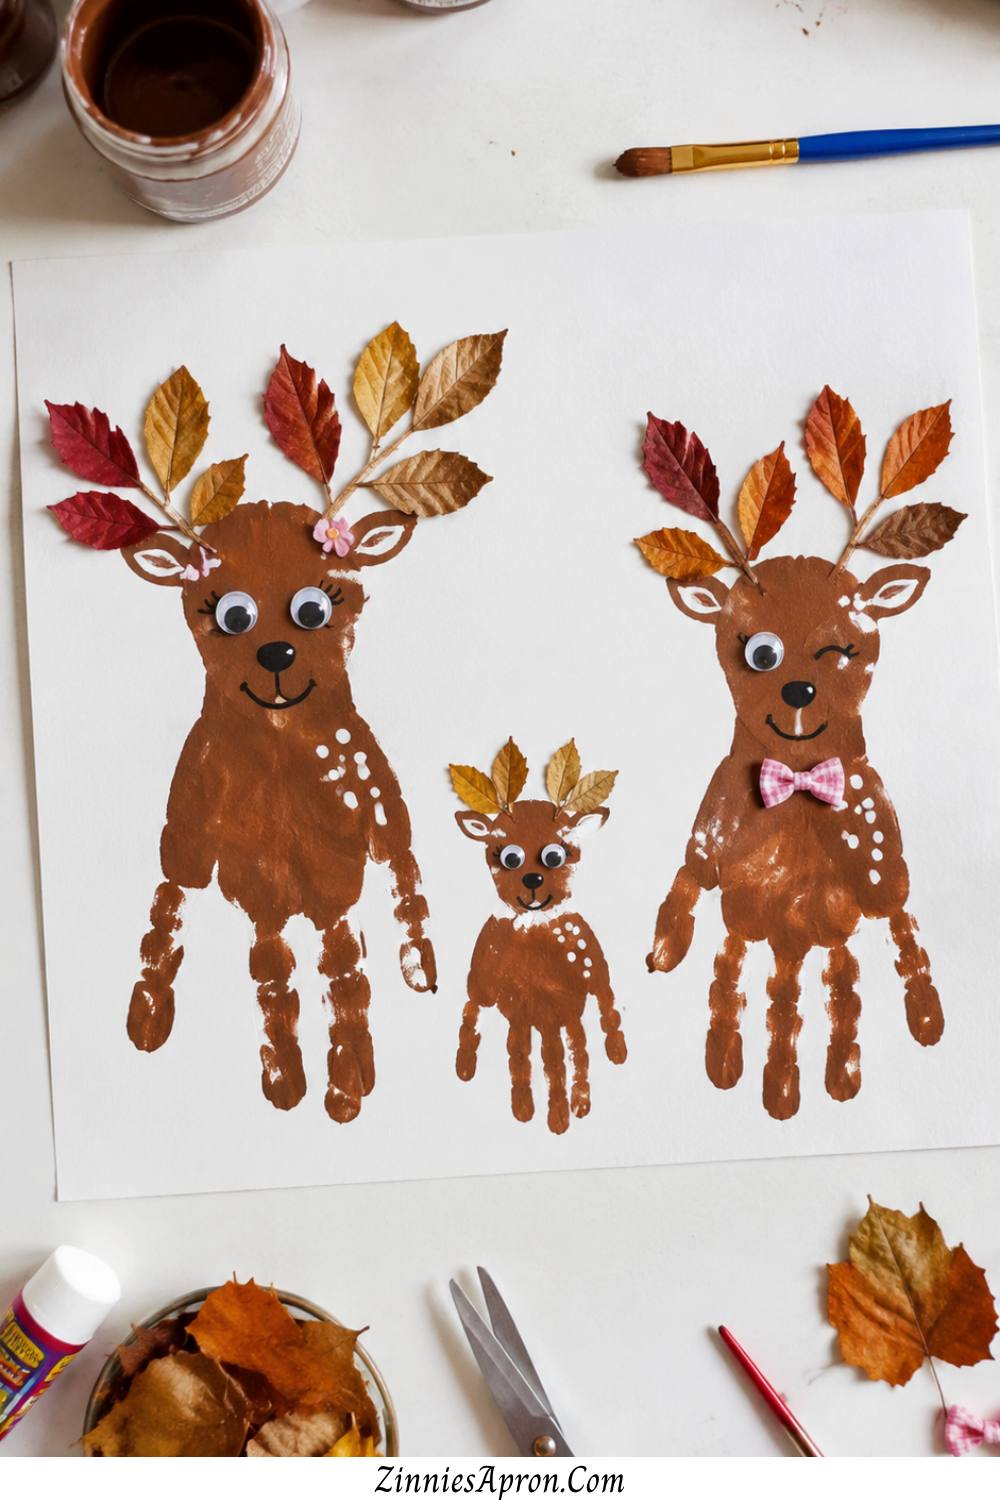
Different sized handprints — toddler, kid, adult — lined up side by side as a deer family on one piece of cardstock. Each one gets its own personality with different expressions, drawn-on eyelashes, or a tiny bow.
This is one of those handprint fall deer crafts that families hold onto forever. Because the sizes change. Next year, that toddler handprint will be bigger, and suddenly this piece of paper becomes a time capsule.
Frame it. Seriously. A simple black frame from the dollar store turns this into wall art that looks intentional, not like a refrigerator leftover.
How to Set It Up
Use a long piece of cardstock or watercolor paper so all the handprints fit in a row. Start with the smallest hand on the left and go up in size.
Paint each one separately and press them with about two inches of space between. Once dry, draw faces, add googly eyes, and give each deer a personality.
3. Handprint Deer on a Fall Tree Canvas
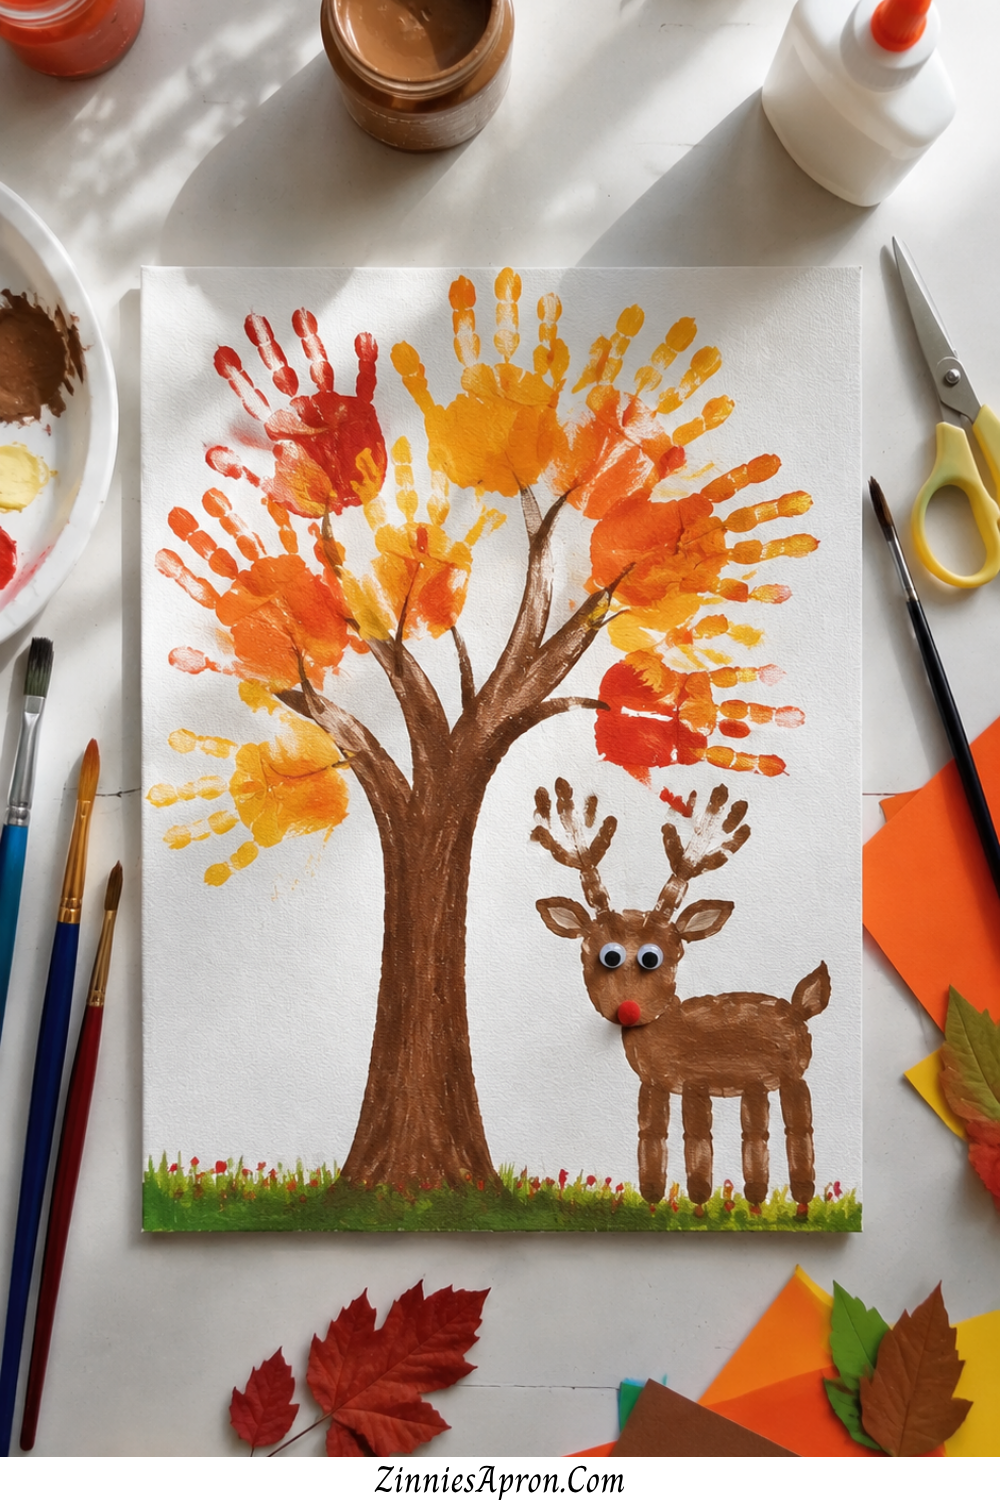
Paint a bare tree trunk on a small canvas. Use handprints in fall colors orange, red, gold as the branches and leaves. Then add one small brown handprint deer standing underneath the tree.
The finished piece looks like actual fall art. Not craft-project art.
The kind of thing someone sees on your shelf and says, “Wait, a kid made that?” That reaction alone makes this one worth the fifteen minutes it takes.
If you want more creative art projects for kids that look impressive, this one fits right in with that collection.
Canvas Tips
An 8×10 canvas from the dollar store is the perfect size. Paint the trunk first with brown acrylic and let it dry completely before adding the handprint leaves.
Otherwise everything smears into a brown muddy mess and trust me, that’s not the aesthetic we’re going for.
4. Handprint Deer Puppet on a Popsicle Stick
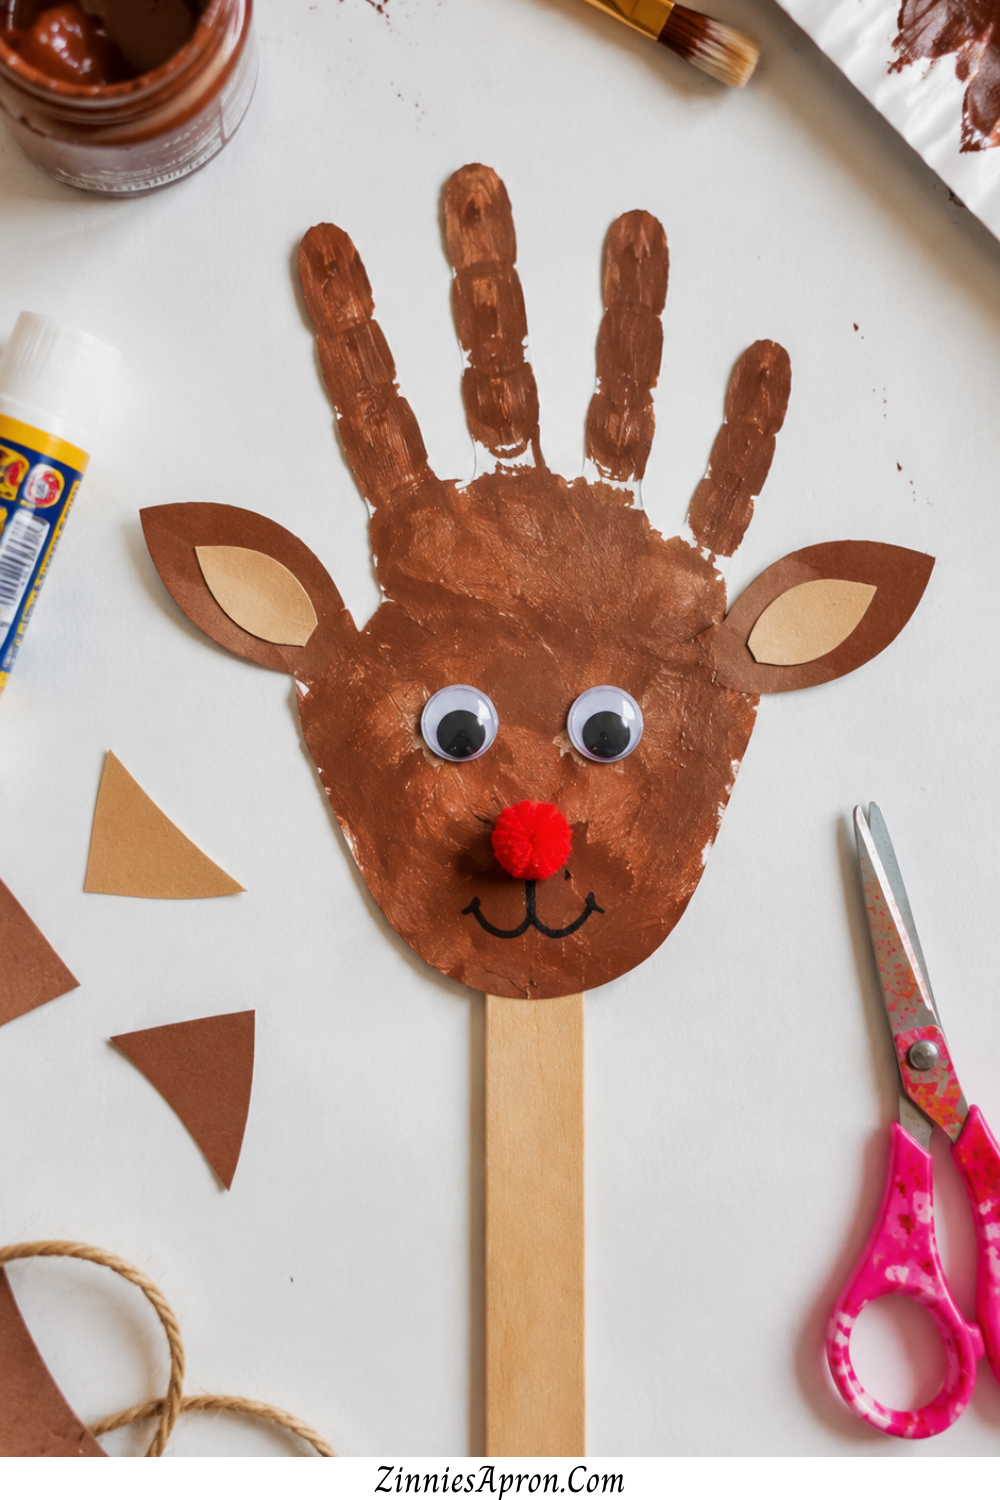
Brown handprint, cut out, decorated as a deer face, glued to a popsicle stick. Instant puppet show material.
Kids make these and immediately start doing voices. Every single time. The craft takes maybe ten minutes, but the puppet show that follows?
That can go on for an hour. Which means this is technically a two-in-one activity and during fall break, that kind of math matters.
For more ideas using supplies you probably already have at home, check out these pipe cleaner crafts for kids that are just as easy and just as fun.
Assembly
Press the handprint, let it dry, cut around it carefully (an adult job for younger kids). Glue googly eyes onto the thumb area that’s the deer’s face.
The fingers become the antlers. Add a small brown or red pom-pom nose, and glue the whole thing to a popsicle stick or craft stick. Done.
5. Handprint Deer Wreath
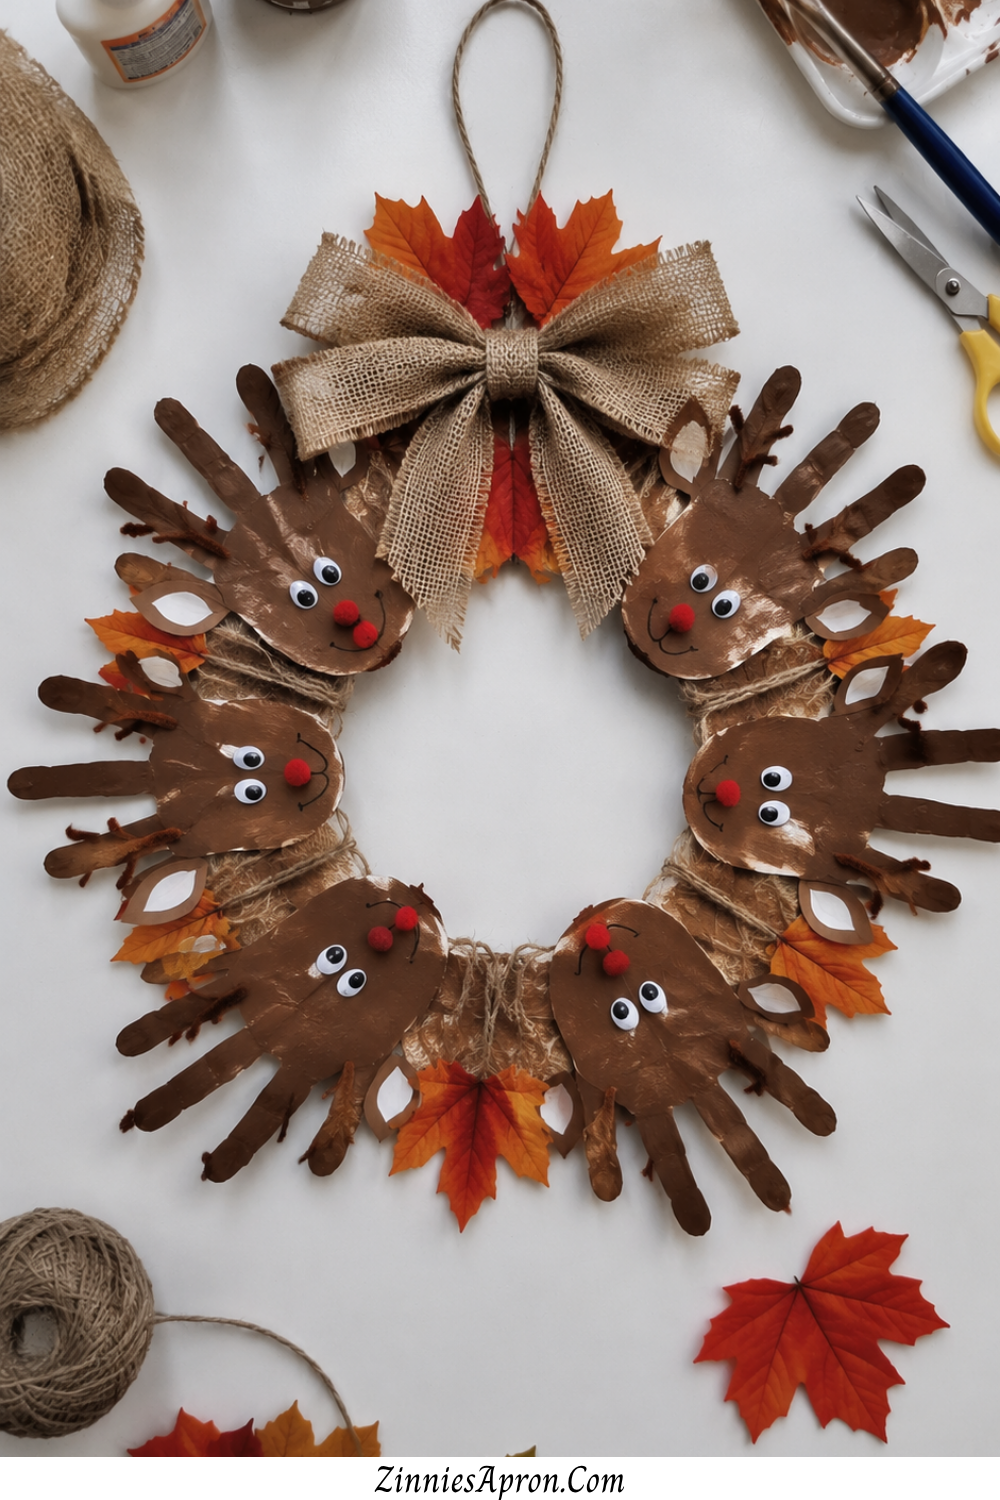
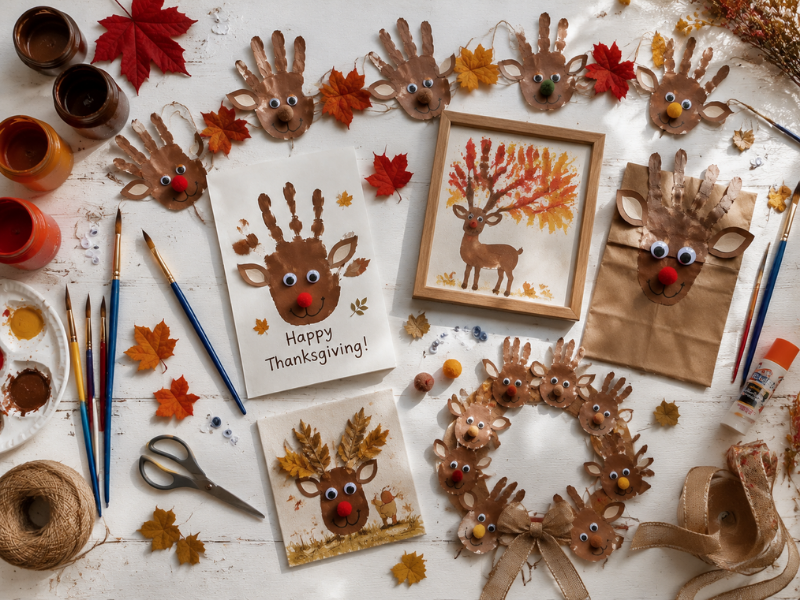
Multiple brown handprints arranged in a circle to form a wreath shape, each one a little deer face with antlers.
Add a burlap bow at the bottom, and suddenly you have fall front door decor made entirely by tiny humans.
This is one of those handprint fall deer crafts that works beautifully as a group project.
Each kid contributes one or two handprints, and the whole thing comes together as a collaborative piece.
Classrooms, playgroups, Sunday school classes this is the one to pull out when you need every kid involved.
If you’re looking for more fall front porch decor ideas that feel seasonal and personal, this wreath fits right in.
How to Make It
Cut a large circle from cardboard (a pizza box works perfectly). Press brown handprints onto separate paper, cut them out once dry, and glue them around the cardboard ring with the fingers pointing outward.
Add googly eyes, drawn-on noses, and a burlap or ribbon bow at the bottom. Punch a hole at the top and hang with twine.
6. Handprint Deer Greeting Card
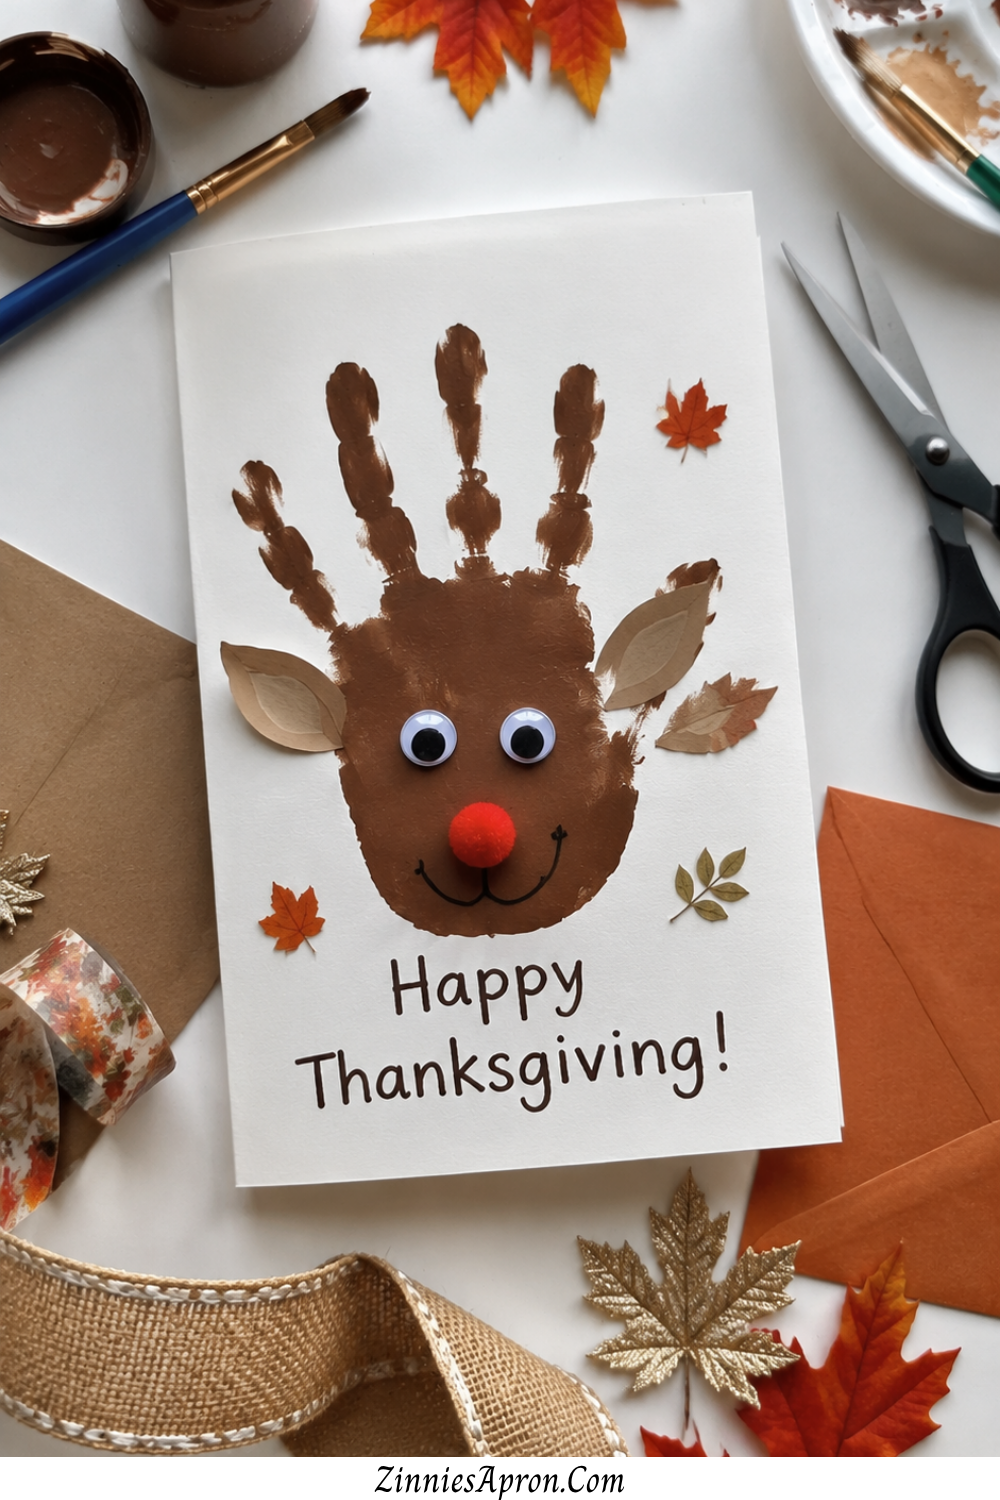
Fold a piece of cardstock in half, press a brown handprint on the front as the deer’s head and antlers, and write “I’m so DEERly thankful for you” inside. That’s a Thanksgiving card that actually means something.
Because here’s the truth about handmade cards the person who receives one never throws it away. Especially if there’s a tiny handprint on the front.
Grandparents will keep this in a drawer for decades. That’s not an exaggeration.
These also work as thank-you cards for teachers, Sunday school teachers who deserve more appreciation than they get, and basically anyone your kid wants to say something kind to.
Making It Special
Use heavier cardstock so the card feels sturdy when someone holds it. Let the handprint dry completely before folding wet paint and a fold crease is a recipe for a smeared mess.
Inside, let the child write or dictate their own message. Even if the spelling is creative, that’s what makes it real.
7. Handprint Deer Footprint Combo
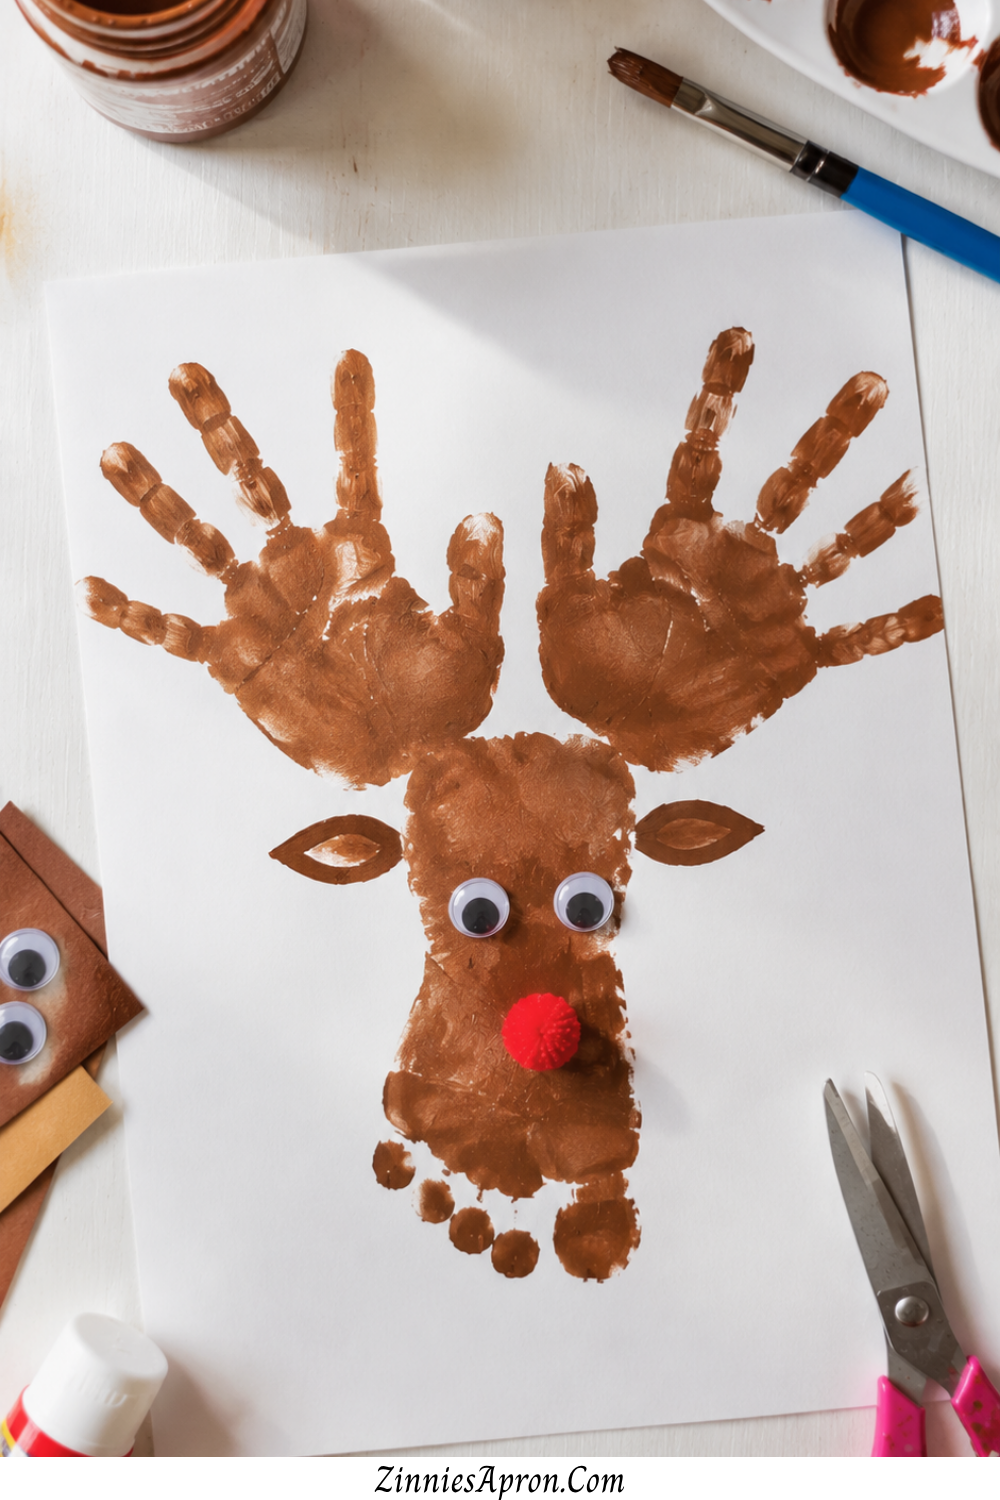
Footprint as the deer’s face, handprints as the antlers. The scale works surprisingly well — and kids think the whole process is hilarious. Something about painting the bottom of your foot just hits different when you’re five.
This is also one of the handprint fall deer crafts that captures size the best. Because feet grow even faster than hands. A year from now, that footprint will look impossibly small, and you’ll be glad you made this.
How the Proportions Work
Press the footprint first in light brown or tan heel at the top, toes at the bottom. That’s the deer’s face with the toes as the chin area.
Then press two handprints in darker brown at the top of the heel, fanning outward as antlers. Add eyes just above the arch of the foot and a nose at the ball of the foot.
It sounds strange on paper, but it genuinely looks like a deer when it’s done.
8. Handprint Deer Mason Jar Luminary
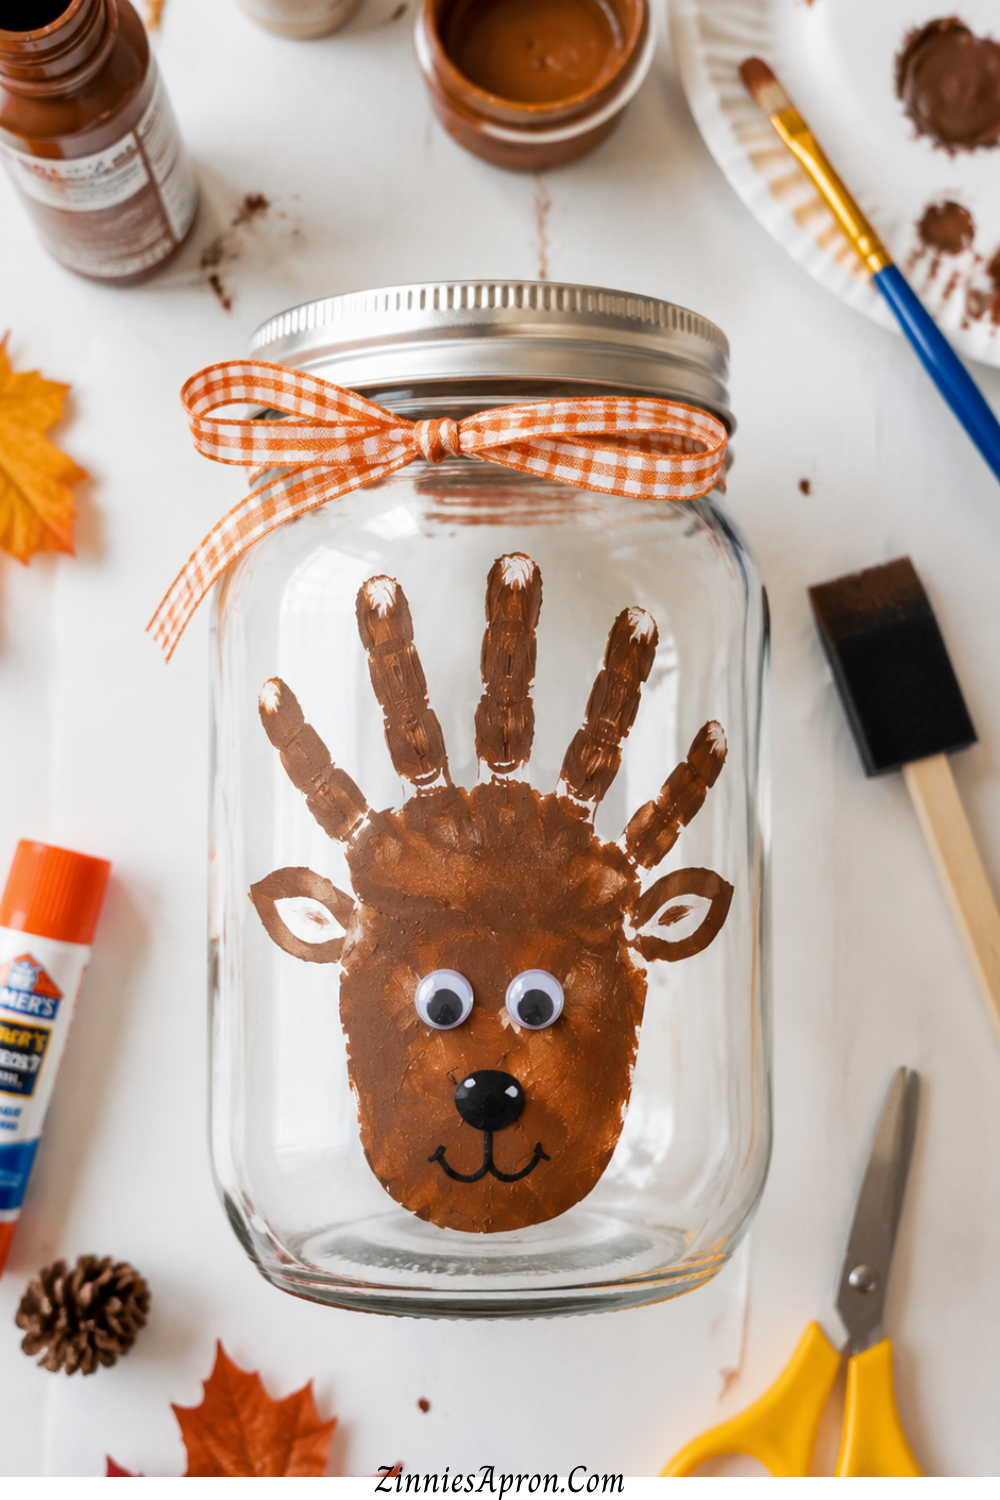
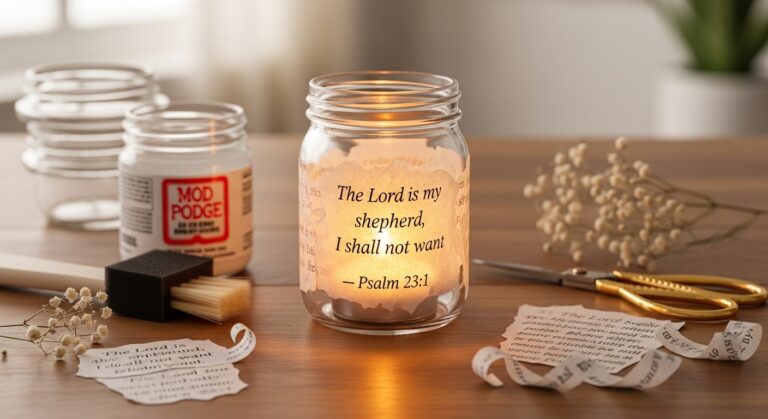
Press a brown handprint onto a mason jar with acrylic paint. Add antler details with a fine-tip marker once the paint dries. Drop a battery-operated tea light inside, and the whole thing glows.
This is where handprint fall deer crafts cross over from “cute kid project” into “actual decor.”
Because when that tea light flickers through the glass at night, the handprint deer looks warm, intentional, and kind of magical. Line three of these on a fall mantel or a windowsill and the whole room changes.
Important Details
Use acrylic paint, not washable washable paint wipes right off glass. Press the hand firmly and lift straight up without wiggling.
If the print smears, wipe it off immediately with a damp cloth and try again. The jar needs to be completely clean and dry before painting.
A thin coat of clear craft sealant over the dried print helps it last. For more on the best sealants for craft projects, that guide breaks down exactly which one to use.
9. Handprint Deer Paper Bag Puppet
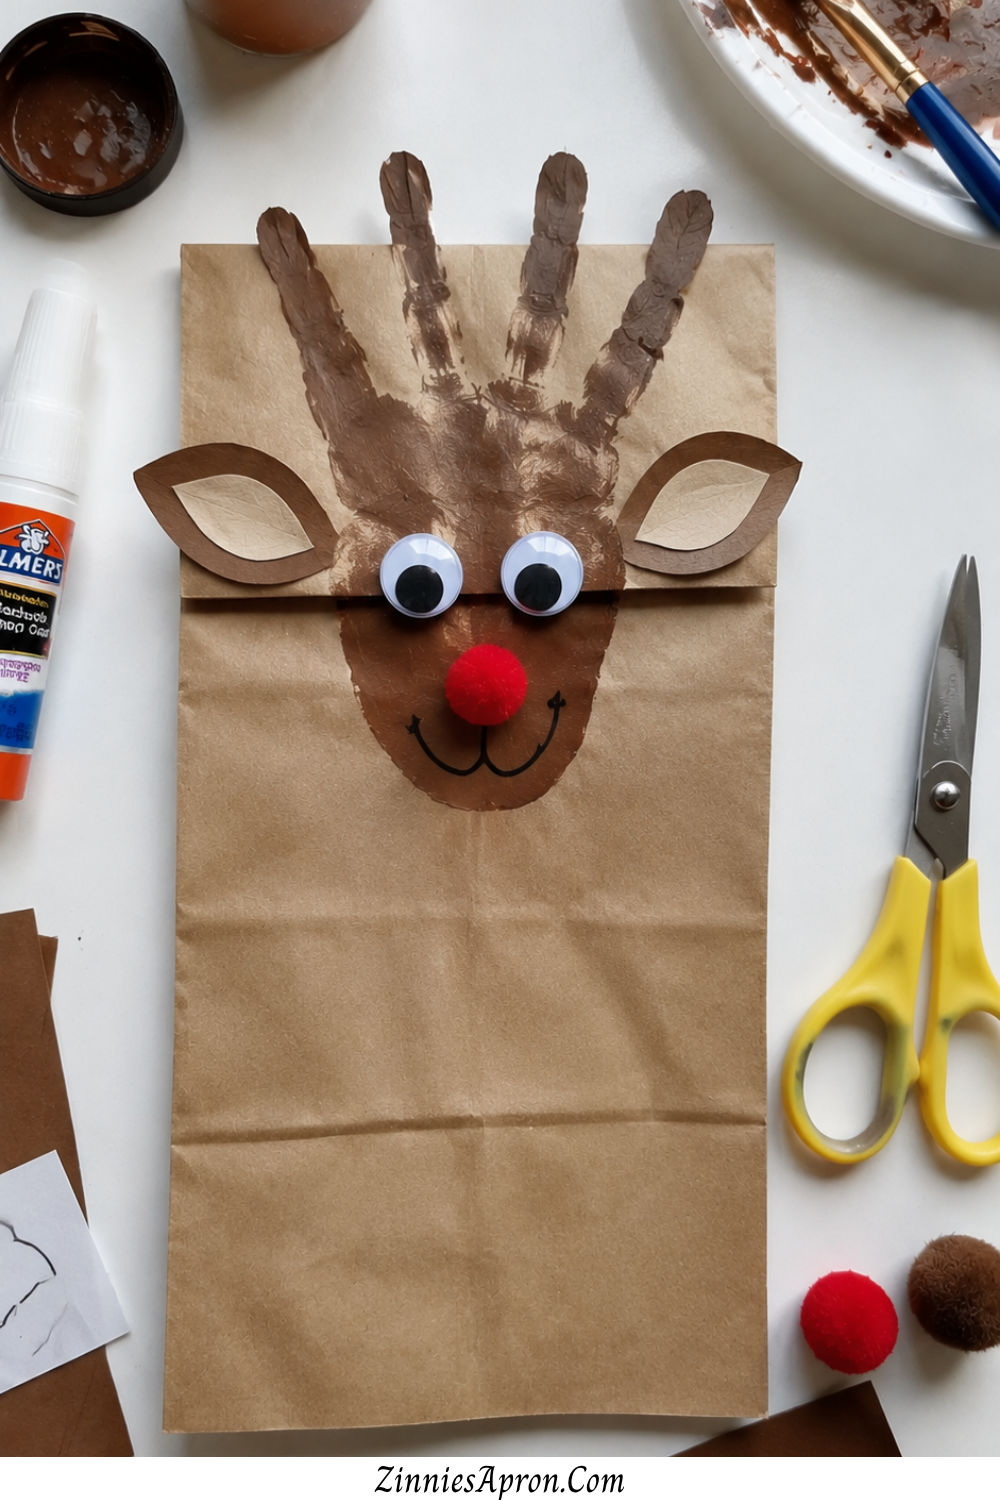
Brown paper lunch bag. Handprint pressed on the top flap as antlers. Deer face drawn below. Open and close the bag to make the deer “talk.”
This one’s been around forever because it just works. The paper bag already has a natural fold that functions as a mouth, so the puppet element is built right in.
Kids don’t need instructions they grab it, open and close it, and start performing a one-deer show immediately.
If you need more crafts that double as imaginative play, this kind of craft-to-play pipeline is exactly what keeps kids engaged longer than ten minutes.
Supplies
One brown paper lunch bag, brown paint, googly eyes, markers, and a pom-pom nose. Press the handprint onto the flat top flap of the bag so the fingers fan upward as antlers.
Draw the deer’s face on the section just below the fold. When the child opens and closes the bag from behind, the deer talks.
10. Handprint Deer with Tissue Paper Fall Background
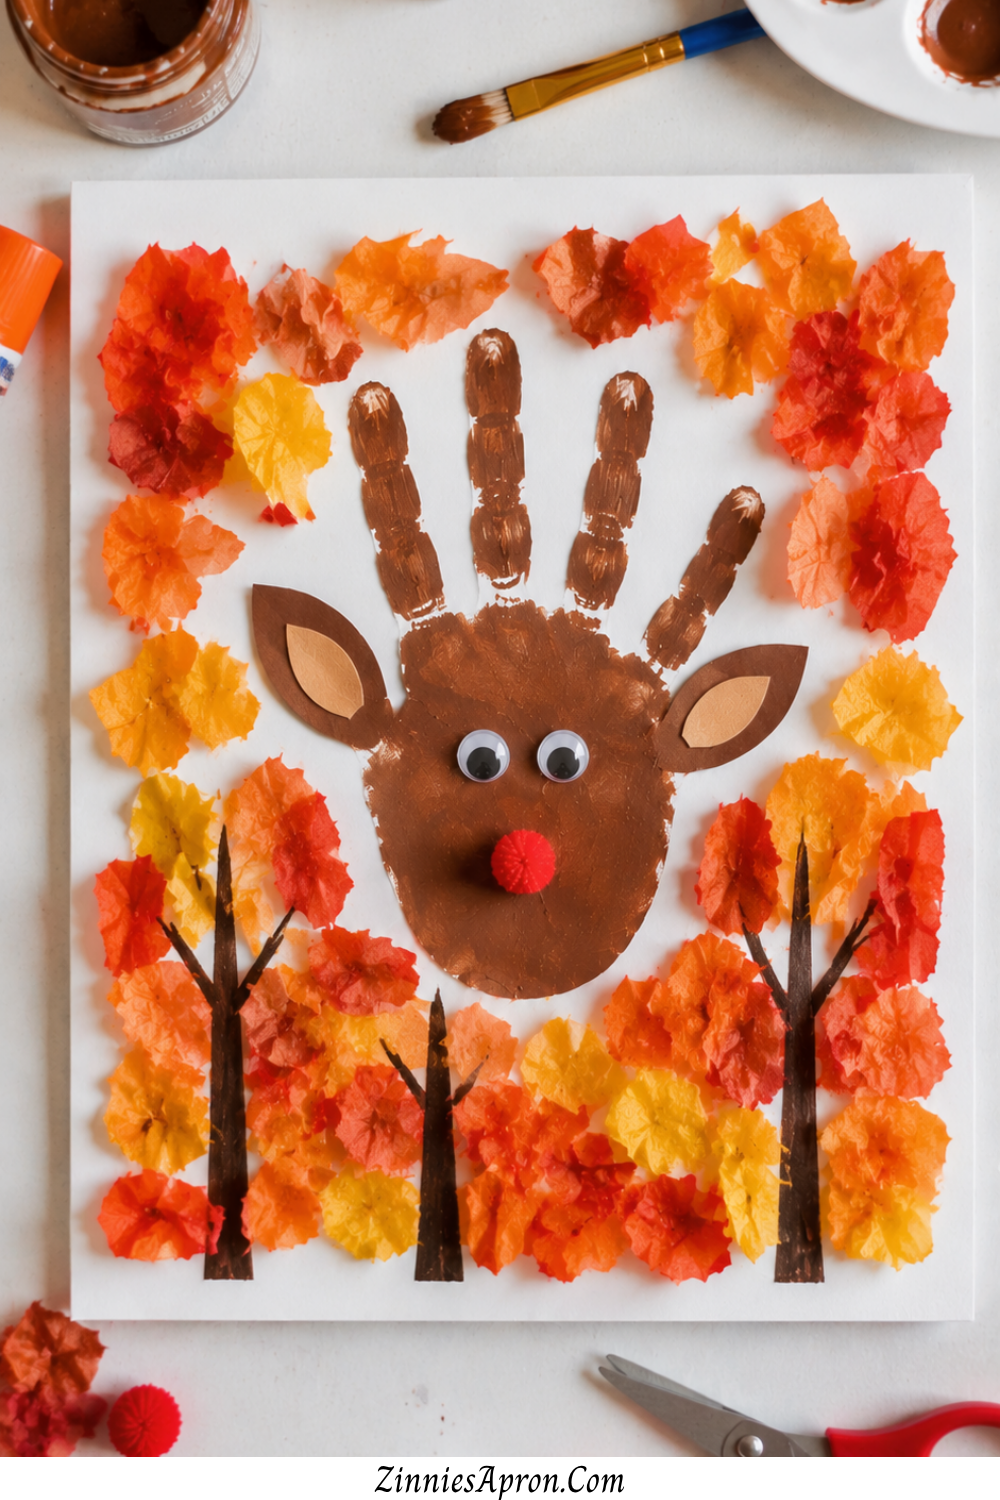
Handprint deer in the foreground. Crumpled tissue paper in oranges, reds, and yellows filling the background as a fall forest.
The texture contrast between the smooth painted handprint and the crinkled tissue paper makes this one look like it belongs in a classroom art show.
What makes this one of the best handprint fall deer crafts for younger kids is the tissue paper step. Crumpling paper is a fine motor skill disguised as fun.
Toddlers and preschoolers don’t realize they’re strengthening their hand muscles they just think they’re making a mess. And they love it.
For more crafts that build skills without feeling like work, these farm animal crafts for kids follow the same approach.
Layering the Background
Start by tearing tissue paper into small pieces roughly two-inch squares. Crumple each one loosely and glue them across the top two-thirds of the paper in fall colors.
Don’t flatten them. The dimension is the whole point.
Once the background is full and dry, press the brown handprint deer in the lower section. Add eyes and a nose once the handprint dries.
11. Handprint Deer Bookmark
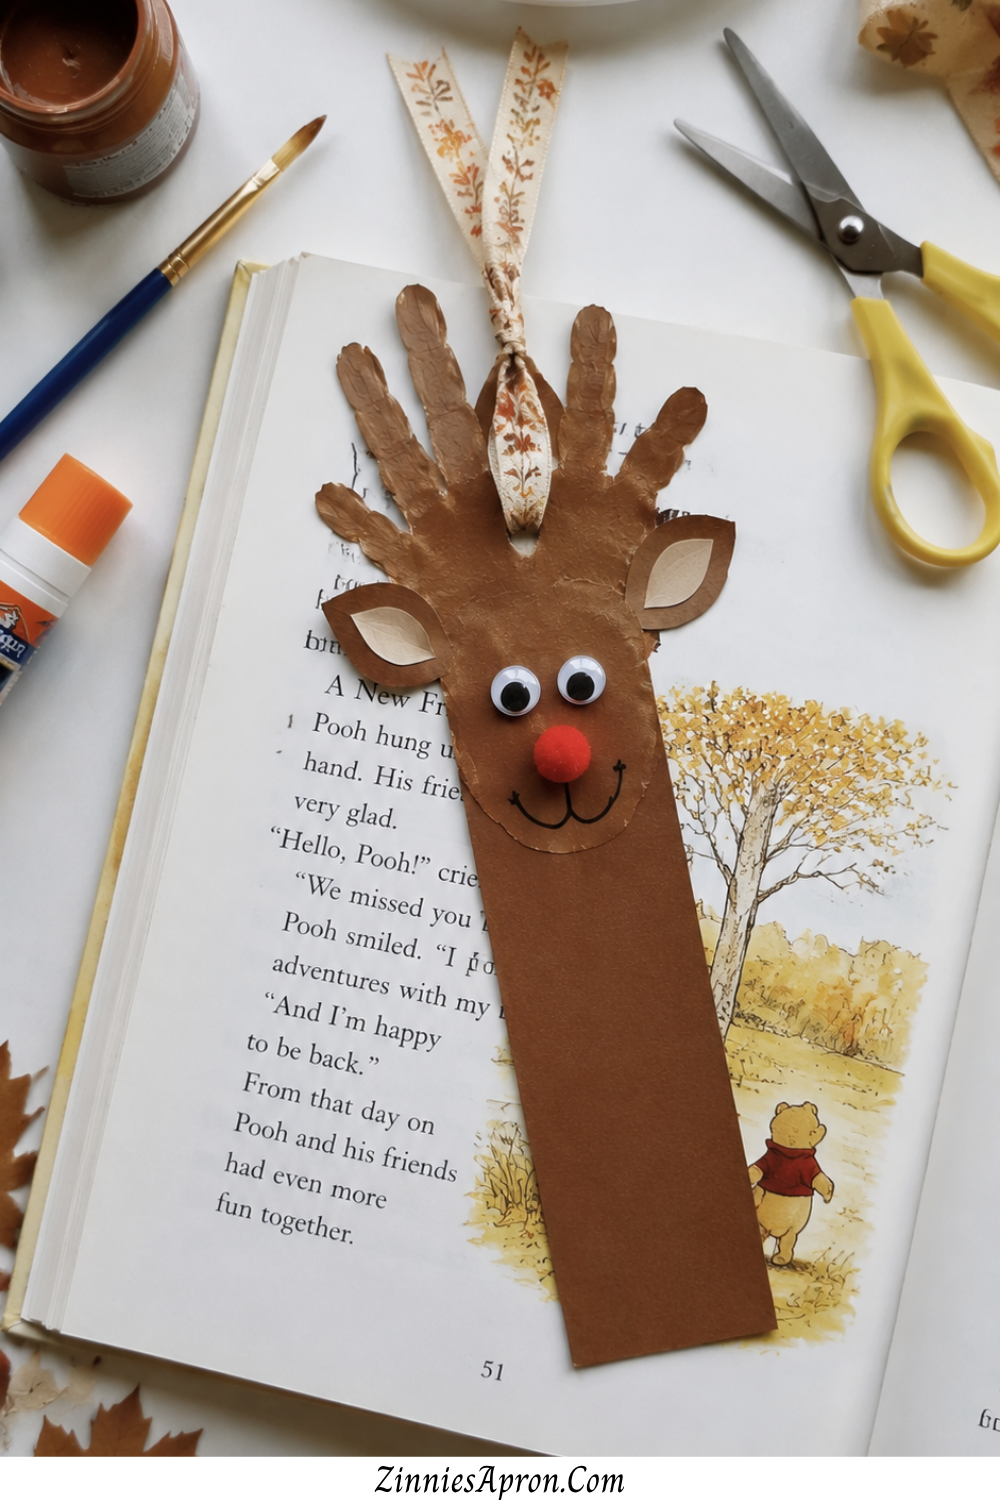
Cut the handprint out, turn the fingers into antlers, laminate it, and attach a tassel or ribbon at the bottom.
A craft that kids will actually use and that’s saying something.
Most crafts end up in a drawer or on the fridge for two weeks before quietly disappearing. This one lives inside a book.
Every time they open it, there’s their own tiny hand staring back at them. That’s the kind of handprint fall deer craft that earns its spot.
Making It Last
Laminating is the key. Without it, the paint flakes and the paper bends within a week. If you don’t have a laminator, clear packing tape on both sides works fine.
Cut the handprint into a roughly rectangular bookmark shape keep the antler fingers intact but trim the palm section so it’s narrow enough to fit between pages.
Punch a hole at the bottom and thread a piece of ribbon or yarn through.
12. Handprint Deer with Button Ornaments
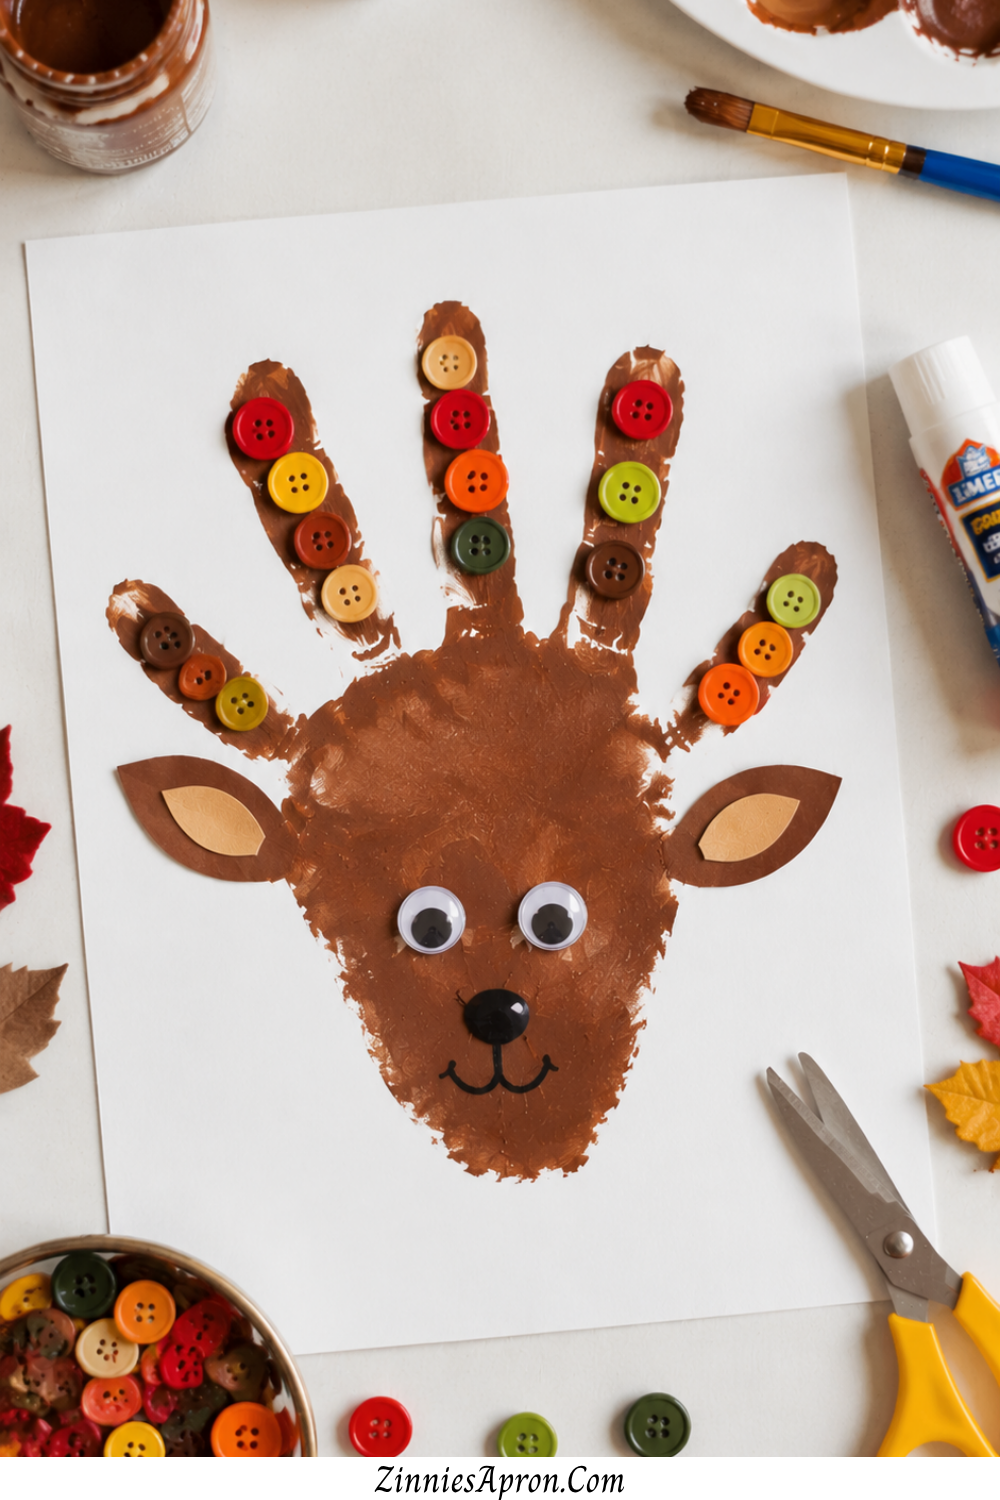
Brown handprint deer with tiny fall-colored buttons glued between the antler fingers like little ornaments hanging from the antlers.
Oranges, deep reds, mustard yellows the buttons add color and texture in a way that flat paint just can’t.
This craft straddles that fall-to-Christmas transition perfectly. It’s autumnal enough for October and November, but the “ornaments on antlers” detail gives it just enough holiday energy to last through December.
That kind of seasonal range is hard to find in one craft.
Button Selection
Use flat two-hole or four-hole buttons, not shank buttons shanks don’t glue flat and they’ll pop off within a day.
Smaller buttons (half inch or less) work best between the fingers.
Put a generous dot of tacky glue or hot glue (adult only) under each button.
Let it dry completely before handling buttons and gravity are not friends during the drying phase.
13. Handprint Deer Resist Art
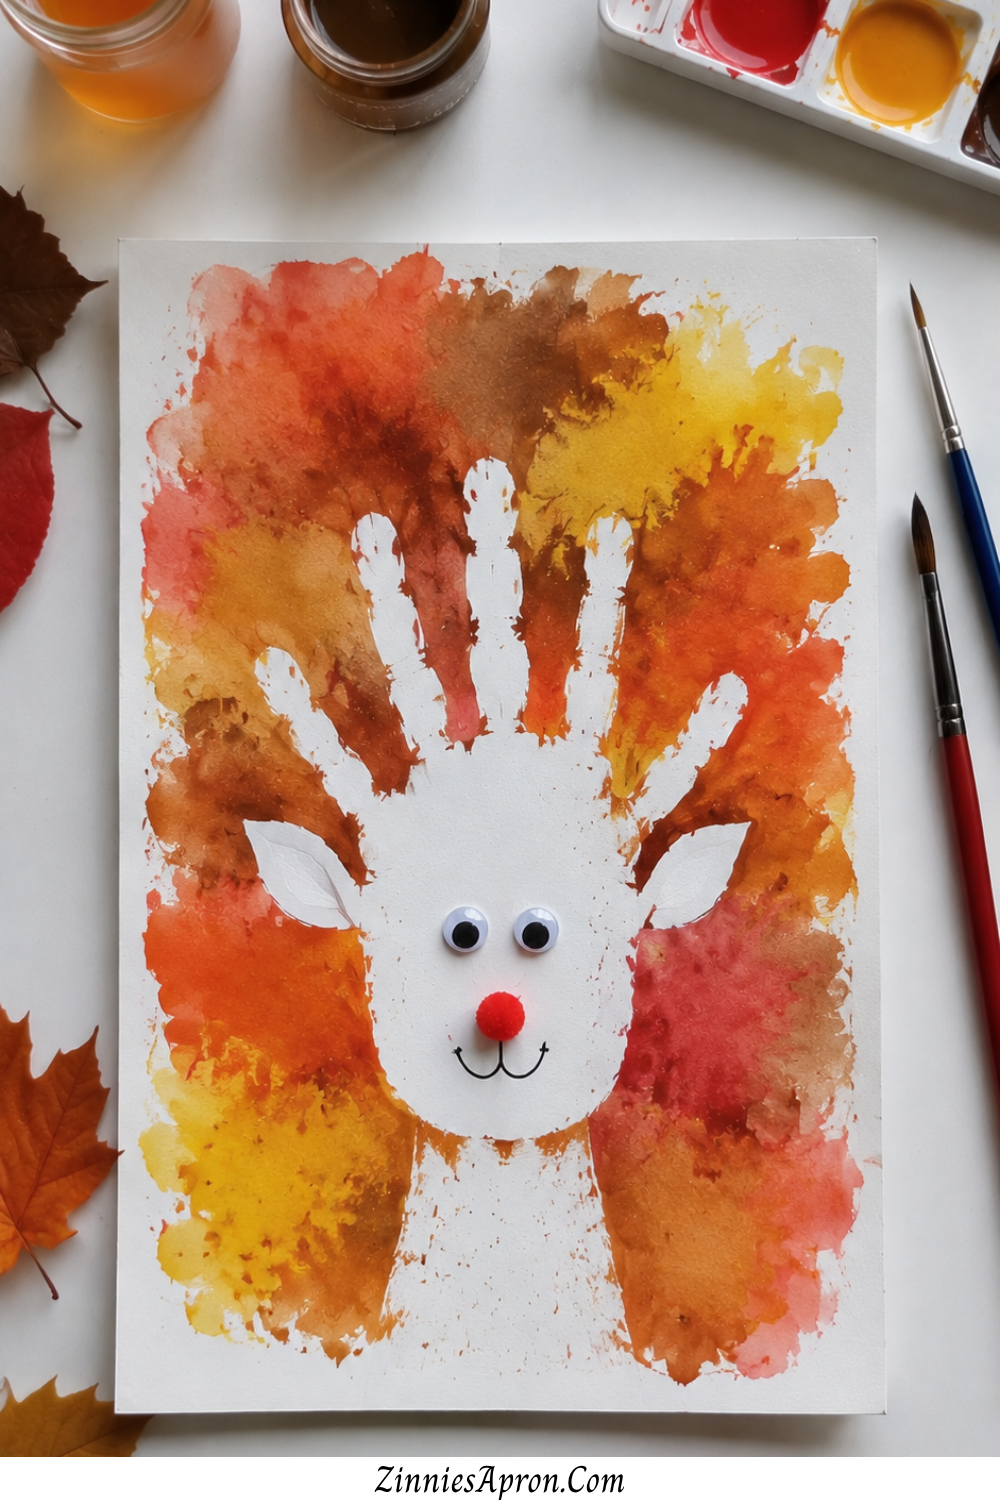
Press a handprint in white crayon on white paper. Then watercolor wash the entire page in fall colors burnt orange, goldenrod, cranberry red. The deer appears like magic as the wax resists the paint.
Kids lose their minds over this one. Every single time.
There’s something about watching the invisible handprint reveal itself that makes the whole table go quiet for exactly two seconds before erupting.
It’s the closest thing to a magic trick you can pull off with a crayon and a paintbrush.
This is also one of the most beautiful handprint fall deer crafts on this list because the watercolor background looks genuinely artistic. Not like a kid’s project. Like something you’d actually frame.
How to Get a Clean Reveal
Press hard with the white crayon. Really hard. If the wax layer is too thin, the watercolor will bleed right through and you won’t see the deer clearly.
Use a thick, waxy crayon — not a colored pencil or a thin crayon that’s been worn down to a stub. Once the invisible handprint is pressed, use a wide brush and very wet watercolor paint.
Brush in long, even strokes across the page. Don’t scrub. The resist works best with a smooth, soaking wash.
14. Handprint Deer Nature Collage
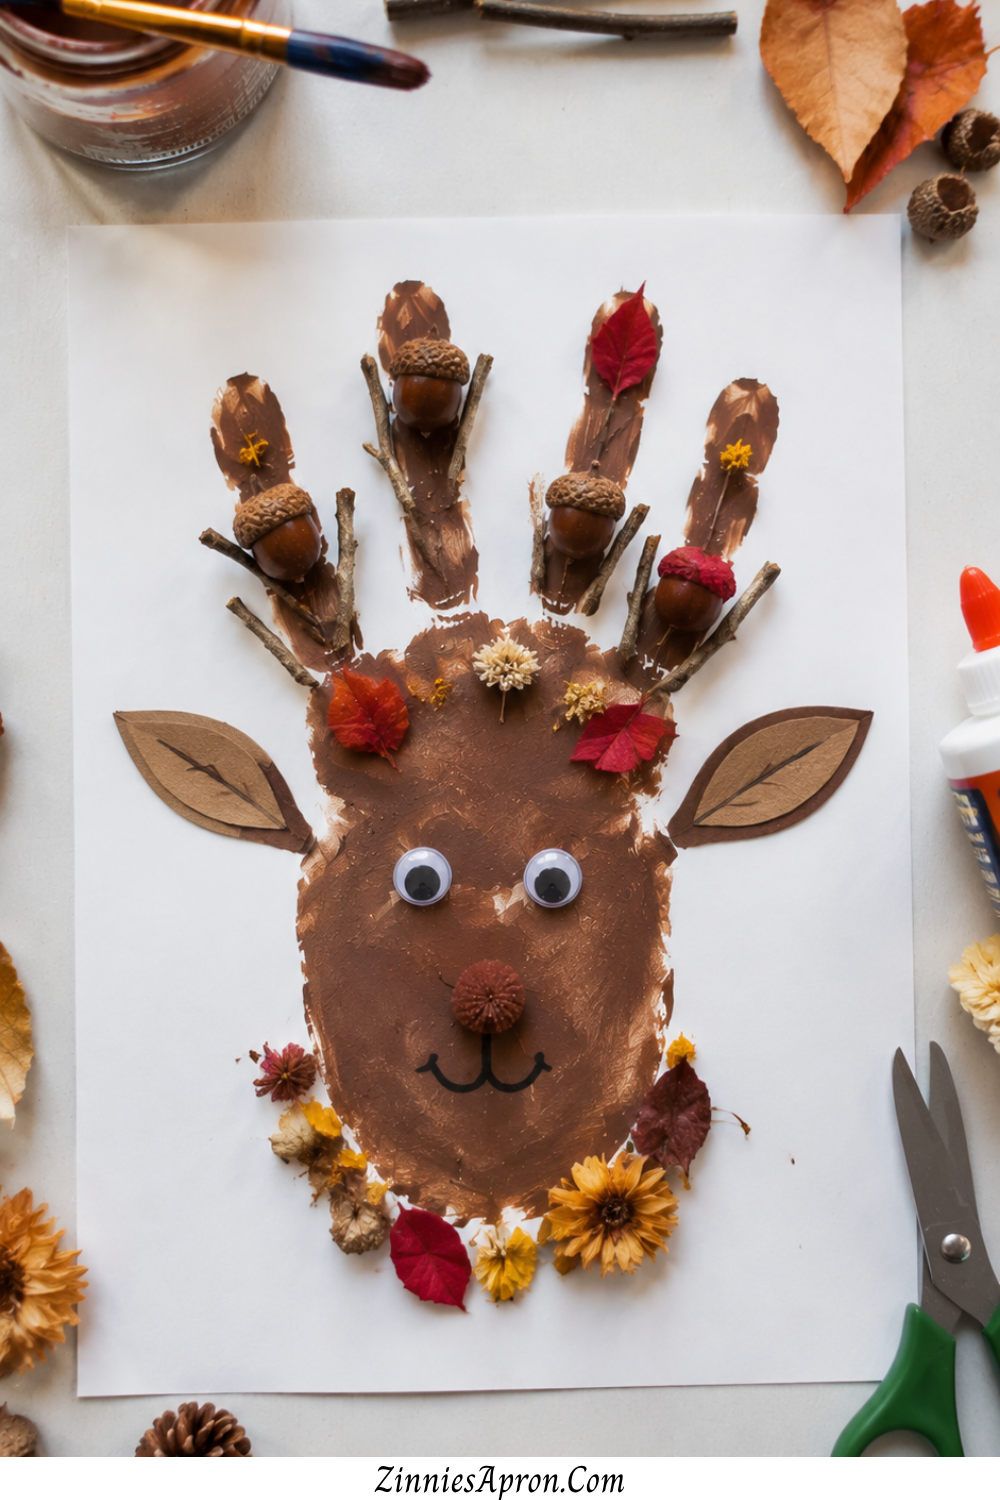
Handprint as the base. Then decorate with actual nature finds acorn caps for ears, tiny twigs for extra antler detail, dried flower petals around the edges, seed pods scattered in the background. Part craft, part nature walk activity.
This is the one that turns a regular afternoon into a whole experience. Because it starts outside. You walk, you collect, you come back inside and build something with what you found.
The National Wildlife Federation encourages this kind of nature-based play as one of the best ways for kids to connect with the outdoors and when the finished product is this cute, the motivation is built right in.
According to NAEYC, hands-on art activities like this support cognitive development, fine motor skills, and creative problem-solving in early childhood. So it’s not just cute it actually matters.
Best Nature Materials to Collect
Acorn caps, small twigs (no longer than three inches), dried leaves that are still flexible enough to glue flat, tiny pinecones, seed pods, and dried flower petals.
Avoid anything damp or green it’ll mold within days. Lay your finds on a paper towel for an hour before crafting to let any surface moisture dry.
For more nature-inspired creative projects kids love, these ideas follow the same hands-on approach.
15. Handprint Deer with Pom-Pom Nose Garland
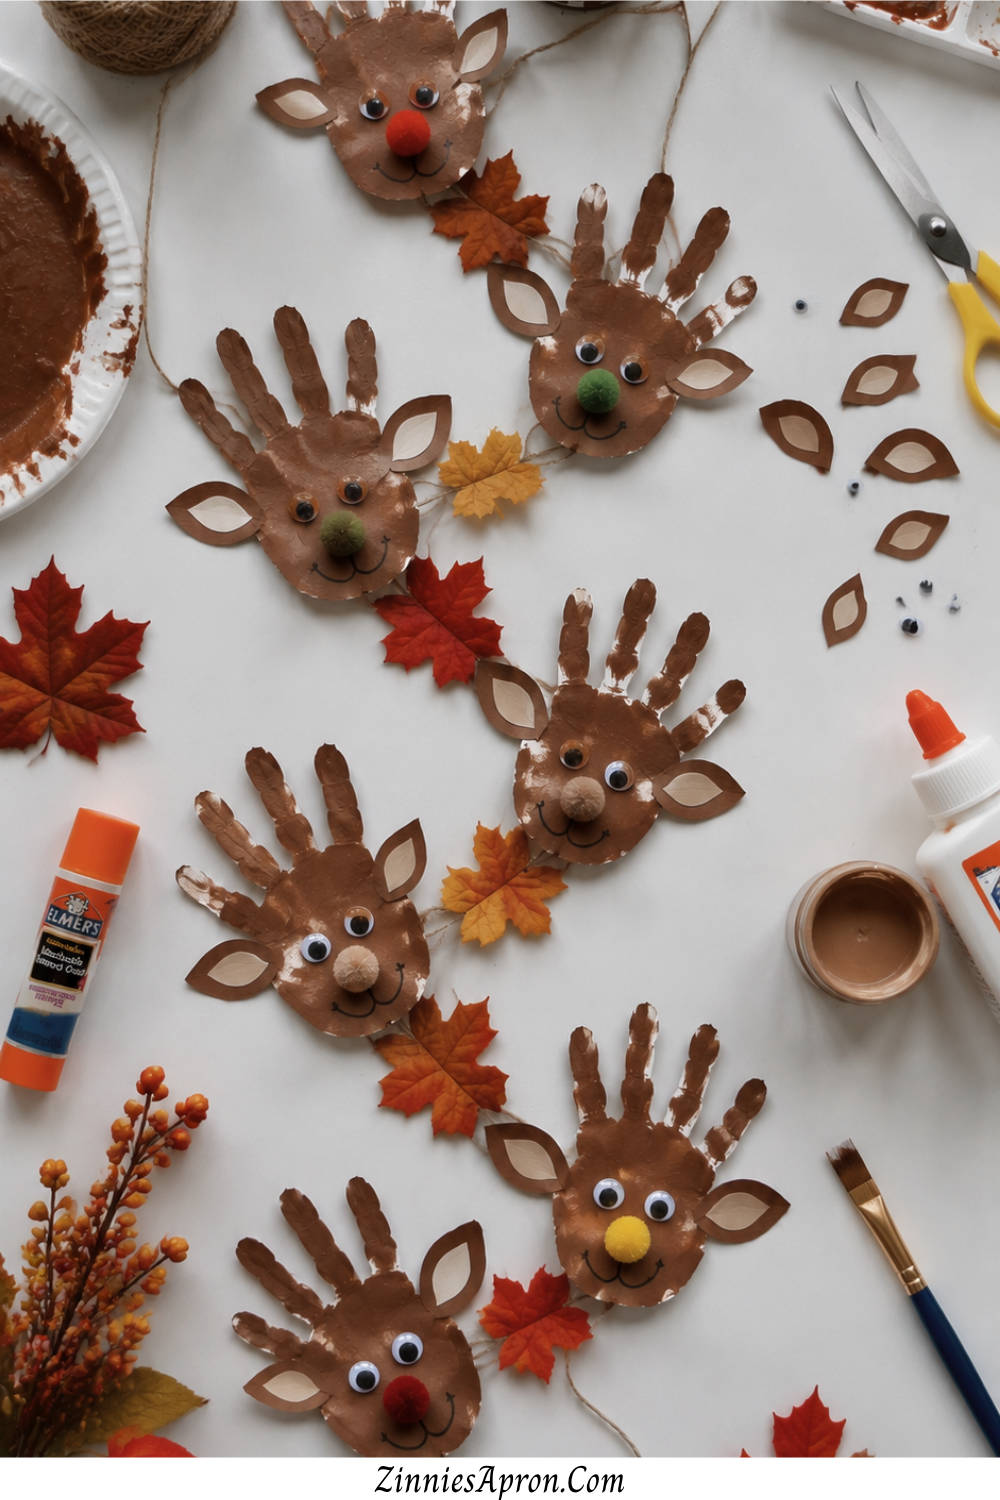
Make several handprint deer, string them together with twine, and give each one a different colored pom-pom nose.
Red, orange, gold, burgundy instant fall mantel garland made entirely from handprints.
This is the handprint fall deer craft that scales. One handprint is a keepsake. Five handprints strung together on twine is decor.
Hang it across a mantel, drape it along a bookshelf, or pin it to a wall above the couch. It turns a craft session into a decorating statement.
It’s also a great one for families with multiple kids. Each child makes their own deer, and then they all get strung together as one garland.
Everyone’s hands. One piece of fall decor. That’s the kind of project that makes everyone feel like they contributed because they did.
For more DIY pumpkin decorating ideas that go beyond the basics, pair this garland with some no-carve pumpkins and your fall setup is done.
Assembly
Press handprints on separate sheets of paper, let dry, cut out. Punch two small holes at the top of each handprint (one on each side, near the outer fingers).
Thread twine through all the handprints, spacing them about four inches apart. Glue a different colored pom-pom nose on each one. Tie small loops at each end of the twine for hanging.
Quick Supply List for All 15 Handprint Fall Deer Crafts
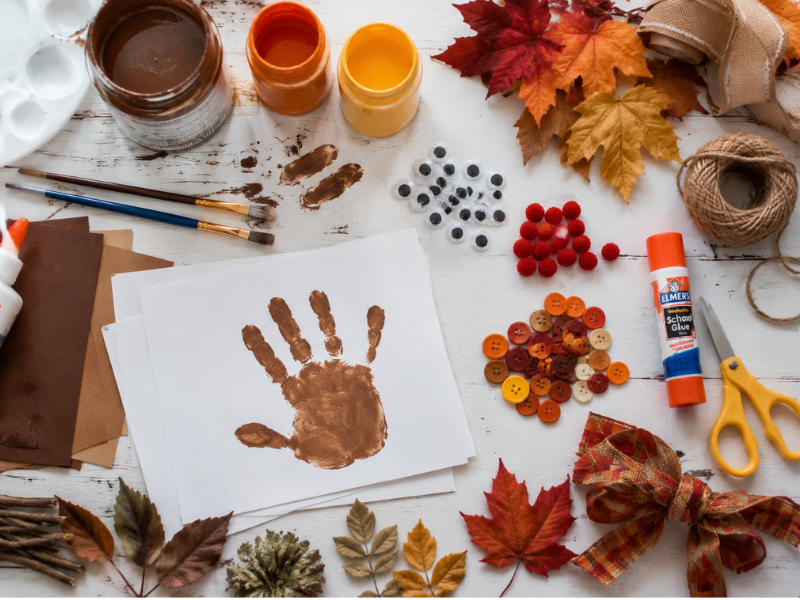
You don’t need to buy everything for every craft. But if you want to be ready for any of them, here’s what covers the full list:
brown washable paint, brown acrylic paint (for the mason jar), white and cream cardstock, watercolor paper, a small canvas, googly eyes in assorted sizes, pom-poms in fall colors, fall-colored buttons, tissue paper in orange, red, and yellow, white crayons, watercolor paint set, tacky glue and glue sticks, brown paper lunch bags, popsicle sticks, twine, a laminator or clear packing tape, scissors, fine-tip markers, ribbon, and mason jars.
Most of this comes from a single Dollar Tree or craft store trip. If you already have paint and paper at home, you’re halfway there.
Also grab baby wipes. You will need baby wipes. More than you think.
For the full toolkit breakdown, this post on must-have craft tools for DIY covers everything in detail.
Frequently Asked Questions
What age is best for handprint fall deer crafts?
Most of these work for kids ages 2 through 10, though toddlers will need more hands-on help with cutting and gluing.
The handprint pressing part is doable for even the youngest kids they just need an adult guiding their hand onto the paper.
How do I keep handprint crafts from smearing?
Let each layer dry completely before adding the next element. Use a hair dryer on low for about 30 seconds if you’re short on patience.
Also, lift the hand straight up after pressing dragging or twisting is what causes smears.
Can I use finger paint instead of regular washable paint?
You can, but finger paint tends to be thicker and goopier, which makes the handprint less defined.
Washable tempera paint gives the cleanest prints with the most detail in the fingers. If clean lines matter for the craft, tempera is the better choice.
How do I preserve handprint crafts so they last?
Laminating works for flat paper crafts. For canvas or mason jar projects, a clear acrylic spray sealant adds a protective layer that prevents chipping and fading.
Store flat paper crafts between sheets of wax paper in a folder or photo box to prevent sticking.
What if my child won’t keep their hand still for the handprint?
Totally normal, especially with toddlers. Paint their hand with a brush instead of pressing into a paint tray — it gives you more control.
Press their hand onto the paper quickly and firmly, then lift. One clean press is all you need. If it’s not perfect, that’s honestly part of the charm.