Wondering which keepsakes actually survive the years? Santa handprint crafts, done right, last well past this one Christmas.
Hands grow fast, and a handprint craft is one of the few keepsakes that captures a size that’s gone within months. Not lost, exactly, just grown out of, the way a pair of tiny shoes gets grown out of.
That’s really why this craft ends up meaning more than the few minutes it takes to make. It was never really about Santa. It’s a size, a shape, a moment, pressed into something that can be picked up years later and held.
The catch is that not every version of this craft actually survives that long. Paper fades and yellows in a drawer.
Salt dough that isn’t dried all the way through can crack or mold months later, put in a box no one checks until it’s too late.
A handprint made to last has to be made the right way from the start, otherwise “keep forever” is just something written on a blog post, not something that actually happens.
That’s what these fifteen ideas actually deliver on, a Santa handprint craft still intact and worth pulling out ten Christmases from now, not just for this one.
Make a heartfelt keepsake with 15 Handprint Flower Bouquet Crafts for Grandparents Day (Toddler to Tween Friendly), featuring adorable handprint projects that grandparents will treasure for years.
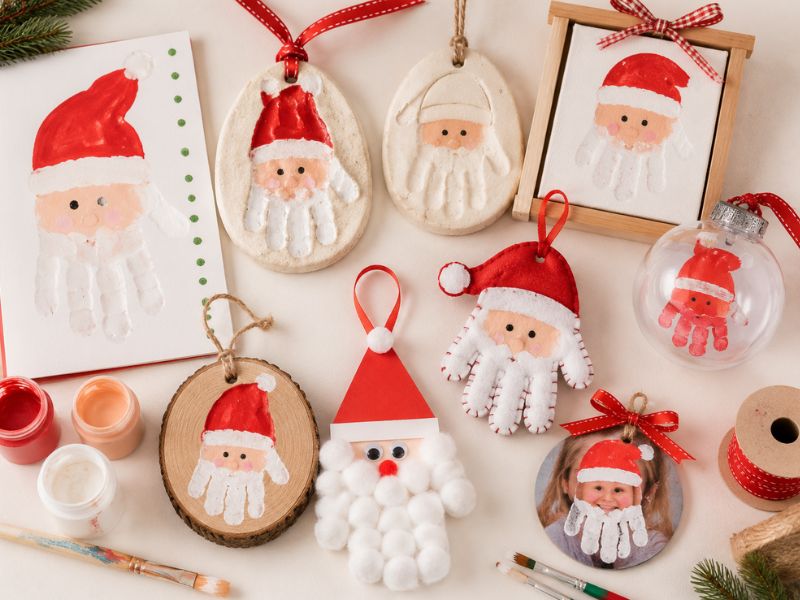
1. Paper Handprint Santa (Cardstock)
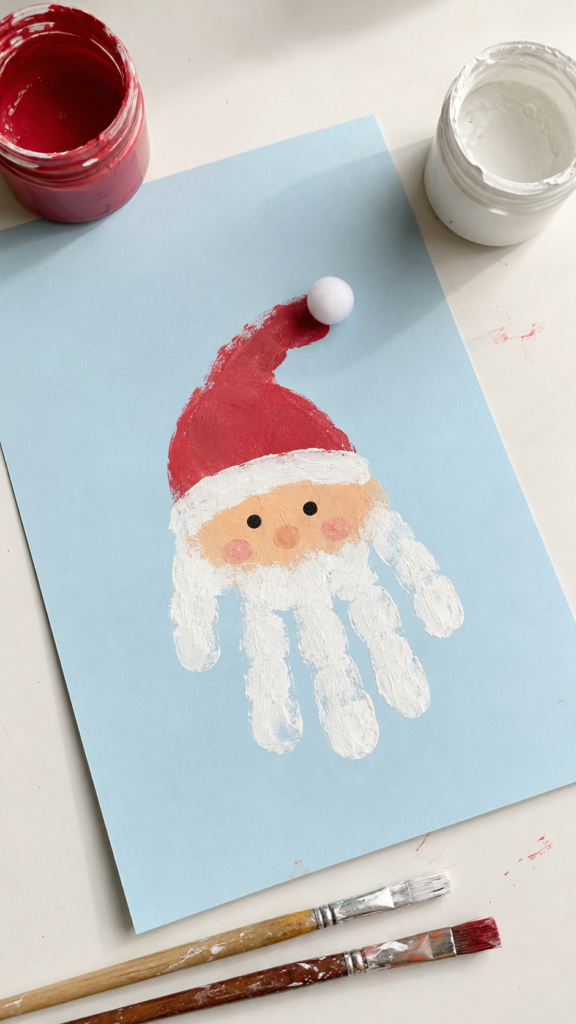
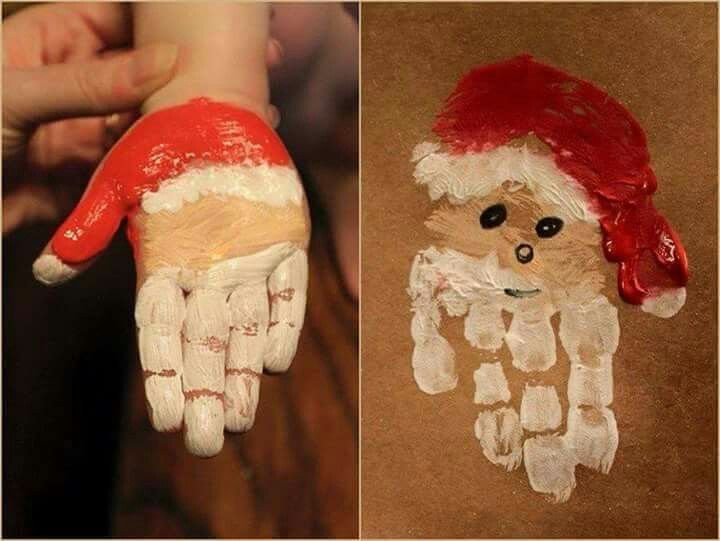
This one works because of where the paint goes, not how it’s applied.
The top third of the hand, fingers and thumb, gets painted white, which becomes Santa’s beard once pressed down. The palm stays bare skin-tone, forming the face.
A small triangle of red painted just above the fingers, before pressing, becomes the hat.
Understanding that mapping, fingers to beard, palm to face, top edge to hat, is the whole technique, and it’s why this craft works on the first try even for someone who’s never done a handprint craft before.
How long it realistically lasts:
On standard paper, expect noticeable yellowing and fading within a few years, especially if it’s displayed rather than stored flat and out of light.
Switching to acid-free cardstock and adding a matte UV-resistant sealant changes that math significantly, closer to a decade or more when stored flat, away from direct sunlight and humidity.
2. Salt Dough Santa Handprint Ornament
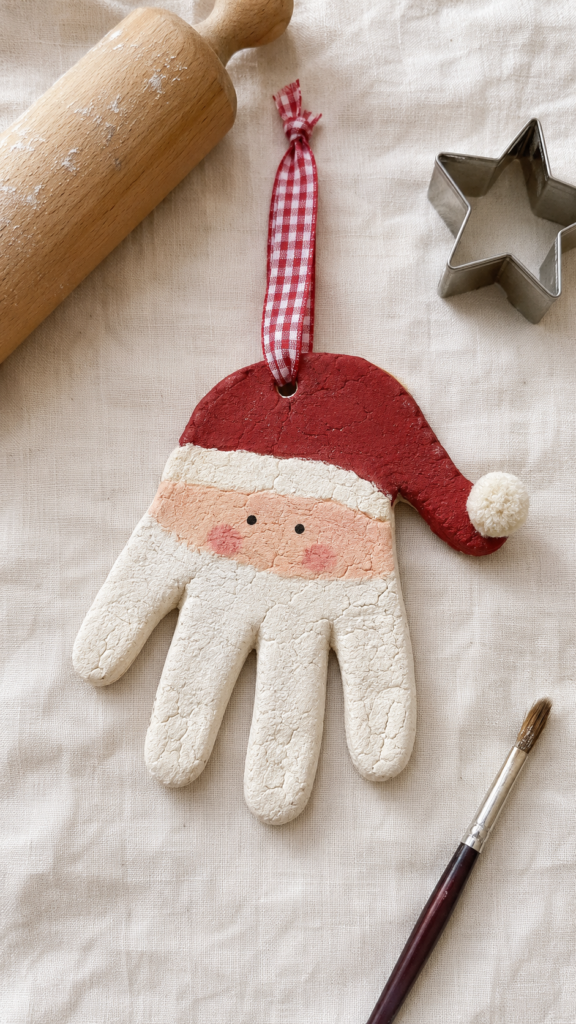
The difference between this and a painted handprint is that the shape itself is captured, not just the color.
Rolling out salt dough to about a half-inch thickness and pressing a hand straight down into it, firmly, but without twisting, leaves an actual mold of every crease and finger.
That’s what makes it worth learning to do right: once it’s dried and painted, what’s hanging on the tree isn’t a picture of a hand, it’s a cast of one.
How long it realistically lasts:
Done properly, this is genuinely a “keep forever” piece. Fully cured salt dough, painted and sealed, can last well over a decade, generations, even.
The failure point isn’t age, it’s trapped internal moisture from underdrying, which shows up as cracking or mold within the first year, usually discovered only when the ornament comes back out of storage the following Christmas.
Celebrate the fall season by creating 18 Handprint Fall Deer Crafts Kids Will Love Making, where little handprints transform into charming autumn deer and keepsake artwork.
3. Air-Dry Clay Santa Ornament
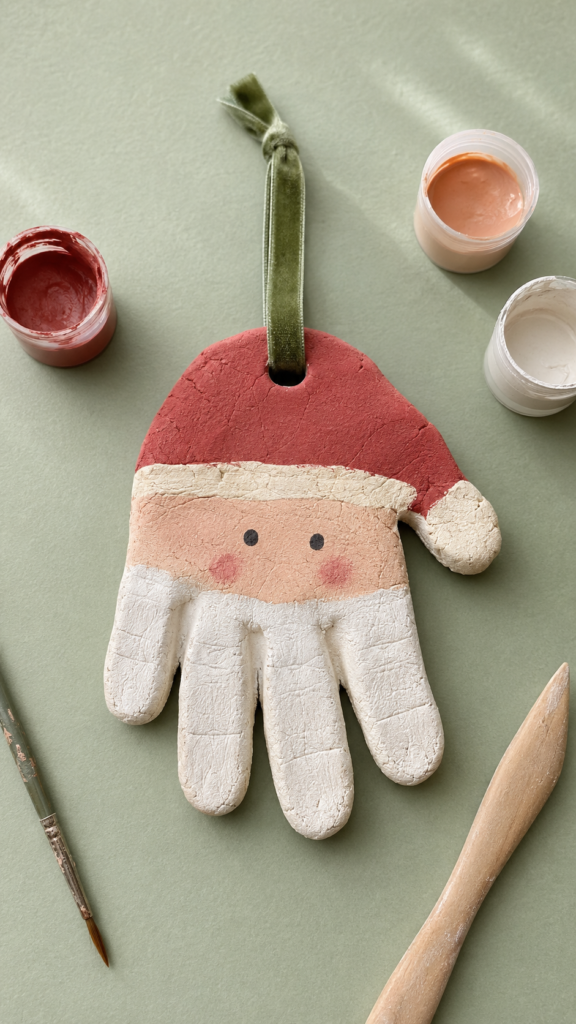
This works the same way as salt dough, press the hand into a rolled slab before it sets, but air-dry clay is built specifically to cure without an oven, so there’s no risk of a raw center hiding under a dry-looking surface.
Rolling it slightly thicker than salt dough, closer to three-quarters of an inch, gives the imprint enough depth to hold its detail as it dries and shrinks slightly, which air-dry clay does more than salt dough.
How long it realistically lasts:
Among Santa handprint crafts, this is one of the more stable long-term options, since air-dry clay doesn’t carry salt dough’s risk of trapped internal moisture.
Full curing takes longer, often several days to a week for a hand-sized piece, depending on thickness, but once cured all the way through and sealed, it holds up for decades without the cracking or mold risk that comes from rushing salt dough.
4. Painted & Framed Canvas Handprint Santa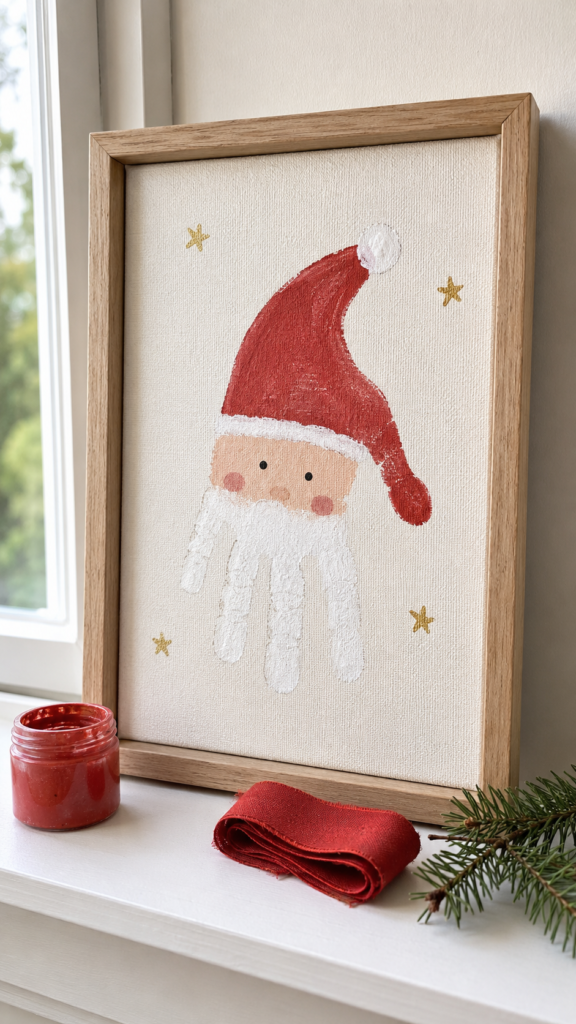
The same beard-hat-face color mapping used on paper gets pressed onto a small canvas instead, then framed or left as-is to stand on a shelf.
Canvas takes acrylic paint far better than paper does, so the colors go on more solidly and don’t soak in and dull the way paint can on regular cardstock.
How long it realistically lasts:
Acrylic paint on canvas is one of the more durable combinations here, canvas doesn’t yellow the way paper does, and acrylic holds its color well over time.
Kept out of direct sunlight, a painted canvas piece easily holds up for decades, making it one of the sturdier Santa handprint crafts on this list without needing a special sealant.
5. Handprint Santa Ornament in a Glass Bauble
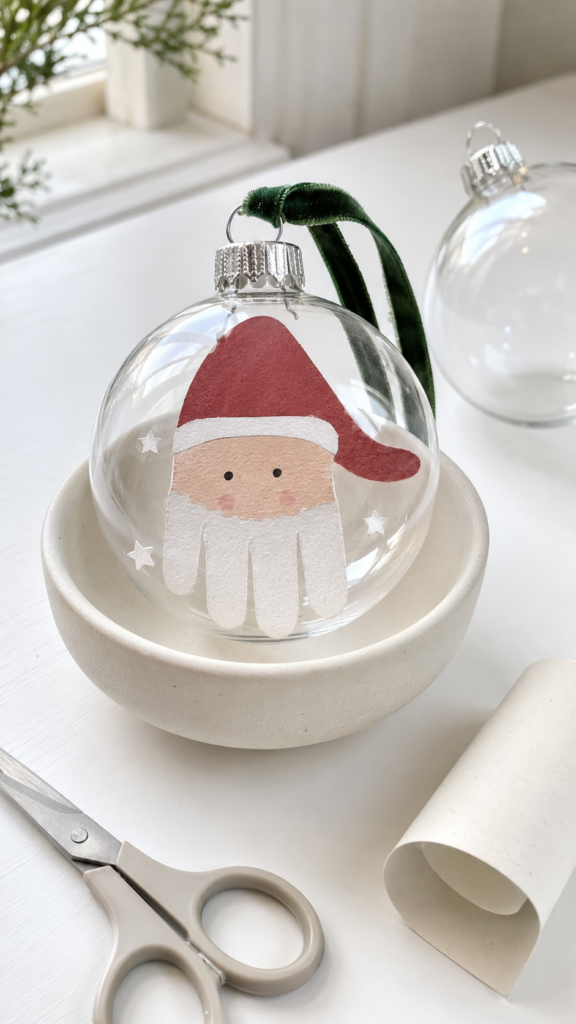
A small paper or cardstock handprint gets cut down to fit inside a clear glass bauble ornament, rolled slightly to slide through the opening, then unrolled once inside so it sits visible through the glass.
It’s one of the less common Santa handprint crafts online, and it solves a real problem the paper versions don’t, the glass shell keeps light, dust, and handling away from the paper itself.
How long it realistically lasts:
The glass does a lot of the preservation work here.
A handprint sealed inside a bauble isn’t exposed to the humidity or handling that damages a loose paper piece, so even standard paper tends to hold its color and shape noticeably longer inside glass than out in the open.
Kept out of direct sun, this version can realistically last well over a decade.
6. Handprint Santa Footed Ornament (3D Salt Dough)
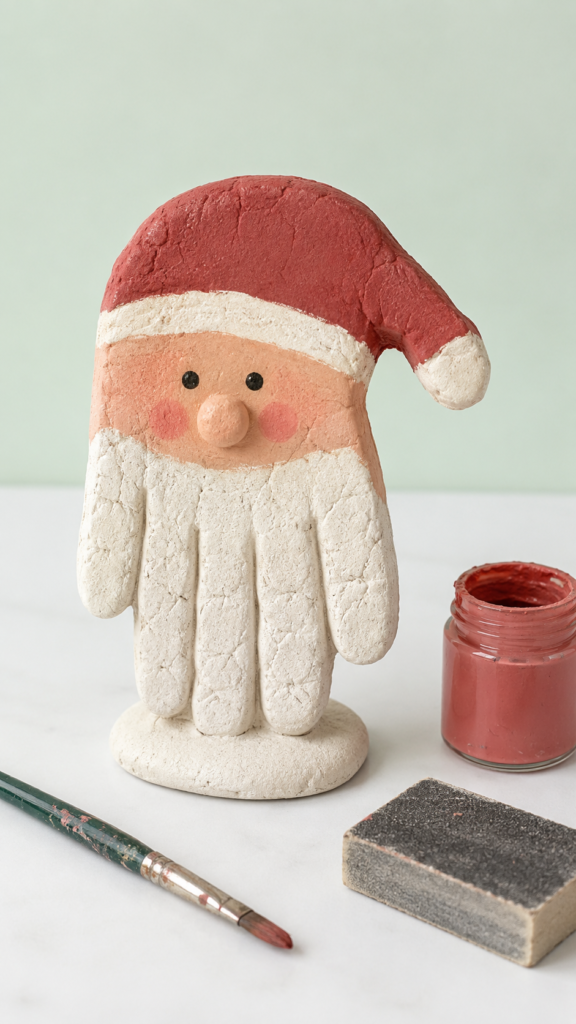
Instead of a flat imprint, the hand is pressed into a rounded ball of salt dough that’s been flattened only on the back, leaving the front slightly domed.
Adding a small pinch of dough at the base as a stand turns it into a free-standing piece rather than a hanging one, a small Santa figure a child’s hand shaped, meant to sit on a shelf or mantel rather than a tree.
How long it realistically lasts:
The same rules apply as any salt dough piece, full drying through the thickest part is what determines whether this lasts.
Because this version is thicker than a flat imprint, it needs more drying time to cure all the way through; rushing it is the single biggest risk. Done right, it holds up for decades, same as the flat version.
7. Fabric Handprint Santa (Stitched or Fabric Paint)
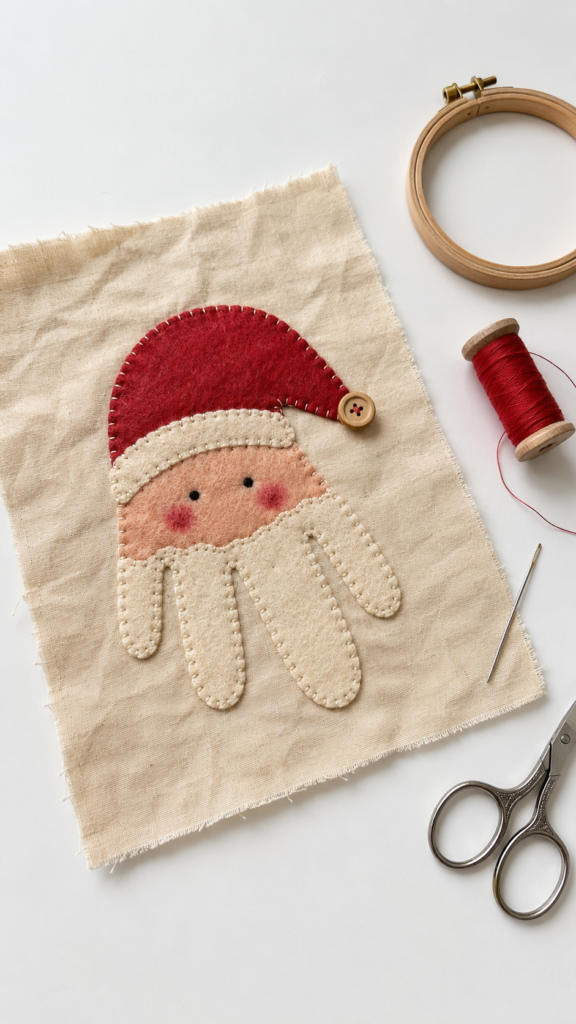
A hand is either painted with fabric paint directly onto muslin or cotton, or traced and cut from red and white felt and hand-stitched together, to make a soft, textile version of the same Santa design.
This is one of the few Santa handprint crafts that isn’t paper, dough, or clay-based, and it holds up differently because fabric flexes instead of cracking.
How long it realistically lasts:
Fabric paint on natural fiber holds color well for years, especially if kept out of direct sun and washed rarely, if ever, once finished as a keepsake rather than a wearable piece.
Felt versions, since they’re stitched rather than painted, avoid fading almost entirely, the main risk over time is loose stitching, not color loss, so a few reinforced stitches at stress points make this one of the more physically durable options on the list.
8. Handprint Santa Fridge Magnet (Air-Dry Clay, Flat)
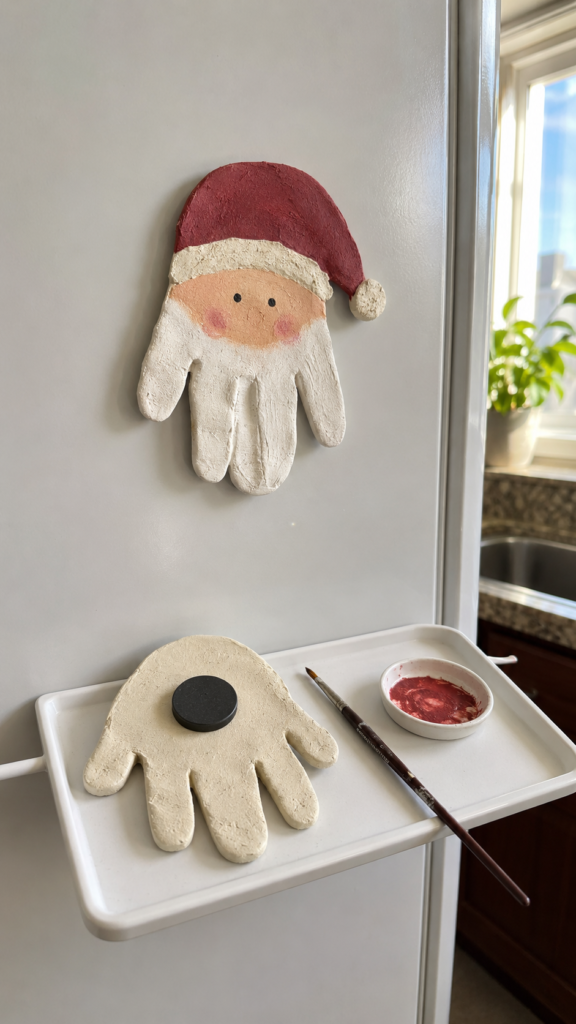
Pressing a flattened disc of air-dry clay, thin and even, closer to a quarter-inch throughout, gives the same handprint imprint as thicker pieces, but dries faster and works well as a magnet or small ornament, depending on what’s added to the back before it cures.
Among Santa handprint crafts, this one earns its place by being used daily rather than displayed once and packed away.
How long it realistically lasts:
Thinner clay cures faster and more evenly than a thicker piece, which lowers the risk of underdrying compared to a 3D version.
Sealed after painting, a flat clay piece holds up well over a decade, though a magnet backing sees more daily handling, so checking the glue bond occasionally helps it last as long as the clay itself does.
9. Handprint Santa Wood Slice Ornament
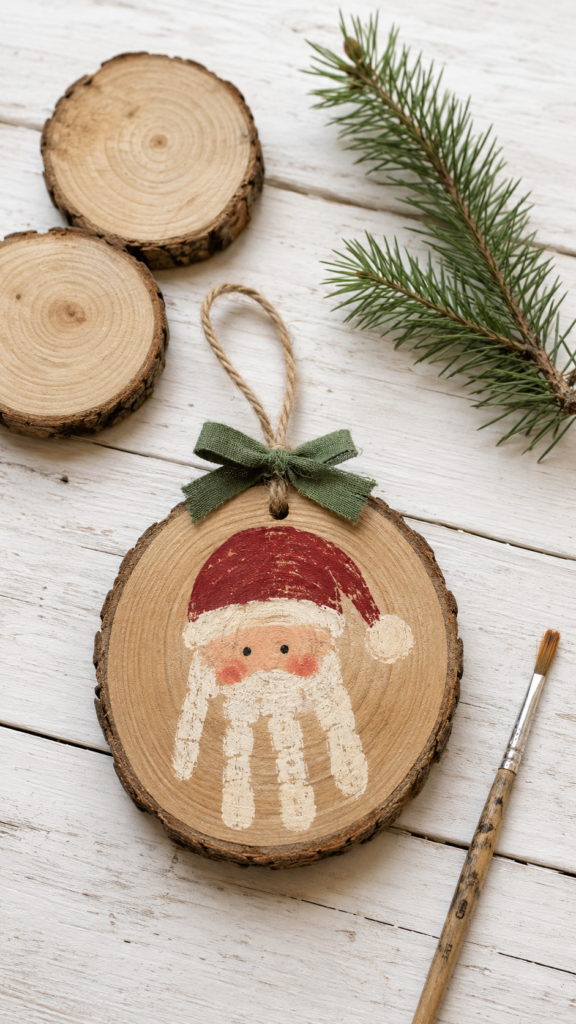
Sanded wood slices, the kind sold pre-cut for coasters, make a sturdier and more rustic base than paper or canvas.
Painting the handprint directly onto the wood lets some of its natural grain show through around the edges, giving it a warmer, farmhouse look most Santa handprint crafts don’t have.
How long it realistically lasts:
Wood holds paint well and doesn’t yellow the way paper does. The real risk is humidity, untreated wood can warp or crack over time in damp conditions.
A light coat of wood sealant before painting, and again after, protects both the wood and the paint underneath it. Done that way, a wood slice ornament realistically holds up for decades on a tree or shelf.
10. Handprint Santa Ornament in a Glass Bauble
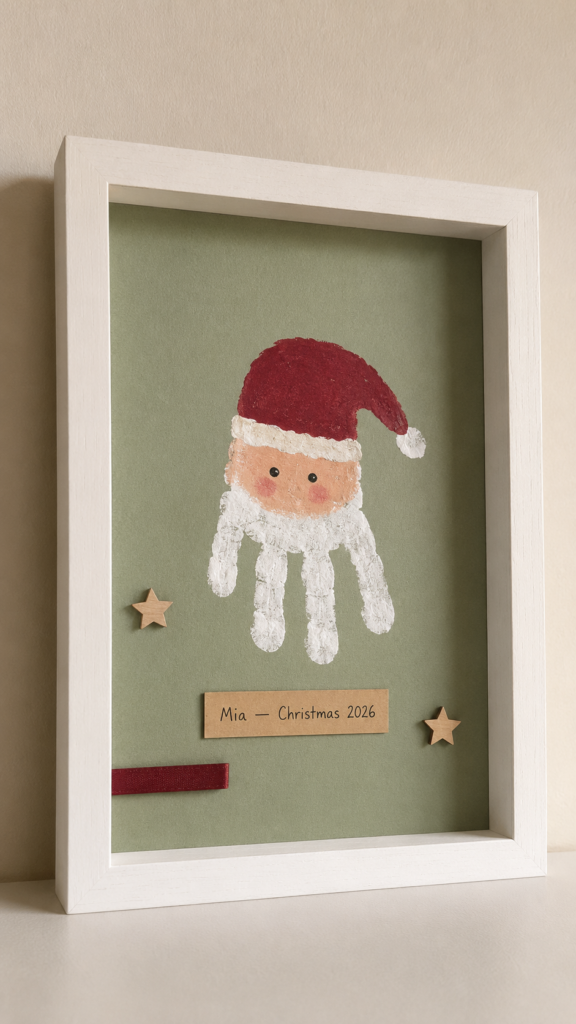
A small paper or cardstock handprint gets trimmed down, rolled to fit through the opening of a clear glass bauble, then unrolled once inside so it sits visible through the glass.
It’s one of the less common Santa handprint crafts, and it solves a real problem the plain paper versions don’t, the glass shell keeps light, dust, and handling away from the paper itself.
How long it realistically lasts:
The glass does a lot of the preservation work.
A handprint sealed inside a bauble isn’t exposed to the humidity or handling that damages a loose paper piece, so even standard paper tends to hold its color and shape noticeably longer inside glass than out in the open.
Kept out of direct sun, this version can realistically last well over a decade.
Keep little hands busy before decorating the house with 15 Christmas Tree Crafts for Toddlers Can Finish Before the Real Tree Goes Up, a collection of easy, festive projects perfect for preschoolers and young children.
11. Handprint Santa Beard Beard Made From Real Cotton Balls
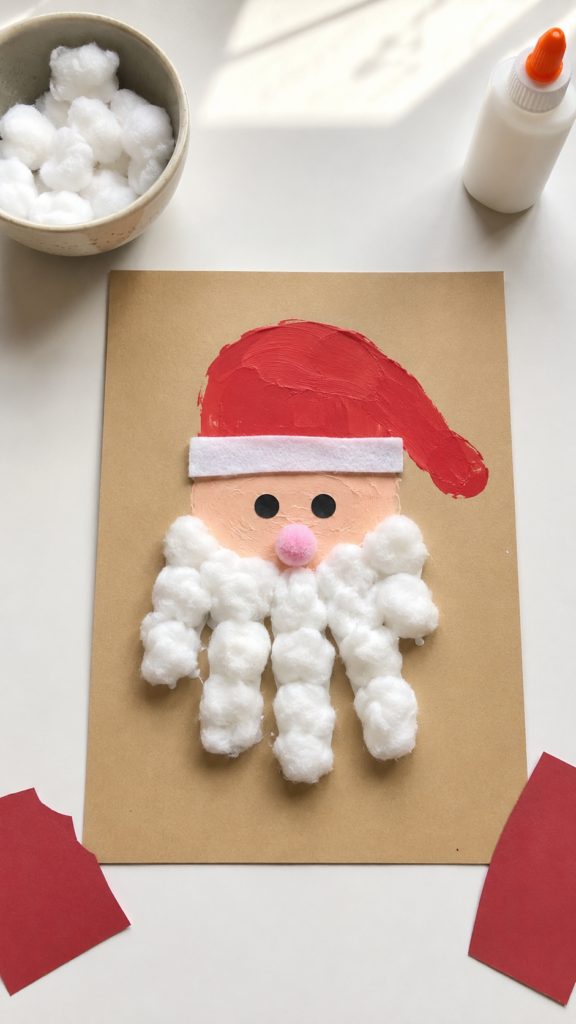
Instead of painting the beard white, the fingers get coated in glue and pressed straight onto a layer of cotton balls, letting the texture do the work paint can’t.
Once dry, the palm and thumb still get painted red and skin-tone the usual way, but the beard itself has real dimension and softness a flat painted section doesn’t.
How long it realistically lasts:
Cotton balls yellow faster than most other materials on this list, especially with any exposure to sunlight, and glue can loosen over years as the paper backing shifts or flexes.
A light coat of clear sealant over the cotton slows the yellowing noticeably, and mounting the finished piece under glass or in a shadow box protects it from the handling that tends to loosen glued-on texture pieces first.
12. Handprint Santa Puffy Paint Beard
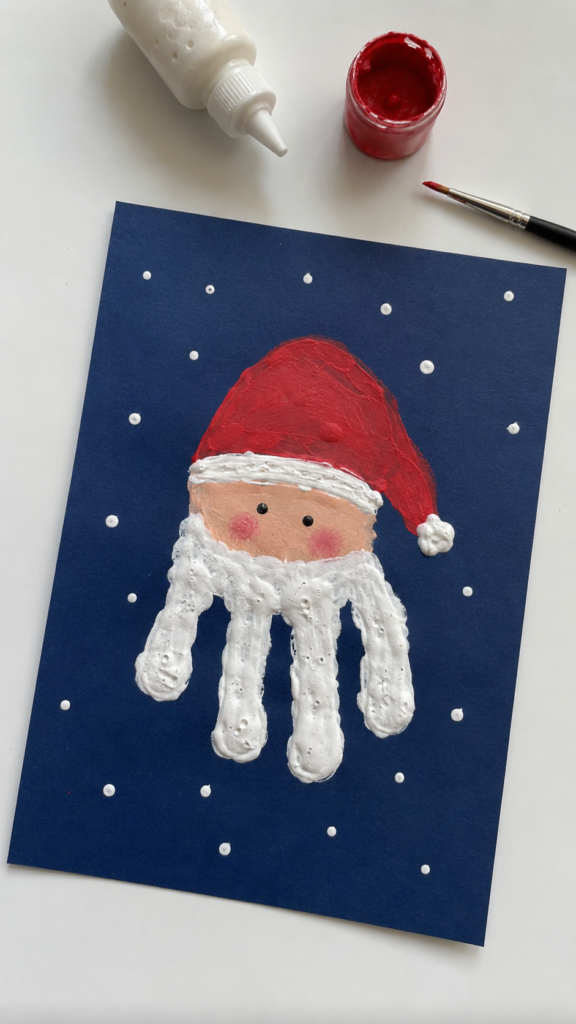
A dimensional or “puffy” paint, the kind that rises slightly and sets with texture, replaces regular paint for just the beard section, giving it a raised, snowy look once dry without needing any extra materials like cotton.
The rest of the handprint, hat and face, still uses regular paint underneath.
How long it realistically lasts:
Puffy paint holds its texture and shape well once cured, and it doesn’t yellow the way cotton does.
The main long-term risk is cracking if the paint layer goes on too thick in one pass, since a thick layer can dry unevenly on the outside before the inside fully sets.
Applied in one thin, even layer rather than a heavy blob, it holds up for many years without losing its raised texture.
13. Handprint Santa With Handwritten Milestone Details
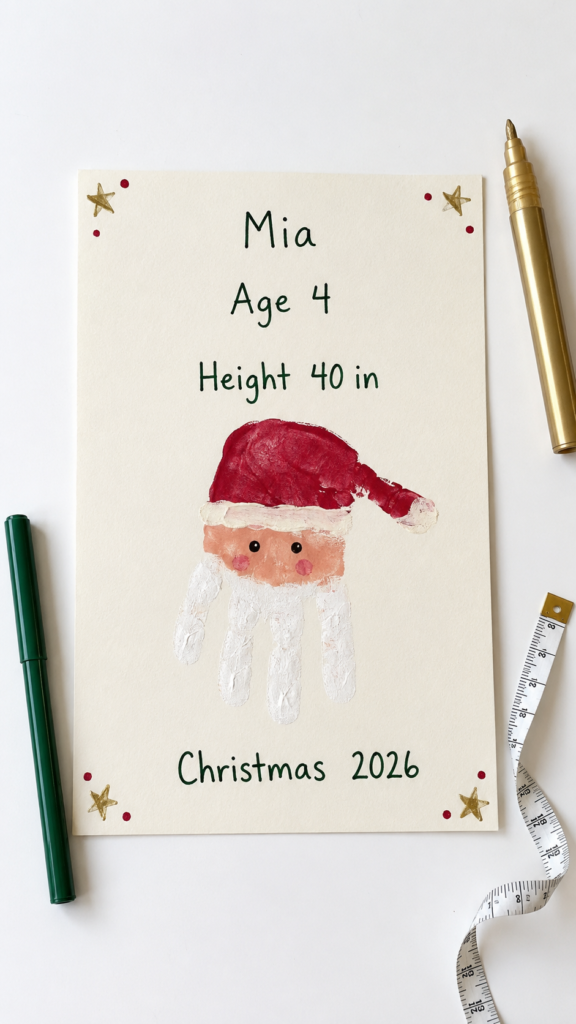
This one uses the same paper or canvas handprint as the earlier ideas, but the child’s age, height, and the date get written directly on the piece, often along the border or on the back, turning it from a picture into a dated record.
It’s a small addition, but it’s the difference between a keepsake that says “a child made this” and one that says exactly which child, and when.
How long it realistically lasts:
The lifespan depends entirely on whatever base material was used underneath, paper, canvas, or wood, so the same rules from those entries apply here.
What this version adds isn’t durability, it’s meaning: even if the paint fades slightly over the decades, handwritten details on the back or border remain legible and often matter more than the visual condition of the piece itself.
Need something festive in a hurry? Last Minute Christmas Craft In 30 Minutes is packed with quick holiday projects you can finish even on your busiest day.
14. Handprint Santa Photo Ornament
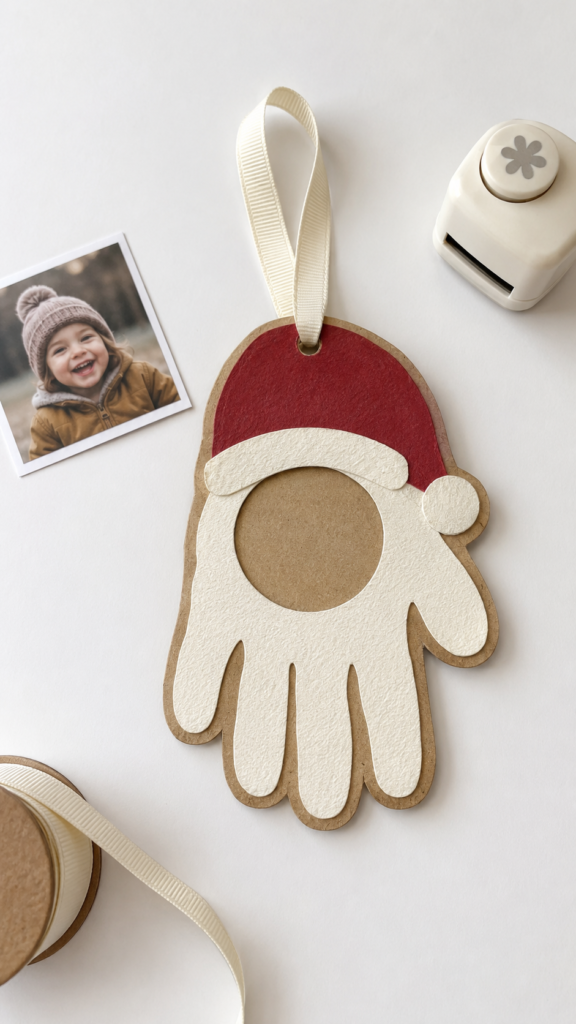
A small photo of the child from that same Christmas gets glued to the back or center of a painted handprint Santa, so the ornament pairs a physical print of their hand with an actual image of them at that age.
It’s a simple pairing, but it solves something the handprint alone doesn’t, a hand shape says “small,” while a photo says exactly how small, and whose.
How long it realistically lasts:
Photo paper fades under UV exposure the same way regular paper does, so keeping this one out of direct sunlight matters even more than with a plain handprint.
Printing the photo on matte rather than glossy paper resists fading slightly better, and mounting the whole piece under a light coat of sealant, or inside a glass ornament shell, protects both the print and the handprint together.
Done that way, this stands among the more sentimental of the Santa handprint crafts here, since it captures two things at once instead of one.
15. Handprint Santa Family Ornament (Multiple Handprints, One Piece)
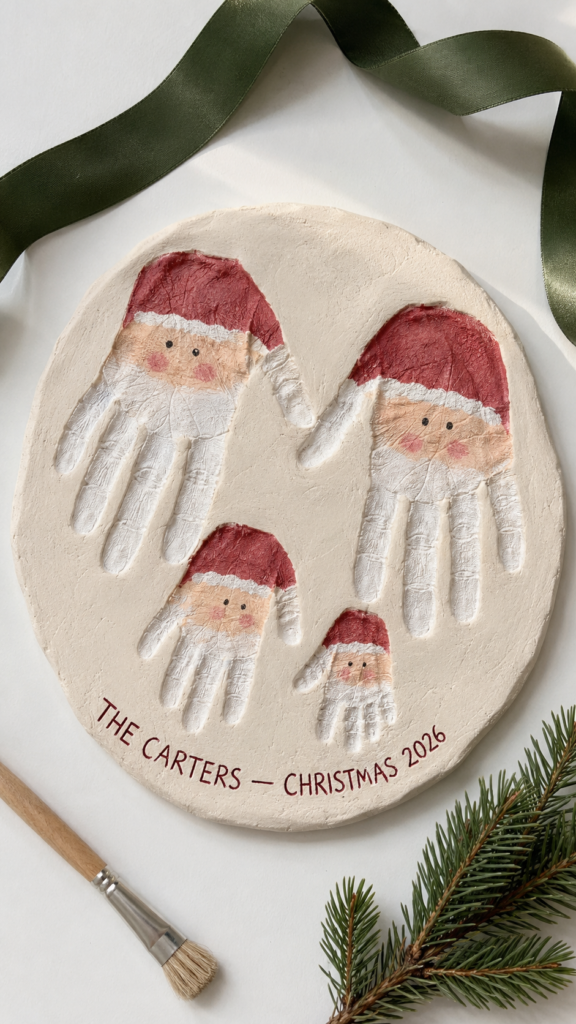
Rather than a single child’s handprint, this version presses several family members’ hands, child, sibling, parent, into the same piece of salt dough or clay, layered or arranged side by side to form one combined Santa design.
It turns a single-child keepsake into something that captures a specific year for the whole household, not just one person’s hand size.
How long it realistically lasts:
The same drying rules apply here as with any dough or clay piece, but with one added consideration, multiple handprints pressed close together often mean uneven thickness across the piece, so the thickest section needs to be fully dry before painting or sealing, not just the thinnest.
Done properly, this becomes one of the more meaningful Santa handprint crafts on the list precisely because it can’t be recreated the same way twice, the hands involved will have changed by next year.
Give everyday items a second life with DIY Christmas Crafts From Recycled Materials, featuring creative, budget-friendly decorations and gifts made from things you already have.
How to Actually Preserve These Long-Term
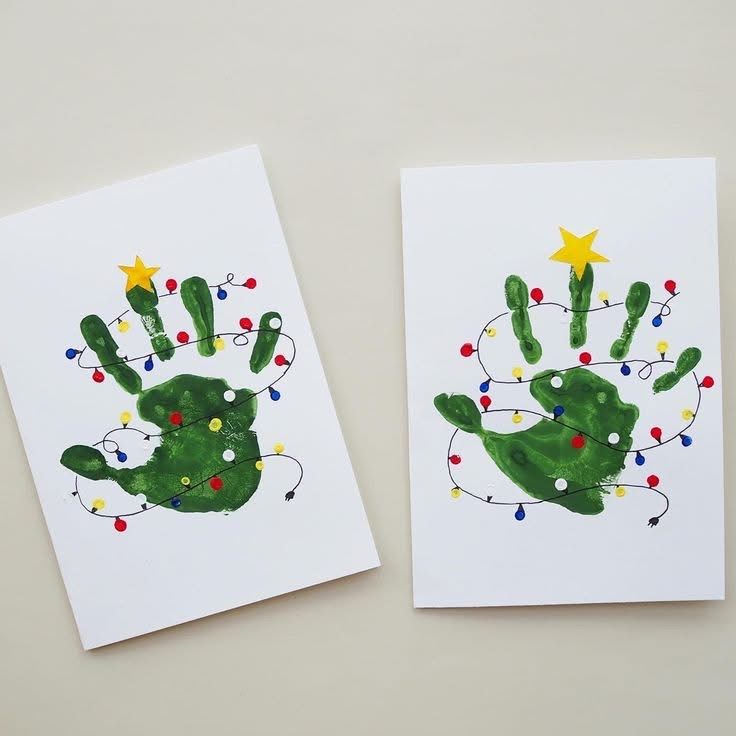
Photo credit: @ Georgie Dobbs
Making one of these well is only half the job, how it’s finished and stored afterward is what decides whether it survives ten years or ten months.
- Dry salt dough and air-dry clay all the way through before painting or sealing. Surface dryness isn’t the same as full-through dryness, especially in thicker sections like a pressed palm.
Air-drying takes several days to a week depending on thickness; low-oven drying speeds this up but needs a long, low setting rather than a quick blast of heat, since rushing it is what traps moisture inside.
- Check for full dryness before moving to the next step. A piece that feels cool or slightly damp to the touch anywhere, especially in the thickest part, isn’t ready.
Painting or sealing over a damp interior locks the moisture in rather than letting it finish escaping.
- Use a UV-safe, matte sealant on anything paper-based or painted. Regular paper and painted surfaces are both vulnerable to fading from light exposure over the years. A light, even coat of a UV-resistant sealant slows that fading significantly and is a step most versions of this craft skip entirely.
- Store everything flat, not stacked or crammed into a box. Stacking puts pressure on paper, dough, and clay pieces alike, which can crack a dried piece or bend a paper one over time.
A shallow, rigid box with pieces laid flat protects the shape far better than a deep bin where everything gets piled together.
- Keep storage spaces dry and temperature-stable. Damp basements encourage mold in dough and clay, while hot attics can warp paper, wood, and painted surfaces.
A closet or storage space that stays roughly room temperature year-round is a safer home for these than anywhere with big humidity or heat swings.
- Keep finished pieces out of direct sunlight, even during display. A few weeks on a mantel each Christmas is fine, but a piece left permanently in direct sun, a windowsill, for example, fades and yellows far faster than one brought out seasonally and stored the rest of the year.
- If an older piece is already cracking, don’t try to reseal it as-is. A crack in dried salt dough or clay usually means moisture is still trapped somewhere inside, and sealing over that just hides the problem.
Letting it sit somewhere dry and well-ventilated for a few more days, then checking again, is safer than sealing a still-damp crack shut.
- If a paper piece has already started to fade or yellow, sealing won’t reverse the damage, but it stops it from getting worse. A UV-resistant sealant applied at that point protects whatever detail and color is left, and moving the piece into a shadow box or frame with UV-protective glass adds another layer of protection going forward.
Fill your home with handmade holiday charm through DIY Christmas Crafts to Make This Holiday Bright, where you’ll find easy decorations, gifts, and festive projects for the whole family.
Common Mistakes That Ruin These Keepsakes
Most of what shortens the life of these crafts isn’t a rare accident, it’s one of a handful of predictable mistakes, made early on, that only shows up months or years later.
1. Underbaking or under-drying salt dough. This is the single biggest cause of failure on this list. A piece that looks dry on the outside can still be damp in the middle, especially in thicker sections like a pressed palm.
That trapped moisture is what leads to cracking or mold later, often discovered only once the ornament comes back out of storage the following year.
2. Applying paint too thick in one layer. A heavy coat of paint, especially on paper or dough, dries unevenly, the outer surface sets before the layer underneath finishes drying, and that mismatch is what causes cracking as it cures.
Thin, even coats, built up in a couple of light layers rather than one heavy one, hold up far better over time.
3. Skipping a sealant on paper or painted pieces entirely. Without any protective layer, paper yellows and painted color fades noticeably faster, especially with any light exposure.
This step gets skipped often simply because it’s not mentioned in most instructions, not because it’s difficult.
4. Storing ornaments in damp basements or hot attics. These are two of the most common storage spots for holiday decorations, and both work against these keepsakes.
Humidity encourages mold in dough and clay, while heat can warp paper, crack paint, and fade color far faster than room-temperature storage.
5. Stacking pieces on top of each other in storage bins. Weight from other decorations pressing down on a dried salt dough or clay piece can crack it, even years after it was made and seemingly fine.
Laying pieces flat, with nothing stacked directly on top, protects the shape long after the initial drying is done.
6. Leaving a piece on permanent display in direct sunlight. A few weeks out each Christmas is fine, but year-round placement on a sunny windowsill or shelf accelerates fading and yellowing far faster than seasonal display followed by proper storage.
7. Assuming “dry to the touch” means fully cured. This mistake connects back to the first one, surface dryness happens well before the inside of a thicker piece is actually finished curing.
Checking the thickest part of a piece, not just the surface, is the only reliable way to know it’s actually ready for paint or sealant.
FAQ
- Can these handprint crafts be made without any paint?
Yes, salt dough, air-dry clay, and cut-paper versions can all be made using texture and color from the material itself rather than paint, which also makes them a safer option for very young hands or sensitive skin.
2. Is salt dough safe to make with a child who might touch it to their mouth? Salt dough itself is non-toxic, made from flour, salt, and water, but the high salt content makes it unpleasant enough to discourage most kids from wanting a second taste.
Supervision is still recommended for very young children during the pressing step.
3. How far in advance of Christmas should these be made?
Salt dough and clay versions need several days to over a week to fully dry, so starting at least two weeks before Christmas leaves enough buffer time.
Paper and canvas versions can be made same-day, since they only need paint to dry rather than the material itself curing.
4. Can a handprint craft be resized or added to as a child grows?
Not on the same piece, but a new handprint made each year, dated and stored together, becomes a size-by-size record over time, several of the ideas above work well repeated annually for exactly that reason.
5. What’s the best way to display several years of handprint ornaments together?
Grouping them by year on a small dedicated ornament tree, garland, or shadow box display keeps them protected while still visible, rather than mixed in loosely with the rest of the holiday decorations.
Conclusion
Fifteen ideas, and every one of them comes down to the same two things: a small hand, and a material that’s actually built to hold its shape for years instead of one Christmas.
That’s really the difference between a craft and a keepsake, not how it looks the day it’s made, but whether it’s still there, intact, the day someone goes looking for it again.
Pick whichever one fits this year, a quick paper Santa for a card, a slower salt dough ornament for the tree, and give it the time it actually needs to dry and cure properly. That patience now is what makes it worth pulling out again in ten years.
That’s the whole point of Santa handprint crafts done the right way, not just something made for this Christmas, but something still worth keeping long after the hand that made it has grown.