This post contains affiliate links. This means I may earn a small commission if you purchase through my links at no extra cost to you.
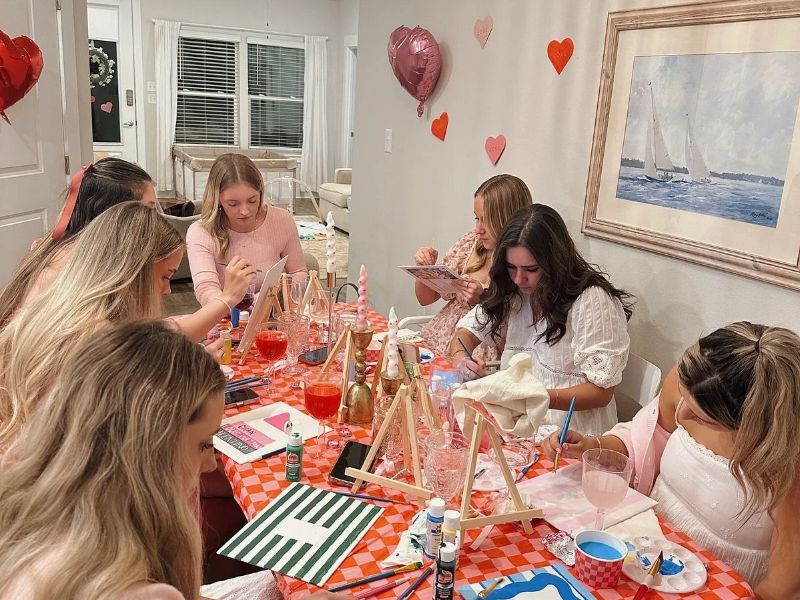
Make your Galentine’s Day craft night ideas count with creative projects women can enjoy together, personalise and take home as keepsakes.
Galentine’s Day began as a fictional celebration on the television sitcom Parks and Recreation in 2010, but the idea soon caught on beyond the screen.
In the episode, Leslie Knope brings her female friends together on February 13 to celebrate their friendship, complete with personalised handmade gifts.
What started as a light-hearted television tradition has grown into an occasion for women to appreciate the friends who make life more meaningful.
And since those original gifts were handmade, a creative get-together feels like a fitting way to celebrate.
These 15 Galentine’s Day craft night ideas for women offer different projects to make with friends, from personalised keepsakes to decorative pieces and thoughtful handmade gifts everyone can take home.
Sharing snacks is part of what makes a Galentine’s gathering special, and 5 Cozy Galentine’s Charcuterie Board Ideas for Sharing, Snacking, and Connection offers inspiration for putting together a board everyone can enjoy.
Galentine’s Day Craft Night Ideas
1. Air-Dry Clay Trinket Dishes With Personal Details
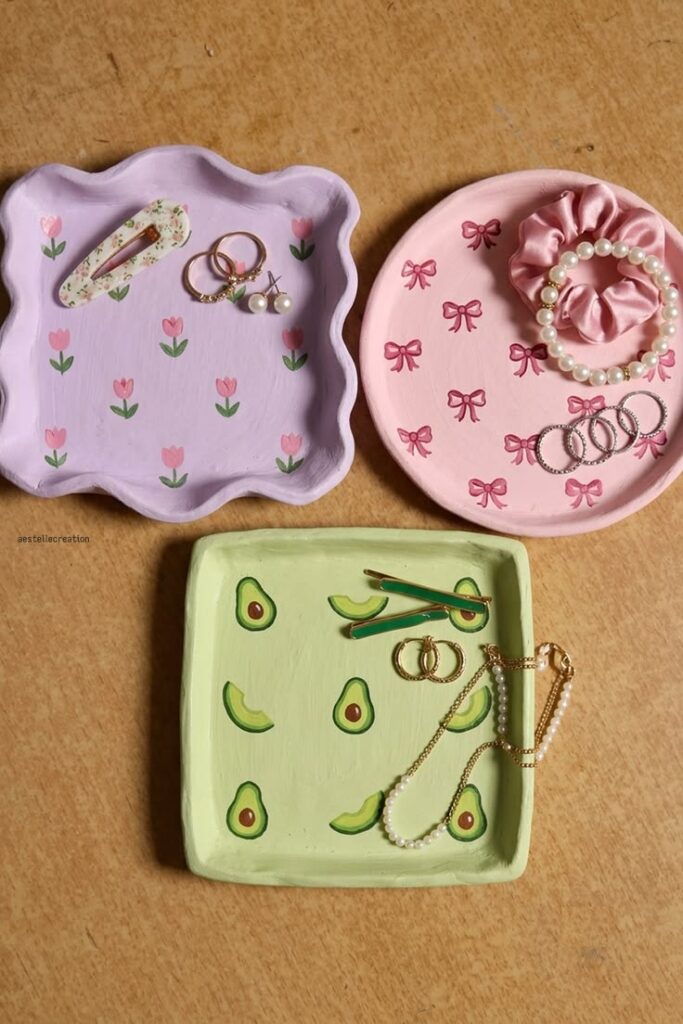
A little dish for rings, earrings or everyday jewellery is something your friends can keep on a bedside table or dressing table long after Galentine’s Day.
The lovely part of this craft is that nobody has to make the same design.
Each woman can choose her own shape, colours and personal details, making the finished dishes feel like individual keepsakes rather than identical party favours.
How to Make the Trinket Dishes
Air-dry clay is a good choice because it hardens without a pottery kiln. For a beginner-friendly project, make small, shallow dishes rather than deep bowls.
A finished width of about 10–12 cm gives enough room for a few pieces of jewellery without using too much clay.
- Prepare the clay: Divide the clay into individual portions and knead each one briefly until it feels soft and workable. Keep unused clay sealed in its original packaging or an airtight bag so it does not begin drying while everyone is working.
- Roll it evenly: Place the clay on baking paper or another clean, smooth work surface. Use a rolling pin to flatten it to approximately 5–6 mm thick. Turn the clay as you roll so the centre and edges have a similar thickness. Very thin edges can become fragile, while uneven thickness may cause the dish to dry unevenly.
- Cut out the shape: Use a round cutter, saucer or small plate as a guide. Circles and ovals are easy for beginners, but heart-shaped and flower-shaped cutters can give the dishes a more personal look.
- Create the curved dish: Place the clay circle over the outside of a small, upside-down bowl covered with a smooth piece of plastic wrap. Gently press the centre and edges to form a shallow curve. Avoid pushing too hard, as this can stretch the clay or make one side thinner than the other.
- Smooth the edges: Run a fingertip lightly along the rim to remove rough edges. A little water can help smooth small imperfections, but avoid adding too much because excess water can make the clay difficult to handle.
Personalise Each Dish Before It Dries
This is where everyone can give the project her own character. Set out alphabet stamps, small texture tools, lace, leaves, buttons and wooden skewers so guests can experiment with different patterns.
Some simple design options include:
- Pressing each person’s initials into the centre or underneath the dish.
- Making tiny floral impressions around the rim using leaves or flower-shaped stamps.
- Creating a scalloped edge by gently pinching sections of the clay.
- Adding small dots, curved lines or geometric patterns with the end of a wooden skewer.
- Making a simple heart or star impression for a friend who prefers a more playful design.
Keep the impressions shallow and avoid adding thick pieces of clay to the rim, as uneven sections can take longer to dry and may be more likely to crack.
What to Prepare for the Craft Night
For a group, arrange the materials on a shared table so guests can choose their designs without waiting for one person to finish using everything.
- Air-dry clay
- Small rolling pins
- Baking paper or smooth work mats
- Round, oval and heart-shaped cutters
- Small bowls for shaping
- Alphabet stamps and texture tools
- Wooden skewers or modelling tools
- A little water and soft cloths
- Acrylic paints and small paintbrushes for the finishing stage
- Compatible clear acrylic varnish
Alphabet stamps and clay texture tools are useful additions if you want everyone to have several ways to personalise a dish. Small bowls in different sizes also give guests a choice of shapes.
Allow Time for Drying and Painting
One detail worth explaining to guests is that the dishes will not be completely finished during the gathering. Air-dry clay needs time to harden before it can be painted.
Crayola, for example, states that its air-dry clay generally takes about 24 hours to dry to the touch and 72 hours to dry completely. The actual time depends on the clay brand, the thickness of the piece and the surrounding conditions.
Leave each dish on its mould initially so it can hold its shape, then allow it to finish drying according to the clay manufacturer’s instructions.
Once completely dry, guests can paint their dishes with acrylic paint, adding initials, flowers, coloured borders or simple patterns.
A compatible acrylic varnish can be applied after the paint has dried, following the product instructions. Test the varnish on a small area first.
A Note About Using the Finished Dishes: These are decorative trinket holders, not food-serving dishes. Air-dry clay is not waterproof, and applying varnish does not make it waterproof.
Keep the finished pieces dry and use them for jewellery, hair clips, keys or other small items rather than food or anything wet.
A relaxed evening with friends doesn’t have to involve complicated plans. Creating a Cozy Galentine’s Night That Feels Effortless and Fun shares ideas for making the gathering enjoyable and easy to organise.
2. Pressed-Flower Glass Frame Art
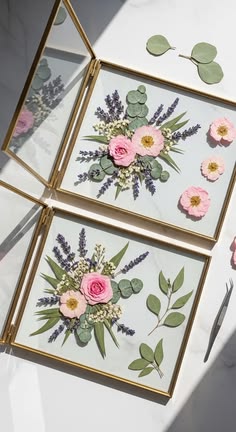
Flowers from a memorable occasion, a favourite garden or even a simple afternoon walk can become something worth keeping when arranged in a glass frame.
For Galentine’s Day, each guest can create a small botanical picture using flowers that remind her of a friend, a special memory or a colour combination she loves.
The important preparation is having the flowers pressed and completely dry before the craft night. Fresh flowers contain moisture, so placing them between glass panes while still damp can lead to deterioration.
Traditional book pressing can take two to three weeks, depending on the flowers and drying conditions.
How to Make the Framed Flower Art
- Prepare the flowers beforehand: Choose relatively flat flowers and leaves, such as small daisies, ferns, pansies and delicate foliage. Place them between sheets of absorbent paper inside a heavy book or flower press. Keep the specimens from overlapping, add weight and leave them until completely dry.
- Choose the frame: Floating glass frames are suitable for thin pressed flowers because the arrangement can be seen from both sides. A regular frame with an acid-free backing is another option, particularly when guests want a coloured background.
- Arrange the composition: Clean the glass before placing the flowers. Use tweezers to position the delicate petals and leaves. Try a small cluster in one corner, a single flower in the centre or a balanced arrangement with leaves surrounding a larger bloom.
- Keep the design simple: Avoid piling too many flowers on top of one another. Thick arrangements may prevent the glass panes from closing properly, while crowded designs can make the individual flowers difficult to see.
- Secure and close the frame: For a floating frame, the two panes hold the thin flowers in place when assembled. For a paper-backed frame, use tiny amounts of suitable clear-drying adhesive on the stems or thicker parts rather than spreading glue across delicate petals.
Materials to Prepare
Pressed flowers and leaves, floating glass frames, fine tweezers, acid-free cardstock for alternative backgrounds, small scissors, soft cleaning cloths and suitable craft adhesive.
Give Guests Room to Personalise Their Designs
Set out flowers in different colours and shapes rather than giving everyone identical selections. Guests can also add a small name, date or short friendship message on the backing card.
Remind them that pressed flowers are fragile and can fade with prolonged exposure to direct sunlight, so the finished frames are better displayed away from sunny windows.
Moms who want a break from their usual routines can find inspiration in 30 Craft Night Ideas for Moms Who Need One Night That’s Just Theirs, with activities to enjoy during a night out or at home.
3. Marbled Stationery Sets
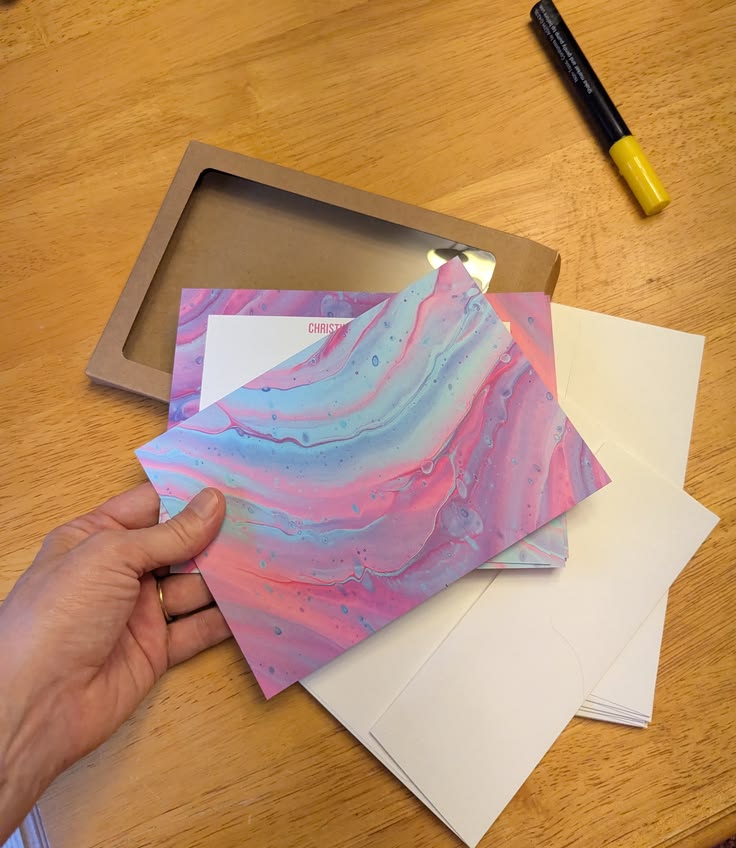
Plain stationery can look quite different when decorated with flowing patterns of colour. Marbling is a good choice for friends who enjoy experimenting with art but may not want to draw or paint detailed pictures.
The pattern forms through floating colours that are gently moved across a prepared surface before paper is placed on top to pick up the design.
For this Galentine’s Day craft, guests can make matching stationery sets containing note cards, envelopes, bookmarks and gift tags. Each person can choose a colour combination, so the finished pieces have a coordinated look without being identical.
How to Make Marbled Paper
There are different marbling methods, so choose one process and prepare the materials according to its instructions. A beginner-friendly option is a ready-to-use paper marbling kit.
- Prepare the marbling tray: Pour the kit’s prepared marbling solution into a shallow tray large enough to hold the paper. Follow the manufacturer’s instructions for mixing and preparing the solution; different products do not all use the same liquid.
- Add the colours: Use droppers or small pipettes to place a few drops of marbling paint onto the surface. Start with two or three colours so the pattern remains clear.
- Create the pattern: Drag a skewer or stylus gently through the floating colours to form waves, loops or feather-like designs. Avoid stirring too much, as this can muddy the colours.
- Transfer the design: Lay a sheet of suitable paper carefully over the surface. Lower it evenly so the paper makes contact without trapping large air bubbles.
- Lift and dry: Remove the paper according to the kit instructions, then rinse it if the process requires rinsing. Lay it flat or hang it to dry as directed.
The Stickley Museum’s starch-based marbling activity demonstrates another method using a shallow starch bath, thinned acrylic paint and heavyweight paper.
The paint is swirled on the surface before the paper is laid over it and lifted to dry.
Turn the Marbled Sheets Into a Stationery Set
Once the sheets are dry, cut them into useful sizes for folded note cards, envelopes, bookmarks and gift tags. A paper trimmer helps create straight edges, especially when several guests are making matching sets.
Leave enough plain space on writing cards so the marbled pattern does not make handwritten messages difficult to read.
Materials to Prepare
A paper marbling kit or the supplies for one chosen marbling method, shallow trays, droppers, styluses or wooden skewers, heavyweight paper, protective table covers, paper towels, drying space, scissors and a paper trimmer.
One useful arrangement is to let guests marble larger sheets first, then cut them into smaller stationery pieces after drying.
This gives everyone several coordinated items from the same design rather than one decorative sheet that may never be used.
A bridal shower can be even more memorable when guests make something together. The Most Creative Bridal Shower Craft Night Ideas for the Bride and Her Girls has creative activities to bring everyone into the celebration.
4. Custom-Printed Tote Bags With Foam Stamps
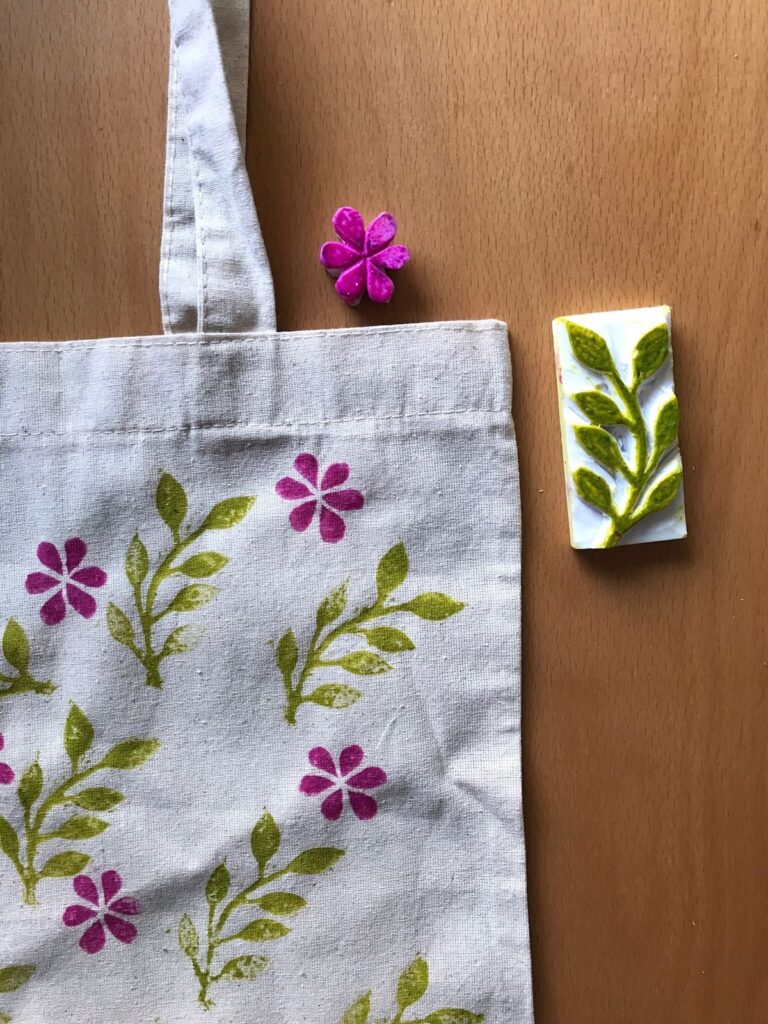
Reusable canvas tote bags are practical gifts, but plain ones can look much more personal with a design made by the owner.
This project gives each guest an opportunity to create something she can carry for shopping, books, craft supplies or everyday errands.
Foam stamps make the process manageable for beginners because there is no need to draw directly onto fabric. Guests can repeat a simple shape, combine several stamps or create a border around the bag.
How to Print the Tote Bags
- Prepare the bags: Use clean canvas or cotton tote bags. Place a piece of cardboard inside each bag to stop ink from transferring to the other side.
- Plan the design: Before applying ink, arrange the foam stamps on a sheet of paper to decide where the pattern should go. This helps prevent overcrowding and gives guests a chance to test their layout.
- Apply the fabric ink: Use a small brayer or foam brush to spread a thin, even layer of textile ink over the stamp. Too much ink can fill the fine details and make the printed shape look blurry.
- Press the stamp onto the fabric: Place the stamp on the tote and press evenly without sliding it. Lift it straight up to avoid smudging the design.
- Build the pattern: Repeat the process with different stamps, leaving enough space between shapes. Guests can make a row of flowers, scattered hearts, initials or a simple geometric pattern.
- Allow the design to dry: Follow the ink manufacturer’s drying and curing instructions before using or washing the tote.
Designs Guests Can Try
- Repeated small flowers across one side of the bag.
- A row of hearts or stars along the bottom edge.
- Initials surrounded by leaves or simple decorative shapes.
- A scattered pattern using two or three colours.
- One large central motif with smaller shapes around it.
Materials to Prepare
Plain canvas tote bags, foam stamps, fabric or textile printing ink, a brayer or foam brushes, cardboard inserts, scrap paper for testing, table covers and paper towels.
Choose the Right Ink
Regular craft paint is not automatically suitable for fabric that will be folded, carried and washed. Use textile ink or fabric paint designed for the material, and check whether it requires heat-setting or another curing process.
Instructions vary by brand, so do not assume that every printed tote can be washed after the same amount of drying time.
For a craft night, guests can finish printing their designs during the gathering, but the bags should be taken home to dry and cure fully before use.
Birthday celebrations can take a creative turn with Birthday Craft Night Party Themes, Ideas and Everything in Between, which offers inspiration for planning a fun evening around crafts.
5. Mini Accordion Friendship Zines
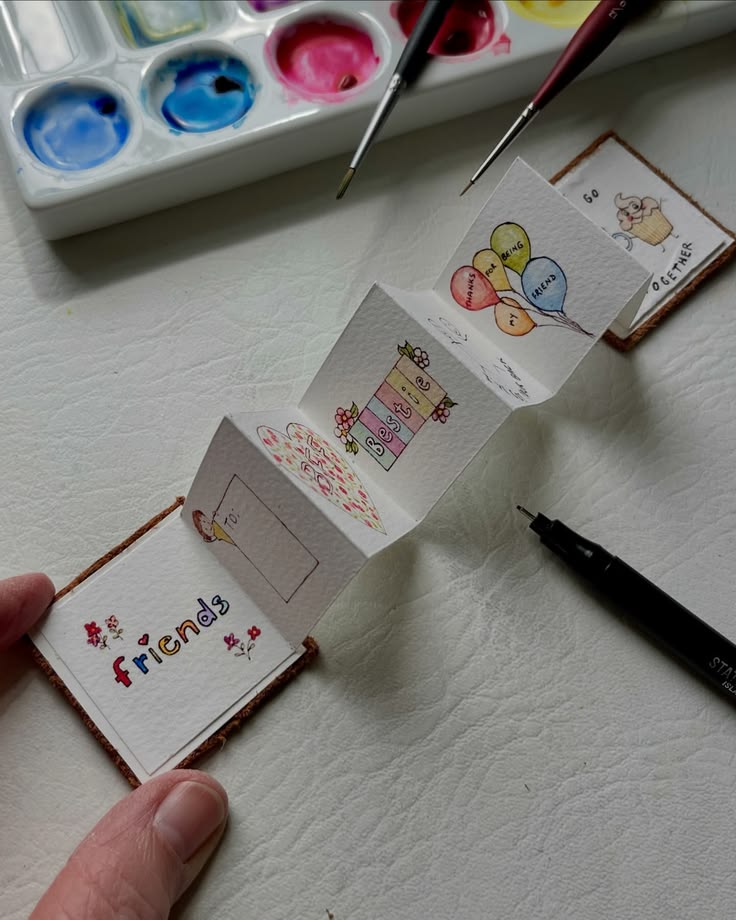
Photos, handwritten notes, favourite sayings and little memories can be collected in a mini accordion book that opens out into several connected panels.
This is a lovely project for friends who enjoy writing, drawing or keeping small mementos.
Unlike a regular greeting card, the folded format gives each person room to tell a short story or create a collection of friendship memories.
An accordion zine is made from paper folded back and forth in a zigzag pattern. It can be created from one sheet or from joined strips of paper, depending on the size and number of panels you want.
How to Make the Mini Zine
- Choose the paper: Start with heavyweight paper or light cardstock that can fold without tearing easily. For a small booklet, cut a long strip into equal sections before folding.
- Mark the panels: Use a ruler and pencil to divide the strip into equal sections. A scoring board or bone folder can help make clean folds.
- Fold the strip: Fold the paper in one direction, then turn it over and fold the next section in the opposite direction. Continue until the strip opens into a zigzag.
- Add a cover: Cut two pieces of cardstock slightly larger than the folded pages. Attach one to the front and one to the back to make the zine feel more like a little book.
- Fill the panels: Guests can use each section for a different memory, photograph, message or illustration.
What to Put Inside the Friendship Zines
Rather than filling every page with random decorations, give guests a few prompts to make the keepsake more meaningful:
- One favourite memory with a friend.
- A funny phrase or inside joke everyone remembers.
- Three things the friendship has taught them.
- A favourite photograph or small printed picture.
- A handwritten note for someone special.
- A place they would love to visit together.
Guests can make a zine for themselves or exchange their finished booklets with another friend. Keep the photographs small enough to fit the panels without covering the writing space.
Materials to Prepare
Heavyweight paper, cardstock for covers, rulers, pencils, scissors or paper cutters, scoring boards, bone folders, glue sticks, washi tape, small photographs, stickers and fine-tip pens.
The advantage of this craft is that the main structure can be completed during the gathering.
Guests can decorate the panels at their own pace, and there is no special drying period beyond allowing any glue to set.
Painting, drinks, and good company make a lovely combination for a get-together. Paint and Sip Craft Night Ideas That Are Way Better Than a Studio shares ideas for creating that experience at home.
6. Personalised Recipe Exchange Folders
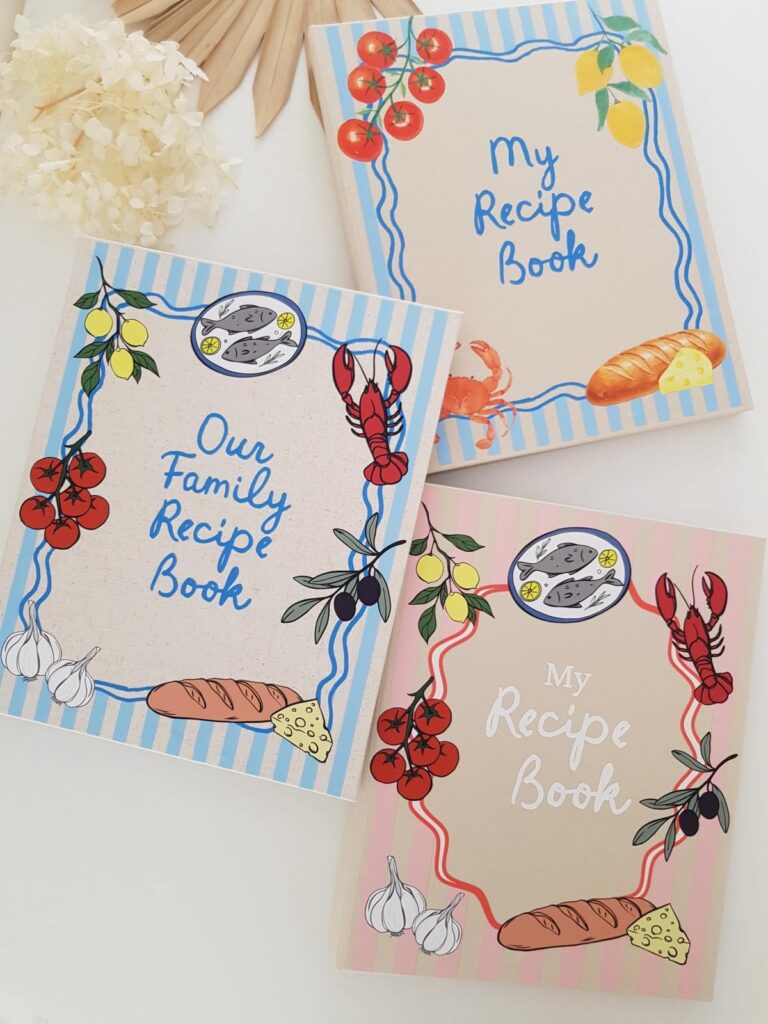
Some recipes are worth keeping because they remind us of a particular person, family gathering or meal shared with friends.
A recipe exchange folder gives everyone a way to contribute something personal while creating a collection they can use long after the celebration.
Instead of simply writing down the name of a dish, ask each guest to bring one recipe she has made and can confidently explain.
It could be a family favourite, a quick weekday meal, a dessert she enjoys making or a dish her friends often ask her to prepare.
How to Put the Recipe Folders Together
- Prepare the recipe cards: Provide blank cards or printable templates with spaces for the recipe name, ingredients, measurements, preparation steps, cooking time and number of servings.
- Ask guests to write a tested recipe: Encourage everyone to include clear quantities and instructions. A recipe that says ‘add some flour’ or ‘cook until ready’ may be difficult for another person to follow.
- Include useful personal details: Guests can add a short note explaining who taught them the recipe, when they usually make it or what makes it special.
- Decorate the cards: Use coloured pens, small food illustrations, patterned borders or stickers to give each card a personal finish. Keep the writing area clear and readable.
- Sort the collection: Arrange the cards into sections such as breakfast, main meals, snacks, desserts and drinks. Add dividers so the folder is easy to use.
- Place the cards inside: Use a small ring binder with protective sleeves or a folder with pockets. Leave a few blank cards at the back for future recipes.
Materials to Prepare
Blank recipe cards, mini binders or folders, dividers, protective sleeves, coloured pens, stickers, patterned paper, scissors and hole punches if you are using loose cards.
Make the Recipe Exchange More Useful
Ask guests to include practical information that is often missing from handwritten recipe collections.
Serving sizes, ingredient substitutions that they have personally tried, storage instructions and preparation time can make a recipe much easier for someone else to recreate.
For example, a guest sharing a banana bread recipe could mention the number of slices it makes, the size of loaf tin she uses and how she checks that the centre is fully baked.
These small details make the collection more useful than a folder filled with recipe names alone.
Adults celebrating a birthday can find more planning inspiration in Adult Birthday Craft Night Party: Themes, Ideas, and How to Pull It Off, from choosing a theme to organising the activities.
7. Personalised Bookplates for Favourite Books
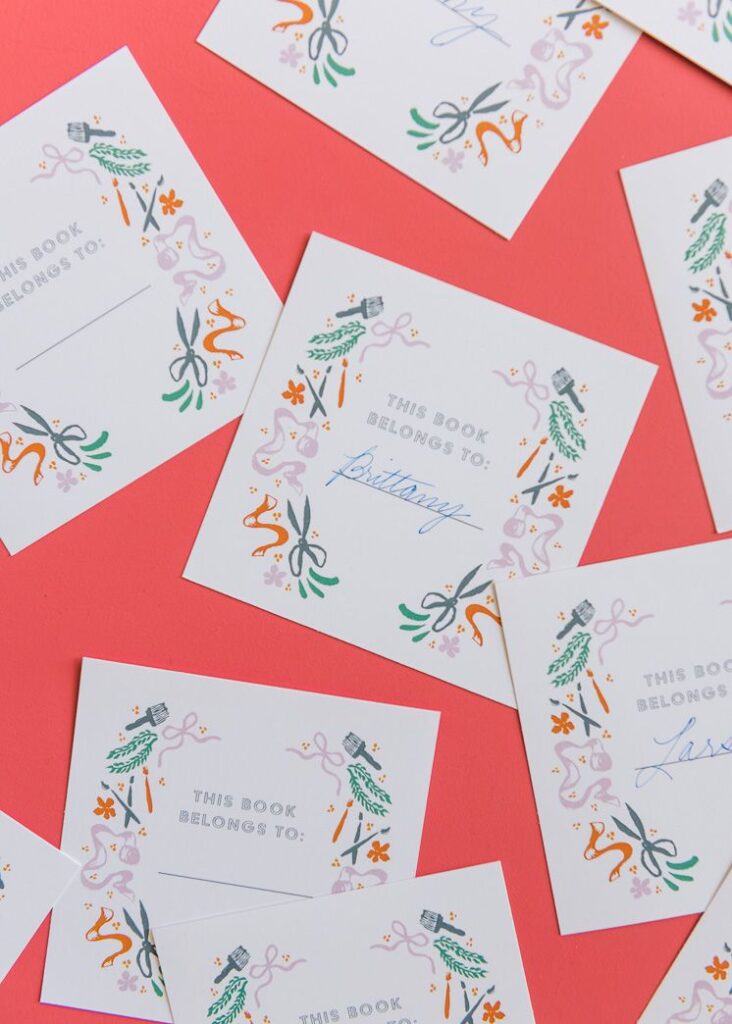
For friends who enjoy reading, personalised bookplates are a simple way to mark the books they own or give a book as a thoughtful gift.
A bookplate is a small label placed inside the front cover, usually carrying the owner’s name and sometimes a decorative illustration or short message.
This project works especially well when guests have different tastes in books.
Someone who loves novels might choose a floral design, while another person may prefer a clean layout with her initials and a small reading-related illustration.
How to Make the Bookplates
- Choose a label size: Keep the design small enough to fit neatly inside a book cover without covering too much of the page. Rectangular, oval and arch-shaped labels are easy to cut.
- Create the design: Use printable label paper or plain cardstock. Add the words ‘This book belongs to’ followed by a space for the owner’s name.
- Personalise the artwork: Guests can add initials, small flowers, stars, books or simple line drawings. Keep the lettering large and readable.
- Print or hand-letter: Prepare printable templates in advance for guests who prefer a clean, consistent design. Others can draw and write their own by hand.
- Cut and finish: Use scissors or a paper trimmer to cut out the labels. If using cardstock rather than adhesive paper, guests can attach the bookplate with a suitable paper adhesive.
Design Ideas to Offer
- Minimalist labels with initials and a thin border.
- Floral bookplates with small leaves or flowers.
- Colourful designs for people who enjoy playful illustrations.
- Literary designs featuring a small open-book drawing.
- Friendship-themed labels with a short message from the giver.
Materials to Prepare
Printable sticker paper, cardstock, small label templates, coloured pens, fine-tip markers, scissors, a paper trimmer, alphabet stamps and adhesive for non-sticker versions.
Guests can make several labels in one sitting, which makes this a useful option for anyone who owns many books or wants to prepare personalised book gifts.
One consideration: bookplates are best used in new or personally owned books. For valuable, antique or borrowed books, avoid attaching adhesive labels because removing them can damage the cover.
A loose bookmark or removable label is a better alternative.
8. Recycled-Paper Bead Bag Charms
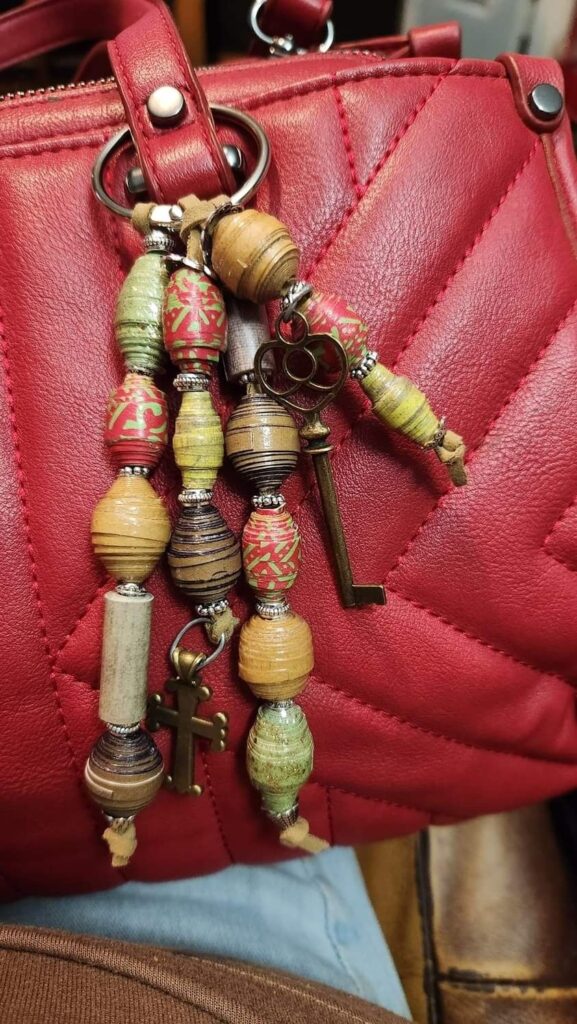
Old magazines, colourful brochures and leftover patterned paper can become decorative beads for a small bag charm.
This project is a practical way to reuse paper that might otherwise be thrown away, while allowing guests to choose colours and patterns that suit their personal style.
The beads are made by rolling long triangular strips of paper around a thin stick or paper-bead roller.
Because the strip is wider at one end and narrows towards the other, each finished bead has a tapered shape rather than looking like an ordinary rolled paper tube.
How to Make the Paper Beads
- Choose suitable paper: Magazine pages, decorative scrapbook paper and colourful printed sheets work well. Avoid very thick card because it can be difficult to roll tightly.
- Cut triangular strips: Use a ruler to mark long triangles with a wide base and a narrow pointed end. The dimensions can vary depending on how large you want the beads to be. Prepare several strips in advance so guests have enough to make a small charm.
- Start the roll: Place the wide end of the triangle around a toothpick or paper-bead roller. Fold the paper over the tool and begin rolling it tightly.
- Apply glue as you go: Add a small amount of paper glue along the strip as you roll towards the pointed end. Keep the paper centred so the bead forms evenly.
- Secure the tip: Apply a little glue to the pointed end and press it down firmly. Slide the bead off the tool carefully and leave it to dry.
- Seal the bead: Apply a suitable clear craft sealer or varnish once the glue has dried. Test the finish on a spare bead first because some varnishes can affect printed colours or paper coatings. <Cite refs={[“turn173268search1″,”turn173268search9”]}/>
Turn the Beads Into Bag Charms
Once the beads are dry and sealed, guests can combine them with larger decorative beads, small metal charms or coloured spacer beads.
Thread the pieces onto a jewellery headpin or suitable jewellery wire, then attach the finished arrangement to a keyring or bag charm clasp. Jewellery pliers and appropriate findings help secure the ends properly.
Guests can create a colour-coordinated charm, use paper from a favourite magazine or make a small set of beads in different sizes. The tapered beads look particularly interesting when arranged alongside round spacer beads.
Materials to Prepare
Old magazines or scrapbook paper, rulers, pencils, scissors or paper cutters, toothpicks or paper-bead rollers, paper glue, small brushes, suitable clear sealer, jewellery wire or headpins, spacer beads, charms, keyrings and jewellery pliers.
A Useful Detail for the Craft Night
Paper beads can be rolled during the gathering, but allow time for the glue and protective finish to dry before assembling or using the charm.
Guests who want to finish sooner can make the beads first and assemble their charms after the coating has dried. This also gives the paper a better chance of staying intact during handling.
Women looking to combine fellowship and creativity can explore Women’s Christian Craft Night: 15 Easy Ideas for Women’s Ministry for activities suitable for a church group or women’s ministry.
9. Painted Glass Bud Vases With Individual Designs
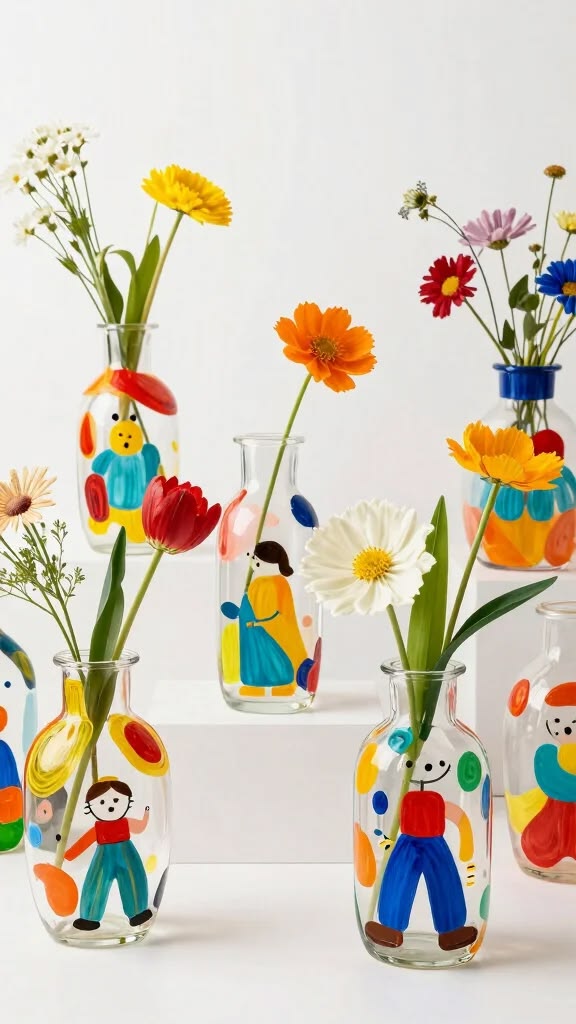
Small glass bud vases are useful for displaying one or two flowers, so guests can make something decorative without having to paint a large surface.
This project is also a good choice when everyone has different artistic abilities.
One person can draw tiny flowers, another can add simple stripes, while someone else may prefer initials or a few coloured dots.
The easiest way to approach this craft is to use clear glass bud vases and paint markers made specifically for glass.
Their narrow tips make it easier to control the design than using an ordinary paintbrush on a slippery surface.
How to Decorate the Vases
- Clean the glass first: Wash the vases, dry them completely and wipe the outside with a suitable glass cleaner or rubbing alcohol if the marker manufacturer recommends it. Dust, fingerprints and grease can affect how the paint adheres.
- Plan the design on paper: Let guests test their patterns on scrap paper before drawing on the vase. This is particularly useful for lettering, where spacing can be difficult to correct once the paint dries.
- Start with simple shapes: Small flowers, leaves, dots, wavy lines, hearts and short names are manageable designs. Use a fine-tip marker for details and a broader tip for larger areas.
- Work in small sections: Rotate the vase as you decorate instead of trying to draw the entire design at once. Leave enough space between patterns so the glass remains visible.
- Allow the paint to dry: Follow the instructions for the particular glass paint or marker. Some products require air-drying, while others need a longer curing period or oven-setting. Do not assume that all glass markers become permanent simply by drying.
Materials to Prepare
Clear glass bud vases, glass paint markers, scrap paper, pencils, glass cleaner, soft cloths and small design templates for guests who prefer tracing.
Design Details Worth Considering
Guests can create a set of two or three matching mini vases, each with a different pattern, or decorate one vase with a name and a flower that represents the recipient.
A simple border around the lower half can also look neat without covering too much of the glass.
Keep paint on the outside of the vase and away from the opening. Check the product instructions before deciding whether the finished vase can be washed or used with water. For a purely decorative version, guests can display it with dried flowers.
If they intend to fill it with fresh flowers, choose a glass-compatible product whose manufacturer permits that use and follow its full curing instructions.
10. Friendship Memory Map Collages
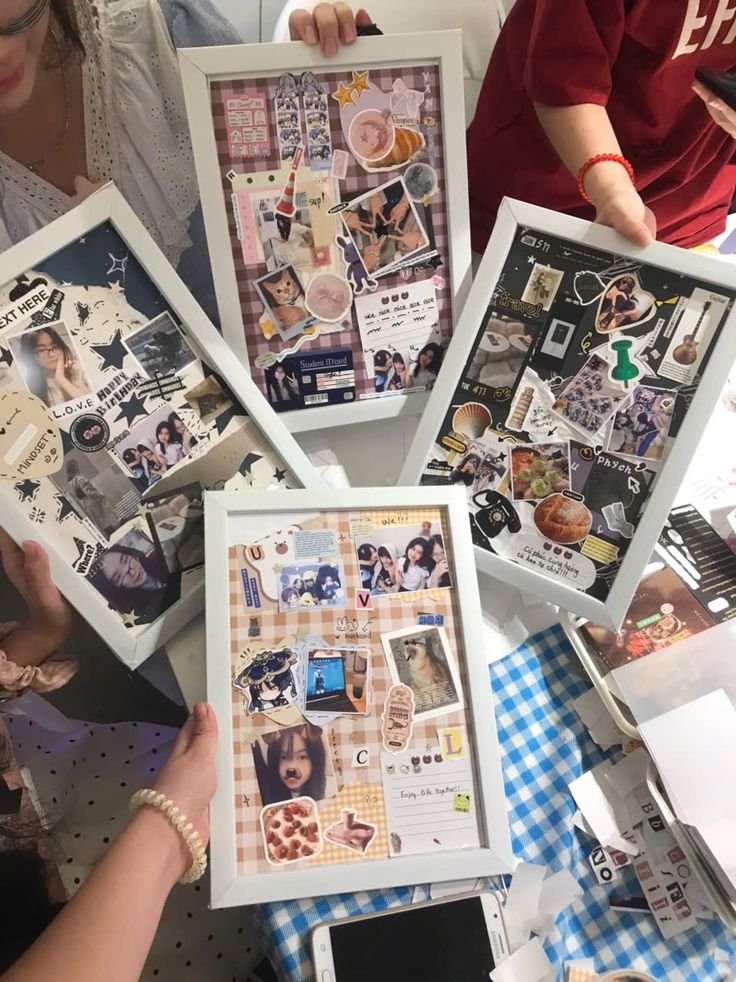
Some friendships are connected to particular places: the school where two people met, the neighbourhood where they grew up, a city they visited together or the café where they always catch up.
A memory map collage gives guests a way to turn those locations into a piece of personal artwork.
Rather than making a conventional map that has to show every road accurately, the idea is to use maps, photographs, labels and short notes to represent places that carry meaning.
Each person can make a collage about one friendship or create a map of several places connected to her closest friends.
How to Make the Memory Map
- Choose the main location: Start with a printed map of a town, city, country or neighbourhood that means something to the person making it. An old road map, a printed map image or a tourist map can work.
- Select the important places: Ask guests to identify two or three locations they want to include. These might be where they first met, a memorable trip, a favourite meeting place or somewhere they hope to visit together.
- Prepare the background: Cut the map to fit a piece of cardstock or a small mounting board. Decide whether to use the entire map or just selected sections.
- Mark each location: Use small paper circles, pins or coloured dots to identify the places. Add short labels such as ‘where we met’, ‘our first trip’ or ‘our favourite weekend spot’.
- Add personal details: Include small photographs, ticket stubs, handwritten notes or dates that help explain why each location matters.
- Arrange before gluing: Move the pieces around until the map is easy to follow. Then attach the elements using glue dots, photo corners or a suitable paper adhesive.
Materials to Prepare
Printed maps, cardstock, small mounting boards, photographs, ticket stubs, coloured paper, scissors, glue sticks, photo corners, fine-tip markers, stickers and adhesive dots.
Give the Collage a Clear Story
One mistake to avoid is filling the board with so many photographs and labels that the map disappears.
Choose one main location or map section, then use a few supporting details to tell the story. Guests can also write a short caption at the bottom explaining what the map represents.
For friends who live far apart, a map showing both locations with a connecting line can make a thoughtful design.
Someone who wants to celebrate a friendship that has lasted for years could mark the different places where important memories were made.
11. Paper Mosaic Coasters
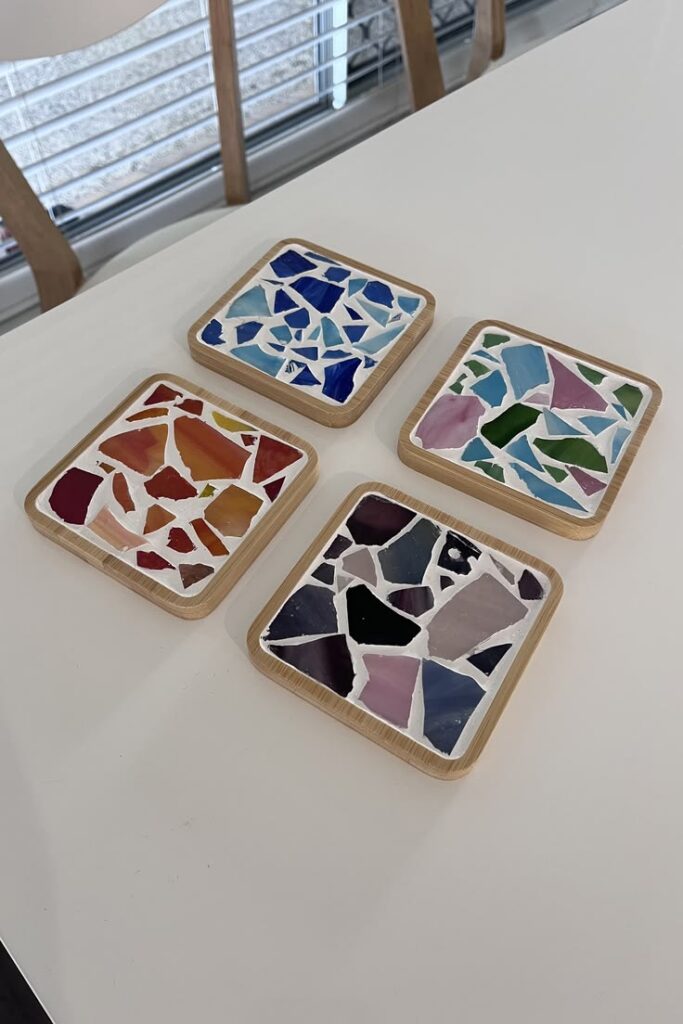
Broken-looking patterns can be created without breaking anything. Paper mosaic coasters use small pieces of coloured paper arranged on a cork base to form a picture or geometric design.
This is a useful project for guests who enjoy arranging shapes and colours but do not want to draw or paint freehand.
The cork base provides a ready-made coaster shape, while the paper pieces create the decorative surface. Guests can make individual designs or choose a shared colour theme so everyone leaves with a different version of the same project.
How to Make the Paper Mosaic
- Prepare the cork bases: Choose flat, clean cork coaster blanks. Square and round shapes are both suitable, but make sure the surface is smooth enough for the paper to adhere.
- Cut the paper pieces: Use coloured cardstock, scrapbook paper or leftover wrapping paper. Cut the pieces into small squares, triangles, diamonds or irregular shapes. Keep the pieces reasonably similar in thickness.
- Arrange the design: Place the paper pieces on the cork before applying glue. Guests can create a simple checkerboard, diagonal stripes, a flower, initials or an abstract pattern.
- Attach the pieces: Apply a thin layer of suitable decoupage medium to a small section of the cork, position the paper pieces and press them gently into place. Continue until the surface is covered.
- Leave space between pieces if desired: Small gaps can create the appearance of traditional mosaic grout, while tightly fitted pieces produce a more continuous pattern.
- Apply the finish: Once the adhesive has dried, use a compatible clear topcoat if the product instructions allow it. Follow the manufacturer’s drying and curing directions before handling.
Materials to Prepare
Cork coaster blanks, coloured cardstock, patterned scrapbook paper, scissors, paper cutters, rulers, pencils, decoupage medium, foam brushes and a compatible clear protective finish.
Make the Design Practical
Small paper pieces are easier to arrange around the curved edges of round coasters than large rectangular pieces. Guests should also avoid adding thick layers that make the coaster uneven or prevent cups from sitting flat.
One important distinction: decorating a cork coaster does not automatically make it suitable for hot mugs or wet glasses. Ordinary paper and craft decoupage finishes may soften, stain or lift when exposed to moisture or heat.
Choose a coating specifically rated for the intended use, and do not describe the finished coaster as waterproof or heat-resistant unless the complete product system supports those claims.
Distance doesn’t have to stop friends from enjoying a creative evening together. How to Plan a Virtual Craft Night Party with Friends (DIY Girls Night Guide) explains how to bring everyone together online.
12. Mini Woven Wall Hangings
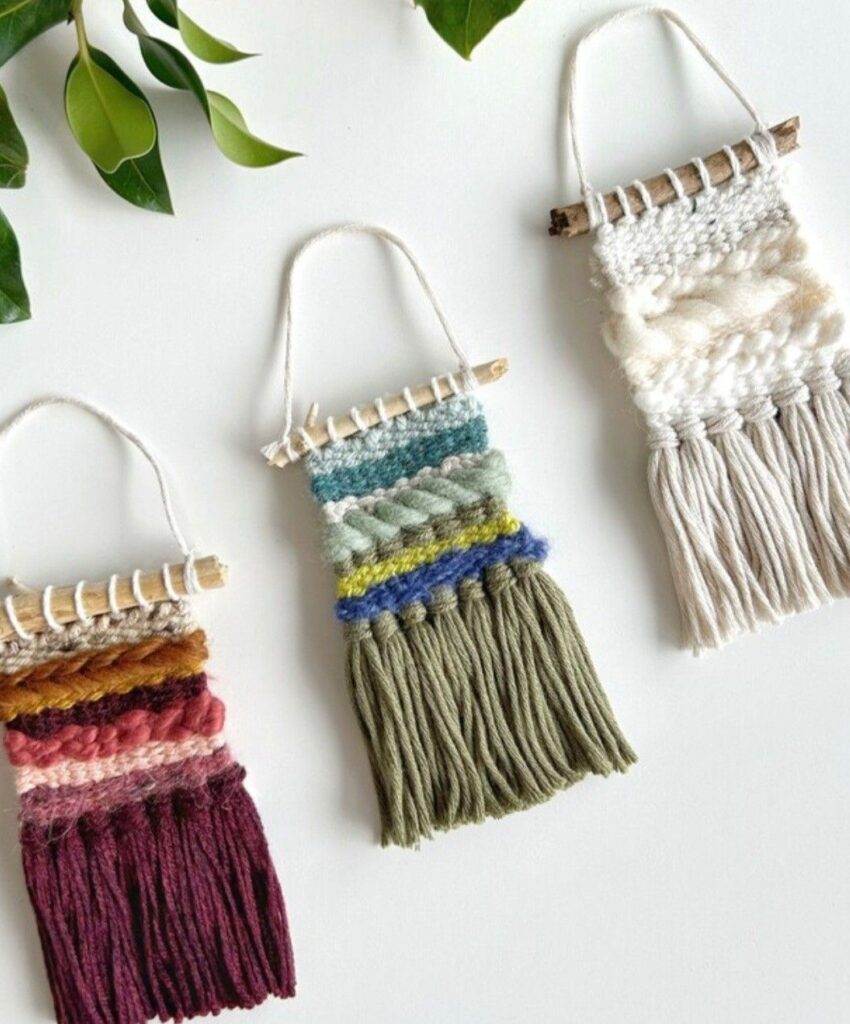
Yarn left over from knitting, crochet or other textile projects can be used to make small woven wall hangings.
This craft introduces guests to a basic weaving technique without requiring a full-size loom or advanced experience.
The project is made by passing yarn horizontally through a set of vertical threads stretched across a small frame. Guests can change colours, mix different yarn thicknesses and add short tassels to create their own designs.
How to Make a Mini Cardboard Loom
- Cut the loom: Use sturdy cardboard to make a small rectangular frame. A piece measuring approximately 15 × 20 cm is manageable for a beginner project.
- Mark the top and bottom: Draw a line across the cardboard near the top and bottom edges. Mark evenly spaced points along both lines, keeping the spacing consistent.
- Make the slits: Cut small slits at the marked points along the top and bottom edges. These will hold the vertical threads in place.
- Thread the warp: Secure one end of the yarn at the back, then pass it through the top and bottom slits in alternating order until the loom has a row of parallel threads. These vertical threads are called the warp.
- Start weaving: Thread a blunt plastic needle with a different yarn colour. Pass it over one warp thread and under the next, continuing across the row. On the next row, reverse the pattern.
- Keep the rows even: Push each completed row gently towards the previous one. Do not pull the yarn too tightly, as this can draw the vertical threads together and distort the sides.
- Change colours: Cut the yarn when you want to introduce another colour, leaving a short tail at the back. Start the new yarn at the same point and continue weaving.
- Finish the weaving: Once the woven section is complete, secure the loose ends and remove the piece carefully from the cardboard loom. Tie neighbouring warp threads together in pairs to prevent the weaving from unraveling.
The Metropolitan Museum of Art’s beginner loom activity demonstrates this cardboard method, including how to thread the warp, weave the horizontal yarn and remove the finished piece. <Cite refs={[“turn118309youtube61”]}/>
Materials to Prepare
Sturdy cardboard, rulers, pencils, scissors, assorted yarn, blunt plastic needles, masking tape, wooden dowels and string for hanging.
Let Guests Experiment With Texture
The most interesting part of this project is the combination of yarn. Smooth cotton gives a different appearance from thick wool, ribbon or textured yarn.
Guests can alternate colours in horizontal bands, make a thicker central section or add a few tassels along the bottom.
For a first attempt, keep the weaving small and use yarn that is not too slippery. Very loose or uneven weaving can leave gaps, while pulling each row too tightly can make the sides narrow.
A simple sample loom on the table can help beginners understand the over-and-under pattern before they start their own.
13. Cyanotype Botanical Prints
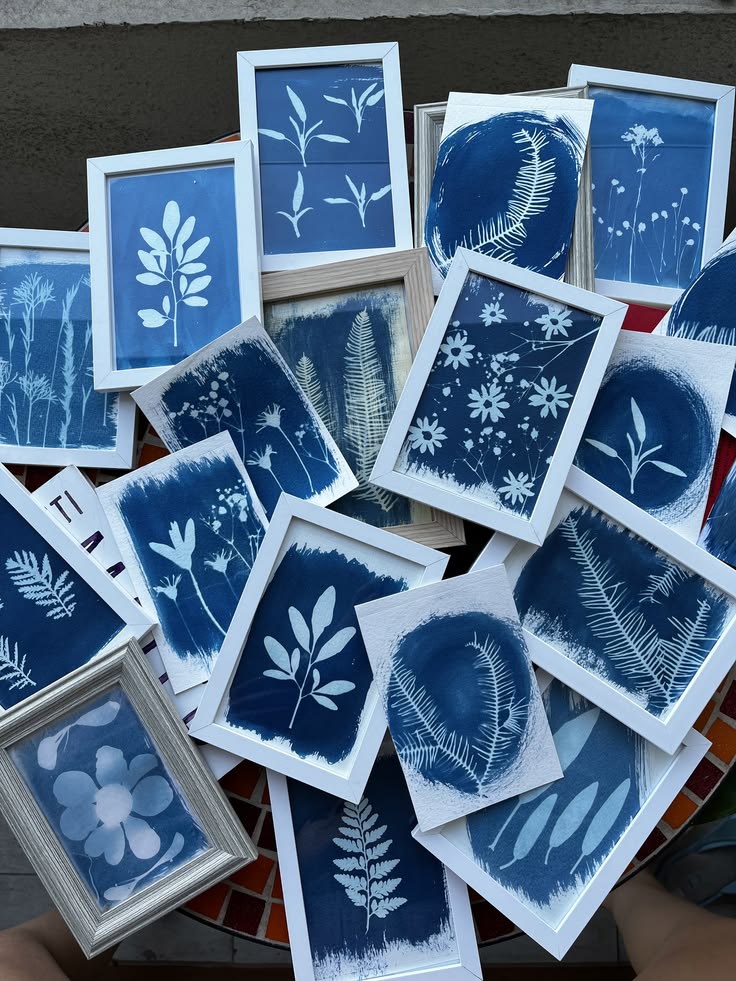
Leaves, flowers and delicate plant shapes can be turned into striking blue-and-white prints using a photographic process called cyanotype.
Unlike ordinary painting, this technique uses light-sensitive paper to record the outlines of objects placed on its surface.
For a Galentine’s Day craft night, guests can make individual botanical prints using leaves, ferns, small flowers or even lace.
Each arrangement produces a different image depending on the shape, thickness and position of the objects.
How to Make Botanical Cyanotype Prints
The easiest option for a group is to buy ready-coated cyanotype paper or a sun-print kit. This avoids having guests mix photographic chemicals or coat their own paper.
- Prepare the design first: Before opening the light-sensitive paper, let guests arrange their leaves and flowers on ordinary paper of the same size. This gives them time to move the objects around without exposing the special paper prematurely.
- Work away from strong light: Keep the cyanotype paper in its light-blocking packaging until everyone is ready. Follow the kit’s handling instructions because the paper is sensitive to UV light.
- Arrange the botanicals: Place the paper on a firm, flat board and position the leaves and flowers on top. Thin, flat materials usually give sharper outlines than thick or curled flowers.
- Hold everything in place: Cover the arrangement with a clear sheet of glass or acrylic suitable for the process. This helps keep the objects flat against the paper while it is exposed.
- Expose the paper: Take the arrangement into sunlight or use the UV light recommended by the kit. Exposure time varies with the strength of the light and the product, so follow the instructions and carry out a test print if possible.
- Rinse the print: Remove the objects and rinse the paper in clean water as directed. The image develops into a blue-and-white design as the paper is washed.
- Dry the finished print: Lay it flat or hang it to dry in a clean place. The blue may deepen as the print dries.
Materials to Prepare
Ready-coated cyanotype paper, flat leaves, small flowers, ferns, lace, firm boards, clear glass or acrylic sheets, trays of clean water, gloves if required by the kit and a clean drying area.
Help Guests Get Better Prints
The arrangement matters as much as the exposure. Overlapping leaves can create dark, crowded areas, while leaving too much empty space may make the print look unfinished.
Encourage guests to combine one larger leaf with smaller pieces of foliage rather than covering the entire sheet.
Also, check the weather and available light before choosing this activity. Cloudy conditions can lengthen exposure time and affect contrast.
The Royal Horticultural Society’s guide explains how sunlight, object placement, rinsing and drying affect the final print.
This is one of the projects that benefits from a little preparation: test the paper and exposure process before guests arrive, and have a backup activity ready in case the sunlight is too weak.
Busy women can set aside time for creativity and relaxation with How to Host a Cozy Self-Care Craft Night for Busy Women, which offers ideas for a quieter, more personal gathering.
14. Decorative Shadow Boxes With Miniature Keepsakes
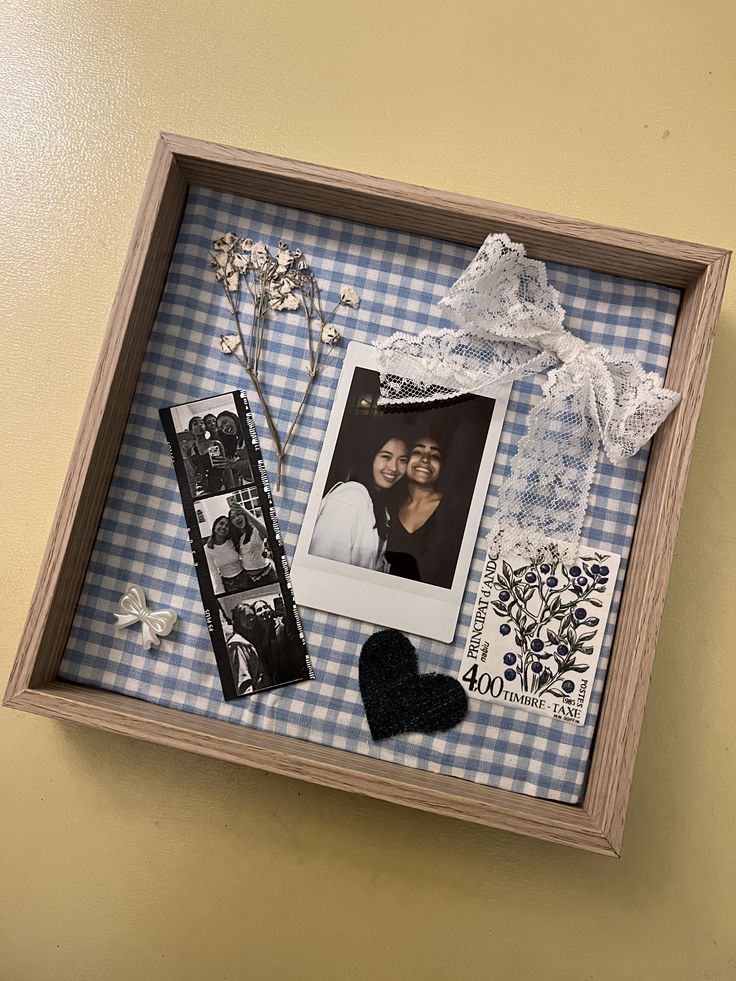
Photographs and small souvenirs often end up in drawers because there is no obvious way to display them together.
A shadow box solves that problem by providing a deeper frame that can hold several objects rather than just one flat photograph.
For this Galentine’s Day craft, guests can create a small display around a friendship memory. It might contain a photograph, a ticket from a shared outing, a handwritten message, a dried flower or a small keepsake from a trip.
How to Create the Shadow Box
- Choose the right frame: Use a shadow box with enough internal depth to hold the items without pressing them against the front panel. Measure the thickest keepsake before selecting the frame.
- Pick a background: Cut cardstock, patterned paper or fabric to fit the backing board. A plain background often makes small photographs and souvenirs easier to see.
- Select the keepsakes: Choose a few items with a clear connection to the memory being displayed. Three or four well-chosen pieces can tell a better story than filling every available space.
- Arrange the main photograph: Place the photograph where it can be seen easily, then arrange the smaller objects around it. Keep the layout balanced and leave enough space between the pieces.
- Add labels and dates: Small caption cards can identify a location, event or year. Guests can also include a short handwritten note explaining the memory behind the display.
- Attach the items carefully: Use photo corners, suitable adhesive dots, archival mounting strips or other appropriate fasteners depending on the item. Avoid applying glue directly to valuable photographs, tickets or irreplaceable keepsakes.
- Close the frame: Check that nothing touches or presses against the front panel before closing the shadow box.
Materials to Prepare
Small shadow box frames, cardstock, fabric backing, photographs, ticket stubs, dried flowers, miniature keepsakes, scissors, photo corners, adhesive dots, tweezers and fine-tip markers.
Make the Contents Tell One Story
Instead of giving everyone random decorative materials, invite guests to bring two or three small items connected to a particular friendship or memory.
Someone could use a photograph and cinema ticket from a memorable outing, while another might display a dried flower, a handwritten note and the date of a special occasion.
Check the frame’s depth before buying it. A frame that is too shallow may press the contents against the front, while one that is unnecessarily deep can leave small objects looking lost.
Guests who do not have personal keepsakes can make a friendship-themed display using a photograph, a printed quote and decorative paper elements. That way, nobody has to bring something valuable or sentimental to take part.
15. Hand-Stamped Gift-Wrapping Paper
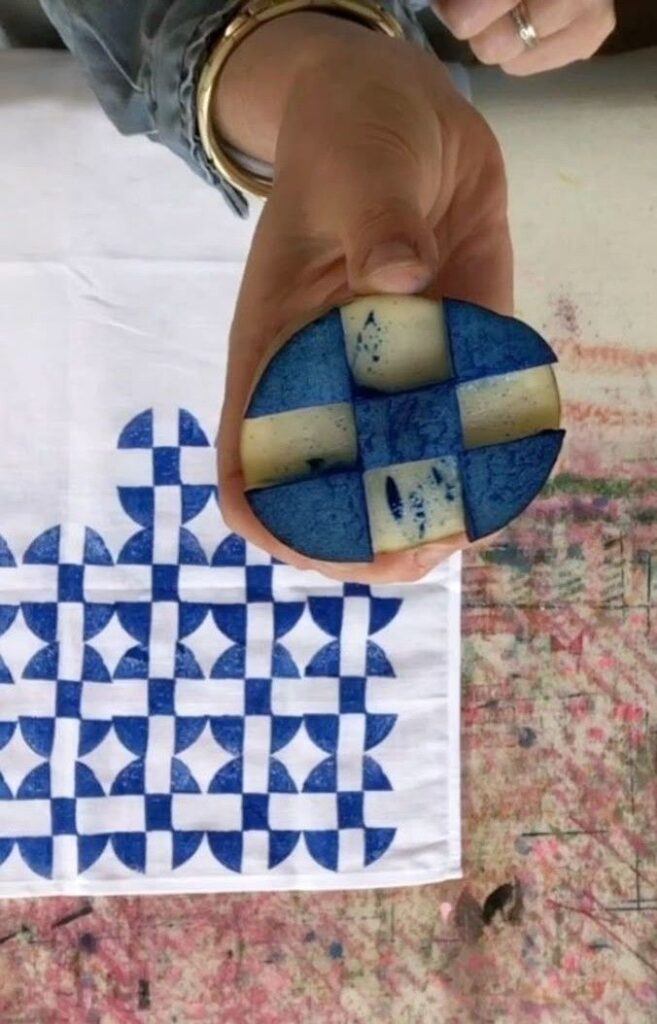
Wrapping paper does not have to come from a shop in a ready-made pattern.
With plain kraft paper and a few stamps, guests can print their own designs and make wrapping sheets for birthdays, thank-you gifts or future occasions.
This is a useful final project because the finished paper can be stored and used later. Guests can also create matching gift tags from leftover paper, giving them a coordinated wrapping set rather than a single decorated sheet.
How to Print the Wrapping Paper
- Prepare the paper: Cut kraft paper into manageable sheets and smooth out any folds. Tape the corners lightly to the work surface so the paper does not move while stamping.
- Choose two or three stamps: Flowers, leaves, stars, hearts and geometric shapes are easy to repeat. Using a small selection keeps the pattern organised.
- Test the stamps: Press each stamp onto scrap paper first to check how much ink it picks up and whether the design prints clearly.
- Build the pattern: Start from one edge and repeat the design across the sheet. Leave consistent spaces between the stamps, or alternate two shapes to create a repeating pattern.
- Avoid incomplete impressions: Make sure the entire raised surface of the stamp is covered with ink. Press it down evenly without rocking it from side to side, which can blur the outline.
- Add small details: Once the stamped pattern has dried, guests can add dots, short lines or small coloured details with suitable markers.
- Allow the paper to dry: Leave the sheets flat until the ink is dry enough to handle without transferring onto other surfaces.
Materials to Prepare
Plain kraft paper, foam or rubber stamps, suitable ink pads or block-printing ink, brayers if needed, scrap paper, markers, rulers, scissors, paper tags and table coverings.
Give Each Sheet a Purpose
Rather than stamping a very large roll without a plan, let guests make two or three sheets in sizes they are likely to use. One sheet can be kept for a small gift, while another can be cut into tags or bands for gift boxes.
For a more coordinated set, use the same stamp on the wrapping paper and gift tags. Guests can also leave a blank area on one corner for a handwritten name or short message.
Choose ink that is suitable for paper and check its drying instructions before stacking the sheets, as wet prints can transfer or smudge.
This project is especially useful when the group wants to make something practical without having to complete a complicated object.
By the end of the evening, everyone can leave with personalised wrapping paper ready for a future gift.
Different groups and occasions call for different activities, and How to Host a Craft Night Party for Any Age, Any Season, Any Occasion provides ideas for adapting a craft night to suit your guests.
How to Make the Craft Night Enjoyable for Different Skill Levels
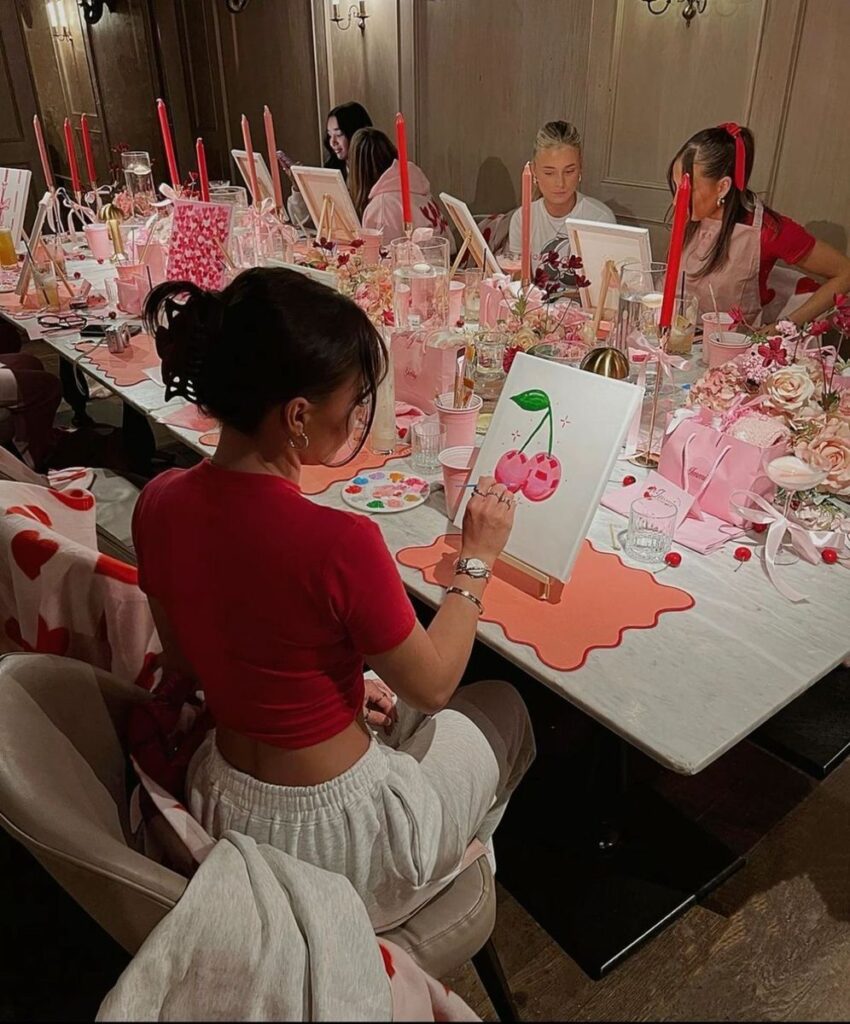
Not everyone coming to the gathering will have the same experience with crafts. One friend may enjoy painting and working with her hands, while another may not have used clay, stamps or weaving tools before.
The aim is to give everyone a project they can enjoy without making anyone feel pressured to keep up with the more experienced guests.
Here are a few ways to make the evening comfortable for the whole group:
-
Include crafts with different levels of difficulty:
Mix projects that require little preparation, such as personalised bookplates and friendship recipe cards, with techniques that take more practice, such as cyanotype printing and mini weaving.
Guests can choose according to their interests and confidence.
-
Provide ready-cut materials where possible:
Detailed cutting can discourage someone who is not comfortable using craft tools. Pre-cut paper, prepared clay portions and ready-to-use stamps allow guests to spend more time creating their designs rather than struggling with preparation.
-
Let everyone personalise the same project differently:
For example, guests making tote bags can choose between a simple stamped pattern, initials or a more detailed arrangement of shapes. Nobody has to produce an identical design for the activity to work.
-
Show unfamiliar techniques before starting:
Demonstrate how to roll paper beads, create an even clay shape or use a foam stamp on fabric. A small sample gives beginners a clearer idea of what to do and helps prevent avoidable mistakes.
-
Keep an easier alternative available:
Someone who does not enjoy weaving might prefer decorating a bookmark or making a friendship card. Having spare cardstock, stickers, markers and simple embellishments gives guests another way to participate without abandoning the gathering.
-
Avoid turning the evening into a timed competition:
Some people will finish quickly, while others may take longer to choose colours, arrange photographs or correct a design. Allow everyone to work at a comfortable pace, with enough breaks for conversation and refreshments.
One final consideration: Choose only two or three main projects for the evening rather than trying to complete all 15 ideas.
Too many activities can leave guests rushing between materials, especially when some crafts require drying or curing time.
A smaller selection gives everyone enough time to enjoy the process and leave with something they have made themselves.
Conclusion
Galentine’s Day is a lovely reminder to make time for the women who share your laughter, memories and everyday experiences.
A craft night gives everyone something different to enjoy, whether it is shaping a clay trinket dish, creating a pressed-flower frame or putting together a little book of friendship memories.
You don’t have to prepare all 15 projects or spend a lot on supplies to make the gathering worthwhile.
Choose two or three Galentine’s Day craft night ideas that suit your group, prepare the materials ahead of time and leave room for everyone to add her own touch.
The finished crafts will be nice to take home, but the conversations and time spent making them together are part of what makes the evening special.