Empty walls can make a home feel unfinished, these 13 DIY reclaimed wood wall art ideas make spaces feel personal and alive.
You walk into your living room, your bedroom, or even your hallway, and your eyes immediately land on that blank, lifeless wall.
It feels unfinished, like something is missing, but you don’t know what. You’ve thought about buying artwork, maybe a framed print or canvas, but either it’s too expensive that you cannot afford it at the moemnt.
Here’s the thing: you don’t need to spend hundreds of dollars to give your walls personality. Reclaimed wood is one secret weapon most people overlook.
It’s affordable, sustainable, and full of character, each knot and grain instantly makes a space feel warm and unique.
And you don’t need to be a master DIYer. These 13 DIY reclaimed wood wall art ideas are easy, realistic, and can turn a plain, boring wall into a conversation starter when someone steps in.
Some are subtle, some bold, but all of them are guaranteed to make your space feel intentional and alive.
Stick around, you’re about to discover how a few simple pieces of wood can completely transform a room, and maybe even make your vistor(s) ask, “Where did you get that?
Looking to make your entryway feel warm and welcoming? Check out how simple techniques in The Best DIY Farmhouse Welcome Signs That Make Your Front Door Instantly Inviting can instantly elevate your front door.
Why Reclaimed Wood is Perfect for Wall Art
-
Sustainable and Eco-Friendly
Using reclaimed wood isn’t just a design choice, it’s a conscious decision that helps the environment. Instead of cutting down new trees, you’re giving old wood a second life.
Each plank you repurpose reduces waste and lowers your carbon footprint, all while creating a piece of art that feels meaningful and intentional.
-
Unique Character
No two pieces of reclaimed wood are the same. Knots, weathered grains, and natural imperfections give each plank its own story.
This organic texture can turn a plain wall into a focal point that instantly draws the eye, something a store-bought print or canvas simply can’t replicate.
-
Budget-Friendly
Blank walls shouldn’t cost a fortune to fill. Reclaimed wood is often far less expensive than buying new materials, or even free if you source pallets, old furniture, or construction scraps. You get the designer look of high-end wall art without the high-end price tag.
-
Versatile Design Options
From sleek modern panels to rustic, farmhouse-inspired arrangements, reclaimed wood adapts to almost any style. It can be stained, painted, or left raw.
Its natural warmth and texture work beautifully in industrial lofts, boho living rooms, or even minimalist bedrooms.
Friends love gifts with meaning, and these Crafts to Make for Friends show thoughtful DIY ideas that they’ll actually treasure.
DIY Reclaimed Wood Wall Art Ideas
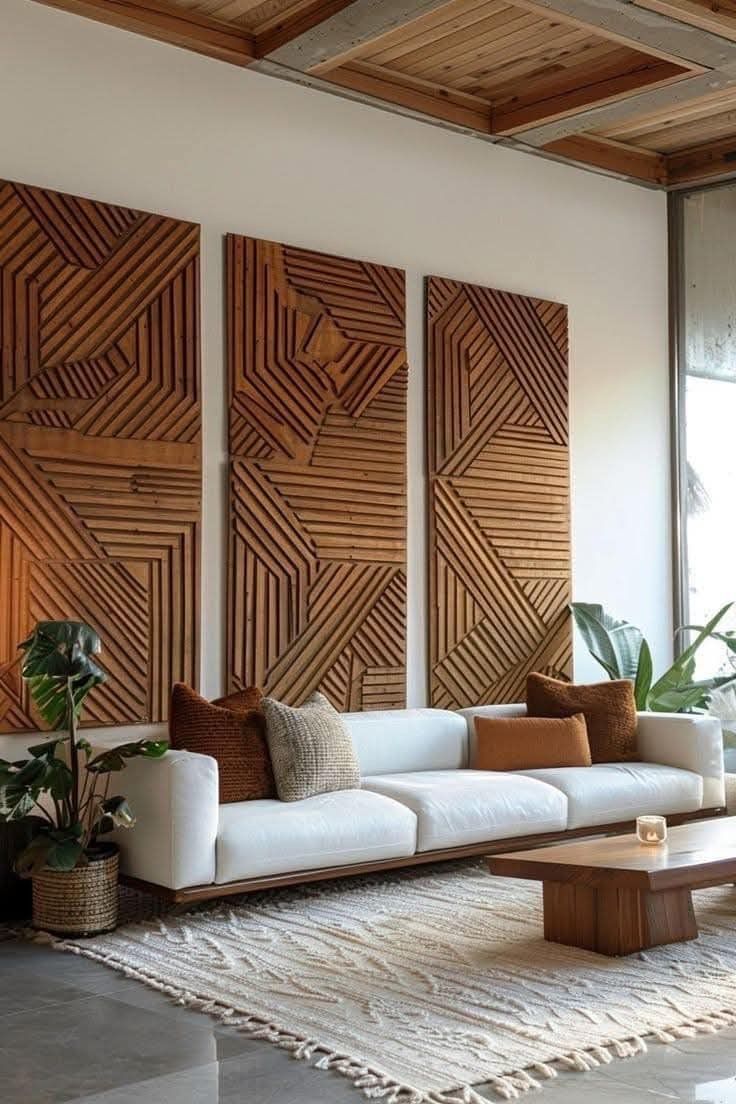
1. Geometric Wood Panels
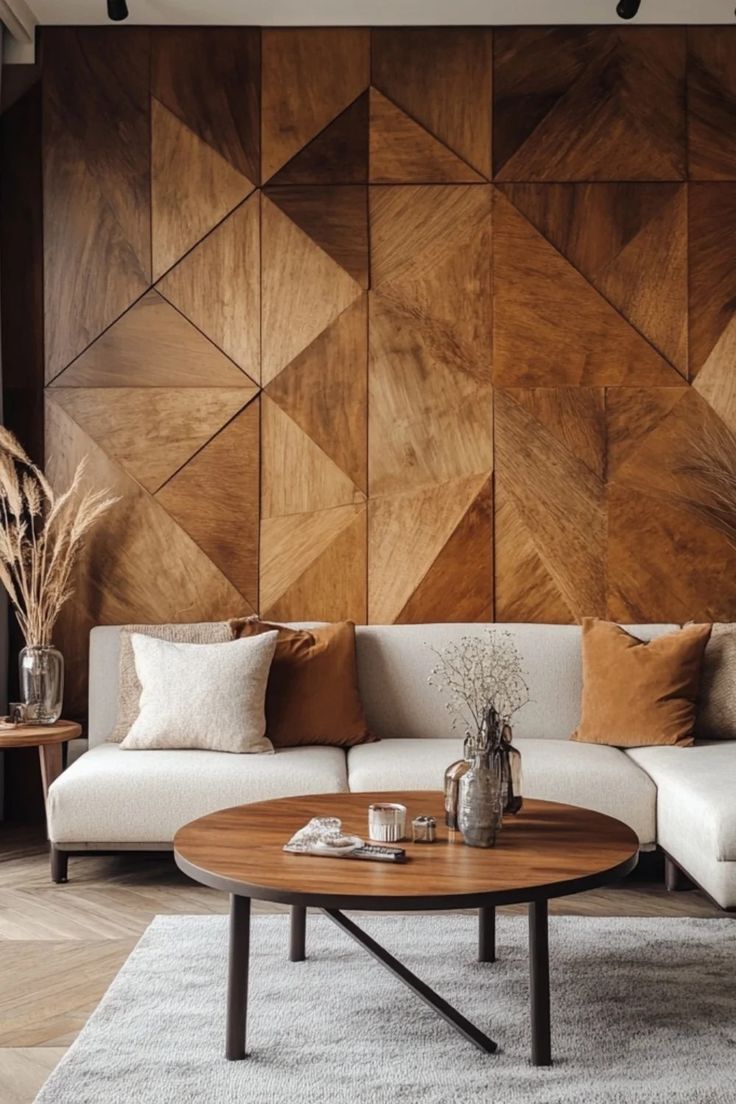
Blank walls can feel overwhelming, but turning them into geometric art instantly gives your space a modern, structured look.
Geometric wood panels are perfect for anyone who wants a bold statement without complicated tools or expensive materials.
Triangles, diamonds, chevrons, or even abstract shapes can turn a plain wall into a design feature that looks custom-made.
How to Do It:
- Gather reclaimed wood planks in varying lengths, widths, and finishes.
- Lay the planks on the floor to experiment with your geometric pattern (triangles, diamonds, chevrons).
- Measure and mark the wall or backboard to ensure proper alignment and symmetry.
- Start attaching the planks from the center of your design, working outward for balance.
- Use nails, screws, or strong wood adhesive depending on the wall surface and plank weight.
- Leave small, even gaps between planks if desired, to add texture and depth.
- Step back periodically to check angles and spacing for a polished, cohesive look.
Crafting Tip:
- Mix wood tones, light, medium, and dark, to create depth and visual interest.
- Keep plank edges straight and consistent for clean, precise geometric lines.
- Use painter’s tape to mark angles before nailing for extra accuracy.
- Lightly sand or seal the wood to prevent splinters and highlight the natural grain.
- For larger walls, consider creating modular sections, this makes installation easier and allows for future adjustments.
Planning an event? The collection of 25 Stunning Welcome Sign Ideas gives creative inspiration for any theme, from casual gatherings to formal celebrations.
2. Rustic Pallet Frames
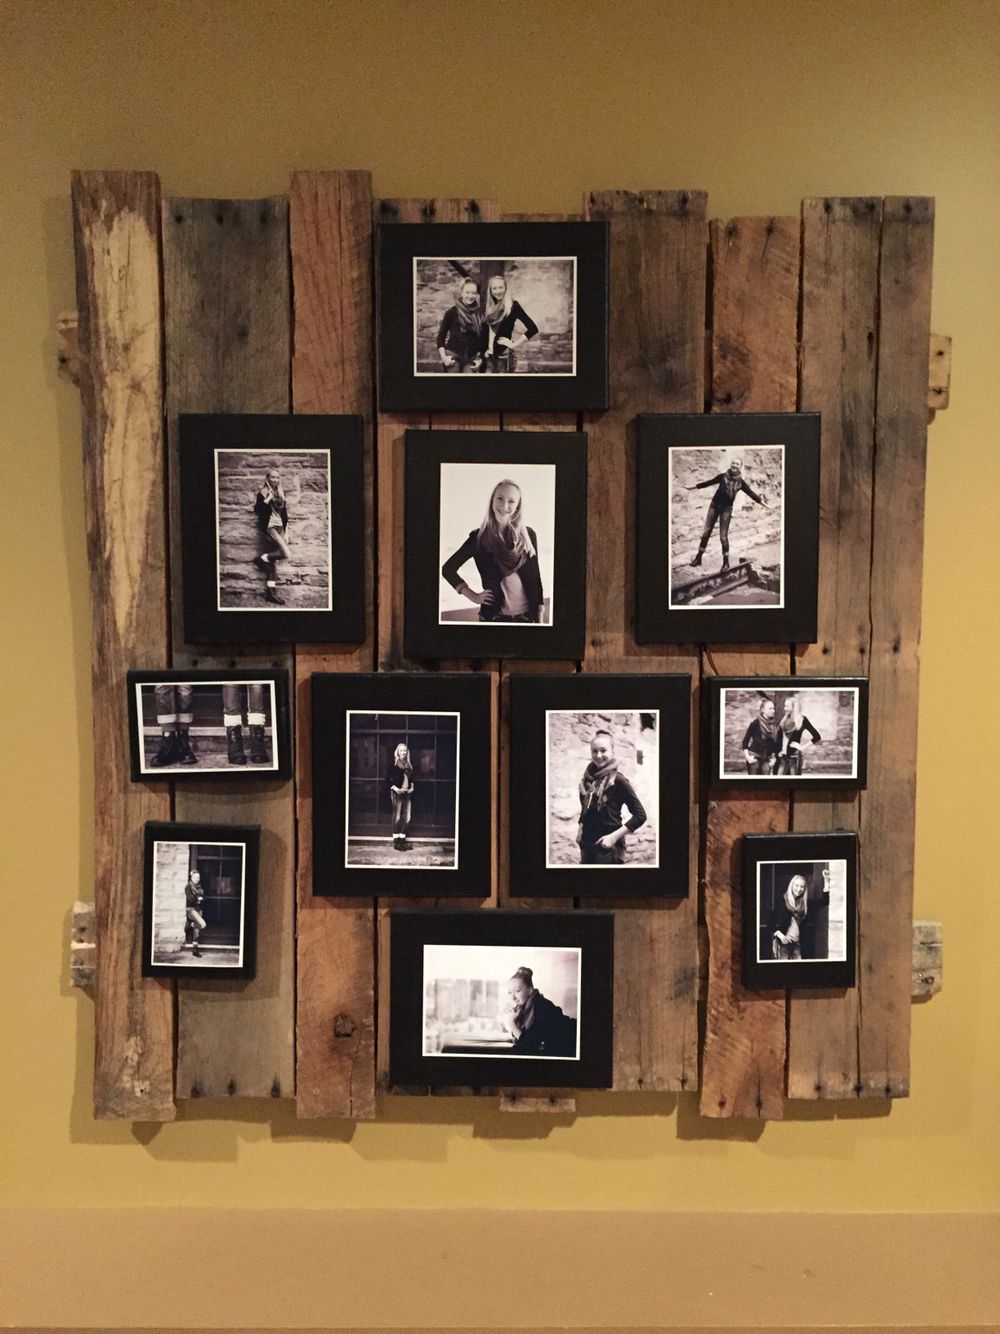
Rustic pallet frames are wall art pieces made by repurposing old wooden pallets into simple, textured frames or panels.
The rough, weathered wood gives a natural, cozy charm, making it perfect for farmhouse, rustic, or eclectic interiors.
You can use them to frame photos, small artworks, or even as standalone geometric or abstract wall pieces.
Each frame carries the character of reclaimed wood, knots, grain, and subtle imperfections, turning a plain wall into a warm, visually interesting focal point.
How to Do It:
- Source old pallets or reclaimed wood pieces that are in good condition.
- Carefully disassemble the pallets and sand each plank to remove rough edges or splinters.
- Cut the planks to uniform lengths to form frames, or leave varying lengths for a more rustic, organic look.
- Arrange the frames on the floor to experiment with layout and spacing.
- Attach the pieces to a wall using nails, screws, or strong wood adhesive, starting from the center outward for balance.
- Optional: add small hooks or clips to turn them into functional frames for photos, prints, or seasonal décor.
Crafting Tip:
- Leave the natural wood finish for authentic rustic charm, or apply a light stain to enhance color and grain.
- Mix frame sizes and orientations to create visual interest and avoid a “matchy” look.
- If displaying photos, use removable clips instead of glue so you can change the display easily.
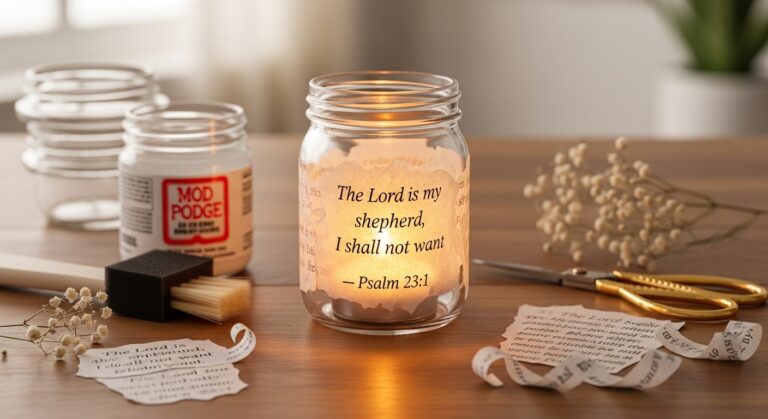
3. Wooden Word Art
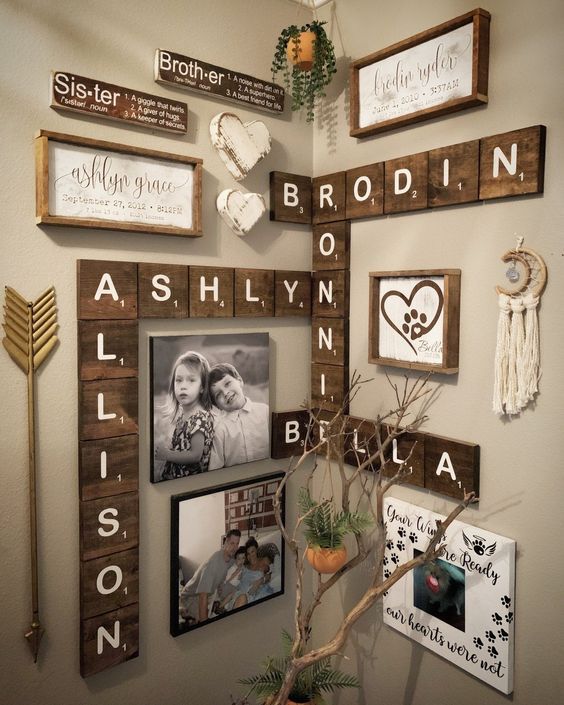
Turning words into wall art is a simple way to make a blank space feel personal and meaningful.
By cutting letters or phrases from reclaimed wood, you can spell out inspirational quotes, family names, or even fun messages that reflect your personality.
This approach to DIY reclaimed wood wall art not only adds a creative, custom touch but also gives your walls a sense of warmth and character that mass-produced pieces can’t match.
How to Do It:
- Select reclaimed wood planks that are smooth and free of major cracks.
- Choose the words or phrases you want to display and create stencils or print templates for each letter.
- Trace the letters onto the wood and carefully cut them out with a jigsaw, scroll saw, or craft knife.
- Sand the edges of each letter for a clean, polished look while keeping some natural texture if desired.
- Arrange the letters on the wall first to experiment with spacing and alignment before attaching.
- Secure the letters using small nails, screws, or adhesive suitable for your wall type.
Crafting Tip:
- Mix fonts, sizes, or even layer letters slightly to create a dynamic 3D effect.
- Lightly stain or paint the letters to enhance contrast against your wall while preserving the wood’s natural charm.
- For a more flexible display, attach letters to a backboard so you can rearrange or swap phrases over time.
4. Reclaimed Wood Shelving as Art
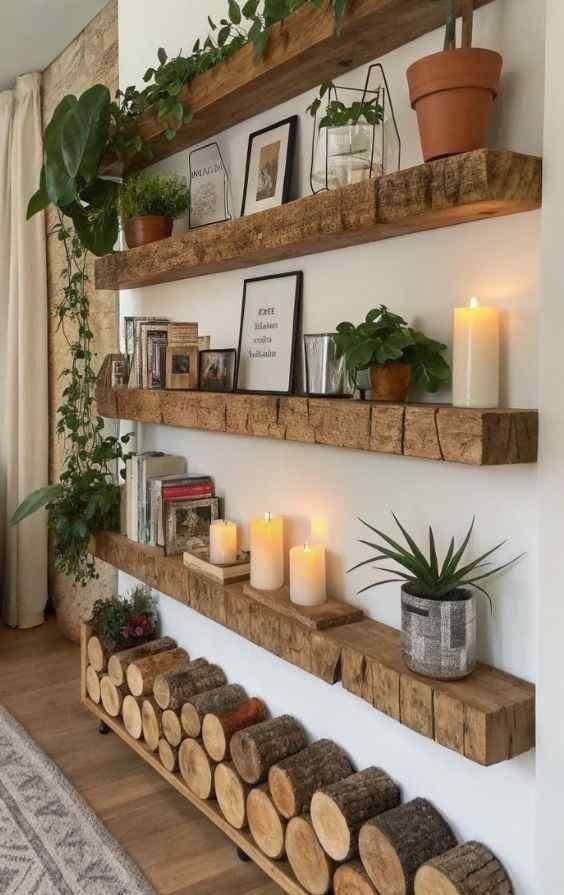
Instead of thinking of shelves purely as storage, you can turn them into functional wall art.
Using reclaimed wood planks as floating shelves or wall-mounted displays, you create a striking visual feature that doubles as a place to showcase plants, books, or decor.
This DIY reclaimed wood wall art adds warmth, texture, and a practical twist to any blank wall.
How to Do It:
- Choose reclaimed wood planks that are sturdy and wide enough to hold items safely.
- Measure and mark the wall to ensure your shelves are level and evenly spaced.
- Install strong brackets or hidden wall mounts, depending on whether you want a visible or floating effect.
- Attach the wood planks securely, making sure they are supported and stable.
- Style the shelves with decorative items, plants, or small framed art to enhance the artistic look.
Crafting Tip:
- Keep the wood natural or lightly sand and stain it to bring out its grain and character.
- Use varying lengths or staggered placements to create visual interest and avoid a uniform, flat look.
- Consider adding LED strip lights under the shelves for subtle illumination that highlights both the wood and the items displayed.
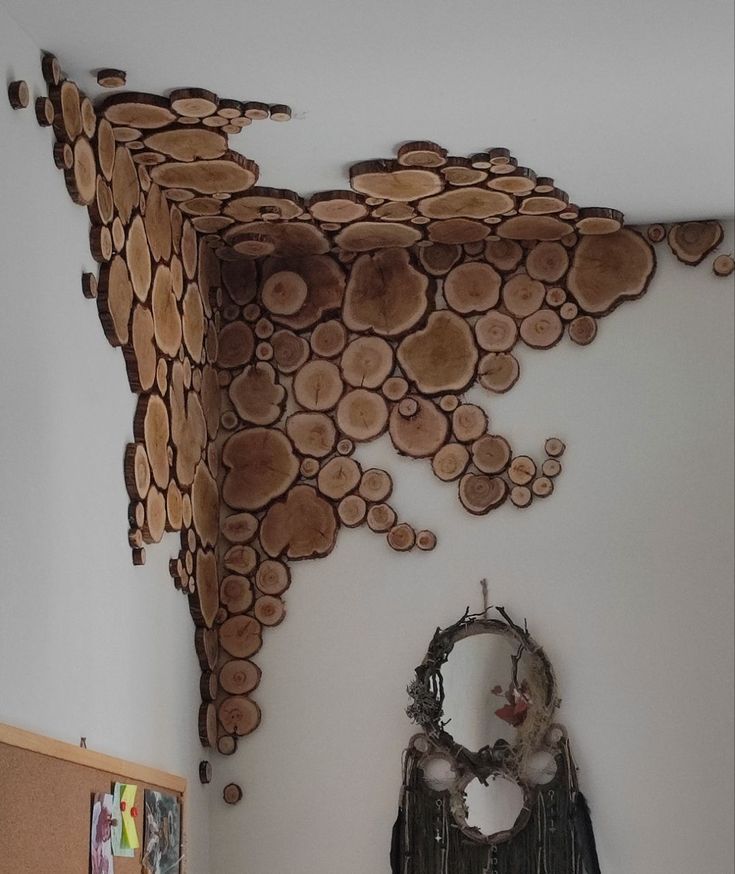
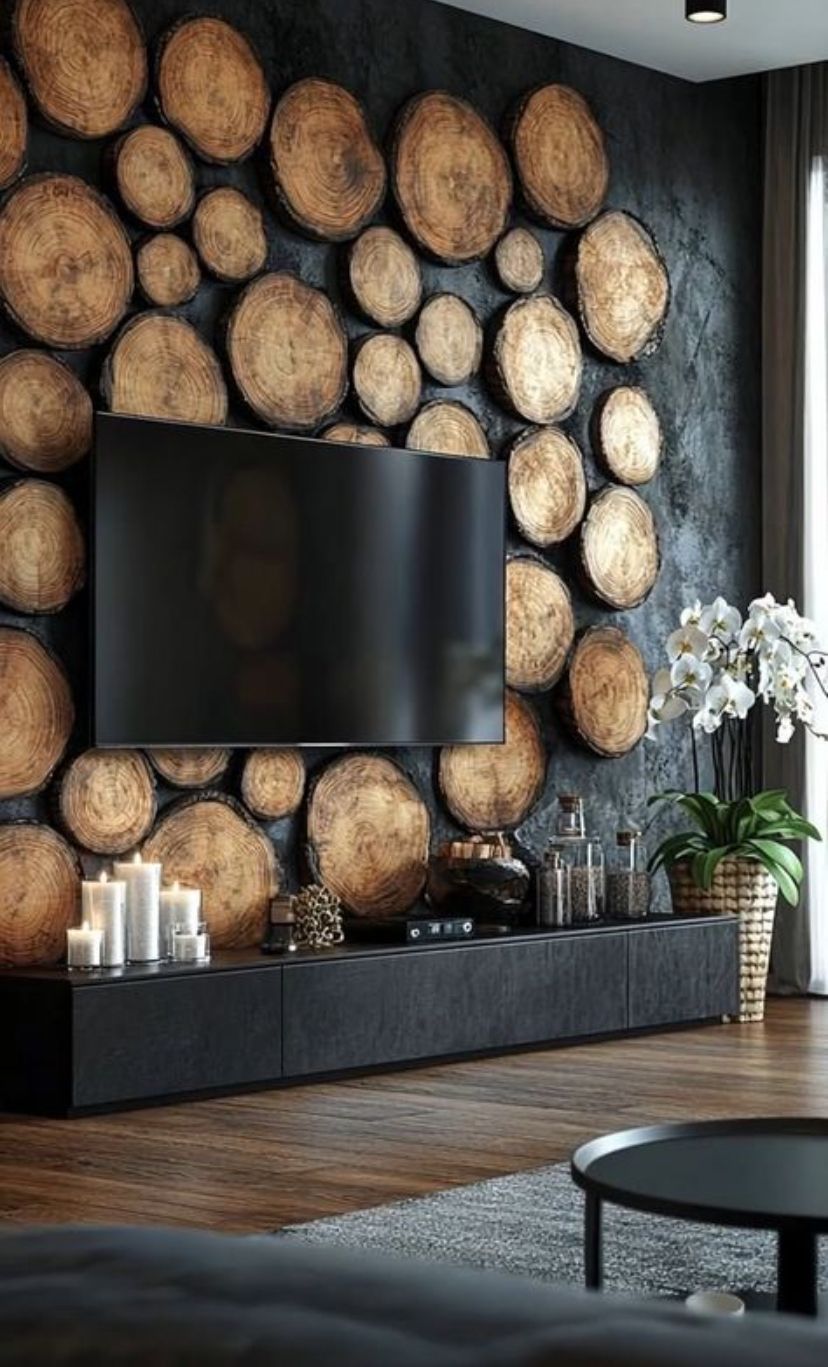
5. Wood Slice Mosaic
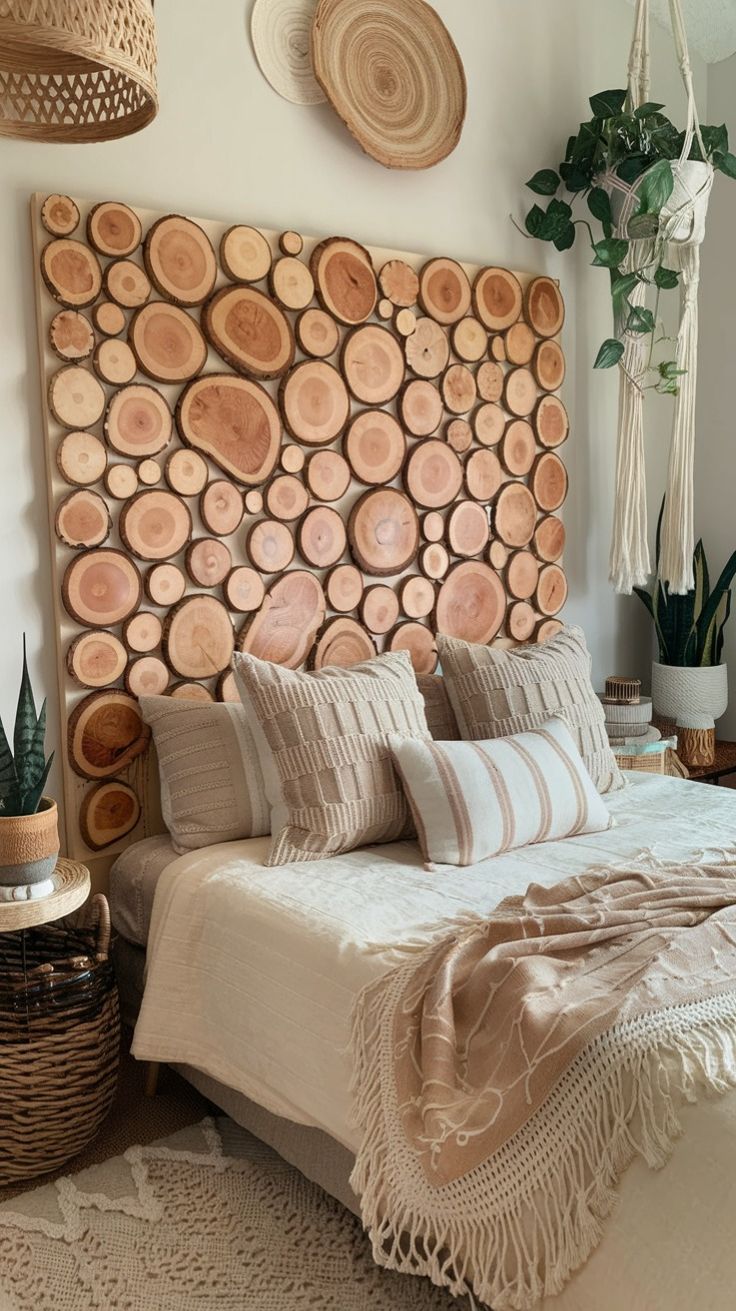
Turn a plain wall into a natural focal point by arranging thin rounds of wood into a mosaic.
Each slice showcases the wood’s rings and textures, creating an organic, earthy pattern that adds warmth and depth to any room.
This type of wall art is perfect for bringing nature indoors while making a subtle yet striking statement.
How to Do It:
- Collect wood slices of varying diameters and thicknesses, making sure they are sanded smooth.
- Plan your layout on the floor, experimenting with patterns such as circles, clusters, or an abstract arrangement.
- Mark the wall lightly with pencil guidelines to help with placement.
- Attach each slice using strong wood adhesive or small nails, starting from the center and working outward.
- Adjust spacing between slices to create balance and visual rhythm across the wall.
Crafting Tip:
- Keep some slices raw and others lightly stained for a natural gradient effect.
- Vary slice thicknesses slightly to add dimension and shadow for a 3D look.
- Consider sealing the slices with a matte finish to protect against cracking while maintaining a natural appearance.
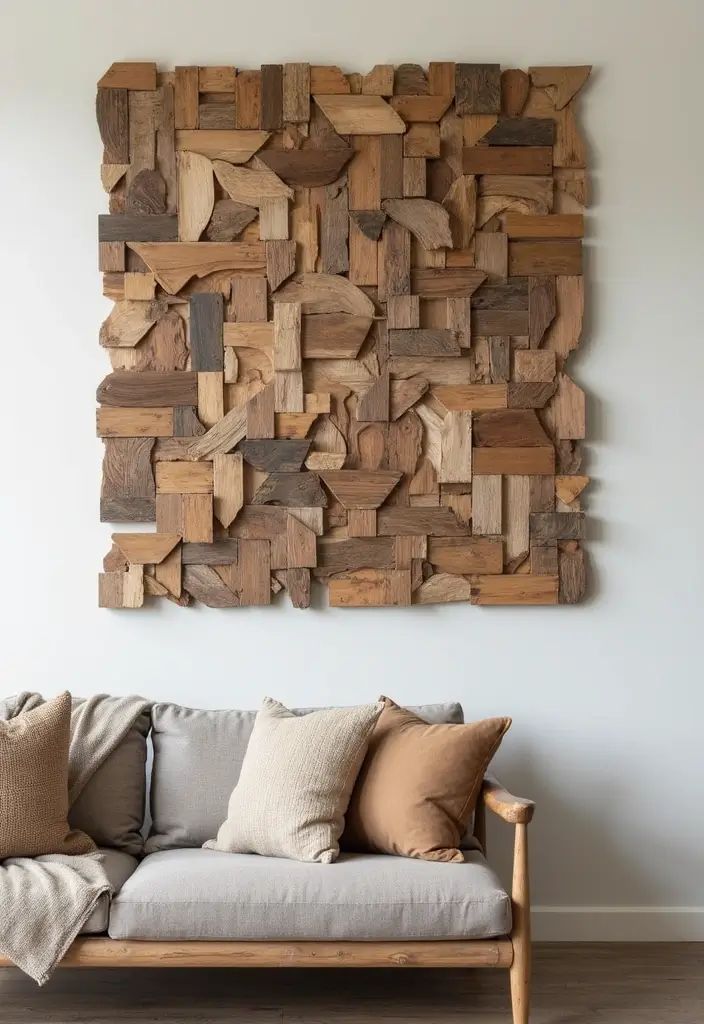
6. Layered Wood Panels
Give your walls instant texture and depth by stacking reclaimed wood planks in layers. This technique creates a rich, dimensional effect that turns a blank wall into a striking feature.
Using different plank sizes, tones, and orientations adds movement and interest, making it one of the easiest ways to elevate your DIY reclaimed wood wall art without complicated tools.
How to Do It:
- Collect reclaimed wood planks of various lengths, widths, and finishes.
- Lay the planks on the floor to plan your layered pattern, experimenting with horizontal, vertical, or staggered arrangements.
- Start attaching the planks from the bottom layer, securing each with nails, screws, or strong wood adhesive.
- Gradually build up layers, overlapping planks to create depth and texture.
- Step back frequently to ensure the design feels balanced and visually appealing.
Crafting Tip:
- Mix light and dark wood tones to enhance depth and make the layers pop.
- Slightly vary plank thicknesses to create subtle shadows and a 3D effect.
- Keep edges straight for a modern look, or leave them uneven for a rustic, organic look.
Avoid frustration and wasted time by learning from The Most Common Crafting Mistakes Beginners Make , so your projects turn out perfectly every time.
7. Mixed Media Art
Create a statement piece that’s truly one-of-a-kind by combining reclaimed wood with other materials like metal, fabric, or paint.
This idea allows you to mix textures, colors, and patterns, transforming a plain wall into a dynamic, visually interesting space.
It’s a perfect way to push the boundaries of DIY reclaimed wood wall art and give your home a personalized, gallery-quality feel.
How to Do It:
- Gather reclaimed wood planks along with complementary materials such as metal sheets, fabric swatches, or acrylic paints.
- Plan your layout on a flat surface, experimenting with layering wood and other textures.
- Attach wood planks first using nails or strong adhesive, then add the secondary materials on top, making sure each element is secure.
- Consider varying heights or angles to create depth and visual intrigue.
- Step back regularly to adjust placement and ensure a balanced composition.
Crafting Tip:
- Balance textures carefully, let the warmth of the wood contrast with the shine of metal or softness of fabric.
- Use neutral wood tones to anchor brighter materials for a cohesive look.
- Don’t be afraid to mix finishes, matte paint, rough wood, and polished metal can work beautifully together.
8. Herringbone or Chevron Wall
![]()
Transform a plain wall into a stylish focal point by arranging reclaimed wood planks in herringbone or chevron patterns.
This design adds movement and a modern, trendy feel while showcasing the natural texture and warmth of the wood. It’s a bold yet versatile way to make any room feel polished and intentional.
How to Do It:
- Collect reclaimed wood planks of equal width for consistency.
- Measure and mark your wall with a guideline to ensure straight alignment.
- Start from the center or a corner, laying planks at precise angles to create the herringbone or chevron pattern.
- Attach each plank securely using nails, screws, or strong adhesive, checking angles as you go.
- Continue layering outward until the wall is covered or you achieve the desired design.
Crafting Tip:
- Keep plank widths and angles consistent to maintain a clean, professional look.
- Mix wood tones subtly to add depth without distracting from the pattern.
- Sand edges lightly to avoid splinters and enhance the natural grain of the wood.
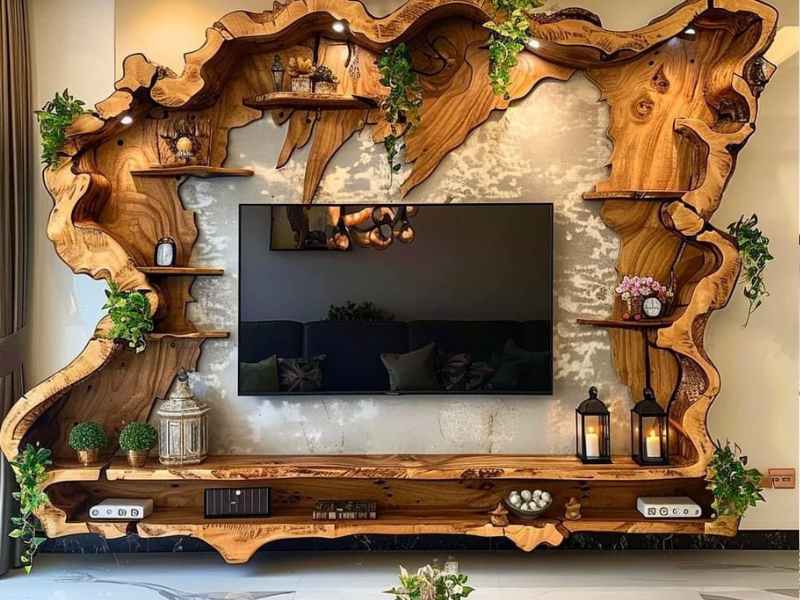
9. Wood and Light Combo
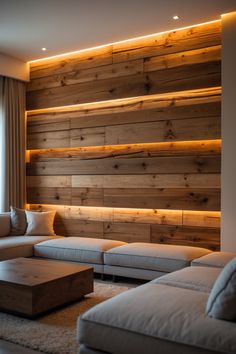
Give your walls a modern, ambient twist by integrating LED lights behind reclaimed wood panels.
This technique highlights the wood’s natural texture while creating a warm, glowing effect that instantly elevates a room.
It’s a nice way to make your DIY reclaimed wood wall art both visually striking and functional, combining design and subtle illumination in one.
How to Do It:
- Choose reclaimed wood panels that are wide enough to conceal LED strips behind them.
- Plan your layout and determine where the LED strips will run for even lighting.
- Attach the wood panels to the wall securely, leaving space at the back for LED placement.
- Install LED strips along the hidden edges or behind panels, following the manufacturer’s instructions.
- Connect the lights to a power source and test the glow before finalizing placement.
Crafting Tip:
- Use warm white LED lights to maintain a cozy, inviting atmosphere.
- Vary plank thickness slightly to create soft shadows and depth.
- Ensure wiring is neatly tucked behind the panels to keep the display clean and professional-looking.
10. Map or Silhouette Art
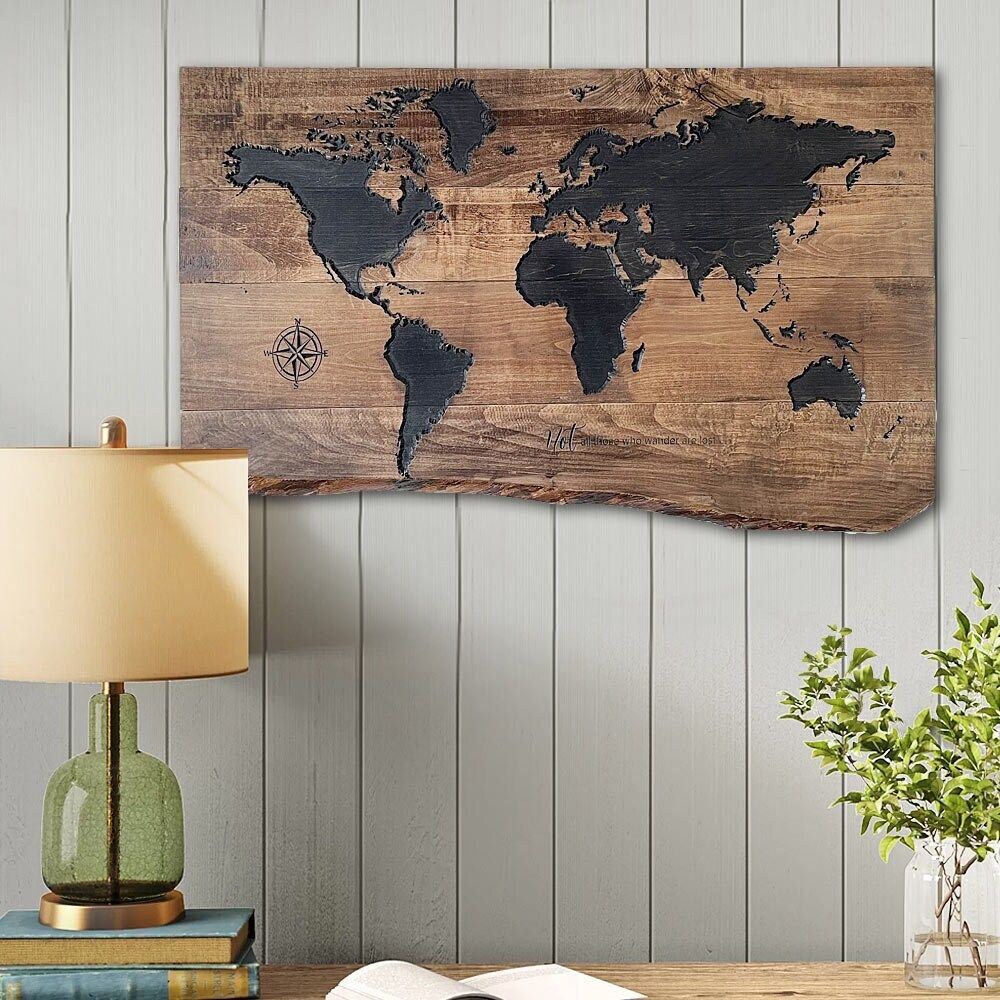
Turn reclaimed wood panels into personalized wall statements by carving or painting maps, animal shapes, or abstract silhouettes.
This approach brings character and story to a blank wall, making it a conversation piece while highlighting the natural beauty of the wood.
Whether it’s a favorite city skyline or a meaningful shape, this idea transforms your wall into functional art.
How to Do It:
- Choose reclaimed wood panels that are smooth and wide enough for your design.
- Select your subject, city map, animal, or abstract shape, and create or print a stencil.
- Lightly trace the design onto the wood using pencil or chalk.
- Carve with a chisel or wood-burning tool, or paint carefully using acrylics or wood-friendly paint.
- Seal the panel with a clear matte or satin finish to protect your design and enhance the wood grain.
Crafting Tip:
- Always use a stencil for precision, especially for intricate maps or detailed silhouettes.
- Mix natural wood tones with painted sections to add depth and visual interest.
- Position panels at eye level for maximum impact and easy viewing.
Get your DIY projects off to a strong start with 10 Must-Have Crafts Tools For DIY , hand-picked to make even complex projects simple and enjoyable.
11. Reclaimed Wood Clocks
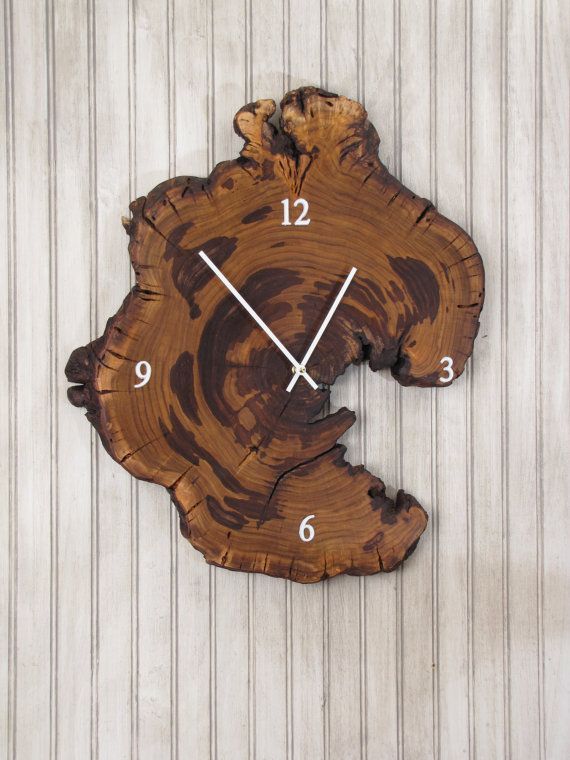
A reclaimed wood clock brings both charm and function to any wall. Using a plank or circular slice, the natural grain, knots, and weathered texture create a rustic yet stylish backdrop for a working timepiece.
It’s a subtle way to add personality to a room while keeping your wall art practical and eye-catching.
How to Do It:
- Select a thick, sturdy wood plank or circular slice that can support a clock mechanism.
- Sand the wood surface to remove splinters while keeping natural grain patterns visible.
- Mark the center and drill a hole for the clock mechanism according to the manufacturer’s instructions.
- Attach the clock mechanism and hands securely.
- Mount the wood clock on the wall using strong wall anchors or brackets.
Crafting Tip:
- Keep the wood finish natural or lightly stained to showcase its character.
- Choose clock hands and numerals that contrast with the wood for better readability.
- For a modern twist, pair rustic wood with sleek, minimalist hands.
12. Seasonal or Rotating Displays
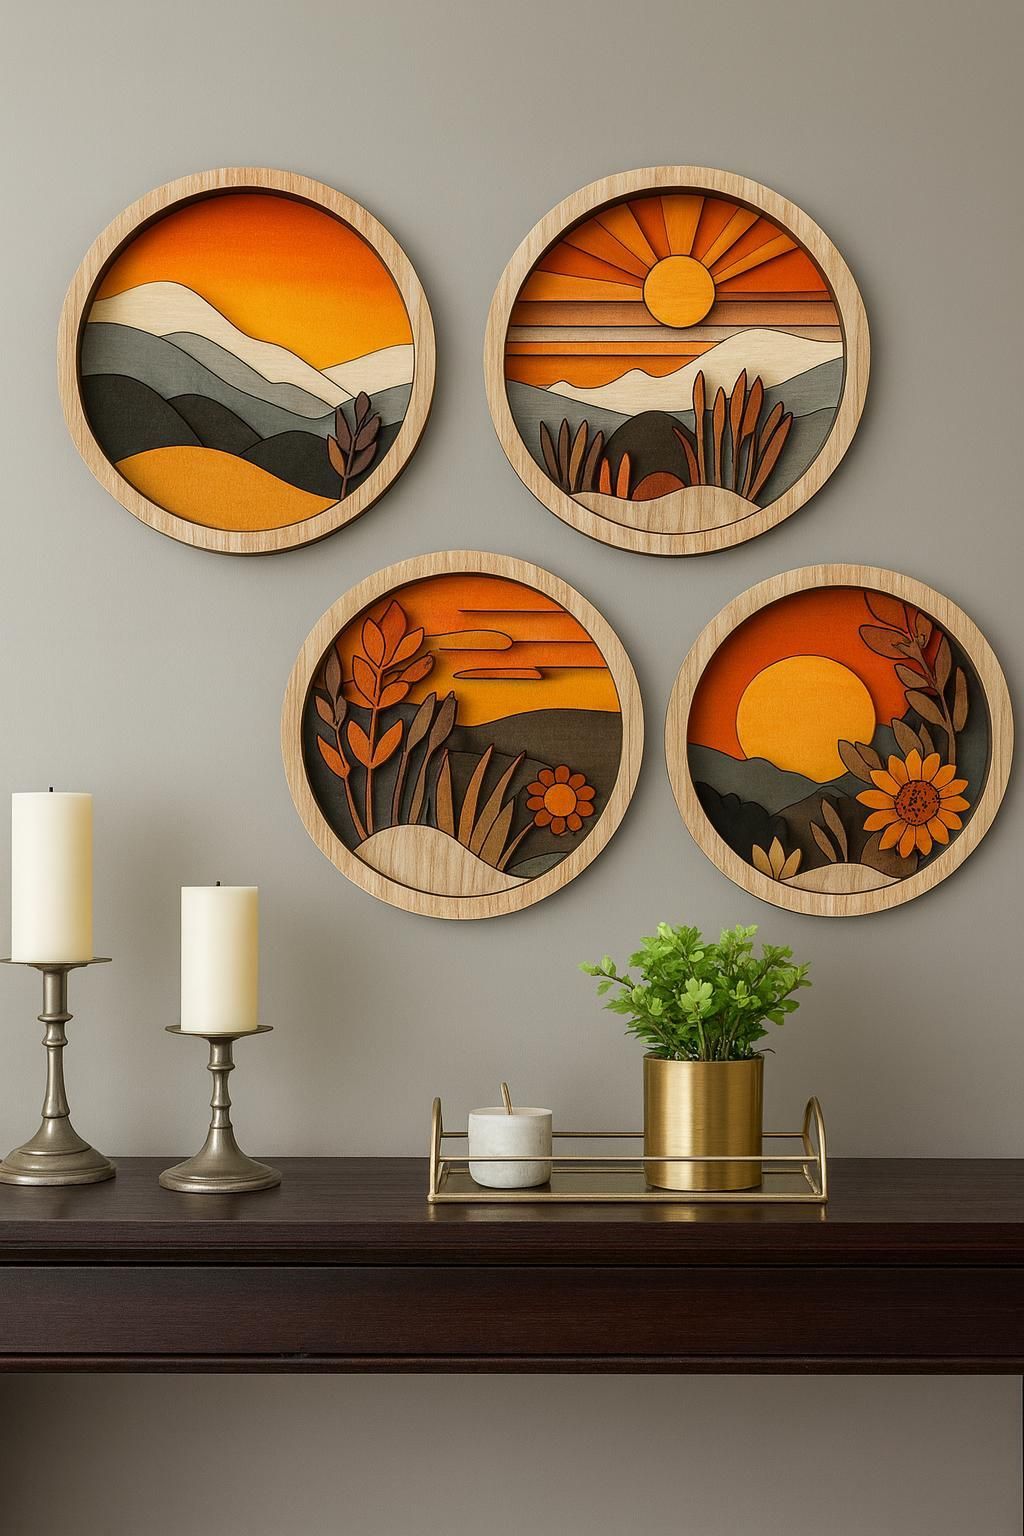
A flexible wall piece that adapts throughout the year adds personality and keeps your decor fresh.
Frame or panel that allows swapping seasonal accents, like autumn leaves, spring flowers, or holiday decorations, you create dynamic, engaging wall art.
This craft makes your DIY reclaimed wood wall art both functional and visually appealing, allowing your walls to evolve with the seasons.
How to Do It:
- Choose a reclaimed wood panel or frame that’s wide and sturdy enough to hold decorative elements.
- Attach hooks, clips, or small shelves to the panel for easy seasonal swaps.
- Prepare seasonal décor items that can be easily hung or placed on the panel.
- Mount the panel securely on the wall at a height that’s easy to reach for changes.
- Swap items regularly to keep the display engaging and relevant to each season.
Crafting Tip:
- Keep the wood base neutral to complement every season’s colors and textures.
- Use interchangeable hooks or clips to avoid damaging the wood when changing displays.
- Consider adding subtle string lights or small accents to enhance the seasonal look.
13. Oversized Statement Panel

A large reclaimed wood panel can instantly anchor a room and serve as a dramatic focal point.
With a single oversized piece or a series of wide planks, you create a bold, cohesive look that fills a blank wall without overcrowding it.
This style emphasizes the natural beauty and texture of the wood, making a striking visual impact in living rooms, bedrooms, or entryways.
How to Do It:
- Select wide reclaimed wood planks or a single large panel with interesting grain patterns.
- Sand the surface lightly to remove rough spots while keeping natural textures intact.
- Arrange planks (if using multiple) on the floor to ensure a balanced composition before mounting.
- Secure the panel(s) to the wall with strong anchors, screws, or brackets suitable for the weight.
- Step back frequently to check alignment and ensure the panel feels centered and proportional to the wall.
Crafting Tip:
- Highlight the wood’s natural grain and imperfections to add character and warmth.
- For added drama, consider a subtle stain or finish that contrasts slightly with surrounding walls.
- If mounting a very large piece, use multiple support points to prevent warping or sagging over time.
Finally, ensure your creations last with The Best Sealant For Crafts, protecting your hard work while maintaining a professional finish.
Ways to Make Your DIY Wall Art Last
Ensuring your reclaimed wood wall art stands the test of time takes a little extra care, but it’s worth it for a beautiful, safe, and long-lasting display. Follow these tips to keep your creations looking great for years:
- Sand and Seal: Always sand reclaimed wood thoroughly to remove splinters, rough spots, and debris. Seal with a clear finish to protect against moisture, pests, and cracking.
- Secure Properly: Use the right wall anchors or brackets for heavier pieces to prevent accidents or sagging over time.
- Balance Wood Tones: Mix warm and cool undertones thoughtfully to create visual harmony and avoid clashes in your space.
- Gallery Composition: Combine smaller pieces into a curated gallery wall to make a statement without overcrowding the space.
These steps help preserve both the beauty and functionality of your DIY wall art, making sure your reclaimed wood projects remain a focal point for years to come.
A seasonal refresh doesn’t have to be overwhelming, these 5 Gentle Ways to Style a Spring Mantel show how to keep your space cozy, fresh, and effortlessly stylish.
Conclusion
A blank wall is a chance to show a little creativity, personality, and heart. These reclaimed wood projects aren’t just decor, they’re stories you build with your own hands.
Pick one idea, enjoy the process, and see how a few thoughtful touches can make your home feel warmer, fuller, and unmistakably yours.
Which DIY reclaimed wood wall art will you bring to life first? Grab some wood, get creative, and let your walls start the conversation.”