This post contains affiliate links. This means I may earn a small commission if you purchase through my links at no extra cost to you.
Fall hits and suddenly every parent on earth is searching for a craft that doesn’t require a $40 Michaels haul and a degree in patience. Good news.
Corn husk crafts for kids cost almost nothing, use a material most people throw away, and actually keep small hands busy long enough for you to finish your coffee.
These are corn husk crafts for kids that work in real life messy, satisfying, and simple enough that a five-year-old can do most of them without someone hovering over every step.
In this post, you’ll find ten projects that use basic supplies, skip the specialty store entirely, and cover a wide range of ages.
Whether you’re a parent filling a weekend, a teacher building a fall unit, or someone who just needs the kids off screens for an hour these deliver.
If you’re looking for more fall crafts for kids, these apple crafts kids will beg to repeat are just as easy to pull off with supplies you already have at home.
Why Corn Husks Are Perfect For Kids’ Crafts
Most people don’t think of corn husks as a craft supply. They think of tamales. Maybe compost.
But once you actually hand a dried husk to a kid and let them twist it, fold it, paint it, or tear it you realize this material was practically designed for small hands and short attention spans.
They’re Cheap, Flexible, and Surprisingly Forgiving
A pack of dried corn husks costs around two to three dollars at most grocery stores.
That single pack gives you enough material for an entire classroom or a full weekend of crafting at home.
And unlike construction paper that rips the second you look at it sideways, corn husks bend without breaking.
They fold, twist, and wrap without tearing which means fewer frustrated tears from the actual child, too. If a fold doesn’t work, you just redo it. No waste. No drama.
Fresh husks straight off summer corn work just as well. Peel them off, let them dry flat for a day or two, and they’re ready.
Either way, you’re working with a material that costs close to nothing and feels a lot more interesting than paper.
The National Wildlife Federation recommends nature-based crafting as one of the best ways to get kids connected to the outdoors, even when the project happens at the kitchen table.
How to Prep Corn Husks for Crafting
If you’re using dried husks from the store, soak them in a bowl of warm water for about ten minutes. They’ll soften up and become pliable easy to fold, easy to cut, easy to shape.
Pat them dry with a towel before crafting so the glue sticks and the markers don’t bleed. That’s it.
Ten minutes of soaking and you’re ready to go.
Fresh husks need even less prep. Just peel and use. If they dry out mid-project, a quick dip in water brings them right back.
The whole process is so simple that kids can do the prep themselves, which honestly makes them feel more invested before the crafting even starts.
Quick Age Guidance and Basic Supplies
Most of the corn husk crafts for kids in this post work for ages four and up. Some of the simpler ones painting, garland stringing work for kids as young as three with a little adult help.
The ones that involve tying and cutting are better for five and older, or with an adult handling the scissors. Not sure which glue to reach for?
This breakdown of what type of glue to use for paper crafts covers everything from hot glue to craft glue and when each one actually works.
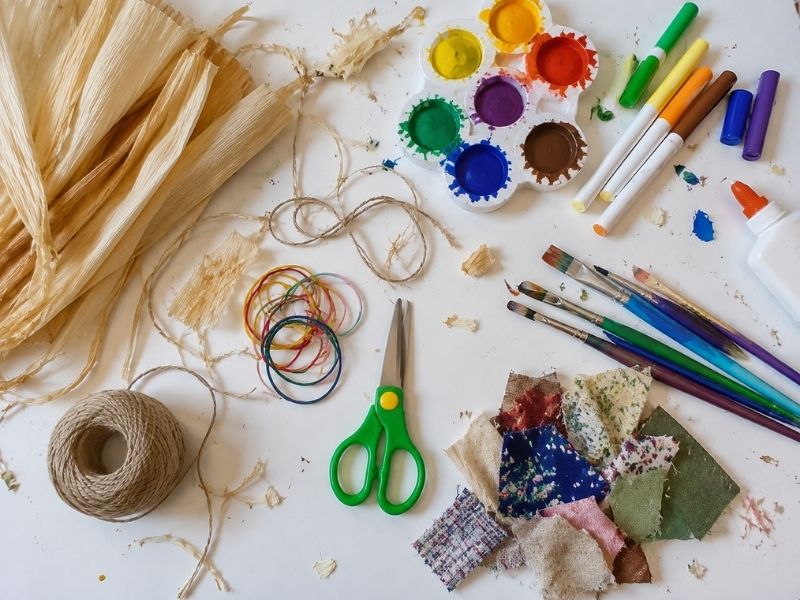
Basic supplies most of these crafts share: corn husks (dried or fresh), scissors, string or rubber bands, craft glue or a low-temp hot glue gun, markers, and paint. You probably already have most of this in a drawer somewhere. That’s the whole point.
1. Corn Husk Dolls — The Classic That Never Gets Old
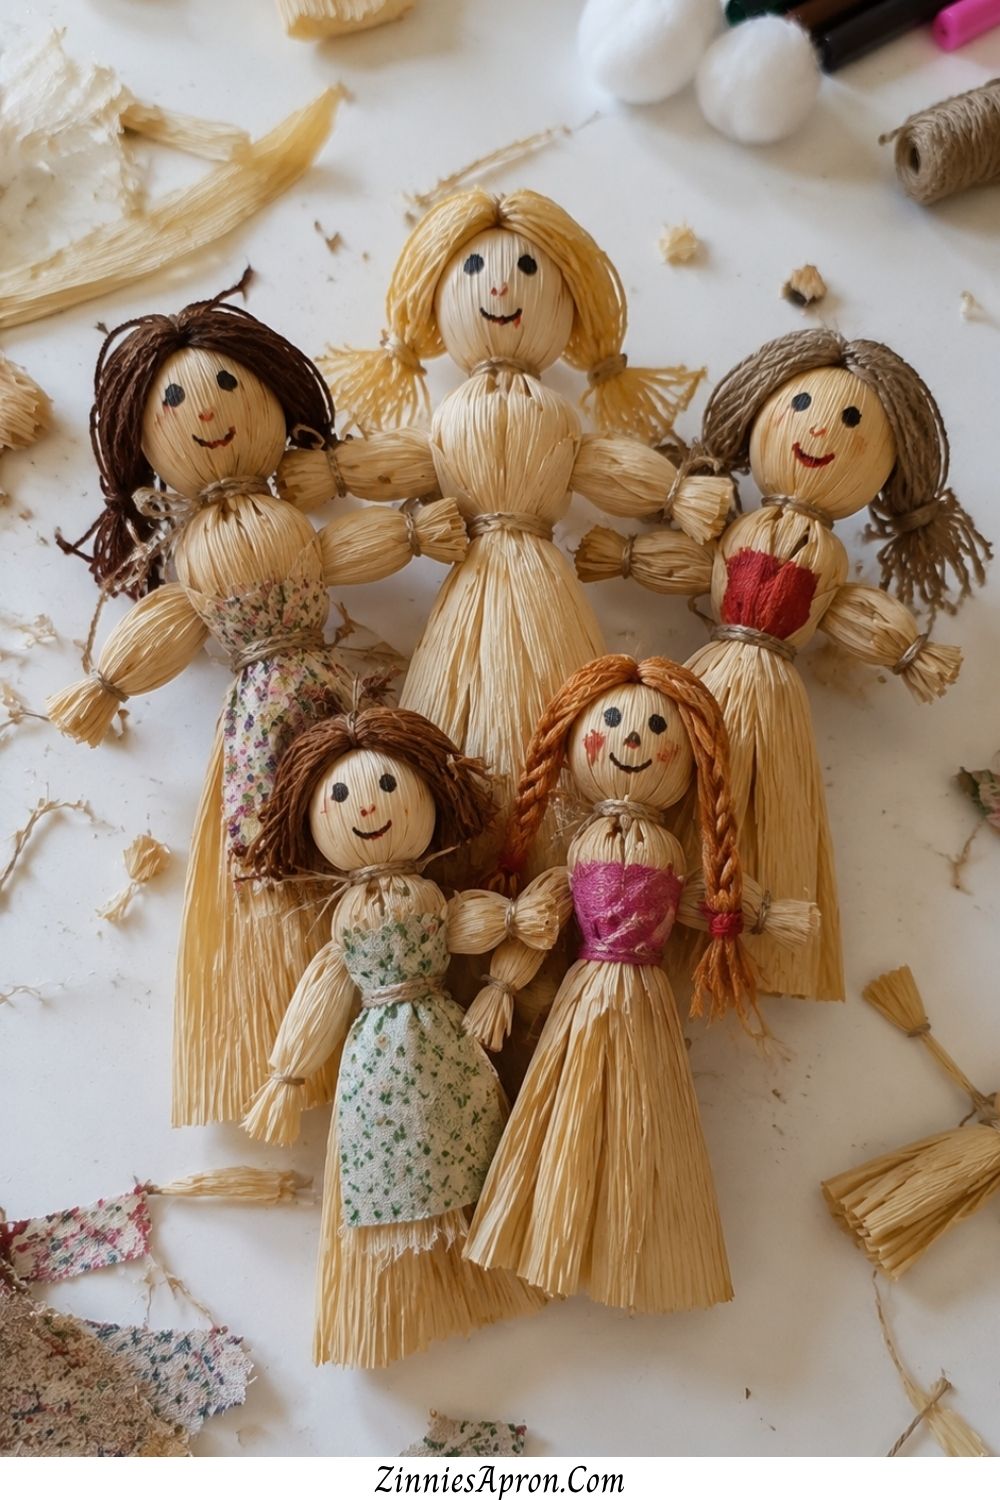
This is the one your grandmother might have made. Corn husk dolls have been around for centuries they were originally crafted by Indigenous peoples across North America, and the tradition has been passed down through generations.
There’s a reason this craft keeps showing up. It works.
Why kids love it: There’s something genuinely satisfying about taking a flat husk and turning it into a figure that stands on its own.
Kids get to shape something with their hands, give it a personality, and name it. That last part always happens, by the way. Every single time.
Age range: 5+ (younger kids can help with decorating but will need an adult for tying)
Materials needed:
- 4–6 soaked corn husks
- String or thin rubber bands
- Scissors
- Markers or fabric scraps for decoration
How to get started: Stack two or three husks together, fold them in half over a small cotton ball for the head, and tie below to form the neck.
Roll a separate husk for arms, slide it between the layers below the head, and tie again at the waist.
Trim the bottom into a skirt shape or split it into legs. Decorate with markers, yarn hair, or tiny fabric scraps for clothing.
The Smithsonian’s National Museum of the American Indian has documented how these dolls carry deep cultural significance across many tribal nations a great conversation starter while the kids work.
Kids who enjoy making things they can actually play with will love this one. And when it’s finished, it doesn’t look like a craft project.
It looks like something someone kept on a shelf for years. For more hands-on activities that hold attention without overwhelming younger makers, these 15 easy popsicle stick crafts for kids are another great option.
2. Corn Husk Butterfly — Easy, Colorful, Great for Younger Kids
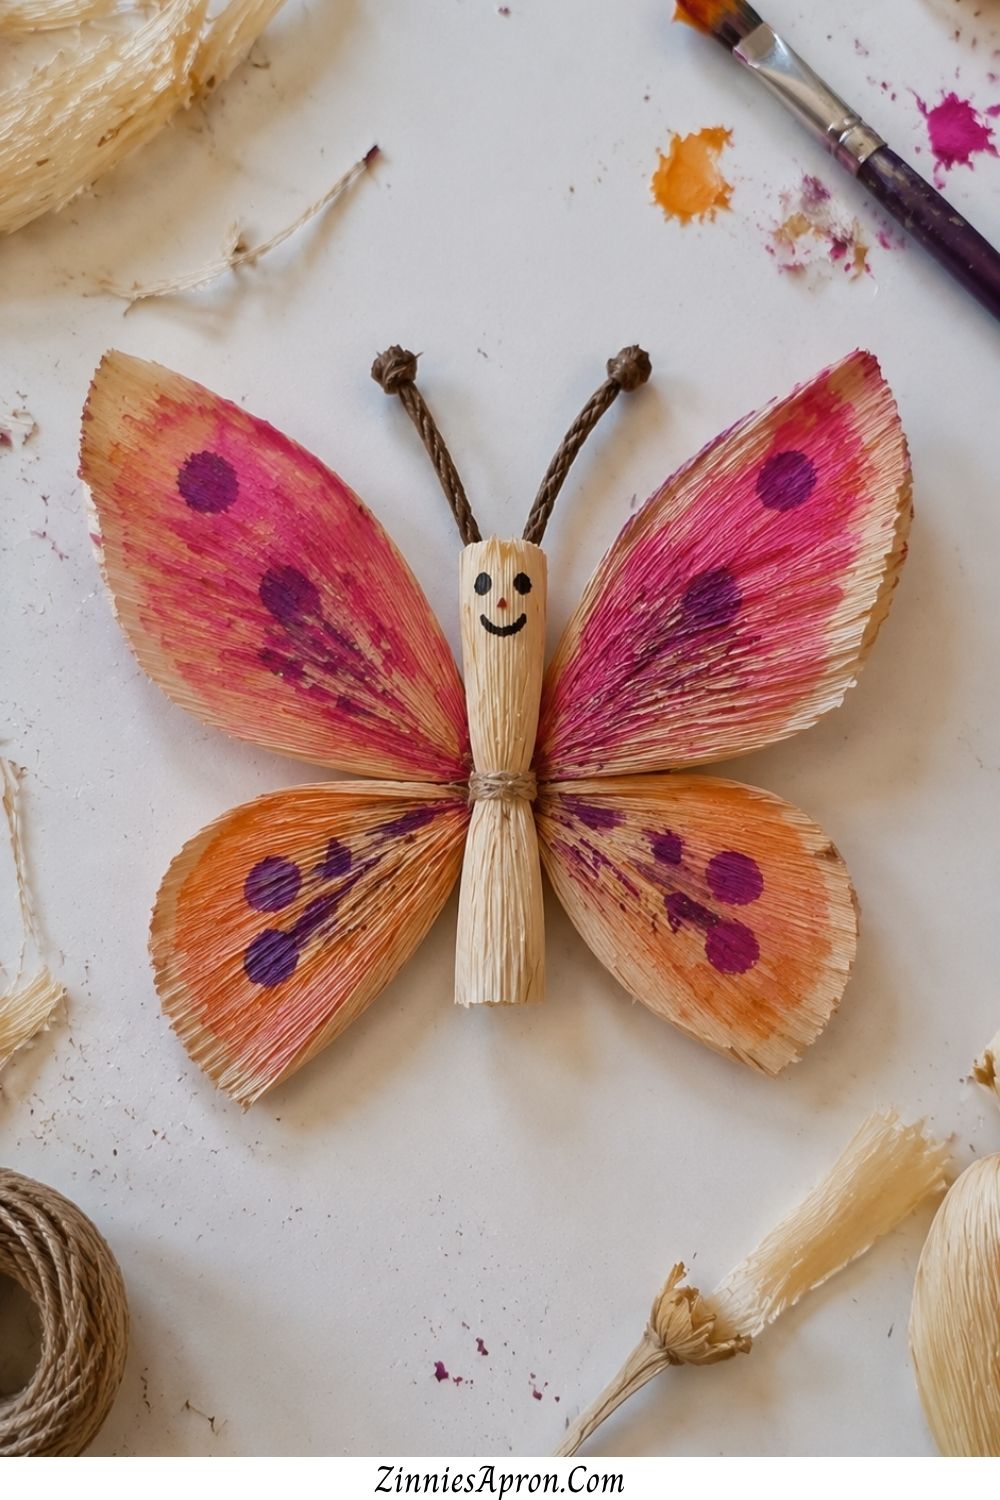
Two husks and some paint. That’s the whole project.
Why kids love it: Butterflies are universally beloved by small children, and the process of folding the husks into wing shapes and then painting them with bright colors gives kids creative freedom without complicated steps.
The symmetry isn’t required to be perfect, which takes all the pressure off.
Age range: 3+ with help, 5+ independently
Materials needed:
- 2 soaked corn husks
- Thin string or pipe cleaner
- Washable paint or markers
- Scissors
How to get started: Fold one husk accordion-style for the top wings and a second for the bottom wings.
Pinch both folded pieces together in the center and tie with string or wrap with a pipe cleaner. Fan out the edges to create the wing shape.
Use the pipe cleaner ends as antennae by curling them. Then paint. Go wild. Neon stripes, polka dots, glitter glue this is the craft where more is more.
These look beautiful hanging in a window or taped to a classroom wall. If you’re planning a full nature craft session, pairing these with woodland animal crafts for preschool creates a gorgeous themed display.
3. Corn Husk Flowers — Perfect for Kids Who Love Making Gifts

This one is so good. The finished flowers look genuinely elegant, and they last indefinitely because there’s nothing to wilt.
Why kids love it: Kids love giving gifts, especially gifts they made themselves.
A corn husk flower looks like it came from a craft boutique, and the look on a grandparent’s face when a six-year-old hands them a handmade flower bouquet? That never gets old. No matter how old you are.
Age range: 5+
Materials needed:
- 4–5 soaked corn husks per flower
- Green pipe cleaners or wooden skewers
- Scissors
- Optional: watercolor paint, food coloring
How to get started: Cut petal shapes from softened husks ovals with pointed tips work best.
Layer three to five petals around the top of a pipe cleaner or skewer, fanning them out slightly.
Secure the base with string or tape, then wrap a strip of husk around the stem to hide the attachment.
If you want color, dip the husks in diluted food coloring before shaping, or paint them after they dry.
A bouquet of five or six makes a gift that genuinely means something. This pairs beautifully with other handmade gift ideas in this guide to crafts to make for friends — meaningful things people actually want to receive.
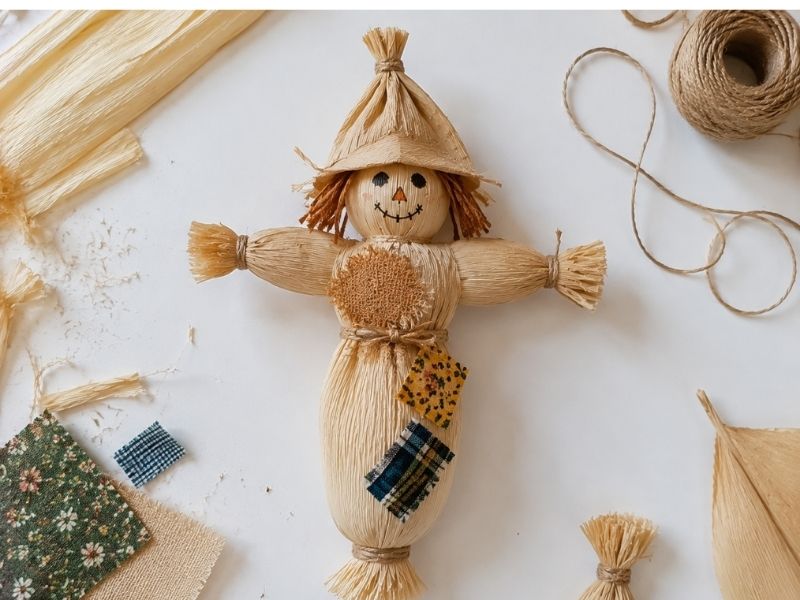
4. Corn Husk Scarecrow — Fall Decor Kids Can Actually Help With
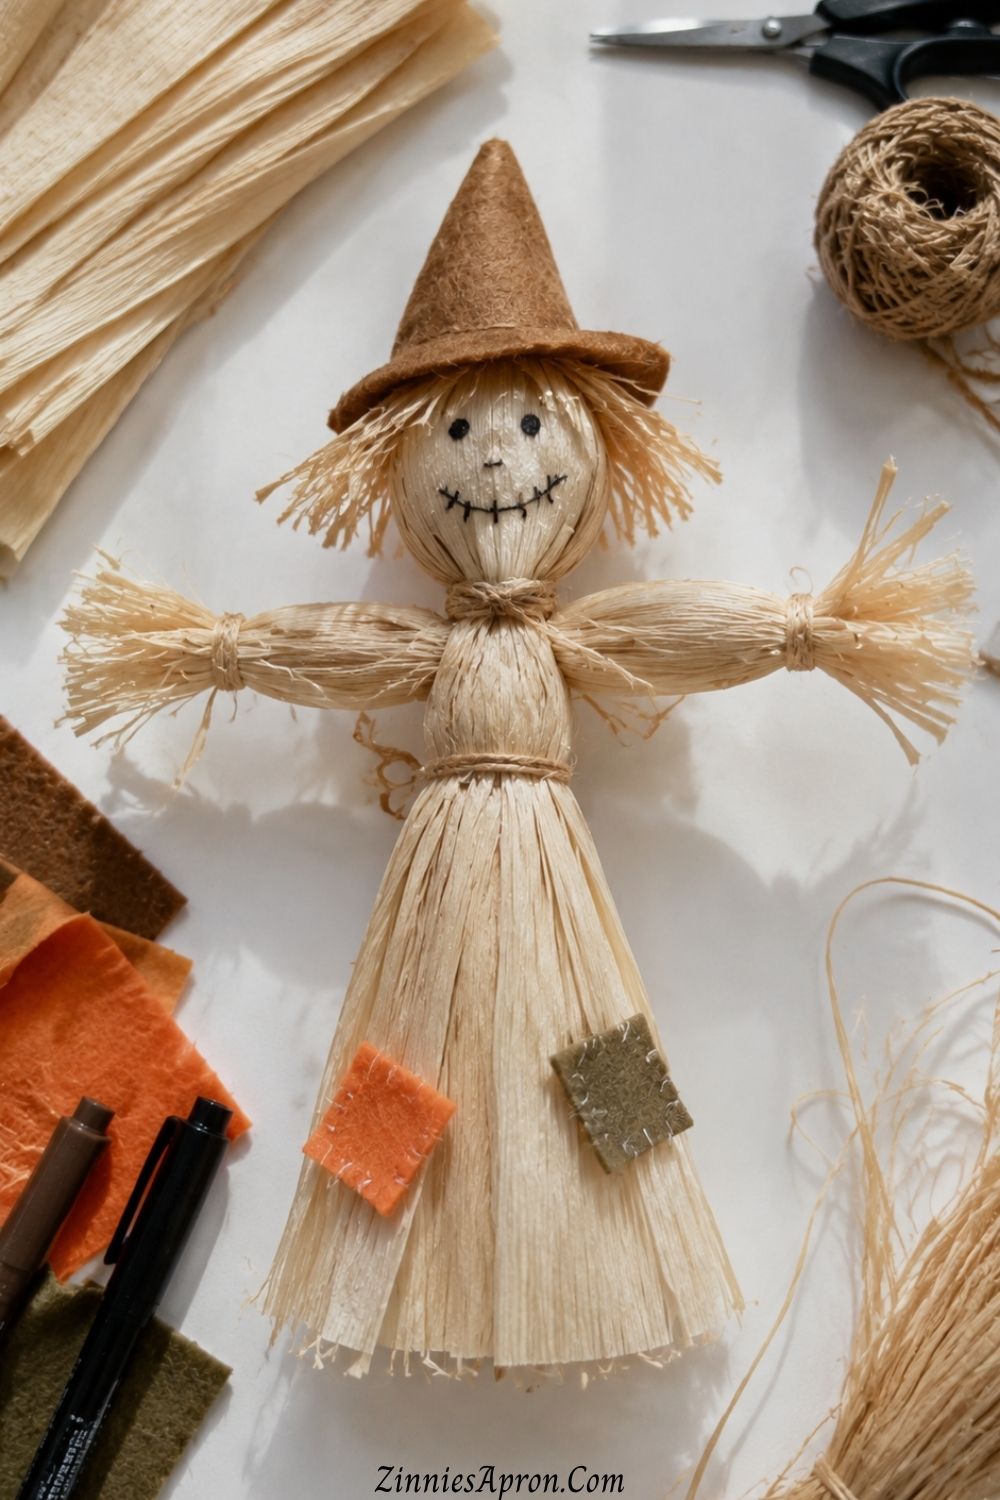
Every October, scarecrow decorations show up on porches everywhere. Most of them were bought. This one gets made by actual small humans and that changes everything about it.
Why kids love it: It’s a character they get to build from scratch. Body, hat, face the whole thing. And it stands up on its own, which matters more to kids than adults realize.
Something about making a thing that stands on a shelf and looks back at them.
Age range: 5+ (younger kids can paint the face and add accessories)
Materials needed:
- 6–8 soaked corn husks
- String
- Markers
- Small fabric scraps or felt for the hat and patches
- Straw or raffia (optional, for hair)
How to get started: Build it the same way you’d build a corn husk doll — head, arms, body but add scarecrow details.
Draw a stitched smile with markers. Cut a tiny felt triangle for a hat. Tie raffia at the wrists and ankles for that classic scarecrow look. The imperfections are what make it.
A crooked hat, a lopsided grin — those aren’t mistakes. That’s character.
For even more ways to decorate for fall with kids, these handprint fall deer crafts pair really well with a scarecrow on the same shelf.
5. Corn Husk Animals — Horses, Birds, Fish, Pick Your Adventure
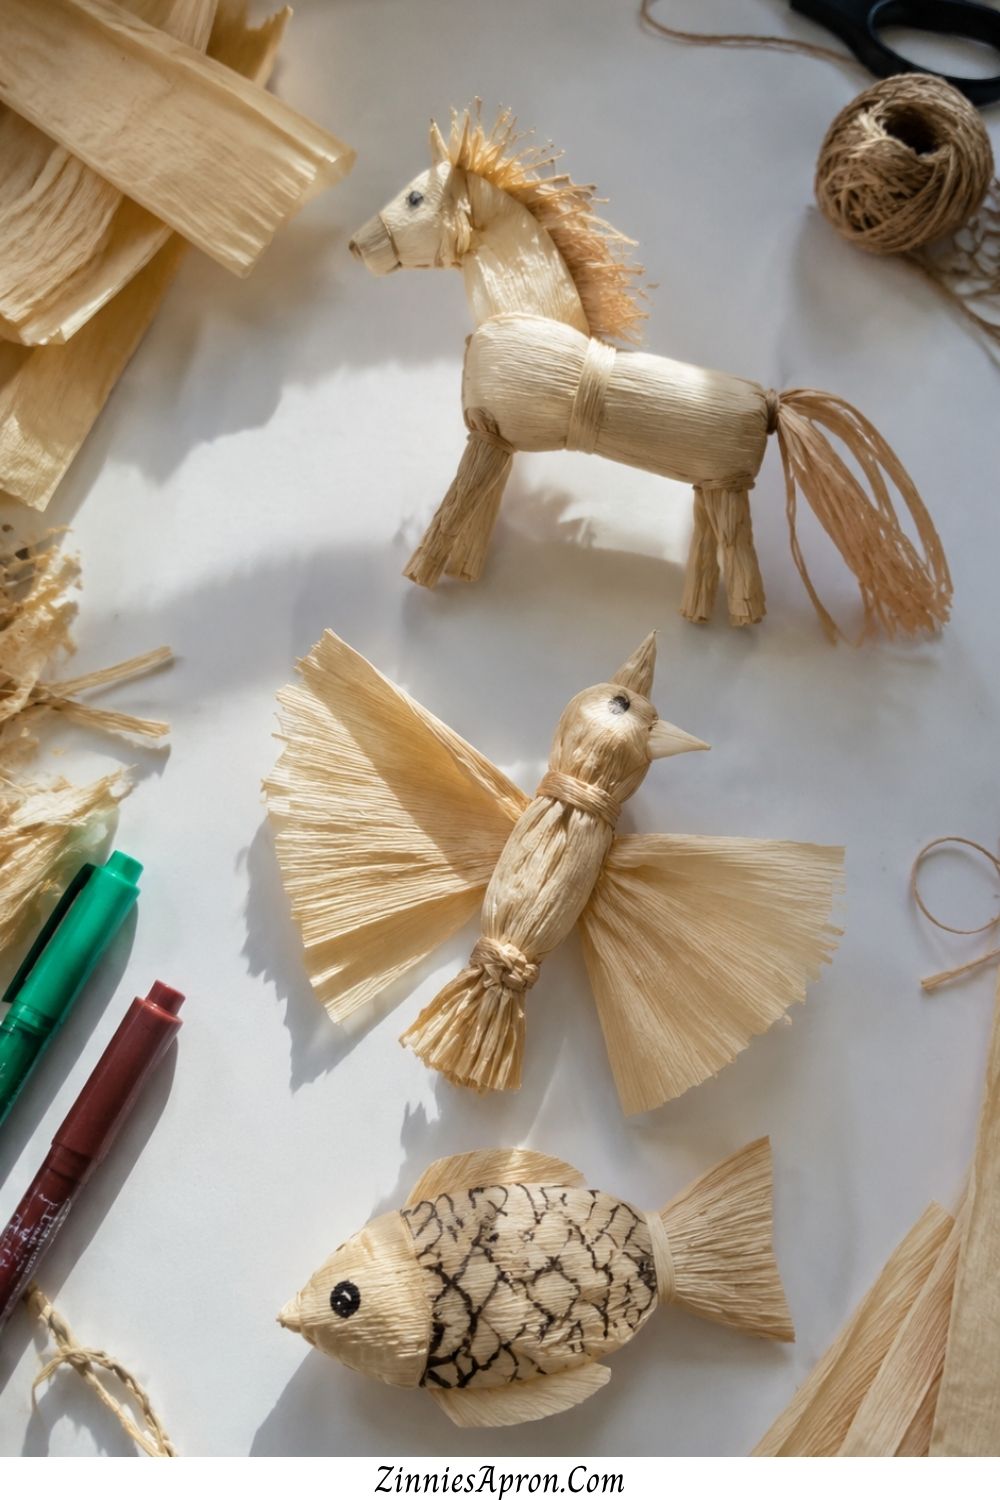
This is the corn husk craft for kids where they choose the direction. Some kids make a horse.
Some make a bird with fanned-out tail feathers. One kid inevitably makes a dinosaur. Let them.
Why kids love it: Freedom. Real creative freedom. You give them the basic technique — fold, shape, tie — and they decide what animal it becomes.
That’s the kind of autonomy kids crave in a craft project, and it keeps them engaged way longer than “follow these eight steps exactly.”
Age range: 5+
Materials needed:
- 3–5 soaked corn husks per animal
- String or thin wire
- Scissors
- Markers for details (eyes, spots)
How to get started: For a horse, roll a husk tightly for the body, fold separate pieces for four legs, and attach with string.
Shape a smaller roll for the head and neck. Use thin corn silk or shredded husk for the mane and tail. For a bird, fold wings from flat husks and fan them out.
For a fish, flatten a husk, cut a tail shape at one end, and draw scales with markers. The trick is to keep it loose — if you try to make these too perfect, the material fights you.
Let the natural shape of the husk guide the form. Kids who enjoy animal-themed making will also love these farm animal crafts for kids, especially if you’re building a whole menagerie.
6. Corn Husk Painting — Skip the Canvas, Paint Right on the Husk
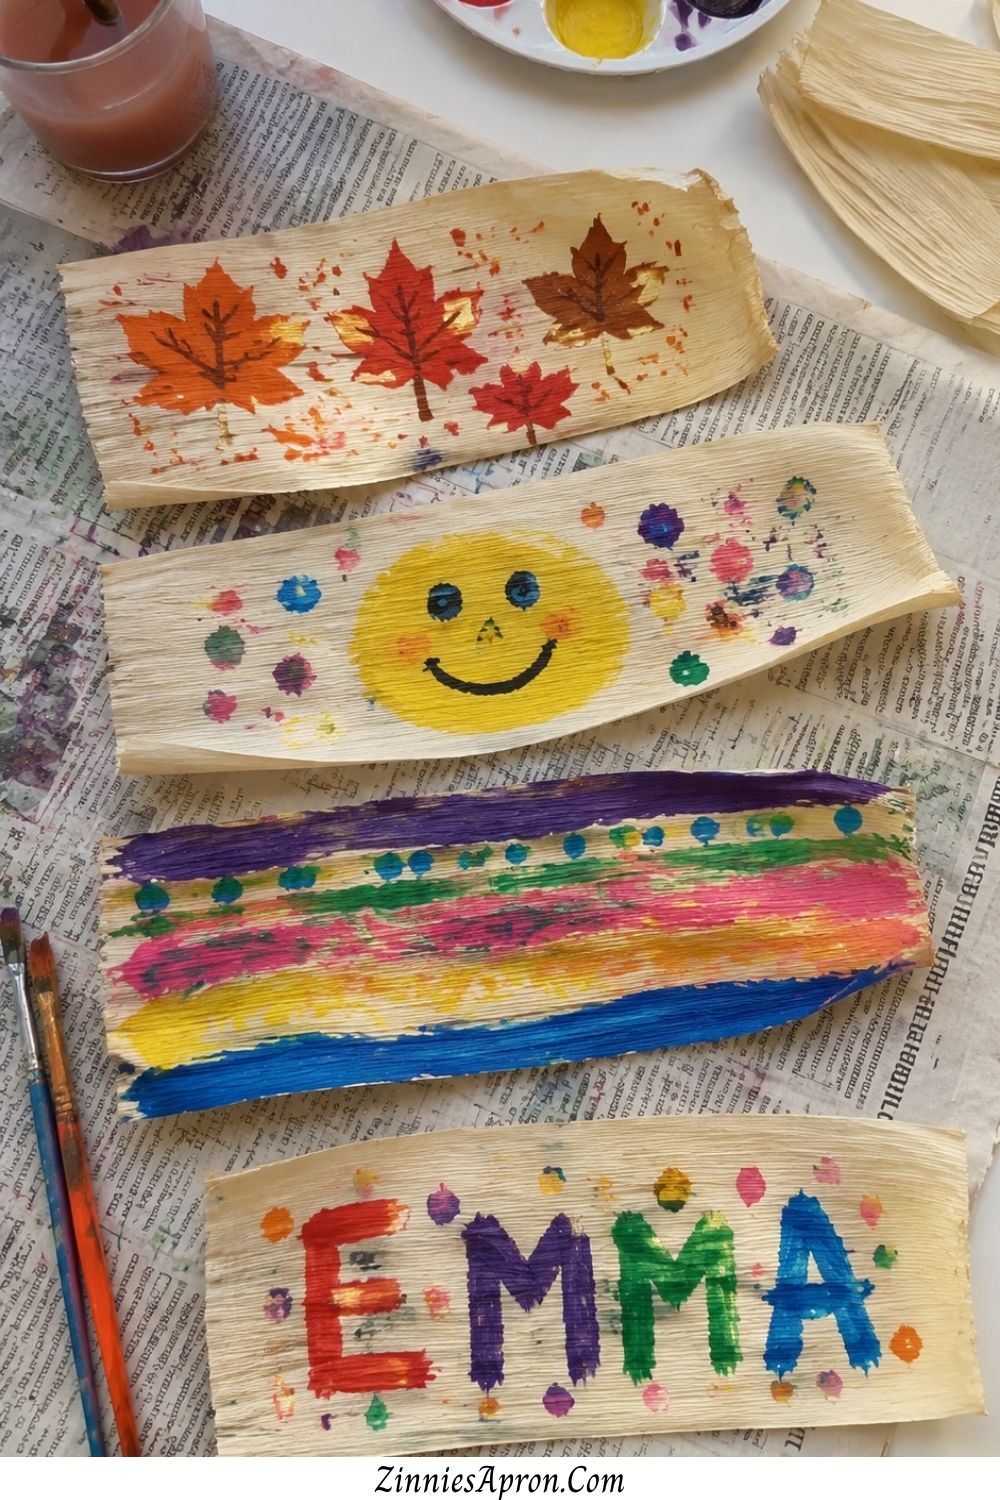
No shaping, no tying. No steps at all, really. Just paint.
Why kids love it: Because it feels different. Painting on a husk instead of paper changes the texture, the way paint sits, the way colors blend.
It’s the same activity they’ve done a hundred times, but the new surface makes it feel brand new. That small shift keeps kids interested in ways a fresh sheet of construction paper just doesn’t anymore.
Age range: 3+
Materials needed:
- Dried corn husks (flat, unsoaked)
- Washable tempera or acrylic paint
- Brushes
- Newspaper or a mat to protect the table
How to get started: Lay flat dried husks on newspaper. Paint whatever comes to mind — fall leaves, faces, abstract patterns, their name.
The natural ridges on the husk create a subtle texture that makes even a simple brushstroke look more interesting.
Once dry, these can be framed, taped to a window, or tucked into a fall display. Want to protect the finished artwork?
A quick coat of sealant keeps it looking fresh — this guide to the best sealant for crafts breaks down which type works best for natural materials.
7. Corn Husk Angel Ornaments — Faith-Friendly, Holiday Crossover

This craft bridges fall and Christmas so naturally that you can make it in October and still have it on the tree in December.
According to the National Association for the Education of Young Children, seasonal crafts that connect to a child’s family traditions strengthen their sense of identity and belonging and angel ornaments do exactly that.
Why kids love it: Angels are one of those figures that feel special to make.
Whether a family is faith-based or simply loves the holiday aesthetic, an angel ornament made by a child’s own hands carries weight.
It’s the ornament that gets unwrapped first every year. The one that still hangs on the tree when everything else gets upgraded.
Age range: 5+
Materials needed:
- 3 soaked corn husks
- String
- A small wooden bead for the head
- Gold pipe cleaner or thin wire for the halo
- Ribbon or string for hanging
How to get started: Drape a husk over the bead to form the head and body. Tie at the neck. Cut or fold two smaller husks into wing shapes and glue or tie them to the back.
Shape a halo from a gold pipe cleaner and insert it behind the head. Attach a ribbon loop at the top for hanging.
These ornaments dry beautifully and last for years. For families who enjoy faith-centered projects with their children, this collection of women’s Christian craft night ideas includes several projects that work just as well with kids at home.
8. Corn Husk Bookmarks — Simple and Actually Useful
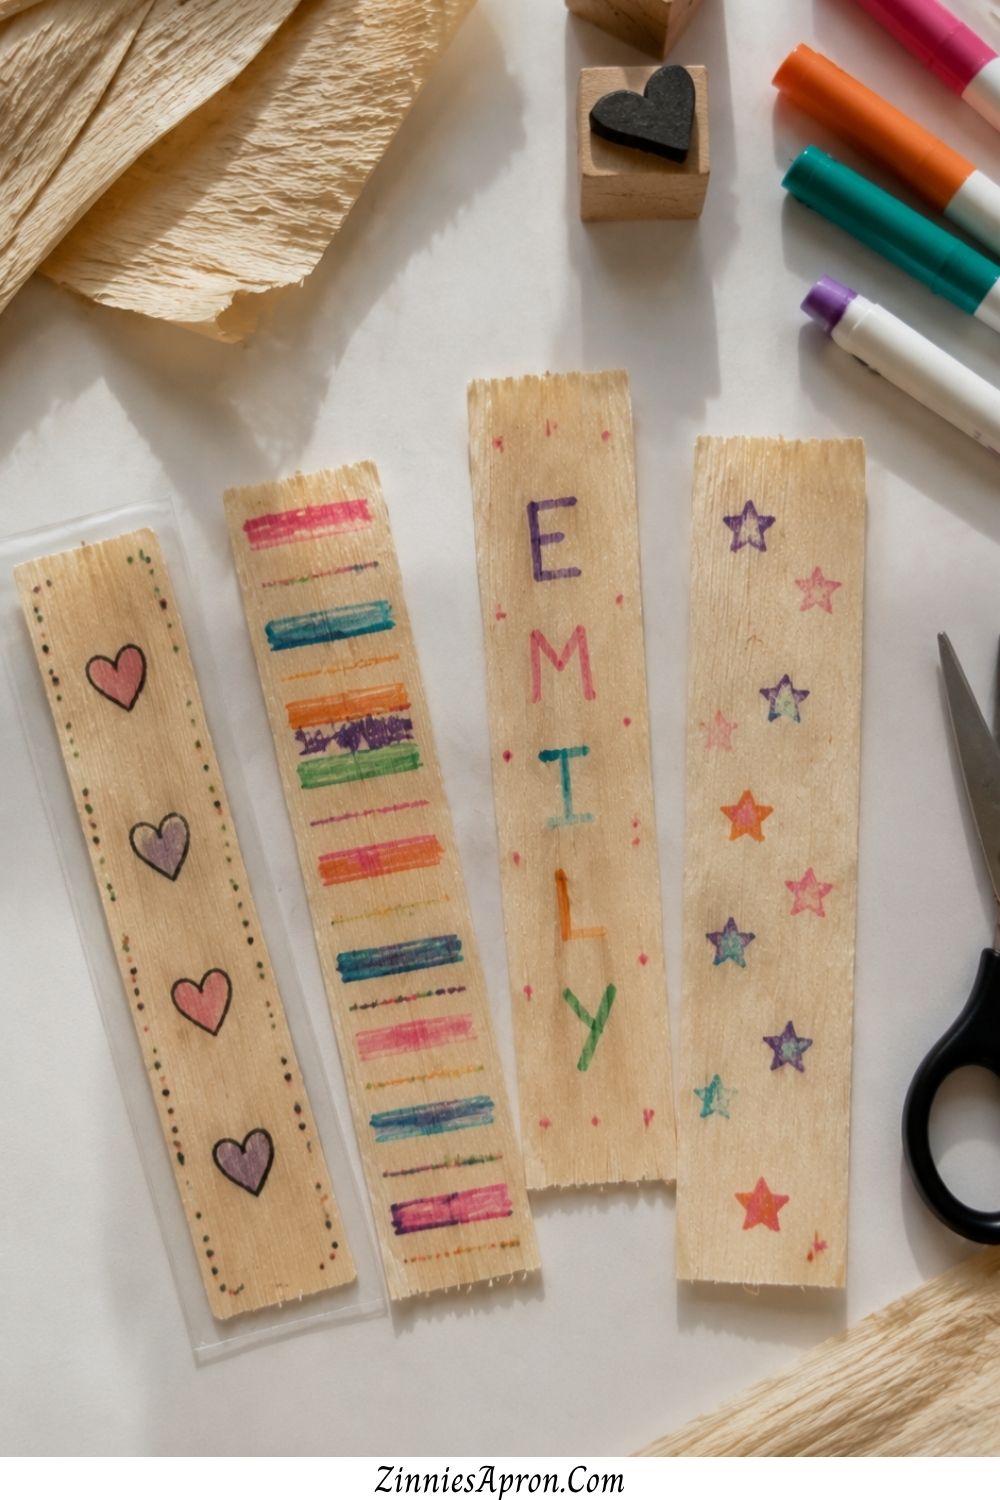
Two ingredients. A husk and a marker. That’s it.
Why kids love it: Because they get to use what they made. Not display it. Not store it. Actually use it.
A bookmark goes into a book and stays there, reminding them every single time they open it that they made something real. For kids who love reading, this is the craft that clicks.
Age range: 4+
Materials needed:
- Dried corn husks (flat strips)
- Markers, stamps, or stickers
- Scissors
- Optional: clear contact paper or laminating sheets
How to get started: Cut a dried husk into a strip about six inches long and one to two inches wide. Decorate with markers — patterns, words, tiny drawings.
For durability, slide the finished bookmark into a self-adhesive laminating pouch or press between two strips of clear contact paper.
Trim the edges clean. Done. These make thoughtful handmade gifts, especially for teachers, grandparents, or the kid’s own bookshelf.
For more craft ideas that double as meaningful presents, Christian DIY gifts for mom has a whole section on handmade bookmarks and keepsakes.
9. Corn Husk Wreath — Group Project Energy, Great for Classrooms
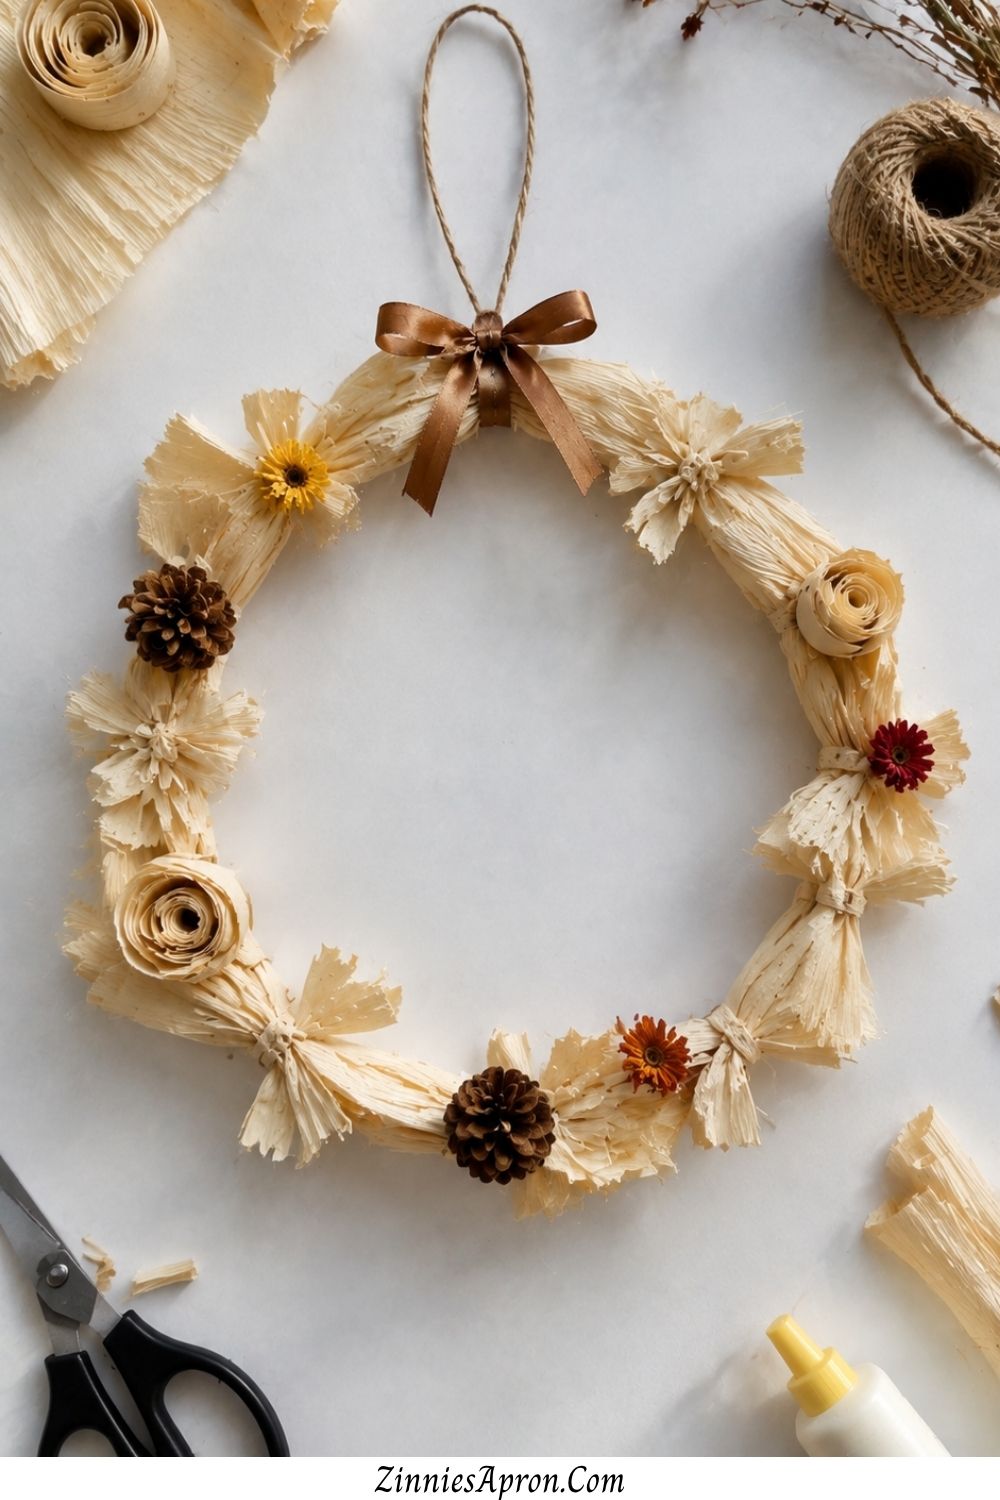
This is the one you pull out when you’ve got a group. A classroom, a scout troop, a birthday party, a rainy Sunday with cousins.
Everyone contributes a piece, and the finished wreath belongs to all of them.
Why kids love it: Because working on a big shared project feels different than making something solo. There’s an energy to it.
Kids talk to each other, compare their pieces, and watch the wreath come together piece by piece. The collaboration is the craft, and the wreath is just the proof that it happened.
Age range: 4+ (each child makes individual pieces; an adult assembles the wreath)
Materials needed:
- A wire wreath frame or a sturdy cardboard ring
- 20–30 soaked corn husks
- Hot glue gun (adult use)
- Ribbon, dried flowers, or small decorations
- String
How to get started: Each child folds or rolls husks into rosettes, loops, or twists.
An adult hot-glues the individual shapes around the wreath frame, overlapping for fullness.
Fill gaps with smaller rolled pieces. Add a ribbon for hanging. This wreath looks stunning on a front door, and it holds up beautifully through the entire fall season.
If you love this kind of natural, handmade décor approach, the post on DIY farmhouse welcome signs covers more ways to make your entryway feel warm and intentional.
The PBS Parents guide to nature-based learning also has excellent ideas for extending group craft sessions into full nature units.
10. Corn Husk Fall Garland — String Them Up and Decorate Anything
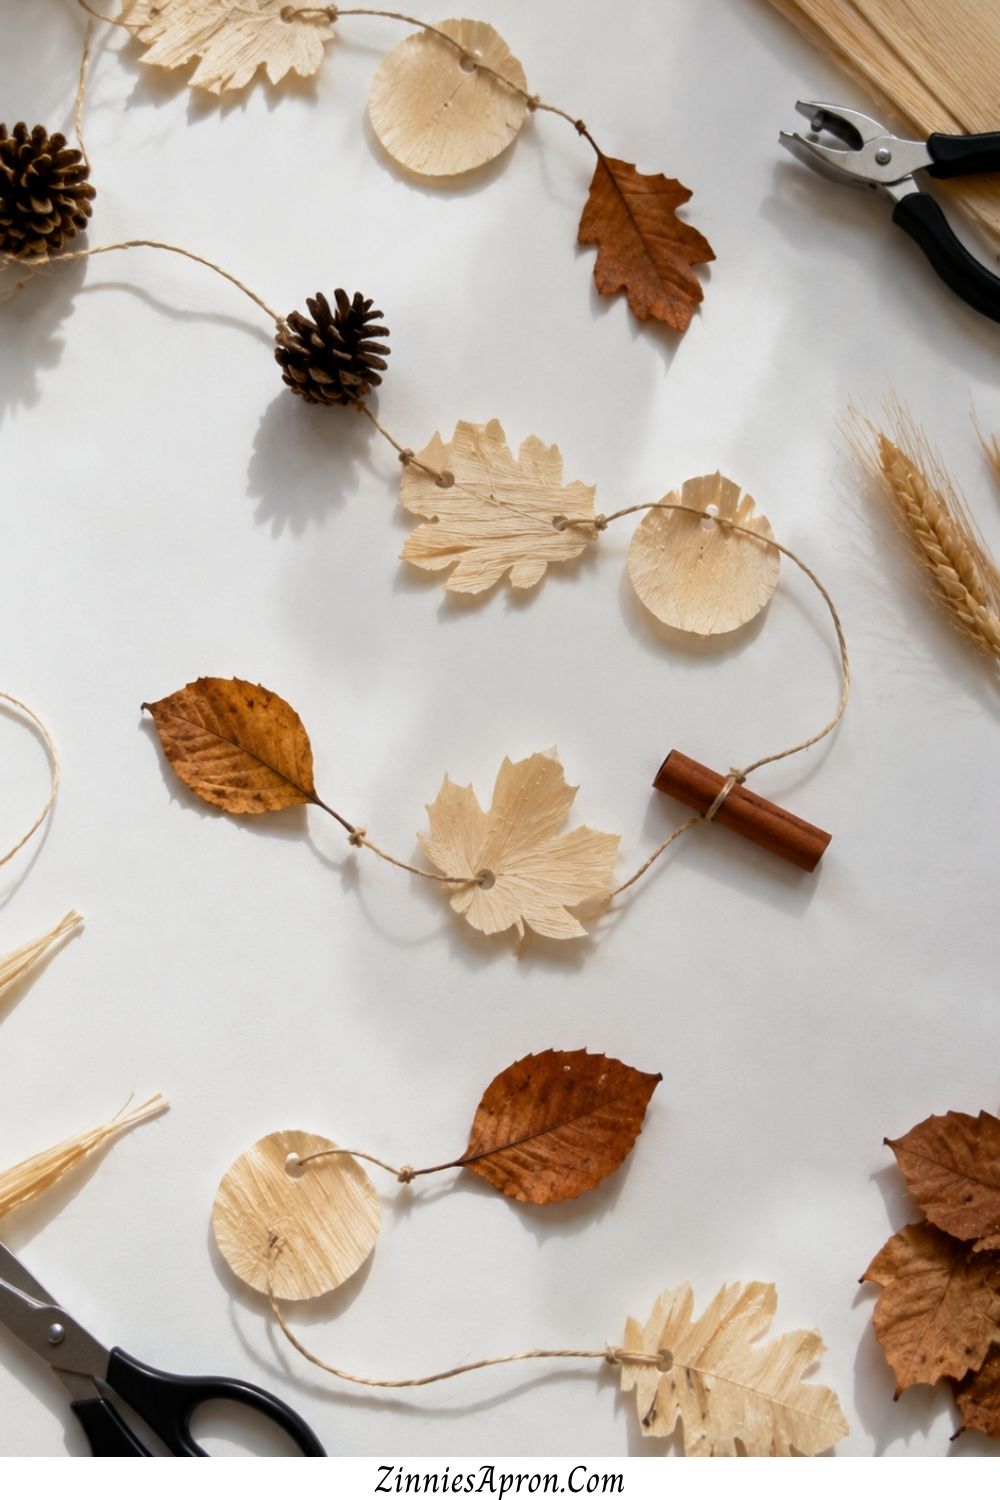
This is the most satisfying corn husk craft for kids to finish, because you hang it up and suddenly the whole room feels like fall.
A fireplace mantle, a classroom bulletin board, a window above the kitchen sink it transforms any space.
Why kids love it: Stringing things onto a line is one of those activities that’s calming and rhythmic.
Kids get into a flow with it. And when the garland goes up, they see their work stretched across an entire wall.
That’s a big deal for a small person. They made the room look different. They changed the space. That matters.
Age range: 3+ (stringing is great fine motor practice for little hands)
Materials needed:
- Dried corn husks
- Twine, yarn, or ribbon
- Hole punch or large needle
- Scissors
- Optional: dried leaves, small pinecones, cinnamon sticks to alternate on the strand
How to get started: Cut husks into leaf shapes, medallions, or strips. Punch a hole near the top of each piece.
String them onto twine, spacing them a few inches apart. For a fuller garland, alternate corn husk shapes with real dried leaves, miniature pinecones, or cinnamon sticks.
The cinnamon ones make the whole space smell like fall. Hang it with small tacks or tape. That’s all there is to it.
If your kids love stringing and creating things for their space, these apple crafts for kids include a few more fall-themed projects that double as room décor.
And if you want to explore even more nature-driven ideas, the mushroom crafts for kids post has several that pair perfectly with a corn husk garland on the same wall.
The Mess Is Worth It
Corn husk crafts for kids aren’t the neatest projects in the world. There will be water from the soaking bowl on the counter. There will be bits of dried husk on the floor.
Someone will definitely get glue on their shirt. And that’s fine. That’s the whole point, honestly.
Because what kids remember isn’t the cleanup. They remember the moment the doll stood up on its own.
The butterfly wings fanning open. The garland going up over the fireplace and everyone stepping back to look at it together.
Those moments are what stay. The mess is temporary. The memory isn’t.
If you enjoyed these projects and want to keep the crafting going, explore more seasonal ideas with these August crafts for seniors in assisted living many of the simpler ones work beautifully for intergenerational projects where grandparents and grandchildren craft side by side.
For hands-on making that uses beads, paint, or mixed media, the bead crafts collection has ideas that adapt well for older kids, too.
Save this post for later — pin it so you have it ready when fall rolls around and someone says, “I’m bored.”
And if you try any of these, come back and tell me which one your kids loved the most. I’m betting on the garland. But the dolls are a close second.
If you want to turn finished projects into lasting keepsakes or gifts, DIY reclaimed wood wall art ideas shows you how to frame and display handmade pieces in a way that looks intentional.
And for anyone working with kids who have sensory sensitivities or cognitive differences, the crafts for seniors with dementia post includes activity design principles that translate directly to inclusive kids’ crafting.
Frequently Asked Questions
What age is best for corn husk crafts?
Most corn husk crafts for kids work for ages four and up. The painting and garland-stringing ones are great for kids as young as three with a little help, while the doll and animal projects suit five and older since they involve tying and cutting.
Where can I buy dried corn husks for crafting?
Your regular grocery store — check the Mexican or Latin food aisle near the masa and dried chiles. A single bag costs two to three dollars and gives you enough husks for dozens of projects. During summer and early fall, you can also use fresh husks straight off the cob.
Do I have to soak corn husks before crafting with them?
For anything that requires folding, tying, or shaping — yes. Soak dried husks in warm water for about ten minutes, then pat them dry. For flat projects like painting or bookmarks, you can use them dry. Fresh husks from an ear of corn don’t need soaking at all.
Can corn husk crafts be preserved or displayed long-term?
Absolutely. Once they dry completely, corn husk crafts for kids hold their shape for months or even years. A light coat of clear acrylic spray or matte sealant adds durability and keeps colors from fading. The angel ornaments and flowers especially last well as permanent décor.
Are corn husk crafts safe for toddlers?
The material itself is safe and non-toxic. For toddlers, stick to painting on flat husks or stringing husk shapes onto a garland — those don’t require scissors or small parts. Always supervise when string, rubber bands, or glue are involved, and skip the hot glue gun entirely for kids under six.