This post contains affiliate links. This means I may earn a small commission if you purchase through my links at no extra cost to you.
You found a craft on Pinterest. It looked simple. Three steps, maybe four.
Cute little candy corn made from stuff you already had in the drawer.
And then the toddler sat down and the glue wasn’t sticking, and the paper was ripping wrong, and somehow there were tears before the cap came off the marker.
We’ve all been there. We’ve all questioned our life choices mid-craft.
Toddlers don’t need impressive crafts. They need fast ones.
Candy corn crafts toddlers can actually finish start to done, with their own hands, before frustration sets in are the only kind worth attempting.
The candy corn shape is one of the easiest in the entire craft universe.
Three colors. One shape. A visible finish line built right into the design.
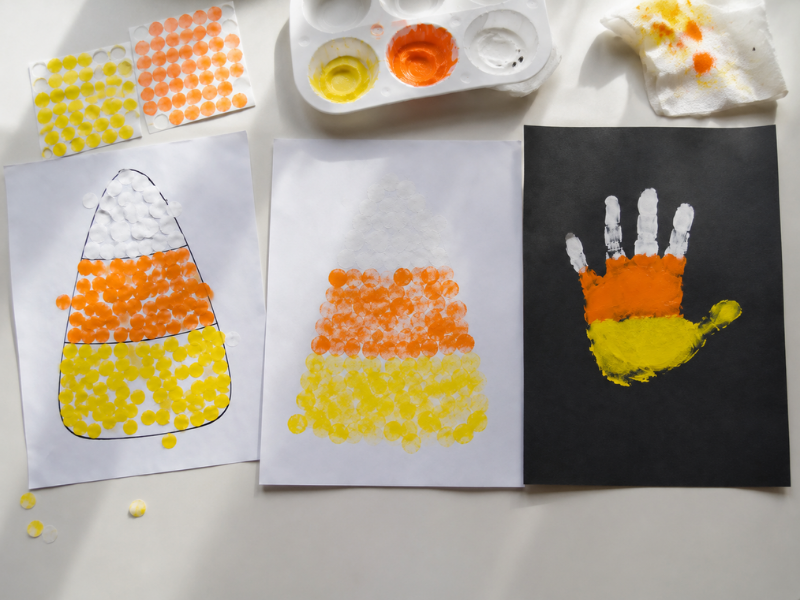
These fifteen projects use three supplies or less each, take minutes instead of hours, and work for kids as young as twelve months.
Whether you need a Halloween party activity, a daycare project, or a Tuesday morning that doesn’t end in goldfish crackers and regret these are the ones that deliver.
Why Candy Corn Crafts Work So Well for Toddlers
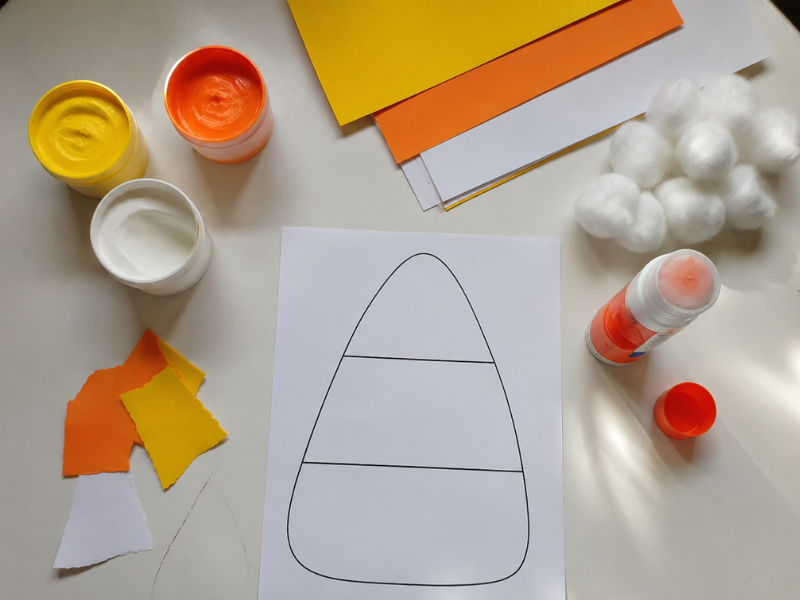
Three sections. Yellow, orange, white. That’s it. Candy corn crafts toddlers love work because the shape itself acts as a built-in instruction manual.
There’s no guessing about where to put what color. No complicated layering. No “wait, which part do I do next?” panic that sends a two-year-old sideways.
Each color section is a visible milestone, and toddlers experience the satisfaction of finishing three times in a single craft.
The instant recognition factor helps too. Toddlers see candy corn everywhere in October on bags, on decorations, on the actual candy their older sibling is hoarding.
They know this shape. They don’t need it explained.
That familiarity removes one of the biggest barriers in toddler crafting: confusion about what they’re even making.
According to Zero to Three, process-based art that uses familiar shapes and colors supports cognitive development and builds confidence in children under three and candy corn delivers on every front.
15 Candy Corn Crafts Toddlers Can Finish Before Snack
1. Candy Corn Torn Paper Collage
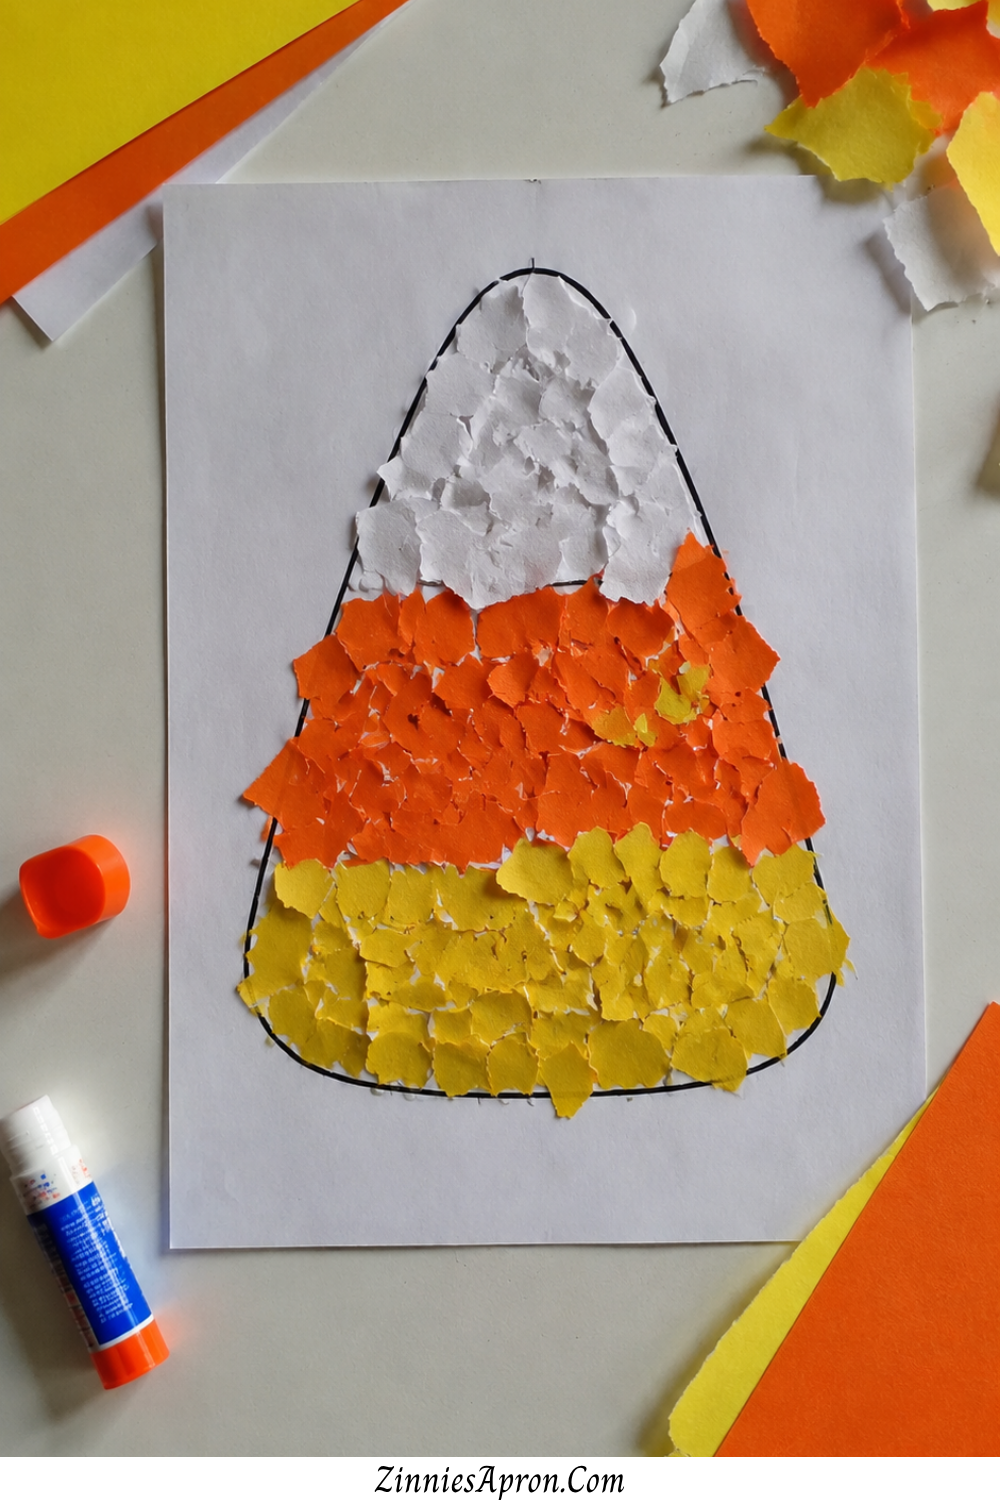
Tearing is the activity. Not a step in the activity. The actual, entire point.
Which is why this one works for kids who destroy things with enthusiasm but haven’t developed the fine motor skills for anything requiring precision.
Why toddlers finish this: There’s no wrong way to tear paper. Every rip produces a usable piece.
The act of tearing is satisfying on its own, and gluing torn pieces inside the outline is just a bonus victory lap.
Supplies needed:
- Construction paper in yellow, orange, and white
- Glue stick
- Pre-drawn candy corn outline on paper
How it works: Toddler tears colored paper into small pieces.
Applies glue inside the matching color section of the outline. Sticks torn pieces down. Done.
Age range: 18 months+
Speed tip: Pre-tear a few pieces to demonstrate what you mean they’ll take over immediately.
Most toddlers are already in a tearing phase with books and mail, so this craft just redirects that energy toward something you actually want torn.
2. Candy Corn Sponge Stamps
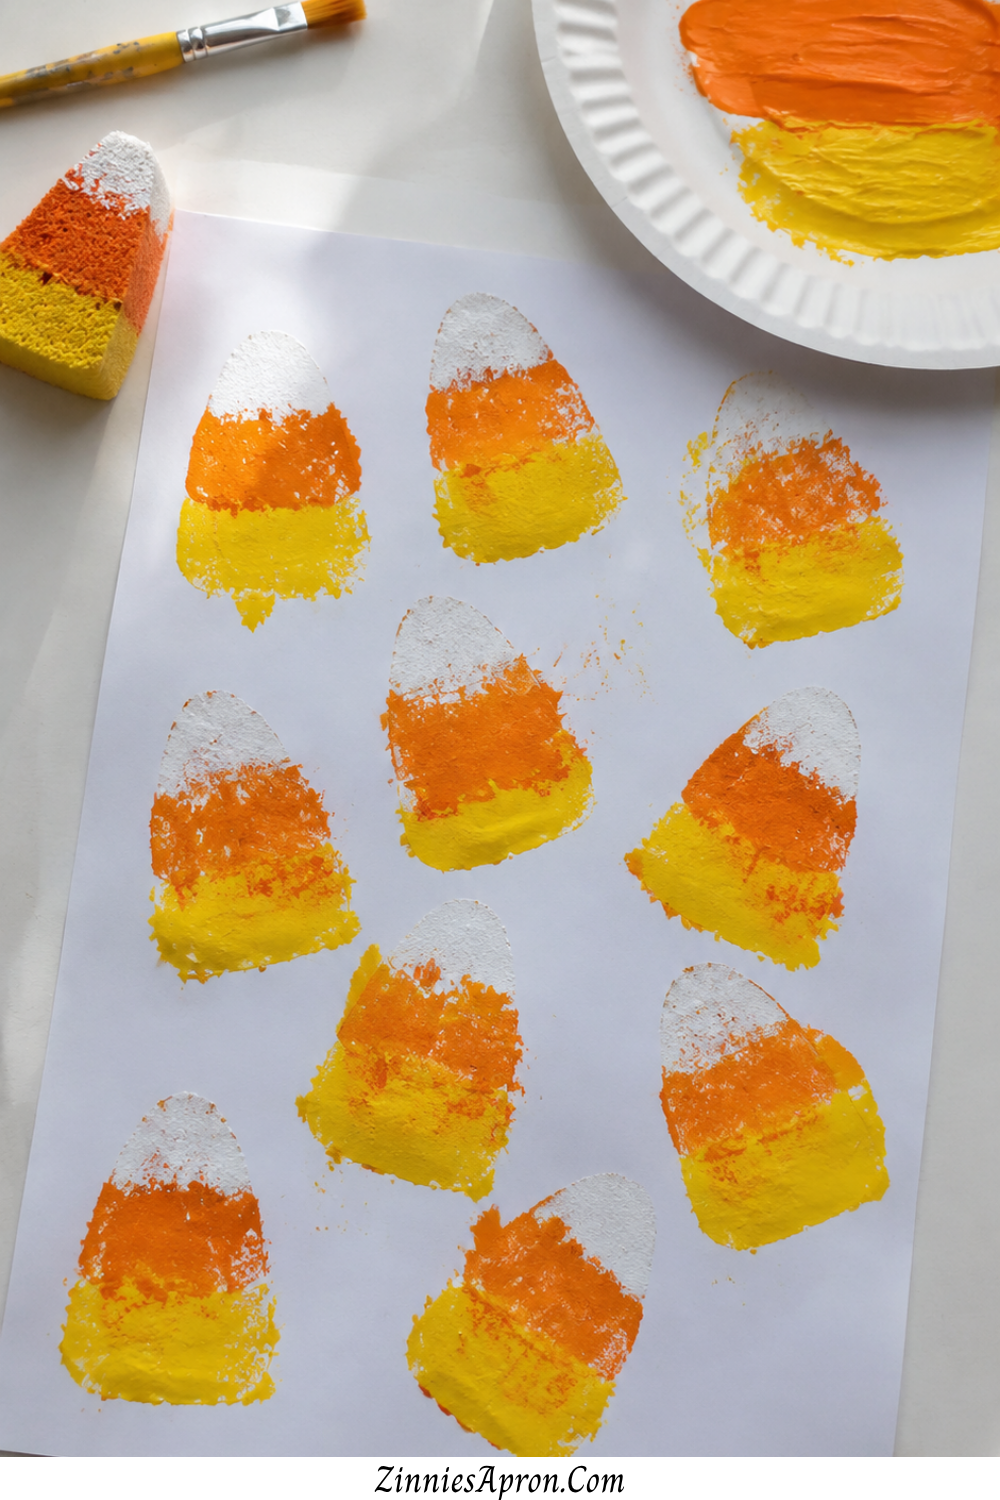
One press equals one finished candy corn. That kind of instant result is currency with toddlers.
They press, they lift, they see the thing, and they press again.
The whole craft is just repetition of a single satisfying motion.
Why toddlers finish this: There’s no assembly. No sequence. No drying time between steps.
Every single stamp is a complete candy corn, which means technically they’re “done” after one press — everything after that is bonus.
Supplies needed:
- Kitchen sponge cut into a candy corn shape (adult prep)
- Paint in yellow, orange, and white (brushed onto the sponge in bands)
- Paper
How it works: Brush or dab the three paint colors onto the sponge in order — yellow bottom, orange middle, white tip. Toddler presses sponge onto paper. Lift. Candy corn.
Age range: 18 months+
Speed tip: Pour paint directly onto a paper plate in three stripes so the toddler can dip instead of waiting for you to brush each time.
Speed matters when your window of cooperation is approximately ninety seconds.
If you’re looking for more stamp-style projects toddlers can handle, woodland animal crafts for preschool includes several print-and-stamp activities that use the same one-motion-one-result approach.
3. Candy Corn Cotton Ball Painting
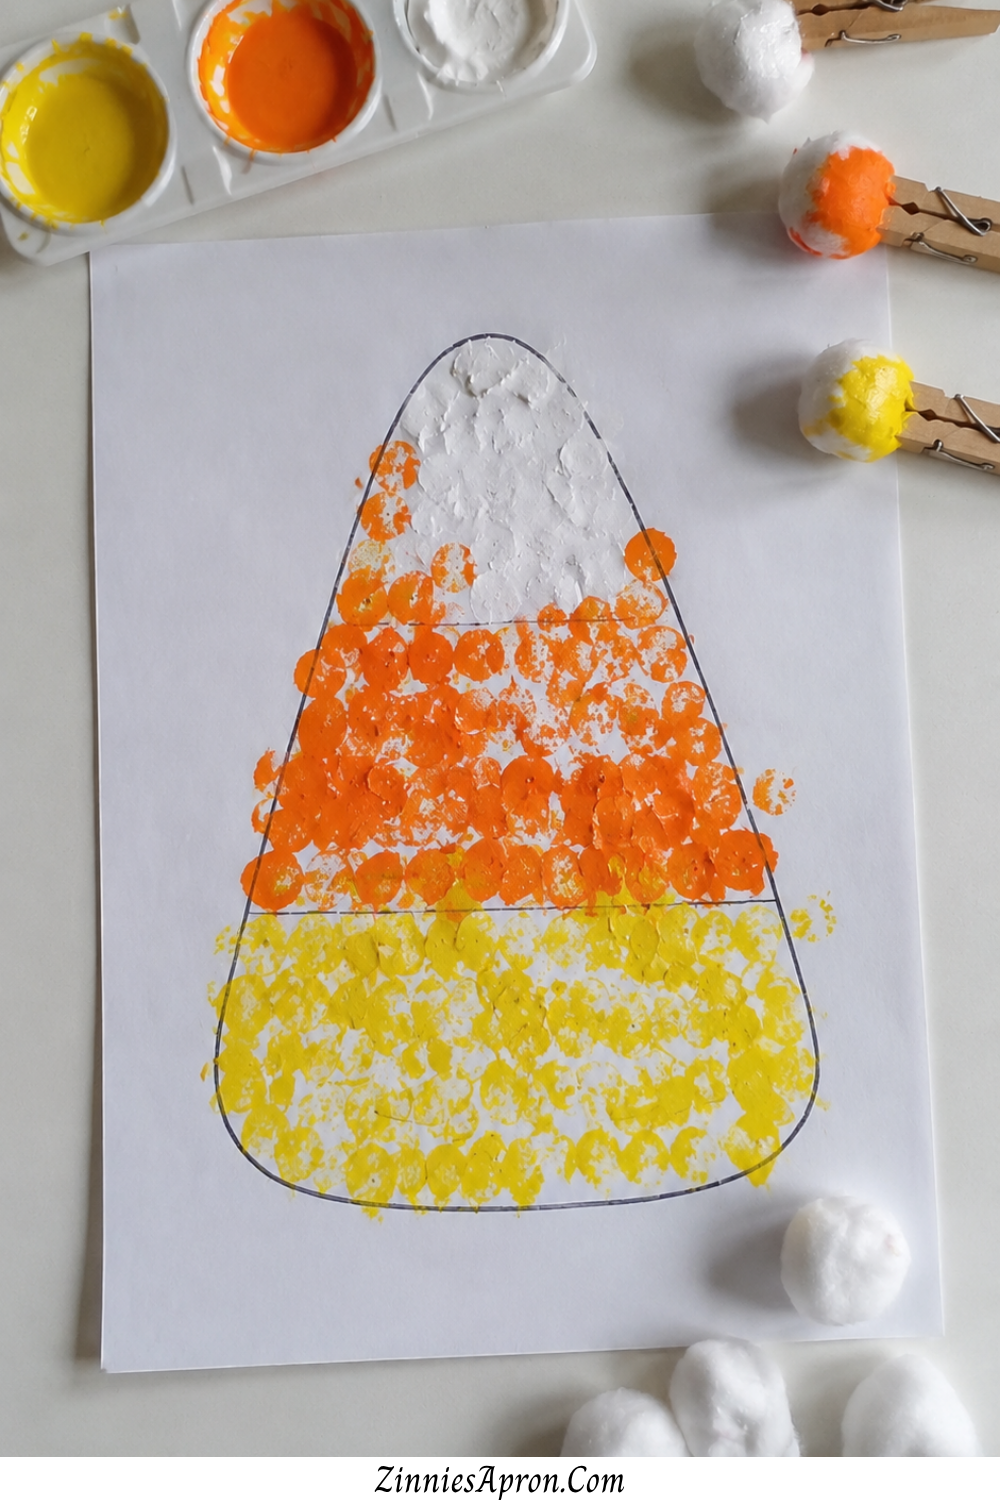
The clothespin is the secret weapon here.
It gives a toddler a grip that works wider and more forgiving than a brush handle — and the dabbing motion is simple enough that even kids who are still figuring out how their hands work can produce something that looks intentional.
Why toddlers finish this: Three color sections. Three cotton balls. Dab, dab, dab.
The clothespin grip eliminates the brush-control frustration that derails most toddler painting projects.
Supplies needed:
- Cotton balls
- Clothespins (one per color)
- Paint in yellow, orange, and white
- Pre-drawn candy corn outline
How it works: Clip a cotton ball into a clothespin.
Dip into the matching paint color. Dab inside the matching section. Repeat with each color.
Age range: 2+
Speed tip: Pre-clip the cotton balls onto clothespins before you call the toddler over.
The clipping motion is too difficult for most two-year-olds, and struggling with it before the craft even starts is the fastest way to lose them.
This is one of those crafts where the most common mistakes beginners make apply directly overthinking the setup kills the momentum.
4. Candy Corn Paper Chain
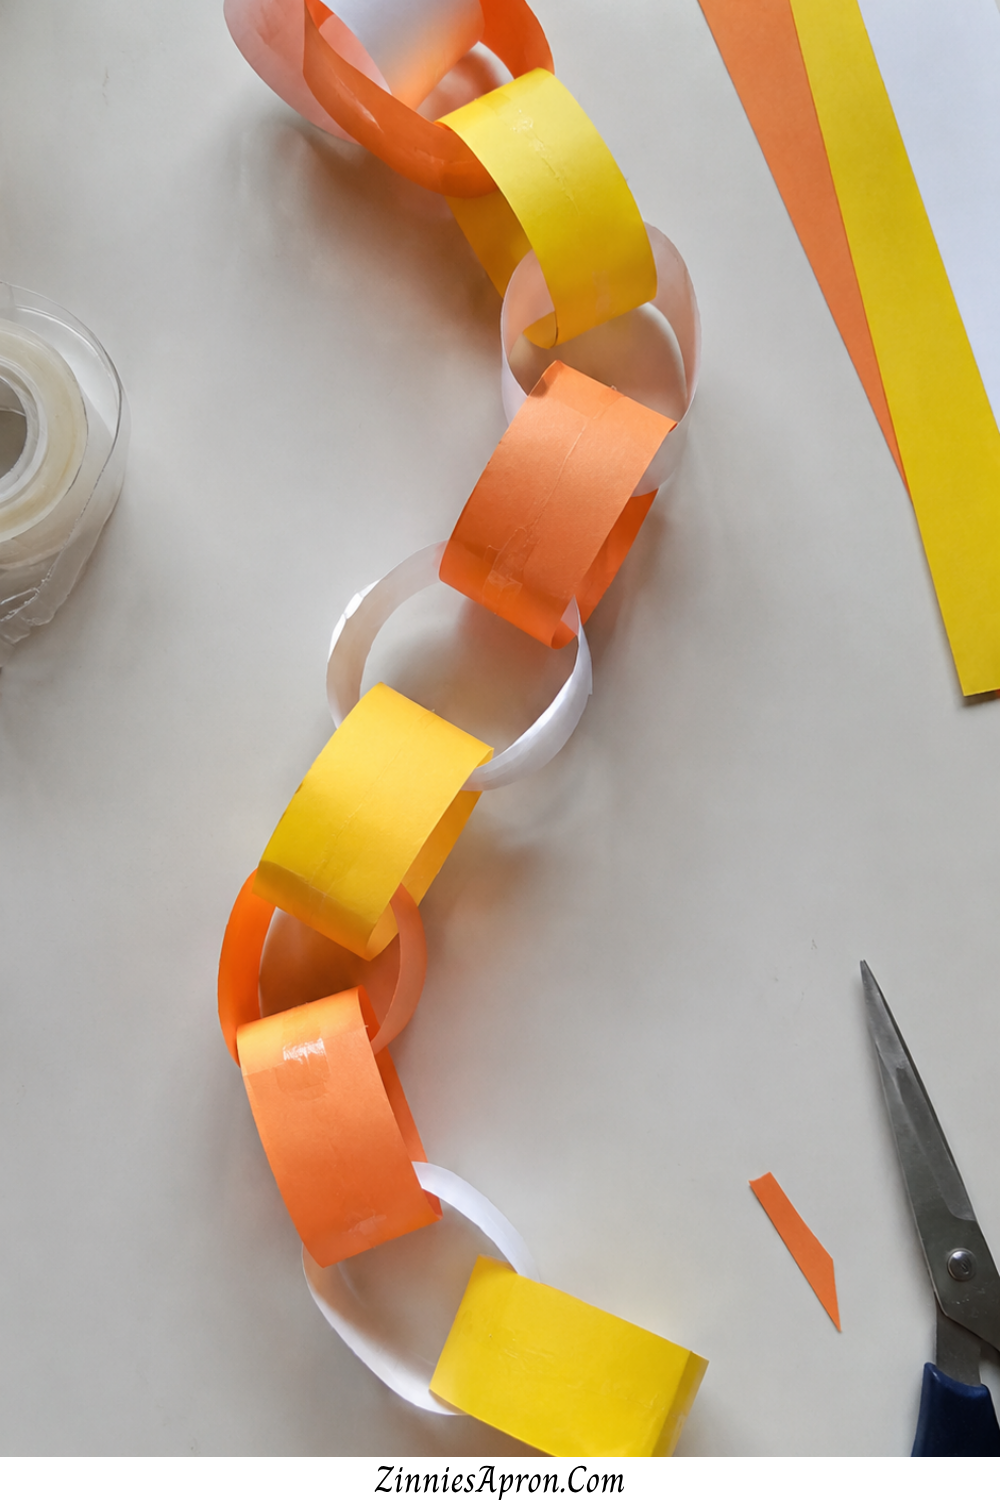
Every single loop is a finished piece. That means a toddler can make one loop and technically be done.
Or they can make twenty. The craft is always in a finished state, which removes the single biggest source of toddler craft meltdowns: feeling stuck halfway through something with no end in sight.
Why toddlers finish this: There’s no such thing as “not done yet.” One loop is a chain.
Two loops is a longer chain. They can stop anytime and it’s still a real thing they made.
Supplies needed:
- Pre-cut paper strips in yellow, orange, and white
- Tape (not glue — more on that in a second)
How it works: Loop a strip, tape it closed. Thread the next color through and tape.
Repeat in candy corn color order yellow, orange, white, yellow, orange, white.
Age range: 2+ with help on the looping
Speed tip: Use tape. Not glue. Tape sticks immediately.
Glue requires patience and drying time, and those are two things toddlers do not have in supply.
A glue stick works in a pinch, but tape is faster and the instant gratification of press-and-stuck is what keeps them going.
5. Popsicle Stick Candy Corn
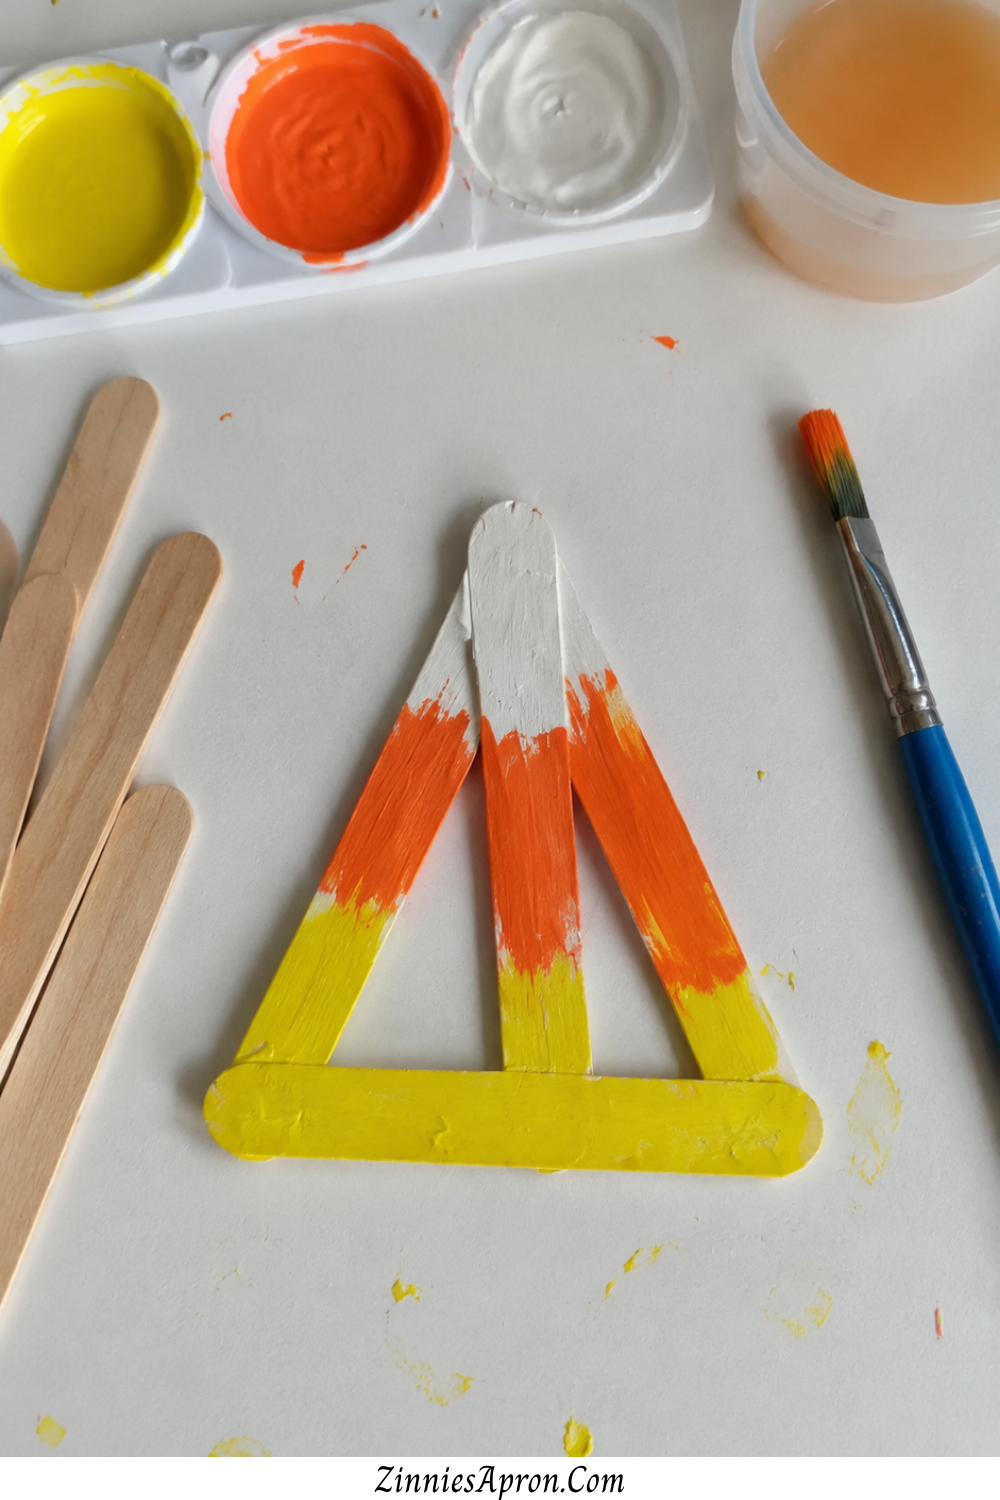
Three sticks. Three colors. Triangle shape. The brushstrokes are wide and forgiving because the surface is narrow, so even the wobbliest toddler painting still reads as clean color bands.
Why toddlers finish this: Every single brushstroke covers a visible area.
There’s no “still mostly blank” stage that makes kids feel like they’re getting nowhere.
Three stripes of paint on a triangle that’s visible progress with every stroke.
Supplies needed:
- 3 popsicle sticks (glued into a triangle by an adult)
- Paint in yellow, orange, and white
- Brush
How it works: Adult pre-glues three sticks into a triangle and lets it dry.
Toddler paints the bottom stick yellow, the middle stick orange, and the top stick white.
Age range: 2+
Speed tip: Separating prep from painting prevents overwhelm.
Pre-glue the triangles the night before or during nap when the toddler sits down, the only job is painting.
One task, three colors, done. For more popsicle stick projects that follow this same separated-steps approach, these 15 popsicle stick crafts for kids are worth bookmarking.
6. Candy Corn Fingerprint Art
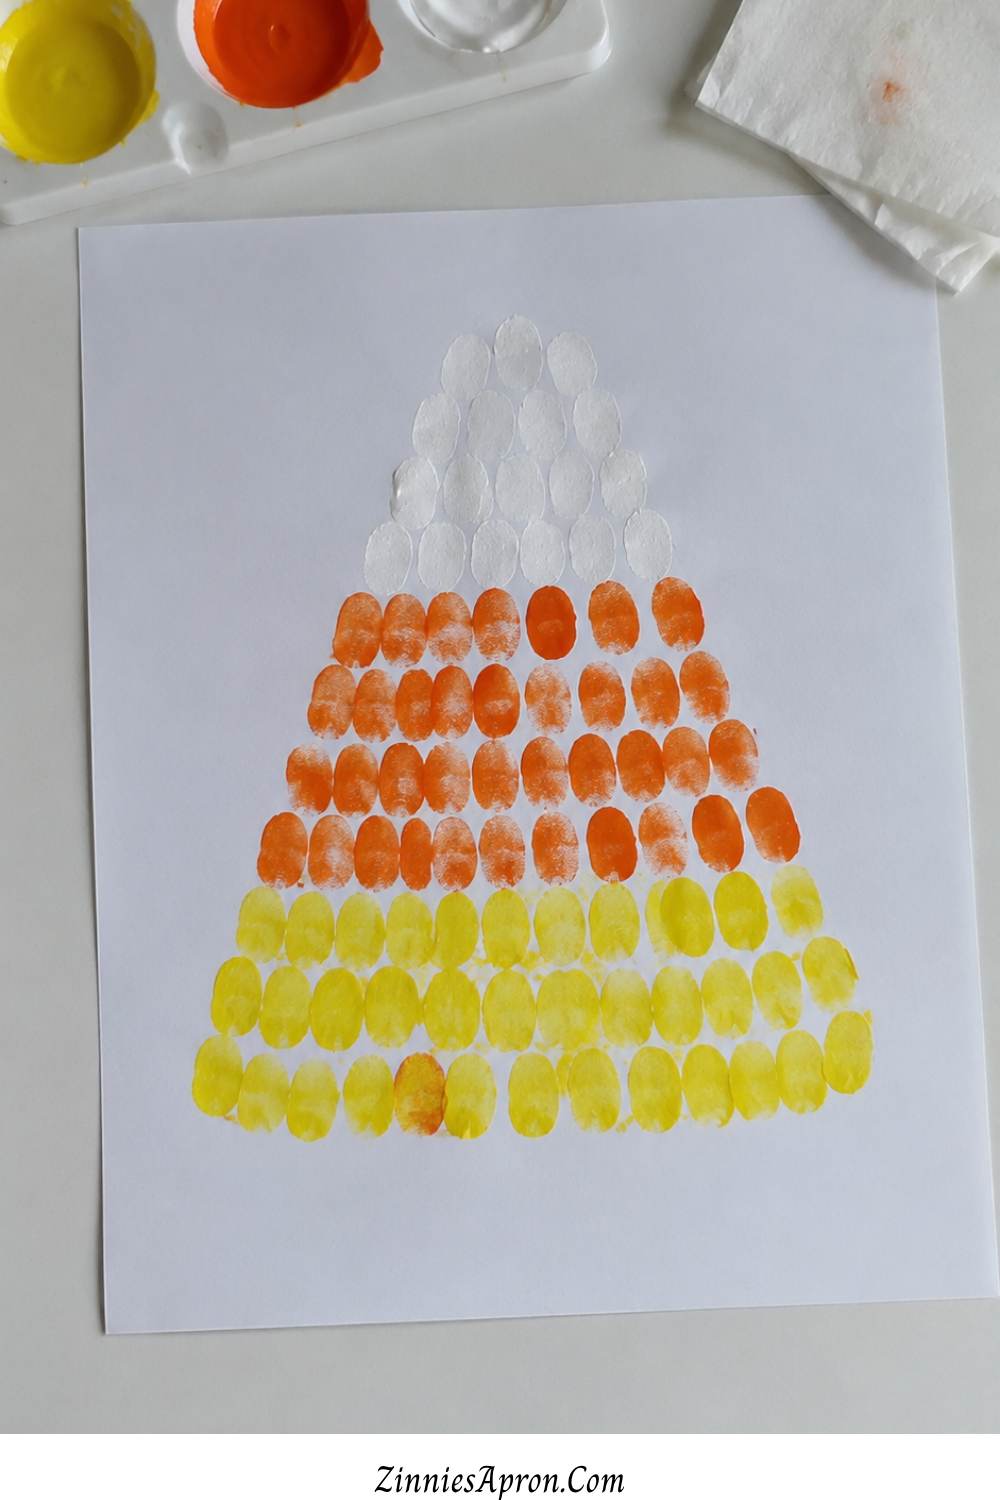
This is the craft for the youngest crafters in the room. One finger. Three colors. Press.
Why toddlers finish this: One dip and one press makes a dot. That’s a finished unit.
They can make three dots and call it done, or they can make fifty. Either way, nobody’s frustrated.
Supplies needed:
- Paint in yellow, orange, and white
- Paper or cardstock
How it works: Dip finger in yellow, press a row of dots on the bottom.
Dip in orange, press a row above. Dip in white, press a row on top. The three rows of fingerprint dots form a candy corn shape.
Age range: 12 months+
Speed tip: Guide their first three dots to show the pattern bottom row yellow, middle row orange, top row white then let them go.
Perfection is absolutely not the point.
The point is that a twelve-month-old just made a recognizable candy corn with their actual finger, and that’s a win for everyone involved.
If your little one loves the fingerprint approach, handprint fall deer crafts takes the concept further with handprint-based animals.
7. Candy Corn Tissue Paper Scrunch
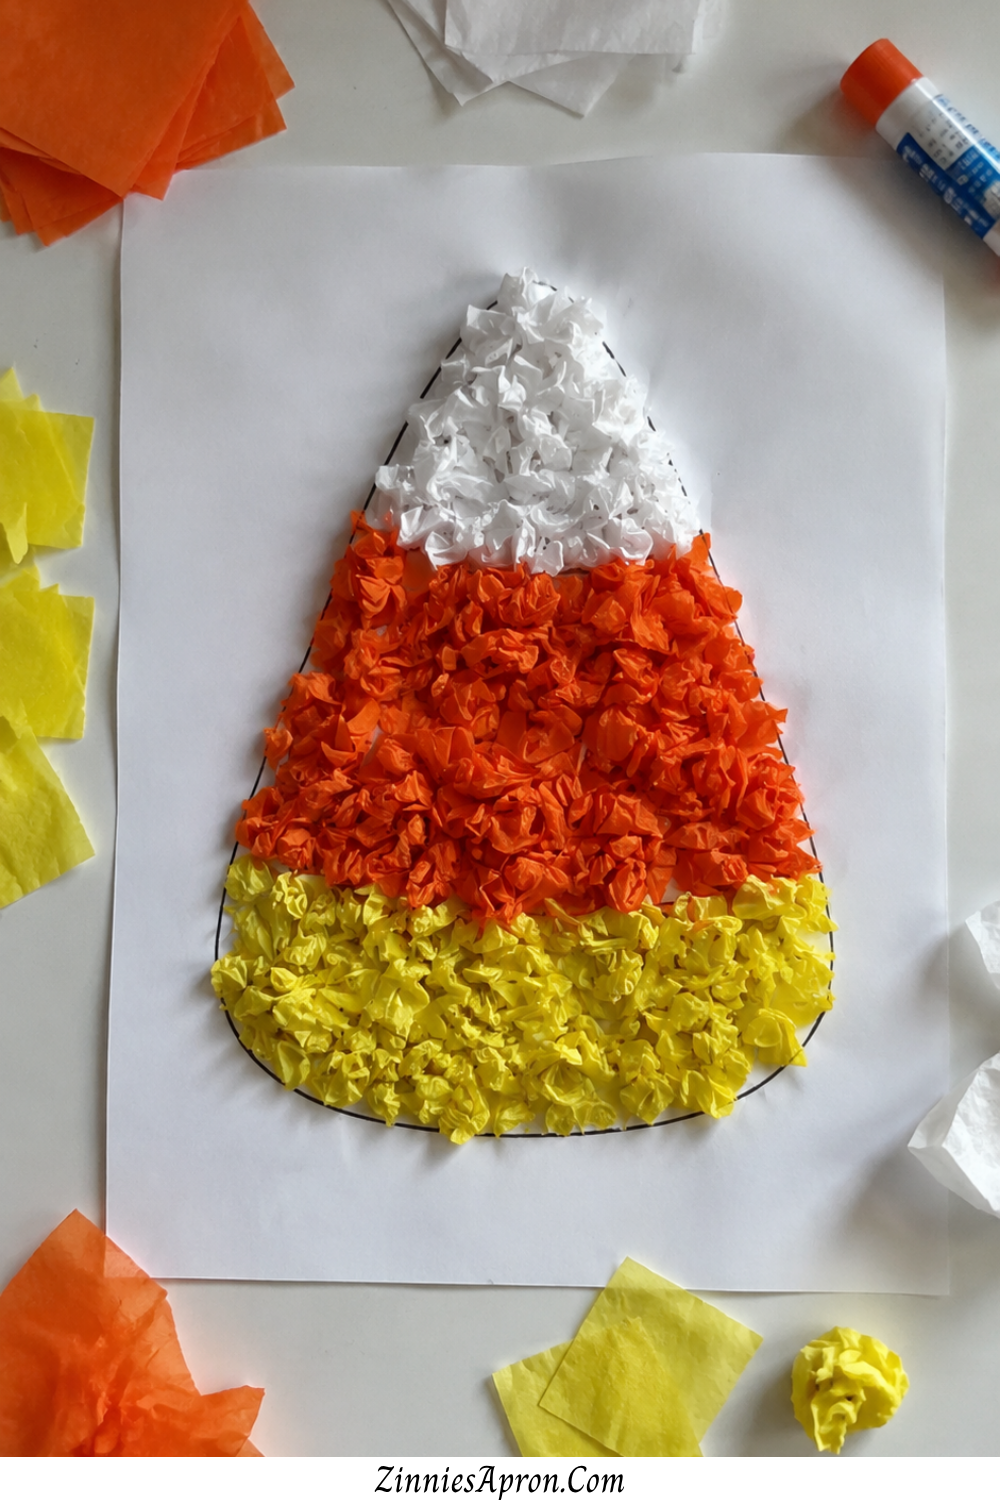
Scrunching is the whole sensory payoff.
The feel of tissue paper crumpling into a ball under tiny fingers that’s not a step. That’s the event.
Why toddlers finish this: They’re engaged before they even start gluing.
The scrunching phase is pure sensory satisfaction, and by the time they’ve made a pile of tissue balls, gluing them down feels like the easy part.
Supplies needed:
- Tissue paper squares in yellow, orange, and white (pre-cut)
- Glue stick
- Pre-drawn candy corn outline
How it works: Toddler scrunches tissue squares into small balls.
Applies glue inside the matching section of the outline. Presses balls into the glue.
The texture when it’s done is beautiful bumpy, colorful, and three-dimensional in a way that flat crafts never are.
Age range: 2+
Speed tip: Pre-cut the tissue paper into roughly two-inch squares.
The scrunching is the fun part. The cutting is not the fun part for anyone.
These textured collage projects are great for building the kind of grip strength the CDC’s developmental milestones guide associates with fine motor progress in toddlers scrunching tissue paper works the same muscles as holding a crayon.
8. Candy Corn Sticker Mosaic
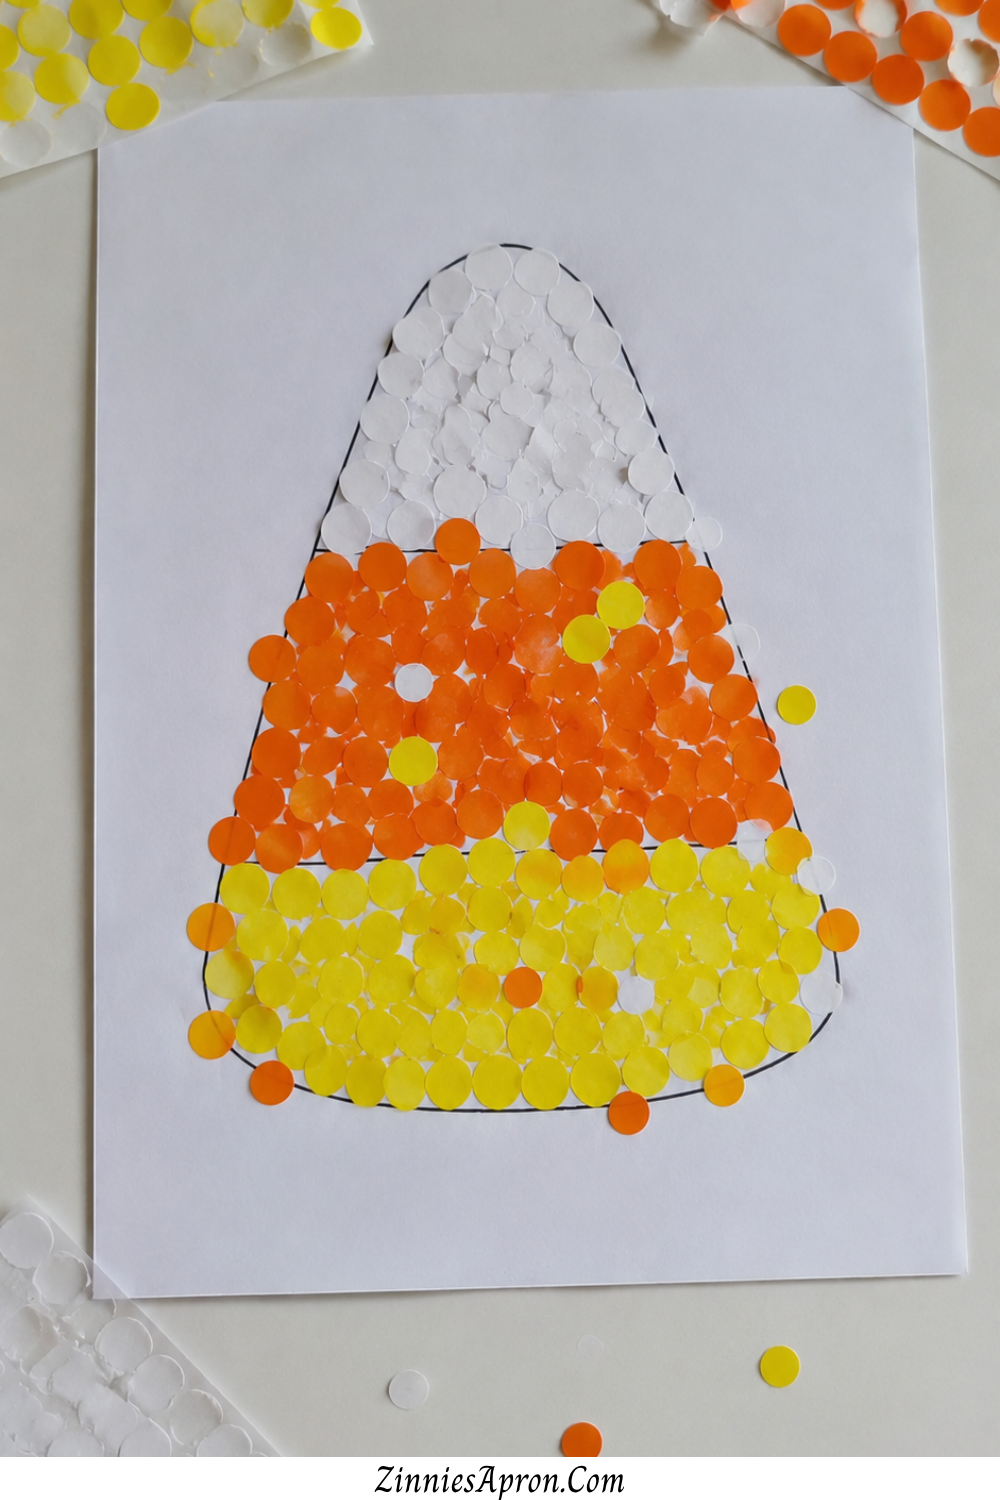
No glue, no paint, no water, no mess, no cleanup.
This is the candy corn craft toddlers can do in the car, at a restaurant, in a waiting room, or on a Tuesday morning when you genuinely cannot handle one more mess today.
Why toddlers finish this: Peel. Stick. Done. The sticker stays where it goes.
Nothing dries, drips, or smears. Every sticker placed is permanent visible progress.
Supplies needed:
- Dot stickers in yellow, orange, and white
- Paper with a candy corn outline
How it works: Peel dot stickers and place them inside the matching color section of the outline.
Fill each section. Done.
Age range: 18 months+
Speed tip: Partially peel the sticker edges before handing them over.
Toddler fingers and sticker backs are sworn enemies, and the frustration of not being able to peel a sticker is powerful enough to end an otherwise perfect craft session in seconds.
For more sticker and collage activities that work for this age group, farm animal crafts for kids includes several peel-and-place projects with the same no-mess appeal.
9. Candy Corn Handprint Art
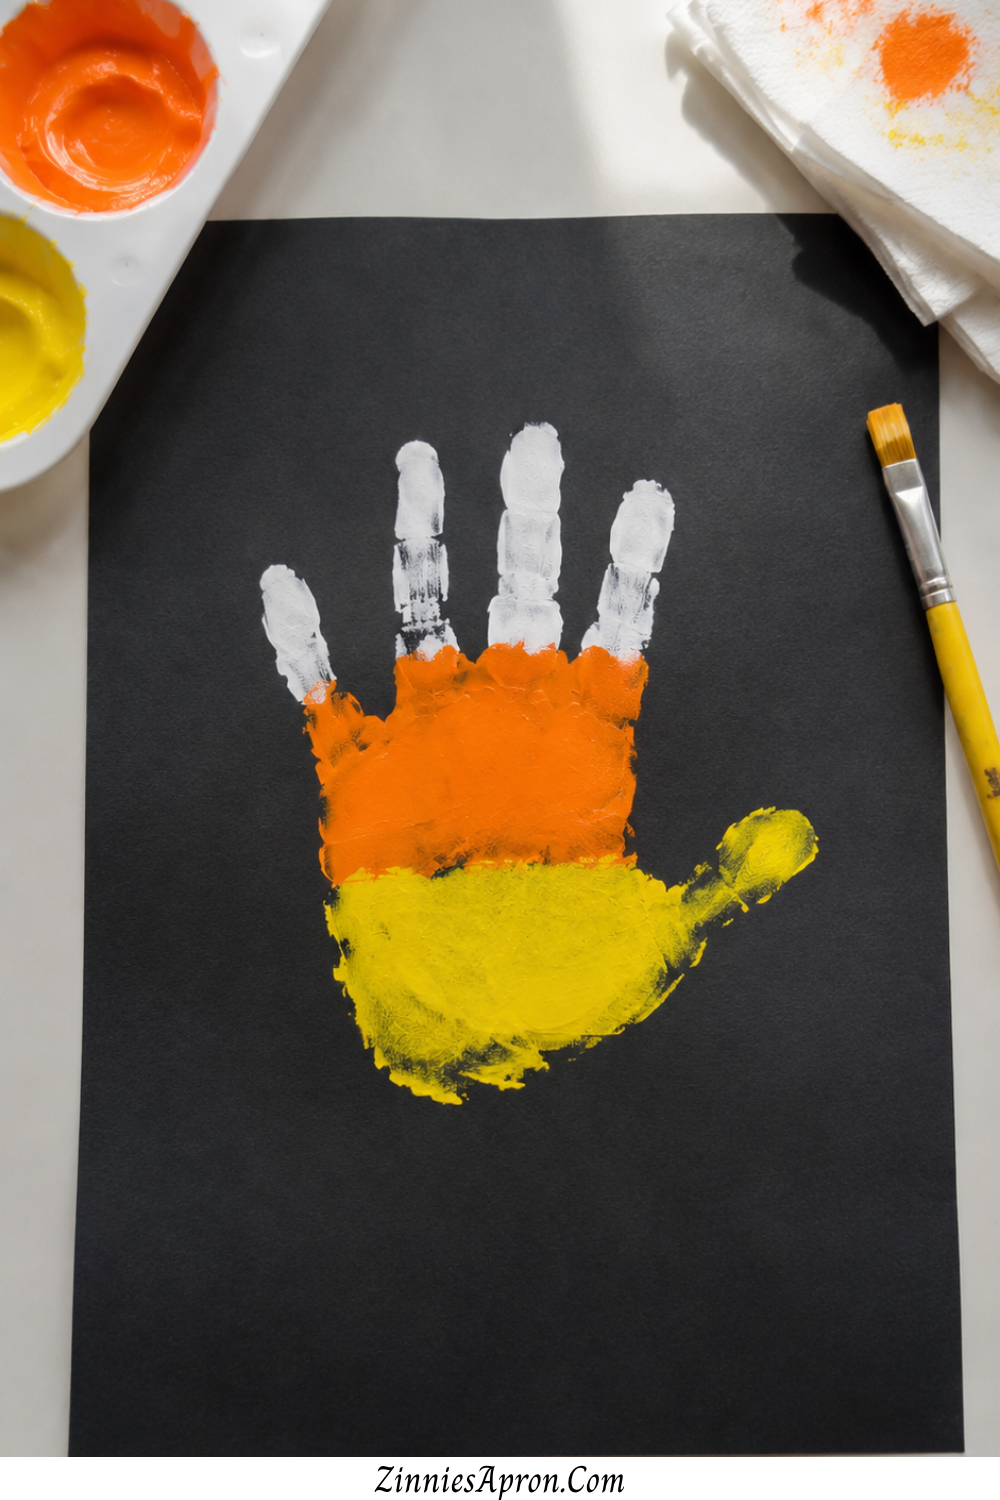
One press. One finished keepsake.
This is less of a craft and more of a memory captured in paint the kind of thing that ends up framed on a wall or tucked into a baby book, not recycled after two weeks on the fridge.
Why toddlers finish this: A single palm press and it’s done. Literally done.
They don’t need to add anything, fix anything, or wait for anything. Press. Lift. Finished.
Supplies needed:
- Paint in yellow, orange, and white
- Black construction paper
How it works: Paint the toddler’s palm in three color bands yellow at the wrist, orange across the middle, white on the fingertips.
Press once onto black paper. The fingers spread upward like the point of a candy corn. Let dry.
Age range: 12 months+
Speed tip: Paint their hand while they’re distracted with a toy in the other hand.
You have about a four-second window before they clench, smear, or wipe their palm on your shirt. Speed is everything.
Confidence is everything. Hesitation is death.
If you’re building a collection of handprint keepsakes, mother-daughter crafts for Mother’s Day includes several handprint projects that preserve these tiny-hand moments before they’re gone.
10. Candy Corn Playdough Smash
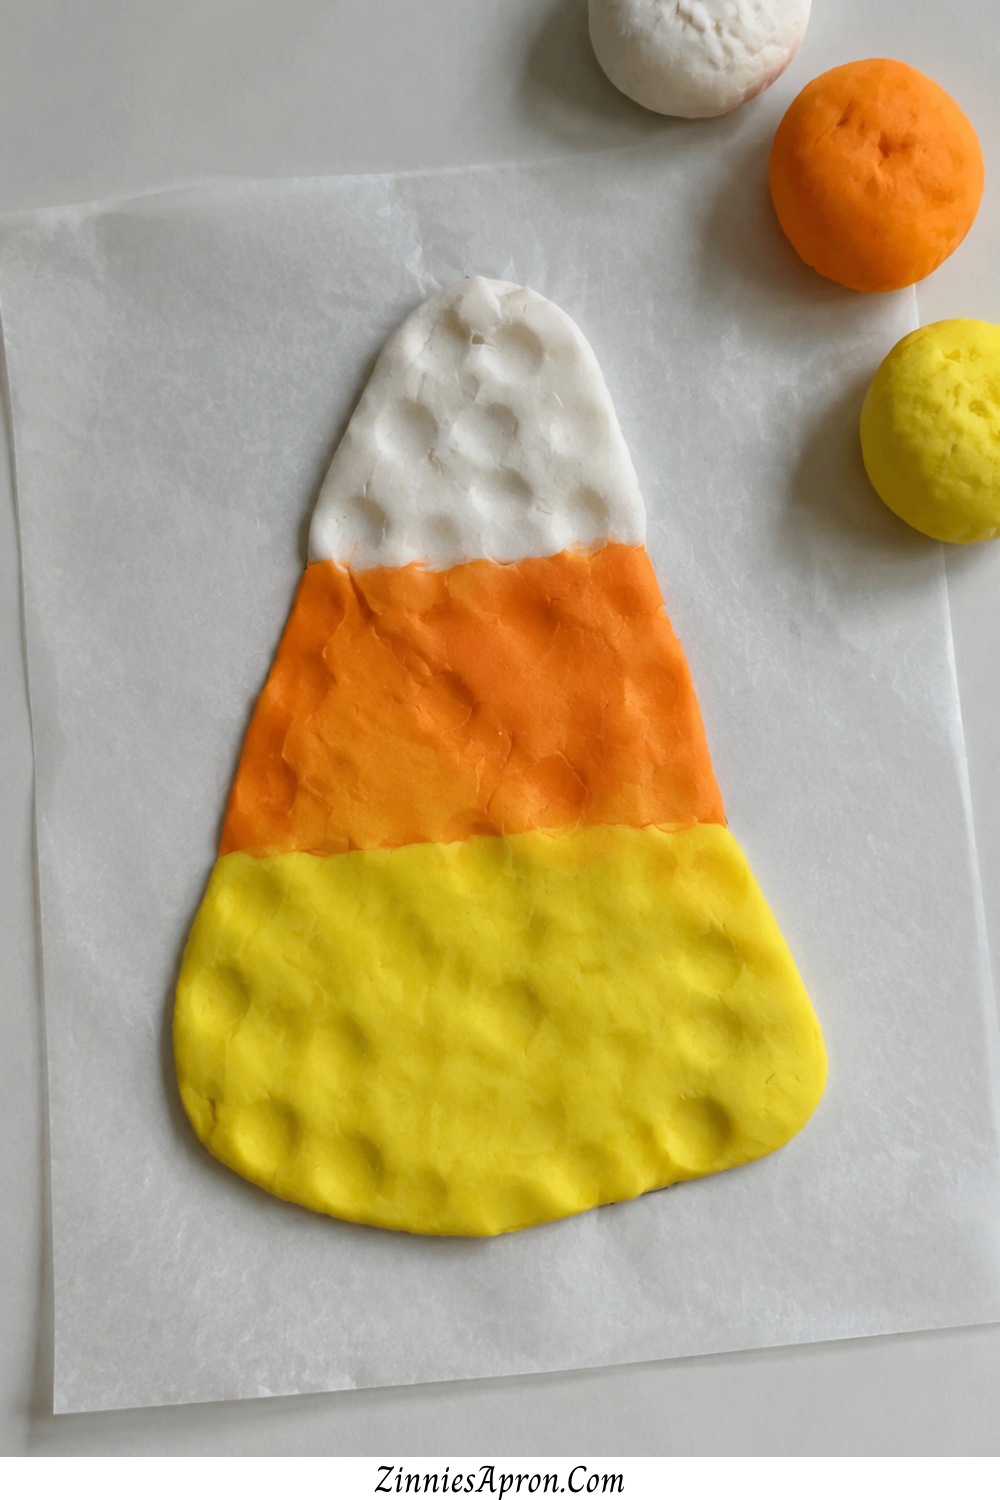
Stack. Smash. Done. And if they want to do it again, each round takes under a minute.
This is the infinitely repeatable candy corn craft toddlers circle back to because the smash is the reward, and toddlers never get tired of smashing.
Why toddlers finish this: The entire craft is three balls and one slam. No drying time. No fragile pieces and glue. If the result isn’t perfect and it won’t be they just ball it up and start over.
Supplies needed:
- Playdough in yellow, orange, and white
- Wax paper or a clean surface
How it works: Roll three balls of playdough one yellow (largest), one orange (medium), one white (smallest).
Stack in order. Smash flat with palm or press gently into a candy corn shape.
Age range: 18 months+
Speed tip: Pre-roll the balls if your toddler is still in the “smash only” phase and hasn’t entered the “roll yet” phase.
Meet them where they are. The smash is the point the rolling is just delivery.
11. Candy Corn Paper Plate Wedge
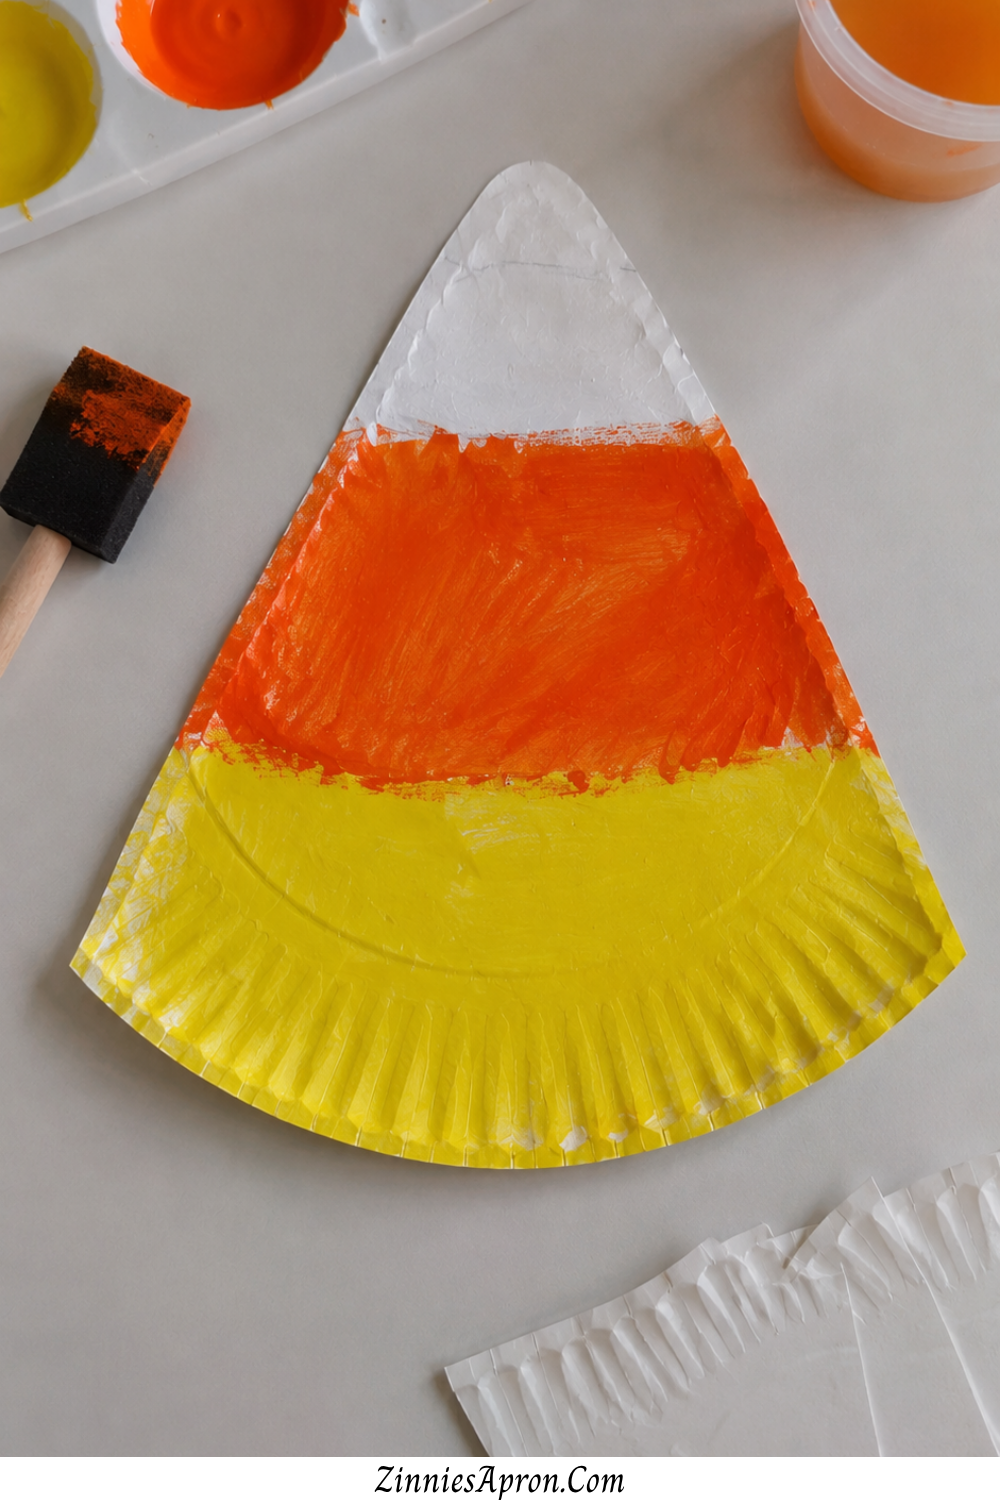
A whole paper plate painted in stripes just looks like a plate with stripes. But cut that plate into a triangle wedge first, and suddenly the shape itself does the heavy lifting.
The toddler just paints and what they hand you at the end actually looks like a candy corn.
Why toddlers finish this: The shape is already candy corn before they touch it. All they have to do is fill in the color. Three bands, three brushes, three moments of satisfaction.
No outline to stay inside, no precision required, and the finished piece is instantly recognizable as what it’s supposed to be.
Supplies needed:
- Paper plate (pre-cut into a candy corn wedge by an adult)
- Paint in yellow, orange, and white
- Chunky brush or foam brush
How it works: Cut the paper plate into quarters, then trim one quarter so the point is slightly rounded that’s your candy corn wedge.
The plate’s raised rim naturally becomes the wide bottom edge, which gives the whole craft a soft, dimensional look.
Toddler paints the wide bottom yellow, the middle orange, and the pointed top white. That’s it.
Age range: 2+
Speed tip: Draw two faint pencil lines across the wedge dividing it into three sections before handing it over. Toddlers respond to visible color zones they know exactly where each color goes without you having to hover and remind them.
The curved rim of the plate is what makes this craft look better than the effort it took. It adds a natural finished edge that flat paper crafts don’t have.
For more paper plate projects that give toddlers a big forgiving canvas, simple flower crafts that encourage creativity uses the same shape-does-the-work approach the plate becomes the flower before the toddler even picks up a brush.
12. Candy Corn Crayon Rubbing
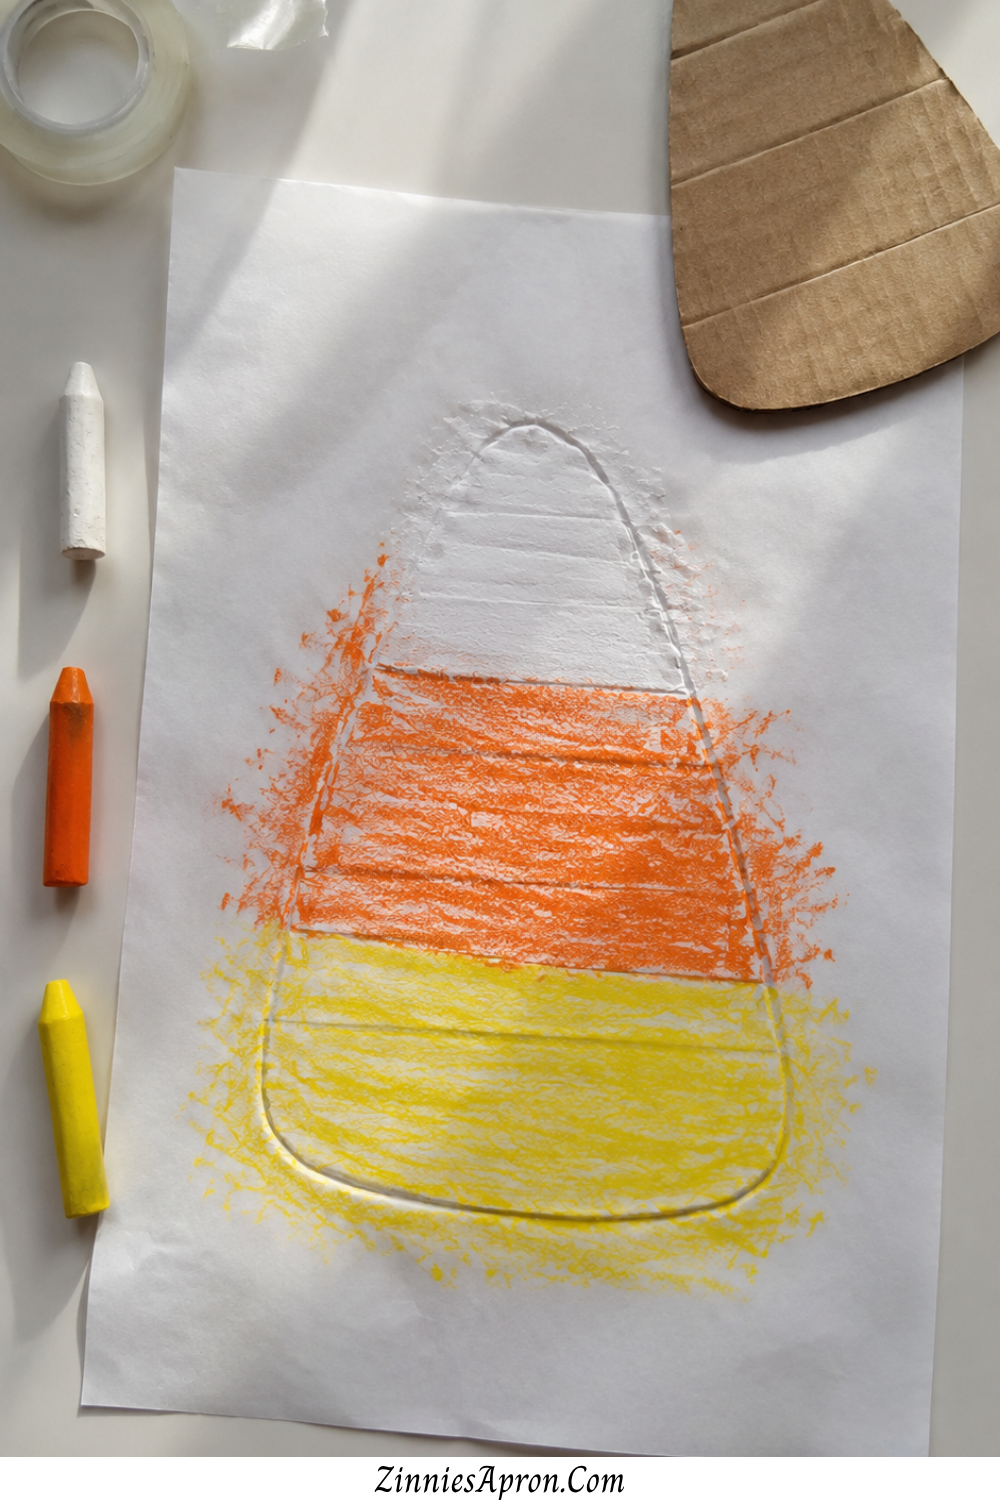
The shape appears like magic. That’s the hook.
You put paper over the cardboard cutout, rub a crayon, and the candy corn materializes underneath the toddler’s hand.
The reveal moment is what makes them want to do it again immediately.
Why toddlers finish this: The process itself creates the result.
There’s no separate assembly step. No “now glue this to that.” Just rub, and the thing appears.
Supplies needed:
- Thick cardboard candy corn cutout (made by adult)
- Thin paper (copy paper works)
- Crayons in yellow, orange, and white (or any fall colors)
How it works: Place the cardboard cutout under the paper.
Toddler rubs crayon over the top. The raised shape shows through.
Use different color crayons in matching sections for the full effect, or just let them go wild with whatever color they grab.
Age range: 2+
Speed tip: Tape the paper to the table so it doesn’t slide.
Nothing kills toddler momentum faster than paper moving mid-rub.
One piece of tape on each corner and the whole experience changes from frustrating to magical.
13. Candy Corn Contact Paper Sticky Wall
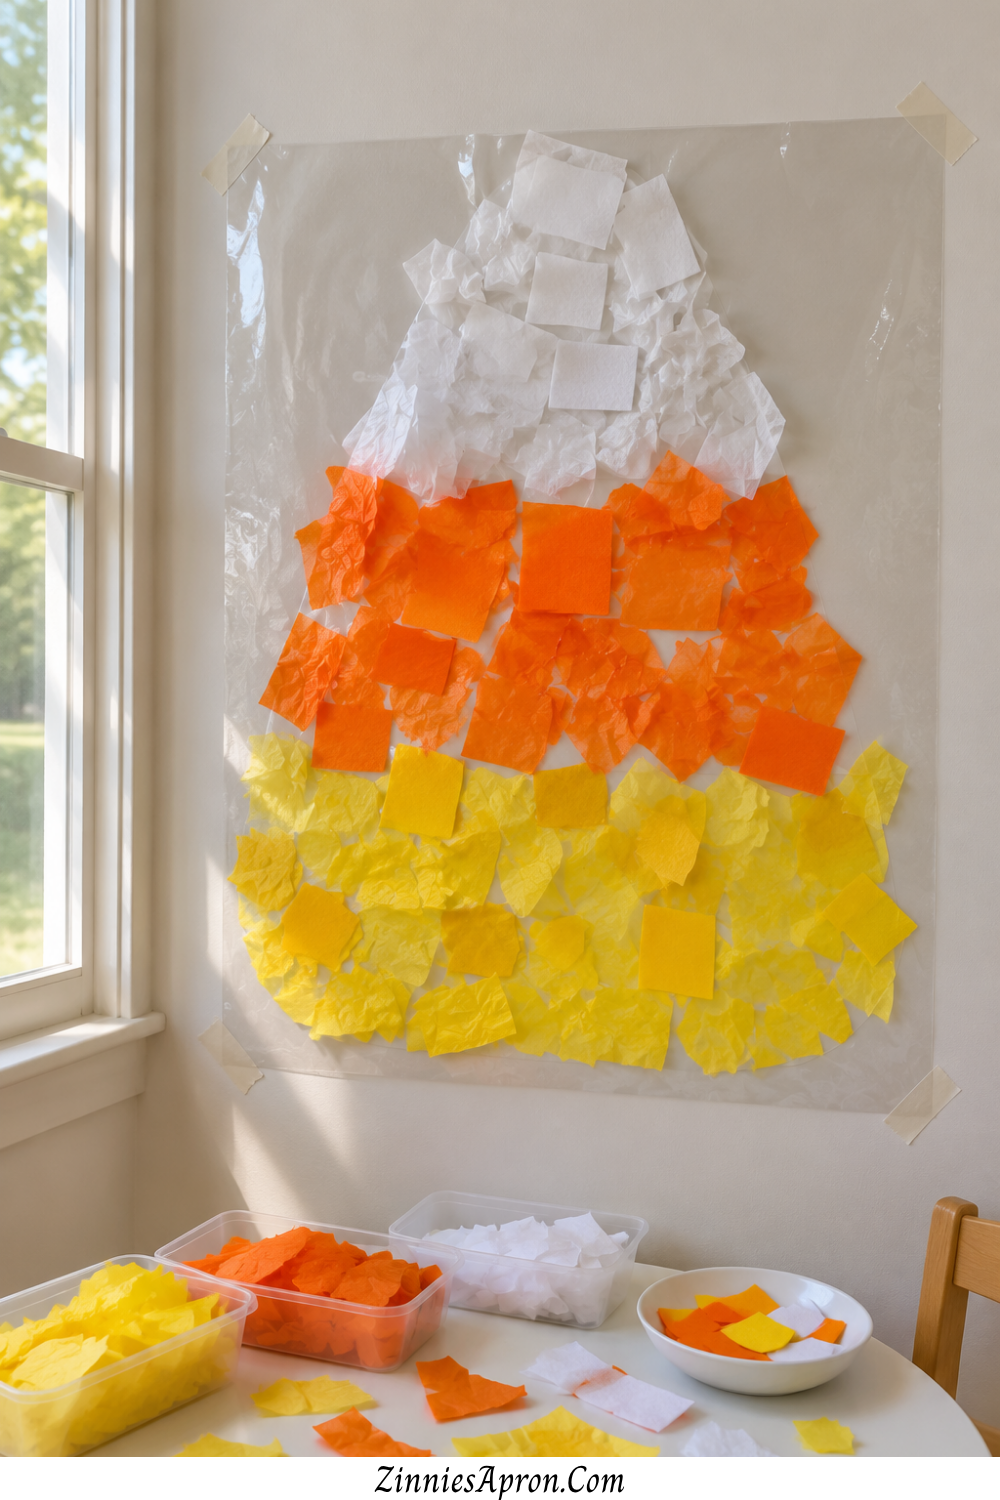
Standing craft. No table needed, no glue needed and no waiting for anything to dry.
The toddler sticks pieces onto a wall-mounted surface and sees the result instantly.
This is the candy corn craft toddlers who hate sitting down will actually do.
Why toddlers finish this: It’s a vertical activity with instant stick-on-and-see-it feedback.
Pieces stay where they’re placed. There’s no drying, no dripping, no sliding off. The wall itself holds everything.
Supplies needed:
- Clear contact paper (taped to wall, sticky side out)
- Pre-cut tissue paper or felt pieces in yellow, orange, and white
How it works: Tape a large piece of contact paper to the wall at toddler height, sticky side facing out.
Hand the toddler colored tissue paper or felt pieces.
They press them onto the sticky surface in any arrangement.
Age range: 12 months+
Speed tip: Tape the contact paper at actual toddler height not your height.
They need to reach it flat-footed. The second a toddler has to stretch or tiptoe, frustration starts.
Drop it low. According to the American Occupational Therapy Association, vertical surface activities like this naturally build shoulder and arm strength while supporting fine motor development in toddlers.
For more standing-friendly craft activities, these mushroom crafts for kids include several that work at a wall or easel.
14. Candy Corn Dot Marker Smash
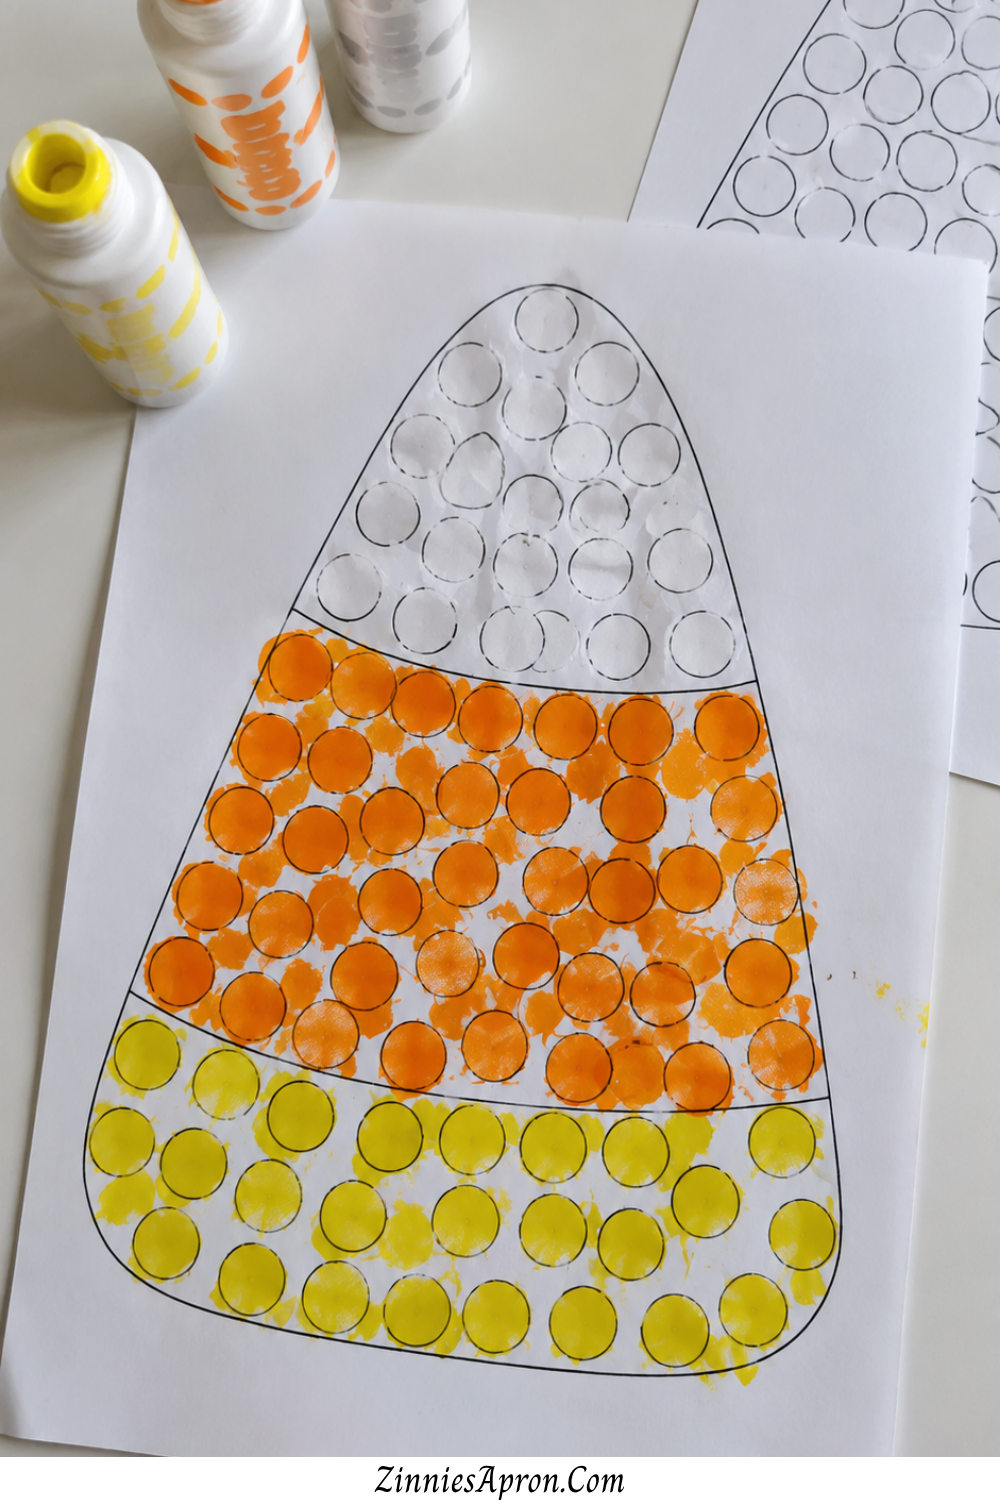
The dot marker is possibly the greatest toddler craft tool ever invented.
Press down. See a perfect circle appear. Lift. Repeat.
The satisfaction loop is nearly unbreakable because every single press produces a clean, bright, visible result with zero skill required.
Why toddlers finish this: Smash and see a dot. That’s the whole interaction.
The matching-colors-to-sections part is just structure around the smashing, and the smashing is what they’re actually here for.
Supplies needed:
- Bingo-style dot markers in yellow, orange, and white
- Paper with a candy corn outline filled with empty circles
How it works: Smash the matching color dot marker into the circles in each section.
Yellow dots in the bottom section. Orange in the middle. White on top.
Age range: 18 months+
Speed tip: Draw big circles, not small ones.
Toddler aim is approximate at best, and a small target turns a satisfying smash into a frustrating miss.
Big circles, big dots, big success. If your toddler loves the dot marker format, the apple crafts for kids post includes dot marker variations for other fall shapes.
15. Candy Corn Cupcake Liner Stack
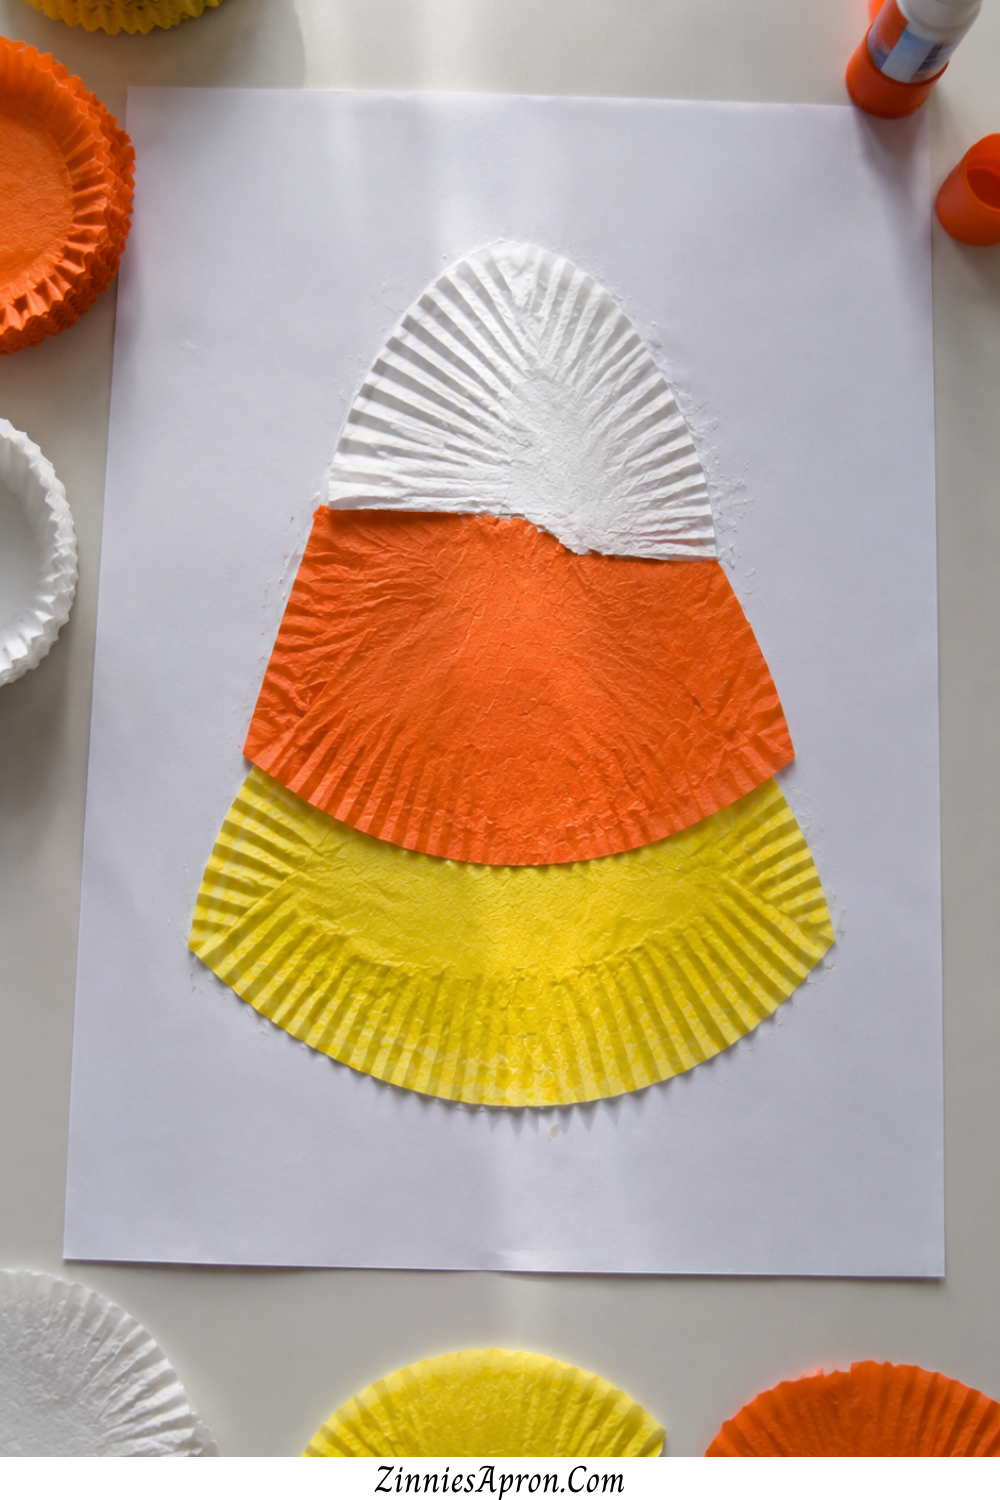
Three glue moves. Three liners. Done. Under sixty seconds.
This is the emergency craft the one you pull out when you have nothing else prepped, the toddler needs an activity in the next thirty seconds, and you need something that qualifies as “doing a craft” without any real setup.
Why toddlers finish this: It’s three steps. Glue, stick, glue, stick, glue, stick.
There is physically not enough time to lose interest because the whole thing is over before the frustration reflex can activate.
Supplies needed:
- Cupcake liners in yellow, orange, and white (or color them yourself)
- Glue stick
- Paper
How it works: Glue the yellow liner at the bottom of the paper. Overlap the orange liner in the middle.
Overlap the white liner at the top. Candy corn.
Age range: 18 months+
Speed tip: Use a glue stick, not liquid glue.
Cupcake liners slide on wet glue, and toddlers do not have the patience for repositioning.
Glue stick gives you immediate tack, and the liner stays where it lands.
For more ultra-fast crafts you can set up in under a minute, corn husk crafts for kids includes several quick nature-based projects that follow the same minimal-supply philosophy.
How to Set Up Toddler Crafts So They Actually Finish
The craft itself is only half the equation.
The setup is where most toddler craft attempts actually fail.
Not because the project was too hard because the environment wasn’t ready.
Prep everything before you call them over. Cut the paper. Pour the paint. Clip the cotton balls.
Lay out the stickers. When a toddler sits down, the only thing on the table should be the activity not your prep work.
Every second they spend watching you get ready is a second of attention span you’ve wasted.
Getting the right tools ahead of time matters — this guide to 10 must-have craft tools for DIY covers the essentials that make setup faster.
Three supplies maximum on the table. More than that and a toddler is overwhelmed, distracted, or actively dismantling the supply pile instead of doing the craft.
One material, one tool, one surface. That’s the formula.
Show them the finished version first. Not instructions. Not a demonstration.
Just hold up a completed example and say, “We’re making this.” Toddlers need to see the destination before they’ll travel.
Understanding what type of glue works best for paper crafts eliminates another setup variable wrong glue is one of the fastest ways to derail a toddler project.
Don’t correct placement or color choices mid-craft. The orange sticker is in the yellow section? Leave it.
The fingerprint dots are in a random pile instead of neat rows? Beautiful. “Done” matters infinitely more than “perfect” when you’re working with someone who has been alive for twenty-four months.
The goal is completion and confidence, not accuracy.
Have the next activity ready. Snack, book, outside time whatever follows the craft should be prepped and waiting.
Smooth transitions prevent the post-craft chaos that makes parents swear off crafting entirely.
Which Candy Corn Craft Should You Start With?
Zero-mess situation: #8 (sticker mosaic) or #14 (dot markers). Nothing spills, nothing stains. Nothing requires a cleanup phase longer than the craft itself.
Keepsake you’ll actually save: #9 (handprint art). That tiny candy corn palm print is the one you’ll frame, tuck into a baby book, or cry about when they’re seven and their hands are suddenly enormous.
Group activity for a party or playdate: #2 (sponge stamps) or #6 (fingerprint art). Both are station-friendly, self-explanatory, and work even when there’s no adult hovering over every seat.
If you’re planning a full party around fall crafts, Christian DIY gifts for mom includes several make-and-give projects that work well at group events too.
Pick one. Set it up while they’re not looking.
And let them finish something before the crackers come out.
Pin this post so you have all fifteen ready when October hits and you need a craft that doesn’t end in tears yours or theirs.
For more fall projects that work across ages, crafts to make for friends and best sealant for crafts are both worth bookmarking for the season ahead.
Frequently Asked Questions
What age can toddlers start doing candy corn crafts?
Several of these — fingerprint art (#6), handprint art (#9), and the contact paper sticky wall (#13) work for babies as young as twelve months with adult help.
Most of the others are doable at eighteen months to two years.
Candy corn crafts toddlers this young can handle are all about simple motions: press, stick, tear, smash.
What’s the easiest candy corn craft on this list?
The cupcake liner stack (#15). Three glue moves, three liners, under sixty seconds.
It’s the emergency craft for when you need something right now with no prep time.
How do I keep a toddler engaged long enough to finish a craft?
Keep it under five minutes. Pre-prep everything.
Put only what they need on the table. Show the finished example first.
And never correct their work mid-craft. The second you say “actually, that goes over here,” you’ve turned play into a test, and toddlers don’t sign up for tests.
Can I use these for a Halloween party or daycare activity?
Yes — sponge stamps (#2), fingerprint art (#6), sticker mosaics (#8), and dot marker smash (#14) all work as self-serve stations.
Pre-portion supplies into individual trays and let kids rotate through at their own pace.
What if my toddler won’t sit still for any craft?
Try #13 (contact paper sticky wall). It’s a standing activity no chair, no table, no “sit down please” battle.
Some toddlers craft better on their feet, and that’s completely normal.