This post contains affiliate links. This means I may earn a small commission if you purchase through my links at no extra cost to you.
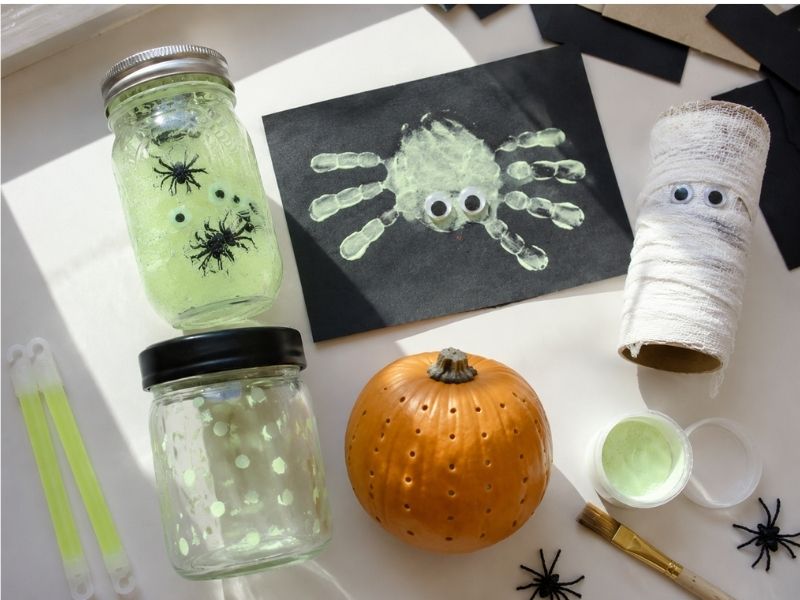
Most kid crafts have a ninety-second lifespan. The toddler finishes, holds it up, says “done,” and walks away while you’re still scraping glue off the table. Glow-in-the-dark Halloween crafts kids beg to repeat work completely differently.
The dark room reveal that moment when you flip the lights off and everything glows creates a payoff so satisfying that kids reset and do the whole thing again on their own.
That word matters: on their own. Not the flat “can we do another craft?” that really means they want screens. Actual, voluntary excitement.
The charge-and-reveal loop drives the repetition. Make the thing, hold it under a lamp, sprint to a dark room, gasp, and start over.
These ten projects use simple supplies and glow bright enough to actually impress. They work for ages one through ten depending on the craft.
Whether you need a Halloween party activity, a rainy October rescue, or a way to make a random Tuesday feel like an event this list delivers.
Why Glow-in-the-Dark Crafts Are the Ones Kids Repeat
Every other craft has a finish line. You make it, you admire it, and it goes on the fridge or into the recycling.
Glow-in-the-dark Halloween crafts kids keep returning to work differently because a built-in cycle drives the engagement. Charge it, darken the room, watch it glow, let it fade, charge it again.
That loop mirrors a mini science experiment on repeat. It creates anticipation “is it charged enough yet?” followed by a payoff that actually delivers.
That reward structure is the same one that makes kids replay favorite games dozens of times.
And because these projects work for Halloween parties, classroom activities, rainy afternoons, AND year-round sensory play, they earn traffic well beyond October.
The American Academy of Pediatrics has documented how sensory-rich activities support cognitive development in young children. The glow just makes it irresistible.
10 Glow-in-the-Dark Halloween Crafts Kids Will Actually Want to Repeat
1. Glow-in-the-Dark Slime Jars

This one isn’t really a craft. It’s a science experiment wearing a costume. And kids fall for it completely.
What makes it repeatable: The charge-sprint-reveal cycle turns it into a ritual. Kids charge the jar, cup their hands around it, and run to the closet.
They watch the glow pulse through the slime. Then they do it again and genuinely one more time after you’ve said “last time.”
Supplies needed:
- Clear school glue
- Liquid starch or contact lens solution
- Glow-in-the-dark powder
- Small mason jars or plastic containers
- Plastic spiders, eyeball beads, or bat confetti
How it works: Mix clear glue with liquid starch until it forms slime. Stir in a tablespoon of glow powder per batch for a strong glow.
Pour the slime into jars and drop in spooky pieces plastic spiders, tiny eyeballs, whatever you’ve got.
Charge under a bright lamp for two to three minutes and head for the darkest room in the house.
Age range: 4+
Parent tip: Glow powder beats glow paint for slime every time. The powder disperses evenly and glows longer. You can find it at most craft supply stores for a few dollars, and one container covers dozens of projects.
If you’re stocking up on basics before a big session, this guide to the most common crafting mistakes beginners make will save you from the ones that waste materials.
2. Glowing Ghost Bowling

This craft stops being a craft and becomes a party game within forty-five seconds. That speed is exactly why it works.
What makes it repeatable: It’s a game. Kids reset the pins and replay on their own for as long as you allow it. No glue dries. Nobody waits. They just knock pins down and set them up again while screaming.
Supplies needed:
- 6–10 empty plastic water bottles
- Glow sticks (one per bottle)
- Black permanent marker
- A small ball or mini pumpkin
How it works: Crack a glow stick and drop one inside each bottle. Draw ghost faces on the bottles with black marker two dots for eyes, a wobbly O for the mouth. Line them up like bowling pins. Turn off the lights. Bowl.
Age range: 3+
Parent tip: This works indoors on hard floors. That makes it perfect for a rainy Halloween night when trick-or-treating falls apart and you need to rescue the evening fast.
The ghost faces add personality that makes kids name each pin and feel genuinely upset when their favorite falls. For more projects that double as toys, popsicle stick crafts for kids includes several you build and then play with.
3. Glow Stick Creature Jars

One jar is never enough. Kids see the first glowing creature staring back at them through the glass and immediately say, “I want to make another one.” Then another. Then four more.
By bedtime you’ve got a glowing monster squad lined up on the windowsill.
What makes it repeatable: The collection impulse drives it. Every creature looks different. Every jar glows a different color. Kids want to build the whole army.
Supplies needed:
- Small glass or plastic jars
- Glow sticks (various colors)
- Scissors (adult only)
- Googly eyes
- Glue dots or double-sided tape
- Gloves and a covered work surface
How it works: An adult carefully cuts open glow sticks and pours the liquid into jars. Swirl the liquid to coat the inside walls. Stick googly eyes on the outside with glue dots. Cap it. Each jar becomes a glowing creature with a personality.
Age range: 5+ (glow stick liquid requires adult handling)
Parent tip: Wear gloves when cutting glow sticks. The liquid irritates eyes and skin on contact, and it stains surfaces, clothes, and everything else it touches.
Cover the table with newspaper before you start. The Consumer Product Safety Commission offers clear guidelines on safe handling of glow products around children worth a quick read before your first session.
4. Glow-in-the-Dark Handprint Spiders

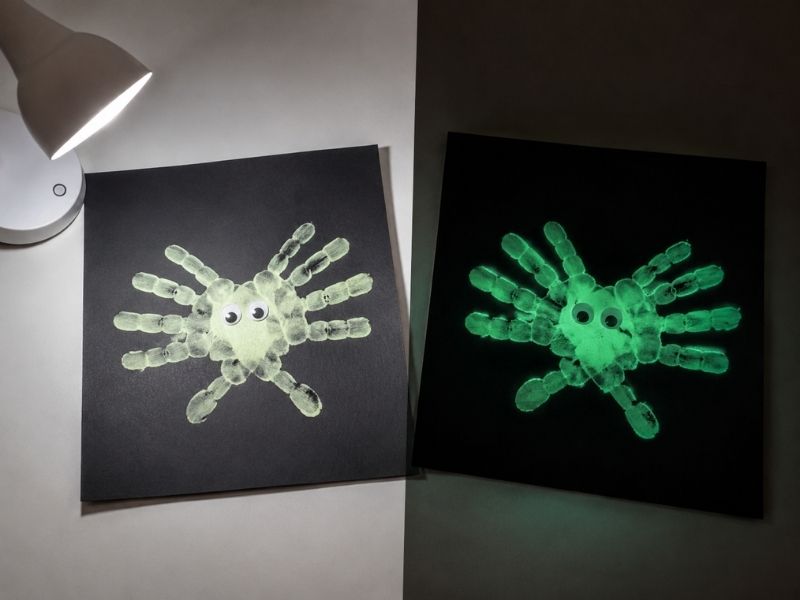
Two handprints. Eight legs. One spider. Every single one comes out looking different, which is exactly why kids refuse to stop at one.
What makes it repeatable: No two handprint spiders match. Kids compare them, rank them, and decide which one looks the scariest. Then they make “just one more” to beat their record.
The paint-on-hands factor also keeps sensory engagement high, which holds attention longer than most parents expect.
Supplies needed:
- Black construction paper
- Glow-in-the-dark paint
- Googly eyes
- A paint tray or paper plate
- Wet wipes (many of them)
How it works: Pour glow paint onto a plate. Press both hands into the paint and stamp them onto black paper with thumbs overlapping the fingers become eight spider legs.
Add googly eyes to the center. Let dry. Charge under a lamp and watch it glow.
Age range: 2+ with help
Parent tip: Make a whole colony. Once kids have four or five spiders, tape them “crawling” up a hallway wall or across a door frame.
The effect in the dark genuinely impresses people the kind of decoration that makes trick-or-treaters stop and stare. Glow-in-the-dark Halloween crafts kids display on walls get the biggest reactions because they transform the space.
This pairs well with handprint fall deer crafts if you’re building a full gallery of handprint art across the season.
5. Glowing Constellation Pumpkins

This one sneaks in actual astronomy while everyone thinks they’re doing a Halloween craft. Nobody expects to learn about Orion at the kitchen table in October. And honestly? It works brilliantly.
What makes it repeatable: Kids swap constellation patterns each time. They poke a new pattern, drop the glow stick in, and check their work in the dark.
That checking step hooks them they see their own work projected as light through the holes.
Supplies needed:
- Small or medium pumpkin (real or craft foam)
- Glow stick
- Nail or small drill bit
- Printed constellation guide
- Marker for plotting dots
How it works: Mark constellation dot patterns on the pumpkin using a printed reference guide. Poke holes at each dot with a nail (adult help for younger kids).
Crack a glow stick and drop it inside. Turn the lights off. The constellation glows through the holes.
Age range: 6+ (hole-poking needs adult assistance for younger kids)
Parent tip: Start with Orion and the Big Dipper. The shapes are obvious, which gives kids a quick win before they try harder patterns.
This pumpkin doubles as a table centerpiece and a night sky lesson at the same time. For another craft that bridges learning and making, simple flower crafts that encourage creativity uses the same open-ended approach.
6. Glow-in-the-Dark Puffy Paint Skeletons

The texture drives half the appeal. Puffy paint is satisfying to squeeze — always has been.
But adding glow powder and black cardstock turns a standard skeleton into something that puffs up like marshmallow and lights up like a nightlight. Kids cannot leave it alone.
Why kids love this one specifically: Every skeleton turns out unique because the puffy paint squeezes differently each time.
And the reveal rewards patience you let it dry overnight for the strongest glow, so the next morning becomes its own little event.
Supplies needed:
- Shaving cream
- White school glue
- Glow-in-the-dark paint or powder
- Black cardstock
- A squeeze bottle or ziplock bag with a corner cut
How it works: Mix equal parts shaving cream and white glue. Stir in glow paint until blended. Transfer the mixture to a squeeze bottle or a ziplock bag with one corner snipped.
Squeeze it onto black cardstock in a skeleton shape — skull, ribcage, spine, limbs. Let dry overnight.
Age range: 3+
Parent tip: Resist checking it in the dark before it fully dries. The glow intensifies dramatically as the puffy paint sets and hardens.
Morning reveals always outperform same-night ones. This is the glow-in-the-dark Halloween craft kids talk about at school the next day.
The combination of puffy texture and glow effect surprises them every single time. If your family enjoyed the skeleton theme, corn husk crafts for kids includes fall projects that pair perfectly alongside it.
7. Glowing Spiderweb String Art
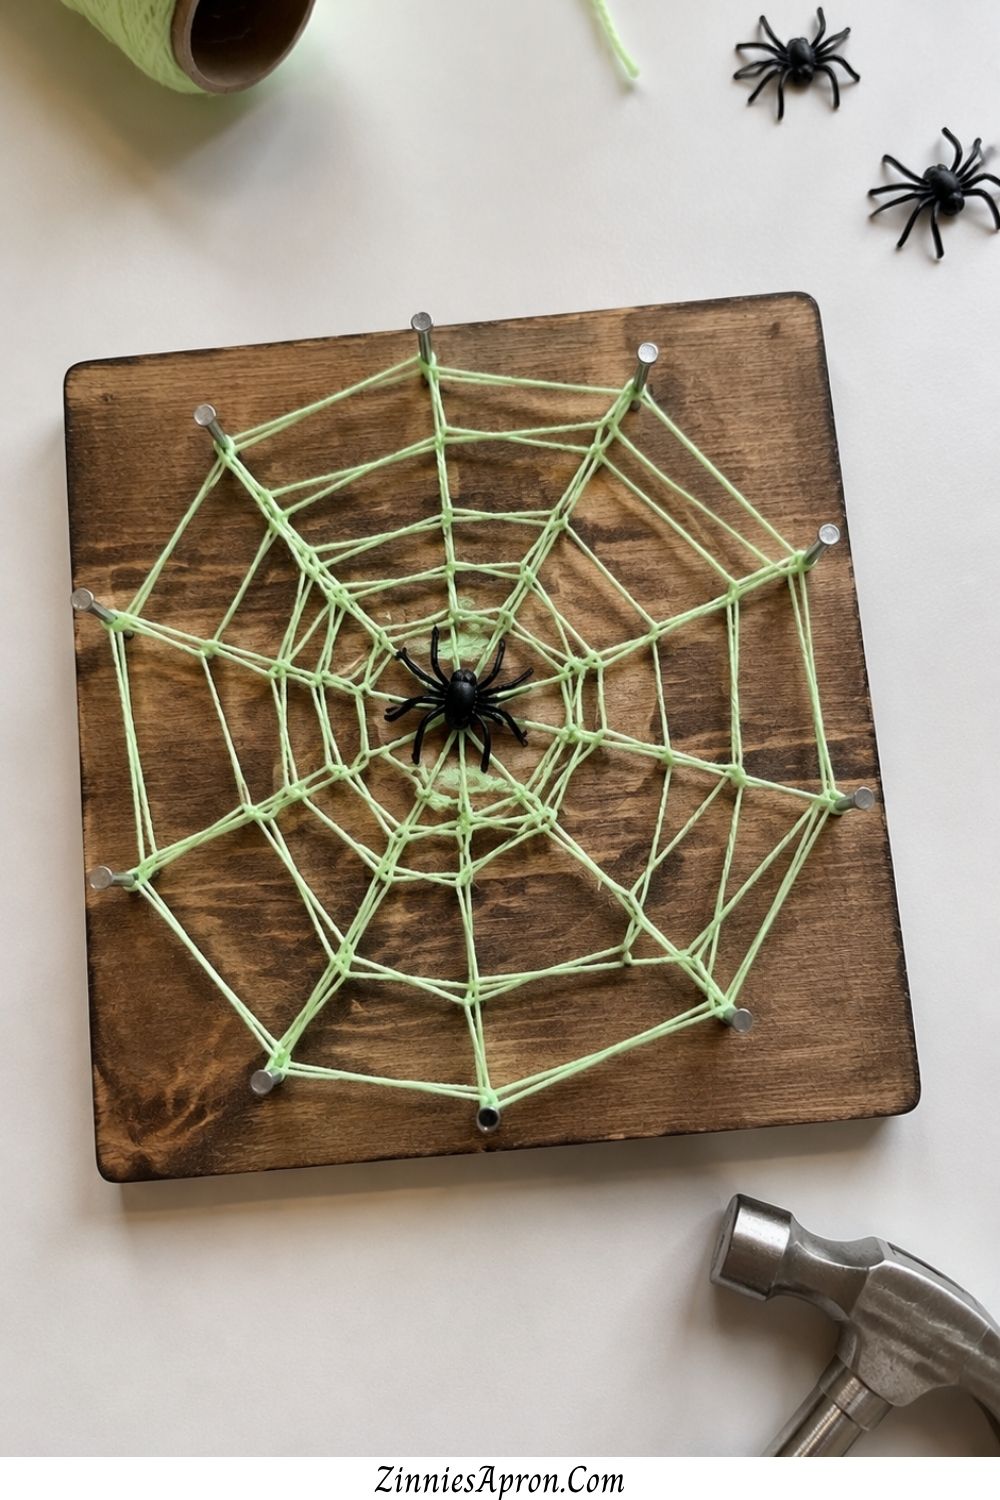
This one challenges older kids the ones who need busy hands and slightly engaged brains. The finished product looks like actual wall art, not a standard kid craft.
And because the board stays intact, the web changes every time.
What makes it repeatable: Unwrap the old web. Wrap a new pattern. The board is permanent the web is temporary. Kids experiment with tighter spirals, wider angles, and asymmetric designs. One board creates infinite webs.
Supplies needed:
- Small wood board or thick cardboard square
- Small nails or push pins (adult places these)
- Glow-in-the-dark yarn or string
- Plastic spider
- Hammer (adult use)
How it works: Hammer nails in a circular pattern around the board twelve to fifteen nails works well. Kids wrap glow yarn from nail to nail in a web pattern, spiraling inward.
Tuck a plastic spider into the center. Charge under a lamp and display.
Age range: 6+
Parent tip: Hammer the nails before the kids sit down. The wrapping is the fun part setup is not. Pre-nailed boards also make this an excellent party station where kids walk up, wrap a web, and move on.
For more display-worthy projects, DIY reclaimed wood wall art ideas covers ways to hang handmade pieces so they look intentional.
8. Glow Jar Fireflies

This is the quiet one on the list. It sits on a nightstand and glows softly while a kid falls asleep. Every night in October they charge it, cap it, and watch the little dots of light appear like summer bugs trapped in glass.
What makes it repeatable: The charge-cap-watch ritual becomes a bedtime routine not a craft they tried once, but a thing they do every night. That shift from project to tradition changes everything about how kids value it.
Supplies needed:
- Mason jar or clean glass jar with lid
- Glow-in-the-dark paint (yellow or green works best)
- Small paintbrush or cotton swab
- Pipe cleaners (for firefly shapes, optional)
How it works: Dip a cotton swab into glow paint and dot the inside walls of the jar randomly. These become the fireflies.
For extra detail, bend small pipe cleaner shapes and drop them inside. Cap the jar. Charge under a bright lamp for two to three minutes. Turn the lights off.
Age range: 4+
Parent tip: Sunlight charges glow paint faster than any lamp. A few minutes on a sunny windowsill before bedtime gives the strongest glow. Call them “ghost lights” or “spirit jars” during October, then drop the spooky name in November instant year-round use.
The National Association for the Education of Young Children has published research showing how calming sensory activities before bedtime improve sleep transitions.
Glow-in-the-dark Halloween crafts kids use at bedtime create the kind of wind-down ritual that sticks long after the holiday ends.
9. Glowing Mummy Wrap Dolls

The wrapping is the craft. The unwrapping is also the craft. Kids wrap, check the glow, decide it’s not spooky enough, unwrap, and rewrap tighter.
The tactile loop winding fabric around something — keeps their hands moving far longer than you’d expect.
What makes it repeatable: Mummies keep getting remade. Kids treat each version like an upgrade. The gauze absorbs paint differently every time, so the glow pattern never repeats.
Supplies needed:
- Small dolls, toilet paper rolls, or cardboard tubes
- Thin white gauze strips or cheesecloth
- Glow-in-the-dark paint
- Googly eyes
- Small bowl for dipping
How it works: Cut gauze into strips. Dip strips lightly in glow paint or brush paint onto them after wrapping.
Wind the gauze around the doll or tube, leaving space for googly eyes at the top. Let dry. Line up a whole glowing mummy army on a shelf and turn the lights off.
Age range: 3+
Parent tip: Thin gauze strips absorb glow paint more evenly than thick ones. They also wrap more smoothly around curves.
If you’re working with a group, pre-cut the strips ahead of time the wrapping is the fun part, not the cutting. Glow-in-the-dark Halloween crafts kids do in groups generate the most energy.
Everyone comparing their mummies, naming them, arguing about whose glows brighter that’s the magic.
For more crafts that use a wrap-and-build approach, bead crafts for seniors includes threading techniques that adapt well for kids’ projects too.
10. Glow-in-the-Dark Sensory Bags
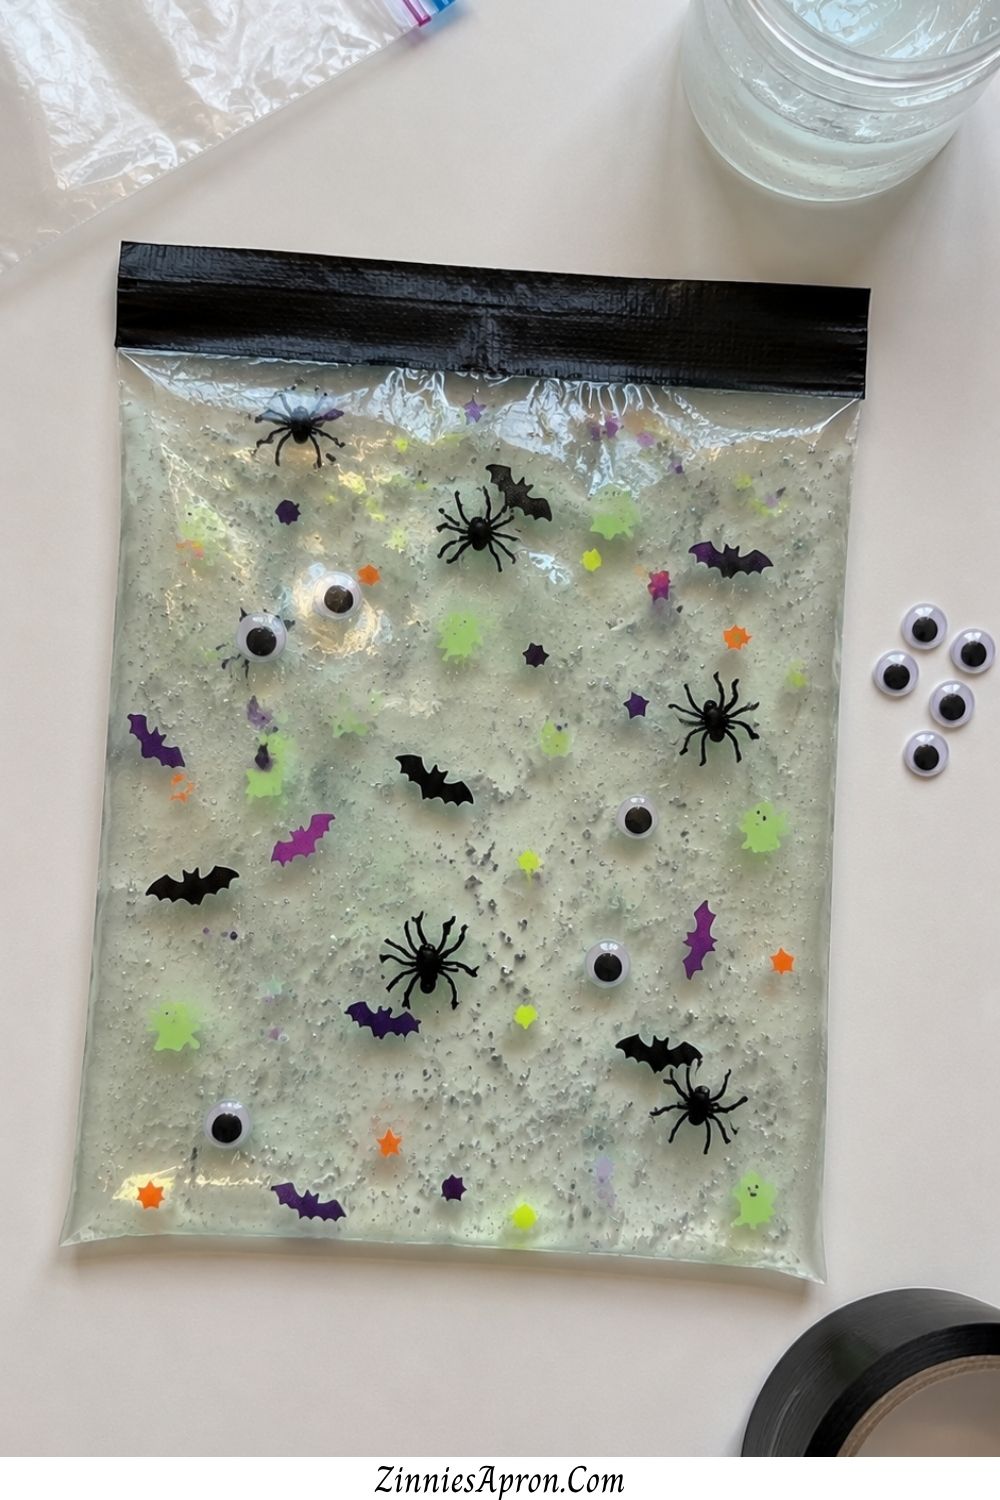
Zero mess. Fully sealed. Works for kids who still eat craft supplies.
This is the glow-in-the-dark Halloween craft kids under three can actually participate in. The squish factor keeps toddlers pressing, poking, and rearranging pieces far longer than seems reasonable for a bag of hair gel.
Why toddlers keep going: The squish never gets old. They press their fingers into the gel, push pieces around, find the hidden spider, lose the spider, and find it again.
The sealed bag means they can do this independently while you sit nearby and exist as a person for five minutes.
Supplies needed:
- Heavy-duty ziplock freezer bags
- Clear hair gel
- Glow-in-the-dark confetti or small foam shapes
- Plastic eyeballs, tiny spiders, foam bats
- Duct tape
How it works: Squeeze clear hair gel into the bag fill it about two-thirds full. Drop in glow confetti, plastic eyeballs, foam bats, and one small spider.
Seal the bag, then reinforce with duct tape along the entire top edge. Charge under a lamp. Squish in the dark.
Age range: 1+ (fully sealed means zero mess and no small-parts access)
Parent tip: Duct tape the seal like your sanity depends on it. Little hands will absolutely try to open it, and clear hair gel on carpet creates a problem you don’t want at 7pm on a Tuesday.
For the “find the hidden spider” version, bury one spider deep in the gel and challenge them to squish it to the surface.
That single change turns a five-minute activity into a twenty-minute one. If you’ve got slightly older kids ready for more structured sensory projects, mushroom crafts for kids hits the same satisfying note with texture and color.
What You Need to Know About Glow-in-the-Dark Supplies
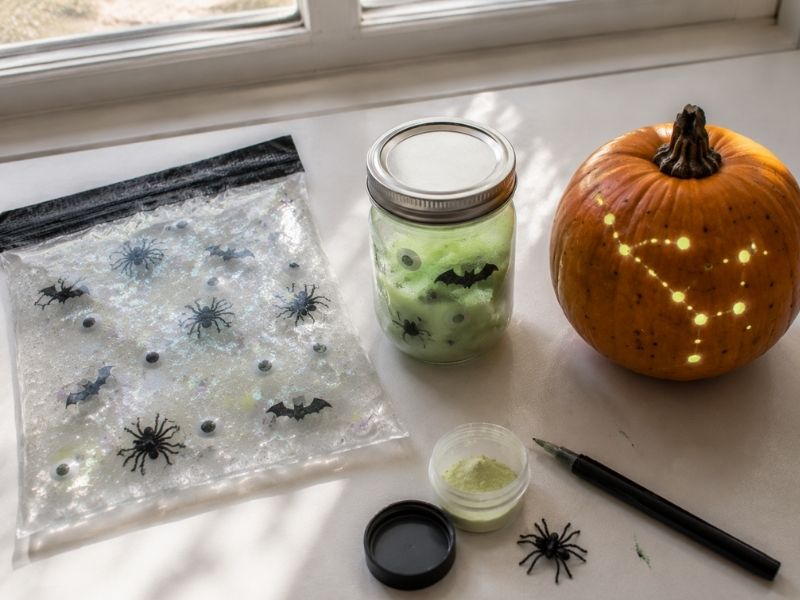
Grabbing the wrong supply for the wrong project leads to dim results and frustrated kids. Here’s the breakdown that saves you money and disappointment.
Glow Paint vs. Glow Powder vs. Glow Sticks
Glow paint is the easiest option — brush it on, charge it, done. It works best for flat projects like the handprint spiders (#4), the puffy paint skeletons (#6), and the firefly jars (#8). The downside: it fades faster than powder and usually needs recharging every few minutes.
Glow powder delivers the strongest glow. Mix it into slime, paint, or puffy paint for brightness that lasts longer and burns brighter.
It works best for the slime jars (#1) and any project where you want the wow factor to hold. One container lasts for dozens of projects.
Glow sticks cost the least and require the least effort — dollar store packs work perfectly. They work best for ghost bowling (#2), creature jars (#3), and constellation pumpkins (#5).
They don’t recharge, but they glow strongly for hours. The PBS Parents guide to sensory activities offers helpful tips on matching supply types to different age groups.
How to Charge for Maximum Brightness
Hold the glow item two to three inches from a bright lamp for two to three minutes. LED desk lamps work well. Sunlight works fastest even thirty seconds of direct sunlight outperforms five minutes under a lamp.
Avoid dim or warm-toned bulbs. They don’t emit enough of the right light wavelength to activate the phosphors in glow materials.
Safety Notes
Glow stick liquid irritates eyes and skin on contact and stains almost everything. Always have an adult cut glow sticks open.
Wear gloves and cover all surfaces. If liquid touches skin, wash with soap and water immediately. For children under three, stick with sealed projects like the sensory bags (#10).
Understanding which adhesives and materials work for which ages also matters — this guide to what type of glue to use for paper crafts includes safety notes for young crafters. Glow-in-the-dark Halloween crafts kids enjoy safely start with the right supply choices. [8]
Which Glow Craft Should You Try First?
Toddlers (1–3): Start with #10 (sensory bags) or #4 (handprint spiders). Both require minimal skill and deliver maximum payoff. The squish and the stamp — those two sensory hooks hold the youngest kids.
Preschoolers (3–5): Go for #1 (slime jars) or #2 (ghost bowling). Slime delivers the tactile factor. Bowling delivers the game factor. Either one keeps a four-year-old occupied for an unreasonable amount of time.
Elementary kids (6+): Hit #5 (constellation pumpkins) or #7 (spiderweb string art). The complexity runs higher, the creative freedom runs wider, and the finished product earns a spot they’ll actually want to keep.
Grab a pack of glow sticks, wait for dark, and let them see what happens. The gasp when the lights go off makes every minute of setup worth it.
Glow-in-the-dark Halloween crafts kids remember are the ones where something ordinary suddenly glowed. [9] That moment changes the whole night.
If you want to keep the momentum rolling beyond Halloween, crafts to make for friends has gift-worthy projects. And apple crafts kids keep coming back to offers more fall fun that doesn’t expire on November 1st.
Pin this post so you have it ready when October hits. And if you try the ghost bowling, come back and tell me how many rounds your kid played before you physically stopped them.
My guess is double digits. For anyone building a craft supply station at home, 10 must-have craft tools for DIY covers everything you need within arm’s reach.
Frequently Asked Questions
Are glow-in-the-dark supplies safe for toddlers?
Glow paint and glow powder are generally non-toxic, but always check the label first. For toddlers, sealed projects like the sensory bags (#10) offer the safest option. Glow-in-the-dark Halloween crafts kids under three can safely enjoy just need a sealed, no-contact design. [10]
How long do glow-in-the-dark crafts actually glow?
Most glow paint and powder projects glow brightly for ten to twenty minutes after a full charge, then fade gradually. Glow sticks last four to eight hours but can’t recharge. The recharge cycle makes paint and powder projects more repeatable kids charge and reveal over and over.
Where should I buy glow-in-the-dark supplies?
Dollar stores carry glow sticks in bulk for almost nothing those work perfectly for ghost bowling and creature jars. Craft stores and online retailers carry stronger glow powder and paint. Glow powder specifically gives you the most versatility because you can mix it into almost any base material.
Can I use these at a Halloween party?
Ghost bowling (#2), creature jars (#3), and sensory bags (#10) all work as party stations. Slime jars (#1) and handprint spiders (#4) make great take-home crafts. Set up each station with pre-portioned supplies and assign an adult to the glow-stick-cutting table.
Do these work year-round or just for Halloween?
Every one of these works year-round. Drop the Halloween theming and they become sensory play, science experiments, or bedroom décor. The firefly jars (#8) transition especially well into a year-round bedtime routine. Glow-in-the-dark Halloween crafts kids love in October become glow science crafts they love in March. [11]