
This post contains affiliate links. This means I may earn a small commission if you purchase through my links at no extra cost to you.
Can DIY Christmas wreath ideas on a budget help you decorate for less? Try these creative designs using simple materials you may already have at home.
Store-bought Christmas wreaths can be beautiful, but their prices may not fit every holiday budget. Making one at home gives you more control over the cost, although cheap materials alone do not guarantee a beautiful result.
What to be intentional about is knowing which materials to reuse, how to arrange them, and where a little detail can make a difference.
These DIY Christmas wreath ideas on a budget use options such as leftover ribbon, old ornaments, fabric scraps, paper and natural materials to create different looks without buying a pile of new supplies.
Supposedly you prefer a simple wreath for your front door or something colourful for an indoor wall, these ideas will help you make thoughtful choices and get more from the materials you have.
Start planning a gathering your guests will enjoy with these 25 Christmas Party Ideas Your Guests Will Still Talk About Next Year.
Check Where Your Christmas Wreath Will Hang
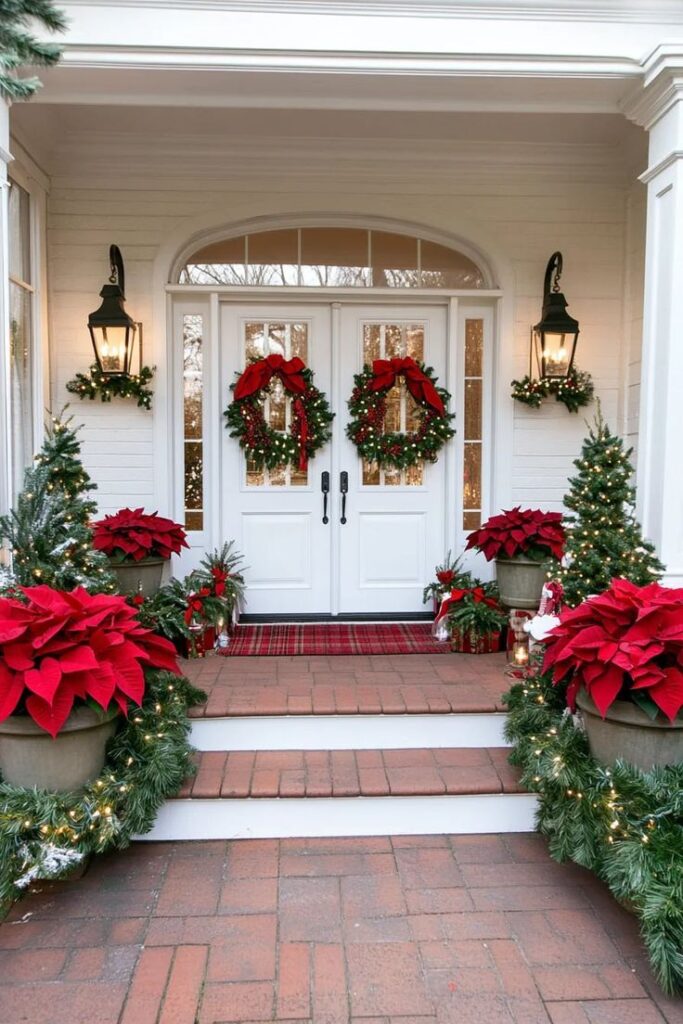
A wreath that looks beautiful on a living room wall may not survive a week on an exposed front door.
Rain, humidity, direct sunlight and wind can damage certain materials, loosen decorations or shorten the life of your finished project.
Choosing the right display spot also helps you avoid damaging your door or buying a wreath base that cannot support your design.
- Match the materials to the location. Paper, cardboard, fabric and dried orange slices are better suited to indoor display or a sheltered porch. Moisture can soften paper, stain fabric and encourage mould on incompletely dried natural materials. Even a covered entrance may be too damp for delicate decorations in wet weather.
- Make sure the hanger can support the wreath. A lightweight paper design puts less strain on a hook than a thick twig wreath covered in pinecones or ornaments. Check the hanger’s weight limit and follow its fixing instructions. For a rental property, an over-door hanger may avoid drilling, provided it fits properly and does not interfere with the door.
- Protect the door’s finish. Check that the wreath and hanger will not scratch the paint, glass or wood as the door opens and closes. A suitable soft pad can reduce rubbing, but test any adhesive on an inconspicuous area first because some adhesives can lift paint or leave residue.
- Keep fresh greenery away from heat. Cut evergreen branches gradually dry after harvesting. Keep wreaths away from fireplaces, candles, heaters and other ignition sources, and remove them if the foliage becomes excessively dry or brittle. Dry natural greenery can catch fire more readily than fresh greenery.
- Account for wind and sunlight. Wind can shift a wreath, loosen decorations or pull it from a weak hook. Direct sunlight can fade ribbon and coloured paper. A sheltered position and securely attached decorations help the wreath retain its appearance for longer.
The aim is to choose a wreath that suits the place where it will be displayed.
Delicate paper and fabric designs can look lovely indoors, while an exposed entrance calls for a more weather-tolerant construction and a secure hanging method.
Give old household materials a festive purpose with these DIY Christmas Crafts From Recycled Materials.
DIY Christmas Wreath Ideas on a Budget
1. Asymmetrical Evergreen Wreath With a Simple Ribbon
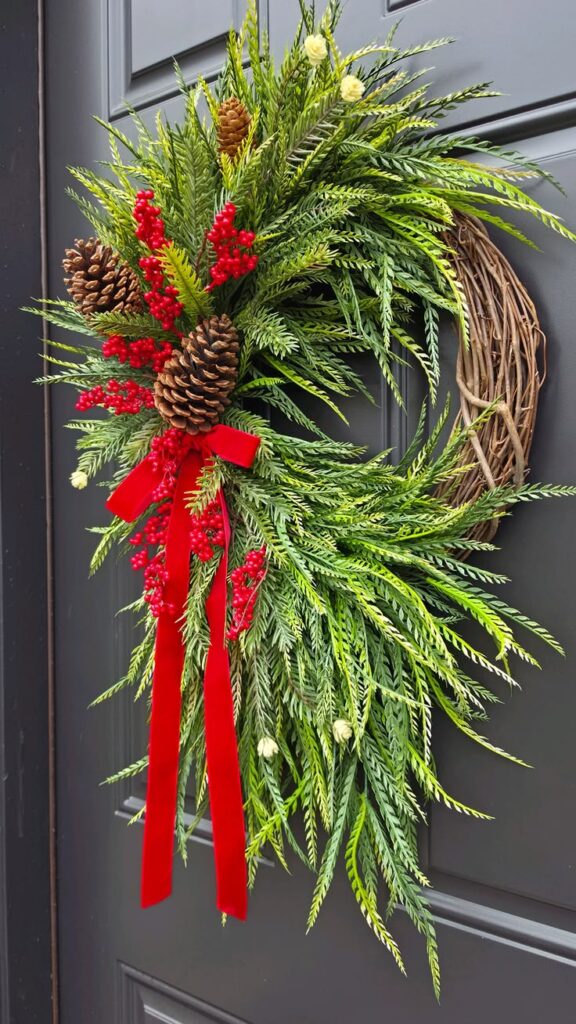
An asymmetrical wreath is one where the decorations are not spread evenly around the circle. Instead of covering the entire base with greenery, you arrange the branches along one side or across part of the top, leaving the rest of the base exposed.
The uneven arrangement is intentional, giving the wreath a natural, modern look without requiring lots of foliage.
This makes it a useful choice when you want a Christmas wreath that looks carefully arranged but need to keep material costs low. The visible twig or grapevine base becomes part of the design rather than something you have to cover up.
Materials you can use:
- A twig or grapevine wreath base
- A few evergreen sprigs, such as pine, fir or spruce
- Florist’s wire
- Ribbon in cream, burgundy or deep green
- Pruning shears
How to make it:
- Plan the arrangement. Lay the greenery along one side of the base, or arrange it diagonally across the top. Move the branches around until the wreath looks balanced, even though the greenery is concentrated in one area.
- Layer the sprigs. Overlap the stems so the cut ends sit beneath the next branch. Pointing the foliage in a similar direction helps the arrangement look neat and natural.
- Secure the branches. Wrap florist’s wire around the stems and base, fastening it firmly at the back. Keep the wire out of sight and trim any excess carefully.
- Finish with a ribbon. Tie a bow near the end of the greenery or use the ribbon as a hanging loop. One well-placed accent is enough; extra ornaments could distract from the simple design.
What gives this wreath its polished look? The contrast between the fuller green section and the exposed natural base. Keep the greenery concentrated rather than adding small sprigs everywhere to fill empty spaces. Those open areas are part of the design.
How to keep it affordable: Reuse a wreath base and use a few suitable evergreen clippings from your garden, where available and safe to collect.
If fresh branches are difficult to find, reusable artificial sprigs from an old Christmas decoration can work too. Fresh greenery will gradually dry out indoors, so keep it away from heaters, fireplaces and open flames.
Running out of time for a holiday project? Try a Last Minute Christmas Craft In 30 Minutes.
2. Champagne Bauble Wreath Made From Leftover Ornaments
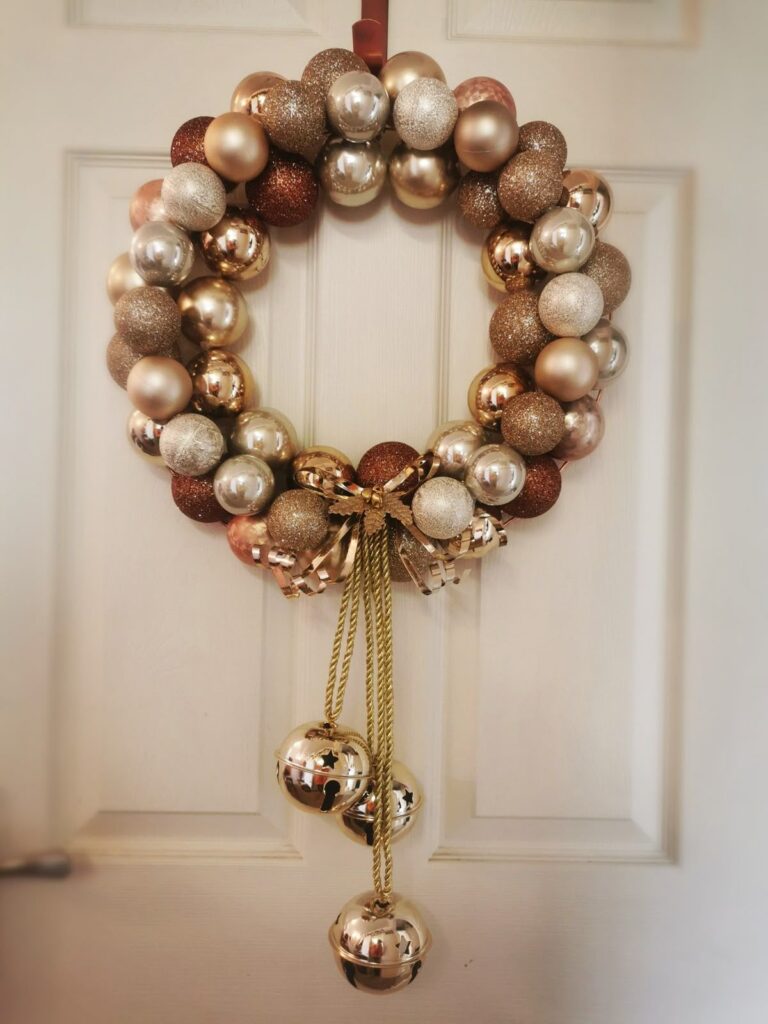
Have a few Christmas baubles left over from decorating the tree? They can become the main feature of a wreath instead of sitting unused in a storage box.
Champagne-coloured ornaments, with their soft gold and cream tones, work particularly well together because they create a coordinated look without needing lots of extra decorations.
Among these DIY Christmas wreath ideas on a budget, this one is especially useful when you already own ornaments but do not have enough to decorate a whole tree.
The key is to group the baubles in one area rather than spreading them randomly around the wreath.
Materials you can use:
- A reused wire, foam or sturdy twig wreath base
- Leftover champagne, gold, cream or similar-coloured baubles
- Florist’s wire or suitable strong craft adhesive
- Ribbon, if desired
- Wire cutters, if using florist’s wire
How to make it:
- Sort your baubles by colour and size. Choose two or three related shades rather than using every colour you own. Separate larger ornaments from smaller ones so you can see how they might fit together.
- Arrange a cluster before attaching anything. Place the larger baubles first, then fill some of the gaps with smaller ones. Try positioning the cluster along one side or across the lower section of the wreath, leaving some of the base visible.
- Secure the ornaments firmly. Lightweight plastic baubles can often be attached with florist’s wire or an adhesive suitable for the base and ornament material. Glass ornaments need extra care because they can break if knocked or pressed together. Avoid relying on glue alone if the wreath will be moved frequently.
- Check the wreath from a distance. Look for obvious gaps, loose pieces or areas that feel too crowded. Add a ribbon only if it complements the arrangement rather than competing with it.
What gives it the expensive-looking finish? The combination of related colours and different ornament sizes creates depth without requiring a large quantity of decorations. Leaving some of the base uncovered can also help the bauble cluster stand out.
How to keep the cost down: Reuse baubles from previous Christmases, including those from an old garland or a damaged decoration set.
If you need to buy a few more, check the sizes and colours before purchasing so you do not end up with a bag of ornaments that do not suit the design. For homes with children or pets, shatter-resistant baubles are a more practical choice.
Make the office gift exchange more interesting with these Office Christmas Party White Elephant Gift Ideas That Actually Get Picked Every Single Time.
3. Dried Orange and Cinnamon Wreath

Dried orange slices bring warm colour to a Christmas wreath, while cinnamon sticks add texture and a natural seasonal detail.
This design suits anyone who prefers a less glittery decoration or wants to use ingredients and materials that may already be available at home.
The main challenge is preparing the oranges properly. Slices that still contain too much moisture can develop mould during storage, especially in humid conditions. Drying them thoroughly before assembling the wreath helps reduce that risk.
Materials you can use:
- A twig or grapevine wreath base
- Oranges
- Cinnamon sticks
- Florist’s wire or suitable craft adhesive
- A knife and baking tray
- Optional ribbon in a natural or muted colour
How to make it:
- Slice the oranges evenly. Cut them into thin, reasonably uniform rounds so they dry at a similar rate. Blot away excess juice with a paper towel.
- Dry the slices thoroughly. Arrange them in a single layer on a baking tray and dry them in a low oven, turning them occasionally. The exact time depends on the thickness of the slices and your oven, so check them regularly. They should feel dry rather than sticky or wet in the centre. A food dehydrator can also be used according to its instructions.
- Plan the placement. Lay a few orange slices and cinnamon sticks on the base before attaching them. Space the pieces out so the natural twig texture remains visible instead of covering the entire wreath.
- Attach the decorations. Use florist’s wire where practical, or an adhesive suitable for the materials. Let any adhesive cure fully according to its instructions before hanging the wreath.
- Store it carefully. Keep the finished wreath in a dry place and inspect it for signs of moisture or mould. Discard it if mould develops rather than trying to cover it with more decorations.
What makes this design look polished? Repeating the orange circles and arranging the cinnamon sticks deliberately gives the wreath a consistent pattern.
A restrained colour scheme of orange, brown and natural wood tones usually works better than adding many unrelated decorations.
How to keep the cost down: Use a small number of oranges and cinnamon sticks rather than buying large quantities solely for decoration.
This wreath is best displayed indoors or in a dry, sheltered location because rain and damp air can damage the dried fruit.
4. Fabric-Knot Wreath From Old Clothes
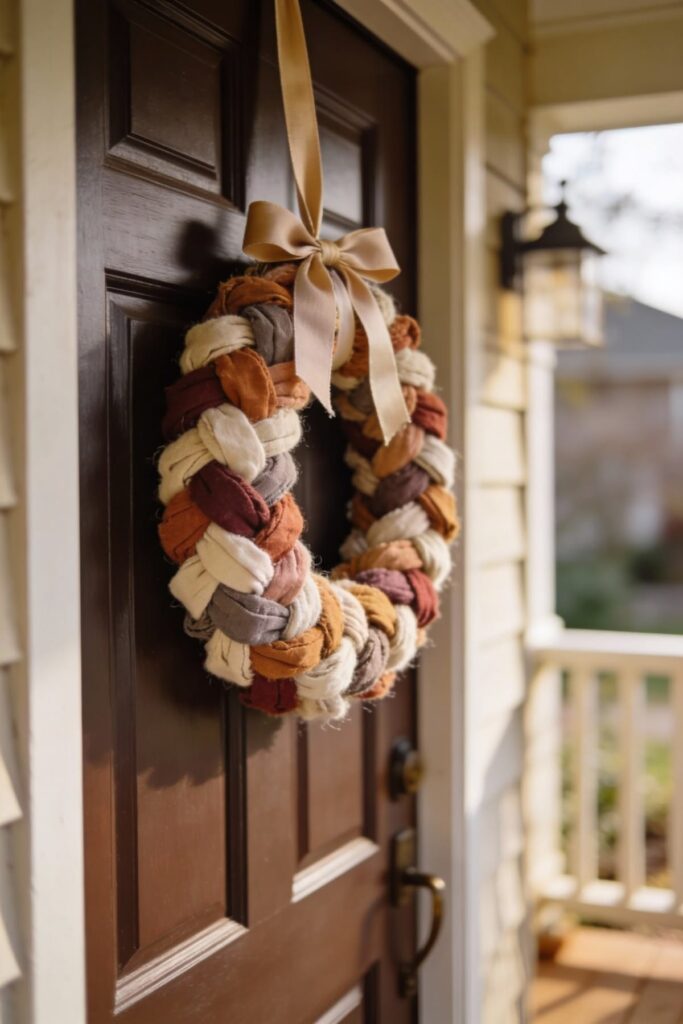
Old shirts, leftover sewing fabric and worn curtains can provide material for a Christmas wreath without requiring new fabric. Here, idea is simple: cut the cloth into strips and tie them around a ring until the base is covered.
The finished look depends largely on the fabric colours, the consistency of the strips and how closely the knots are arranged.
This is one of the more adaptable DIY Christmas wreath ideas on a budget because the fabric can be chosen to suit different homes and traditions.
Green and cream create a quiet Christmas look, while red and white feel more traditional. You can also use colours that match your existing room decorations.
Materials you can use:
- A wire wreath ring or another sturdy circular base with suitable attachment points
- Clean fabric scraps from old clothes or sewing projects
- Scissors
- A ruler or measuring tape
- Optional ribbon for hanging
How to make it:
- Choose the fabric carefully. Select clean cloth in two or three coordinating colours. Cotton and similar woven fabrics are generally easy to cut and tie. Avoid material that sheds heavily or is too thick to knot neatly.
- Cut strips of similar width. The length will depend on the size of the ring and how full you want the wreath to look. Test a few strips first; if the knots are too bulky or the ends too short, adjust before cutting the rest.
- Tie the strips around the ring. Use the same simple knot throughout and push the knots close together. Keep the fabric ends facing a consistent direction to create a tidy, full appearance.
- Check the coverage. Turn the wreath around and look for exposed sections of wire or uneven areas. Adjust the knots rather than adding extra decorations to hide every small difference.
- Add a hanging loop. Use a securely attached strip of fabric or ribbon, ensuring the finished wreath is not too heavy for the chosen hanger.
What makes it look more expensive? Consistent strip widths and a limited colour palette. If the fabric is patterned, choose one print as the main material and use a plain colour to balance it. Mixing every scrap available may save fabric, but it can make the finished wreath look visually busy.
How to keep the cost down: Use offcuts from sewing projects or clothes that are no longer suitable for wearing. Check that the fabric is clean and free from unpleasant odours before cutting it.
This wreath is most suitable for indoor use or a sheltered entrance, since ordinary fabric can fade or become damp when exposed to the weather.
Let toddlers join the holiday decorating with these 15 Christmas Tree Crafts for Toddlers Can Finish Before the Real Tree Goes Up.
5. Kraft-Paper Leaf Wreath
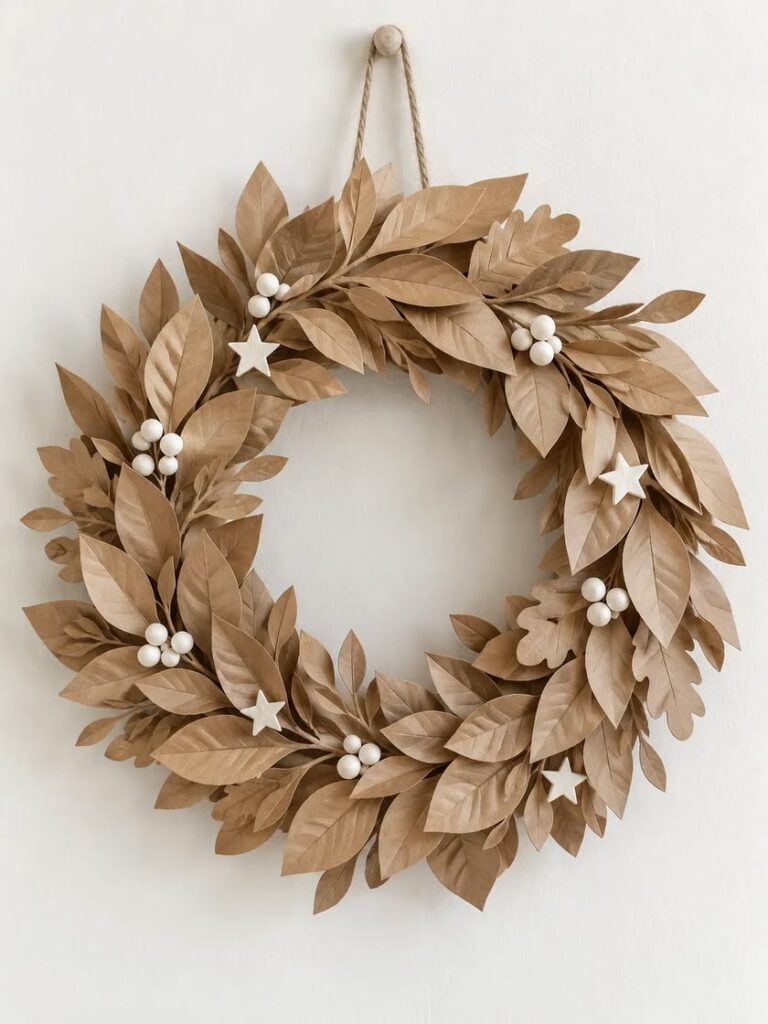
Brown paper bags and plain kraft paper can become a simple leaf wreath without the cost of fresh greenery or store-bought decorations.
This design works well for an indoor Christmas display, especially when you want a natural look and already have paper at home.
Materials
- Brown paper bags or kraft paper
- Cardboard for the wreath base
- Scissors
- Pencil
- Glue or a glue gun
- A small piece of string for hanging
How to make it
- Prepare the base. Cut a large ring from sturdy cardboard. If the cardboard is thin, glue two rings together so the base can support the paper leaves.
- Make a leaf template. Draw one simple leaf shape on scrap paper and cut it out. Use it to trace leaves of a similar size. Keeping the shapes consistent helps the finished wreath look neat.
- Add a little shape. Fold each leaf lightly down the centre to create a natural-looking crease. Avoid pressing the fold too hard, as thin paper can tear.
- Layer the leaves. Glue them around the ring, overlapping each leaf slightly so the cardboard does not show through. Work in the same direction around the base for a more even finish.
- Finish the wreath. Add a paper bow or a simple ribbon if you have one. Let the glue dry fully before hanging it.
How to keep the cost down: Reuse paper shopping bags, delivery packaging or leftover kraft paper. There is no need to buy special craft paper for this project.
What makes the difference: Using one leaf template gives the wreath a more consistent appearance than mixing many unrelated shapes. You can also vary the effect by leaving the paper plain or lightly curling a few leaf tips.
Where to display it: Hang this wreath indoors, away from damp walls or exposed outdoor areas. Paper absorbs moisture and may soften, warp or lose its shape in humid conditions.
If the wreath is going on a front door, choose a sheltered position and bring it inside if the weather turns wet.
6. Yarn-Wrapped Wreath With a Small Metallic Accent

Leftover yarn can cover a plain wreath base and give it a soft, textured finish. This is a useful project for anyone who has spare yarn from knitting, crochet or other crafts but not enough for a larger project.
Materials
- A cardboard or foam wreath ring
- Leftover yarn
- Scissors
- Tape or glue to secure the starting and finishing ends
- A few small bells or another lightweight decoration
- String or ribbon for hanging
How to make it
- Choose your yarn. Pick one colour for a simple look, or combine two colours that sit well together. Red, cream, forest green and grey are possible choices, depending on what you already own.
- Secure the first end. Tape or glue the yarn to the back of the ring. Allow the adhesive to hold before wrapping.
- Cover the base. Wrap the yarn around the ring, keeping each strand close to the previous one. Gaps can reveal the base underneath, so check the front as you work. If the yarn slips, adjust the tension rather than pulling so tightly that the ring bends.
- Finish at the back. Once the base is covered, secure the final end firmly and trim away the excess yarn.
- Add a small accent. Attach a few lightweight bells or one small metallic decoration near the top or side. Keep the detail modest so the yarn remains the main feature.
How to keep the cost down: Use yarn left from previous projects or combine short lengths in a deliberate pattern. Buying several new balls just to cover a wreath may cost more than expected, particularly if the ring is large.
What makes the difference: Even coverage gives the wreath a tidy finish and hides the inexpensive base. If you use more than one colour, plan the arrangement before wrapping so the changes look intentional rather than random.
Where to display it: This wreath is best suited to an indoor wall or a dry, sheltered entrance. Yarn can collect dust and absorb moisture, and some fibres may fade in strong sunlight. Store it in a clean, dry container after Christmas to help it last for another season.
Bring seniors together for a seasonal activity with these 15 Simple Christmas Cookie Decorating for Seniors to Make Together.
7. Pinecone Wreath With a One-Sided Arrangement

Pinecones have plenty of natural texture, so you do not need to cover an entire wreath with them. Arranging a group along one side lets the base remain visible and reduces the number of decorations required.
Materials
- A sturdy twig or grapevine wreath base
- Clean, completely dry pinecones
- Florist wire or a suitable strong adhesive
- Gloves, if needed when handling rough pinecones
- Optional ribbon or a few small decorations
How to make it
- Check your pinecones. Choose cones that are firm and free from visible mould, insects or a musty smell. Remove loose dirt and let them dry thoroughly before using them.
- Plan the arrangement. Place the pinecones along one side of the base before attaching them. Turn some in different directions to create texture, while keeping the overall cluster balanced.
- Secure the larger cones first. Attach the biggest pinecones to the base, then fill the gaps with smaller ones. Florist wire can work well on a twig base; if using adhesive, make sure it is suitable for both materials and follow the product instructions.
- Check for loose pieces. Gently test each cone and reinforce any that shift. Avoid relying on a small spot of glue for a heavy pinecone.
- Add a finishing detail. A plain ribbon can soften the natural look, but the pinecones can also stand on their own.
How to keep the cost down: Use pinecones you can collect legally from a permitted area or obtain from a safe, free source. Do not take them from protected land or private property without permission. If collecting is not practical where you live, a few purchased cones may be enough for a small cluster.
What makes the difference: Repeating one natural material creates a more coordinated look than adding many unrelated decorations. Leaving part of the wreath base visible also makes a small supply of pinecones go further.
Where to display it: Keep the wreath dry and away from fireplaces, candles, heaters and other sources of heat. Pinecones and twig bases can become dry and more flammable over time.
Check the wreath before hanging it, and do not use cones that show signs of mould or insect activity.
For activities adapted to people with more advanced memory loss, see these 20 Christmas Crafts for Seniors in Nursing Homes That Work Even With Advanced Dementia.
8. Felt-Leaf Wreath That Doesn’t Depend on Fresh Greenery
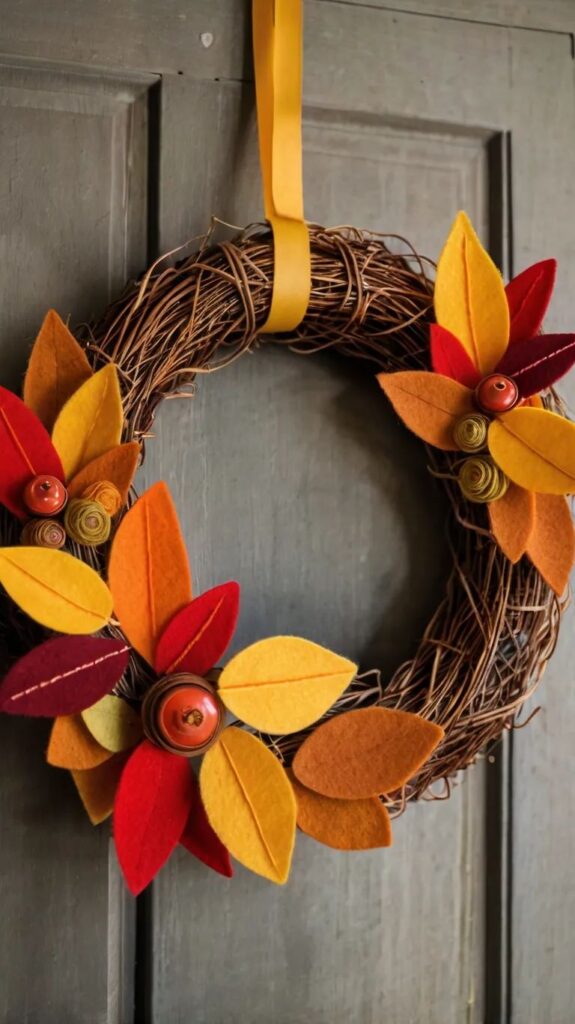
Fresh greenery can be difficult to find in some places, and it dries out after being cut.
Felt leaves offer another option: they keep their shape, do not wilt like fresh foliage and can be packed away for reuse after the holidays.
Materials
- Green felt remnants
- A cardboard or lightweight foam wreath base
- Scissors
- Pencil and paper for a leaf template
- Craft glue or a glue gun
- Optional red felt for berry-shaped accents
- String or ribbon for hanging
How to make it
- Create a leaf template. Draw a simple leaf shape on paper and cut it out. Trace it onto the felt to make several leaves of a similar size.
- Cut the leaves. Use sharp scissors for clean edges. If you have different shades of green in your scrap pile, choose two or three that work well together rather than using every colour.
- Arrange before gluing. Place the leaves around the ring and overlap them slightly. This lets you check for gaps and decide which direction they should face before fixing them in place.
- Attach the leaves. Glue them onto the base, working around the ring in a consistent direction. Add another layer only where the base shows through.
- Add a small Christmas detail. A few red felt circles can suggest berries, or you can leave the wreath green for a quieter look. Secure every decoration firmly, especially if children or pets may reach it.
How to keep the cost down: Use leftover felt from school projects, sewing or earlier crafts. If you need to buy material, a small piece of felt may be enough for a simple wreath, depending on its size and how closely you layer the leaves.
What makes the difference: Similar leaf shapes and a limited colour palette help the wreath look coordinated. Cutting the leaves before you start gluing also makes it easier to spread them evenly and avoid running short near the end.
Where to display it: Felt is suitable for indoor use, but it can collect dust and may fade in direct sunlight. Keep the wreath dry, and store it flat or in a box so the leaves do not become crushed.
If you add small berry accents, make sure they are firmly attached and keep the finished wreath out of reach of young children who might pull them off.
Connect the Christmas story with a hands-on Sunday school activity using these 20 Christmas Bible Crafts for Kids Sunday School That Actually Fit One Class Period.
9. Bare Twig Wreath With One Statement Bow
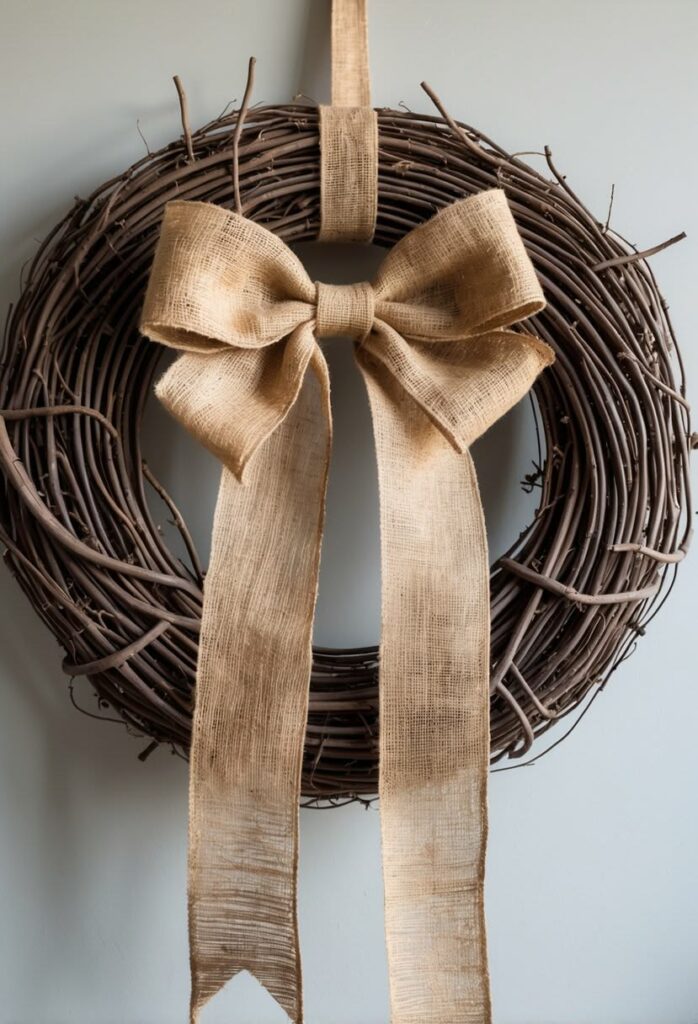
A bare twig wreath uses the natural shape of branches as its main decoration. Instead of covering the entire base with greenery, ornaments or flowers, you leave most of the twigs visible and add one large bow for colour.
This makes it a practical choice when you want a simple Christmas decoration without buying lots of supplies.
Materials
- Flexible, dry twigs or a plain twig wreath base
- Florist wire or strong craft wire
- Wire cutters or suitable scissors
- Ribbon for the bow
- Optional evergreen sprigs
How to make it
- Gather suitable twigs. Choose long, flexible branches that can bend without snapping. Avoid brittle or rotten twigs. Collect only where you have permission, and check that the branches are free from insects and mould.
- Form the circle. Bend the twigs gradually into a ring. Add more branches around the first one, overlapping them to build a stronger shape.
- Secure the base. Wrap wire around the branches at several points. Keep the ends tucked away so they do not scratch the door or catch on clothing. If shaping your own ring is difficult, use a ready-made twig base and decorate it instead.
- Make the bow. Tie a substantial bow from ribbon you already have. Leave the tails long enough to hang neatly, then trim the ends at an angle if desired.
- Attach the bow. Secure it firmly to the wreath with wire or a suitable fastener. Add a few evergreen sprigs beside it if you want a little more colour, but leave enough of the twigs visible.
How to keep the cost down: Reuse a wreath base from a previous Christmas or make one from suitable fallen branches. A single good-sized bow can provide the main festive colour, so there is no need to buy extra decorations just to fill empty spaces.
What makes the difference: The twigs are part of the design, not a base that needs to be hidden. Choose a bow colour that contrasts with the branches, and position it so the wreath looks balanced rather than heavy on one side.
Where to display it: A dry, sheltered entrance or indoor wall is a sensible choice. Wind can catch a large bow, so secure both the bow and the wreath hanger properly. Keep dry branches away from candles, fireplaces and heaters.
For thoughtful workplace presents, see these 25 Christmas Gifts For Co workers That Don’t Feel Cheap Or Weird.
10. Paper-Rosette Wreath From Leftover Wrapping Paper
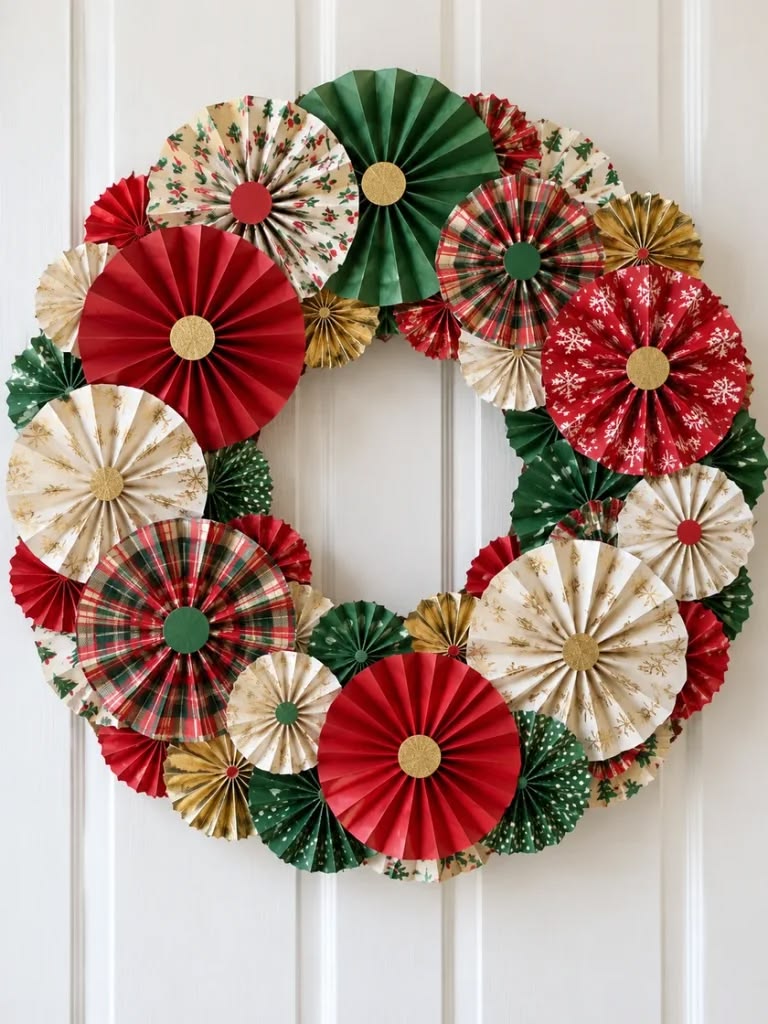
A paper-rosette wreath is made by folding paper into small fan-shaped circles and attaching them to a cardboard ring.
It gives leftover Christmas wrapping paper another use, especially when you have several scraps in similar colours but not enough to wrap another gift.
Materials
- Leftover wrapping paper or other decorative paper
- Sturdy cardboard for the base
- Scissors
- Ruler and pencil
- Glue or double-sided craft tape
- String or ribbon for hanging
How to make it
- Cut the base. Draw a large circle on cardboard and a smaller circle inside it. Cut out the centre to make a ring. Use sturdy cardboard or glue two thinner rings together so the base does not bend easily.
- Prepare the paper strips. Cut strips of equal width. Their length will affect the size of each rosette, so test one strip before cutting all the paper.
- Fold each strip. Fold the paper back and forth in an accordion pattern, keeping the folds as even as possible. Bring the ends together to form a circle and secure them with glue or tape. If the paper is very thin, handle it gently because the folds can tear.
- Make enough rosettes. Prepare several in one main colour, then make a smaller number from a complementary pattern. Arrange them on the cardboard before gluing to check that the colours are balanced.
- Attach the rosettes. Fix them around the ring, placing them close enough to cover most of the cardboard. Allow the adhesive to dry before adding the hanging loop.
How to keep the cost down: Use wrapping paper left over from gifts, paper gift bags or clean pages from old calendars. You can also mix plain paper with patterned scraps rather than buying a new roll.
What makes the difference: Repeating the same rosette shape creates a more coordinated finish, even when the paper patterns differ. Choose one dominant colour and use the second pattern sparingly; too many competing prints can make the wreath look busy.
Where to display it: Keep the wreath indoors and away from moisture, as paper can soften, warp or tear when damp. It is also best kept away from open flames and other heat sources.
Store it flat in a dry box after Christmas so the folded shapes are less likely to get crushed.
11. Mini-Gift Wreath Made With Cardboard Boxes

This wreath looks like a small collection of Christmas presents arranged in a circle.
Instead of buying miniature gift boxes or expensive ornaments, you can make lightweight boxes from clean packaging and cover them with leftover wrapping paper. It is a good way to use small cardboard offcuts that might otherwise be thrown away.
Materials
- Clean cardboard from packaging
- Leftover wrapping paper or coloured paper
- Scissors or a craft knife
- Ruler and pencil
- Glue or double-sided tape
- Ribbon scraps for small bows
- A sturdy wreath base
How to make it
- Make small boxes. Cut and fold cardboard into simple box shapes. Keep the boxes shallow and lightweight so they do not make the wreath too heavy. If you prefer, use small empty packaging boxes that are already the right size.
- Cover the boxes. Wrap each one in paper and secure the edges at the back. Fold the corners neatly to reduce bulky areas that might make the boxes difficult to attach.
- Vary the sizes. Make a mixture of small and medium boxes. A few different sizes create depth, but very large boxes can overwhelm the wreath and make it harder to hang.
- Arrange before attaching. Place the boxes in a cluster on one side of the base or distribute them around the ring. Try different arrangements until the wreath looks balanced and the boxes do not hide one another completely.
- Secure the decorations. Attach each box firmly using a suitable adhesive or wire, depending on the base. Add small ribbon bows if you have scraps available, then check that nothing shifts when the wreath is lifted.
How to keep the cost down: Reuse clean delivery boxes, cereal boxes or other suitable packaging. Covering cardboard with leftover paper can give it a festive appearance without the expense of buying miniature presents.
What makes the difference: Mixing box sizes adds depth, while using two or three related paper colours keeps the arrangement coordinated. Make sure the wreath remains light enough for its hanger; a heavy design can pull loose from a door.
Where to display it: This wreath is best for an indoor wall or a sheltered entrance. Paper-covered boxes can become damaged by rain and humidity.
If you hang it on a door that opens frequently, secure the boxes well and check that they do not knock against the door frame.
Want to move beyond the usual holiday colour scheme? These 25 Christmas Tree Ideas That Aren’t Another Traditional Red and Green Setup offer alternative decorating styles.
12. Jingle-Bell Wreath With a Restrained Metallic Finish

A jingle-bell wreath uses the shine and sound of small bells as its main decoration.
You do not need to cover the whole ring with bells: arranging a small matching group on a plain base can create a festive detail while keeping the materials cost under control.
Materials
- A plain twig or yarn-wrapped wreath base
- Bells from old Christmas decorations, or a small matching set
- Florist wire or another suitable fastener
- Ribbon, if desired
- Wire cutters, if using florist wire
How to make it
- Choose the base. A twig wreath gives the bells a natural background, while a yarn-wrapped base creates a softer appearance. Use a base that can support the weight of the bells.
- Check the bells. Reuse bells that are clean and undamaged. If buying new ones, check their size and attachment holes so you know how they can be fixed securely.
- Plan the cluster. Place the bells together along one section of the wreath. Arrange them in a small group rather than spacing them randomly, and check how they look with the base before attaching them.
- Secure each bell. Use wire or the bell’s existing loop to fasten it firmly. Tuck away sharp wire ends and gently test the bells to make sure they cannot fall off.
- Add ribbon if needed. A small bow beside the bells can introduce colour, but it is optional. Avoid adding several extra decorations that compete with the metallic finish.
How to keep the cost down: Look through old Christmas decorations before buying anything. A few bells from a broken garland or unused ornament can be enough for this design. Buying a large new set may cost more than the finished wreath needs.
What makes the difference: Keeping the bells in one cluster gives the wreath a clear focal point. Matching the metallic finish, such as gold with gold or silver with silver, can help the reused pieces look more intentional.
Where to display it: Keep the wreath securely attached, particularly on a door that moves often.
Small bells can pose a choking risk to young children and pets, so keep the finished decoration out of their reach and check it regularly for loose pieces.
Bells may also make noise when the door moves, which is worth considering if the wreath hangs near a bedroom.
Add a personal touch to your tree with these 20 DIY Christmas Ornaments Crafts for Adults That Actually Look Store-Bought.
13. Geometric Paper-Loop Wreath
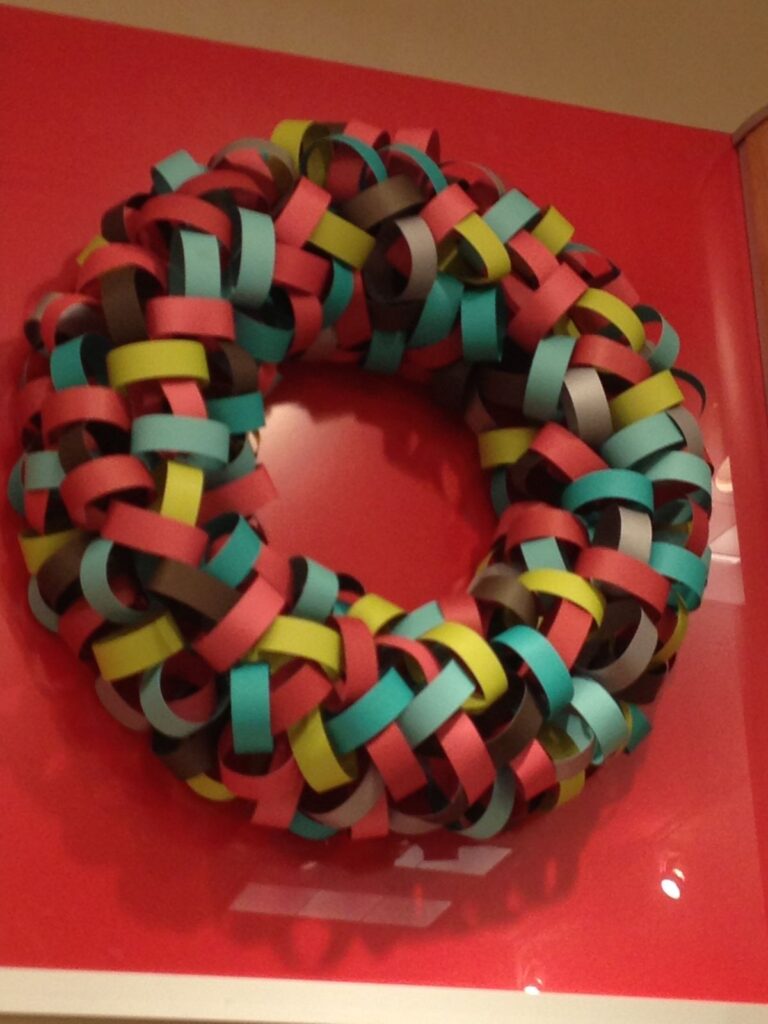
A geometric paper-loop wreath is made by folding paper strips into matching loops and arranging them around a circular base.
The repeated shapes create a neat, modern design without needing flowers, baubles or fresh greenery.
It is also a useful way to use leftover coloured paper from gift wrapping, school projects or other crafts.
Materials
- Coloured paper or leftover wrapping paper
- Sturdy cardboard for the wreath base
- Ruler and pencil
- Scissors
- Glue or double-sided tape
- String or ribbon for hanging
How to make it
- Prepare the base. Cut a ring from sturdy cardboard. If the cardboard bends easily, glue two layers together and allow them to dry.
- Cut matching strips. Use a ruler to cut paper strips of the same width and length. Consistent measurements help the loops look uniform. Test one strip first to see whether you like the size.
- Form the loops. Bend each strip into a loop, bringing the ends together without flattening the rounded part. Secure the ends with glue or double-sided tape. Avoid making the loops too tight, as this can create a flat, cramped appearance.
- Arrange the colours. Place the loops around the ring before attaching them. Solid green with a few white or metallic-paper loops can create a Christmas colour scheme, but other combinations will work too. Check the arrangement from a distance to spot uneven gaps.
- Attach the loops. Glue them around the base, keeping them close together and facing in a consistent direction. Allow the glue to dry fully before adding a hanging loop.
How to keep the cost down: Reuse paper scraps and packaging rather than buying a new pack of craft paper. If your paper is patterned, choose a simple arrangement so the prints do not compete with one another.
What makes the difference: Repetition gives this wreath its clean appearance. Matching the loop size and keeping the colours limited usually looks more coordinated than combining many shapes, sizes and prints. If the cardboard shows through, add a few more loops instead of covering the whole design with extra decorations.
Where to display it: Paper loops can lose their shape when exposed to moisture, so this wreath is best displayed indoors in a dry spot. Keep it away from open flames and heat sources, and store it flat in a dry box after Christmas to protect the loops.
Set up a comfortable evening for watching holiday favourites with these 20 Cozy Christmas Movie Night Setup Ideas That Turn Your Living Room Into a Hallmark Set.
14. Ribbon-Loop Wreath From Remnant Ribbon
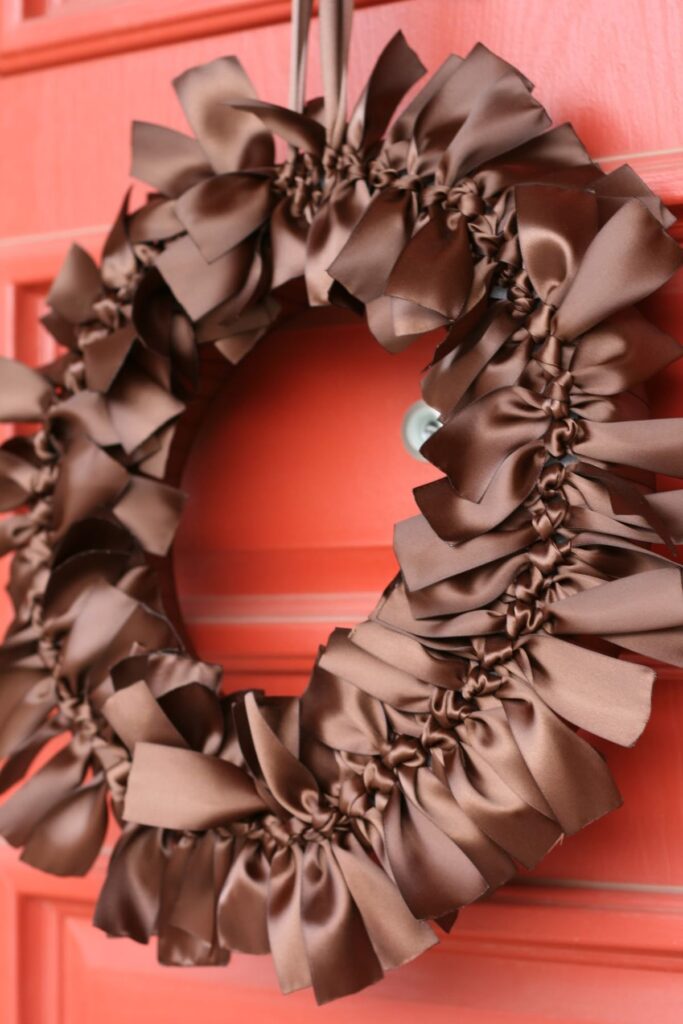
A ribbon-loop wreath uses short pieces of ribbon attached to a ring to create a full, textured decoration.
Unlike a wreath made from one long ribbon wrapped around a base, this design uses individual loops, so it is especially useful when you have leftover lengths from gift wrapping, sewing or previous Christmas decorations.
Materials
- A wire wreath ring or sturdy cardboard base
- Ribbon remnants in two or three complementary colours
- Scissors
- Craft wire, if using a wire ring, or suitable glue for a cardboard base
- A ruler or measuring tape
- Ribbon or string for hanging
How to make it
- Check your ribbon supply. Gather the pieces you have and group them by colour and width. A mix of different ribbon textures can work, but very different widths may make the loops look uneven.
- Choose the loop length. Cut a few test pieces and fold them into loops to see how much they cover. Once you are happy with the size, use the same length for most of the wreath.
- Attach the loops. On a wire ring, tie or secure the ribbon pieces around the frame. On a cardboard base, glue the ends firmly to the back. Keep the attachment points hidden where possible.
- Repeat the colour pattern. Alternate your chosen colours around the ring or group them in sections. Step back occasionally to check that one colour has not become too concentrated in a single area.
- Fill the gaps carefully. Add more loops only where the base is too visible. Finish with a hanging loop and check that the ribbon pieces cannot easily pull free.
How to keep the cost down: Use ribbon left from gift wrapping, sewing projects or older decorations.
Before cutting anything, lay the pieces around the base to estimate whether you have enough. A large wreath may need much more ribbon than a small one, and cutting everything too early can leave you short.
What makes the difference: Similar loop sizes and a repeated colour pattern help the wreath look tidy. If your scraps are short, a smaller wreath is often a better choice than trying to cover a large ring with too little material.
Where to display it: This wreath is better suited to an indoor or sheltered location.
Fabric ribbon can absorb moisture, and some colours may fade in direct sunlight. Secure it well if hanging it on a door, especially if the ribbon loops could catch on the door frame.
Make your space look festive without spending too much with these 30 Christmas Party Decorations on a Budget That Look Like You Hired a Decorator.
15. Natural Seed-Pod Wreath Using Local Materials
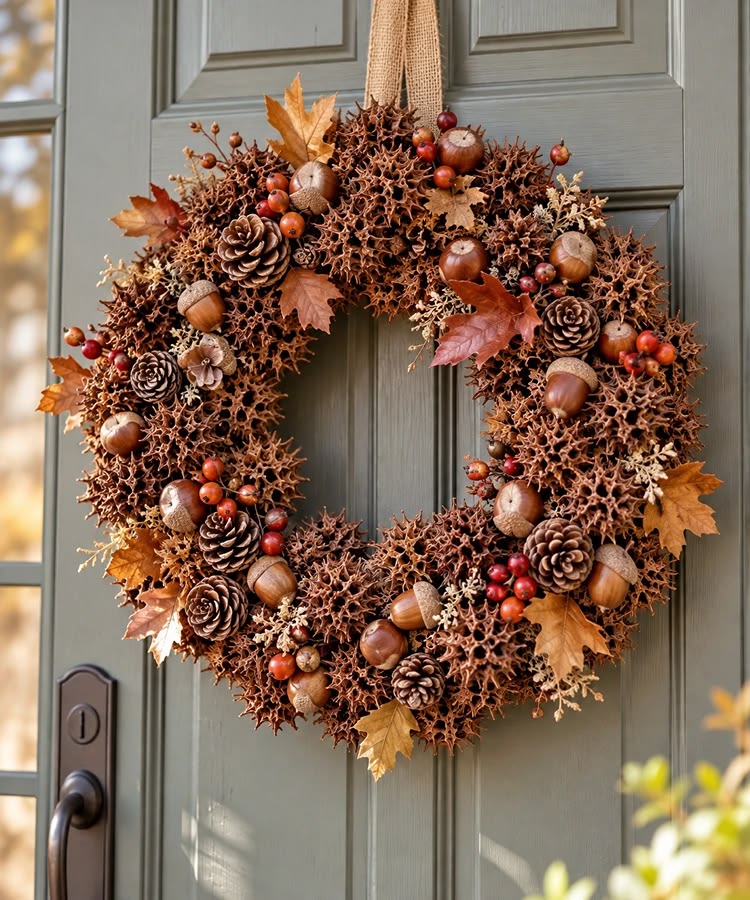
A natural seed-pod wreath uses the shapes and textures of dry plant materials instead of relying on imported pinecones, artificial berries or traditional evergreen branches.
Depending on what grows in your area, you may be able to use suitable seed pods, sturdy twigs and a few dried leaves to create a seasonal decoration that feels connected to your surroundings.
Materials
- A sturdy twig or grapevine wreath base
- Suitable dry seed pods collected with permission, or purchased from a reliable craft supplier
- Strong twigs or dried branches
- Florist wire or an adhesive suitable for the materials
- Gloves and pruning tools, if needed
- Optional ribbon or a few dried leaves
How to make it
- Identify the materials first. Make sure you know which plant the seed pods come from. Avoid unknown plants, toxic species, protected plants and pods with sharp spines that could injure someone handling the wreath. Collect only where you have permission.
- Clean and dry the materials. Remove loose dirt and inspect each piece for insects, mould or signs of decay. Allow the materials to dry completely in a well-ventilated place before assembling the wreath. Damp plant matter can develop mould after it is enclosed in a decoration.
- Choose a suitable base. A twig or grapevine ring provides a natural background and gives you places to attach the pods. Check that the base is firm enough to support the weight of your materials.
- Plan the arrangement. Place the larger pods first, then use smaller pods or short twigs to fill selected gaps. You do not have to cover the entire ring; leaving some of the base visible can help the different shapes stand out.
- Attach everything securely. Use wire for pieces that can be wrapped safely around the base, or a suitable adhesive according to its instructions. Check each item before hanging the wreath, especially if the door will move or the decoration will be handled.
- Add a simple finish. A small ribbon can introduce colour, but it is optional. Let the natural shapes and textures remain the main feature.
How to keep the cost down: Look at suitable materials available locally before buying imported craft supplies. Different regions have different plants, so there is no need to copy a wreath made with pinecones or eucalyptus if those materials are not readily available where you live.
What makes the difference: Choose materials with a few related colours and varied shapes rather than collecting every type of pod you can find. A consistent arrangement, secure attachments and a sturdy base matter more than using expensive or unusual plants.
Where to display it: Keep the wreath dry and inspect it occasionally for mould, insects or loose pieces.
Natural materials can become brittle as they age, and dry plant matter is combustible, so keep the wreath away from candles, fireplaces and heaters. If you cannot confidently identify a plant or assess whether it is safe to handle, leave it out of the project.
Welcome visitors with seasonal outdoor decorations using these Christmas Front Porch Decorating Ideas on a Budget.
How to Make a Budget Christmas Wreath Look More Expensive
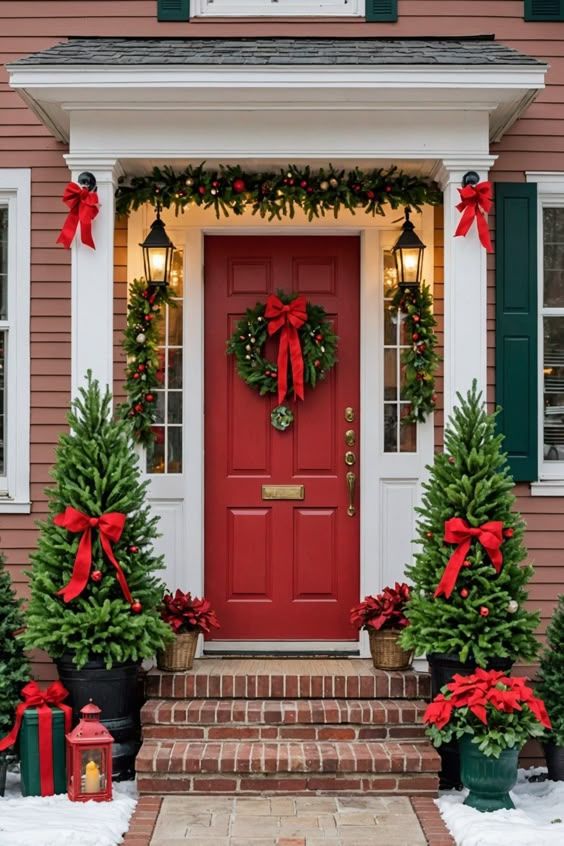
A wreath does not need expensive ornaments or a thick layer of decorations to look good. The way you arrange the materials often makes a bigger difference than how much you spend.
When making a wreath at home, a few simple design choices can help it look neat, balanced and carefully finished.
1. Stick to Two or Three Colours
Using too many colours can make a wreath look busy, especially when the materials come from different leftover projects. Choose two or three colours that work well together and repeat them throughout the design.
For example, brown paper with cream ribbon creates a natural look, while green with a little gold gives a more traditional Christmas feel. You can still use patterned wrapping paper or mixed fabric scraps, but let one colour lead and use the others as accents.
Before attaching anything, arrange the materials on the base and look at them from a short distance. This helps you spot colours that compete with one another before you commit to the design.
2. Repeat Shapes and Textures
Consistency helps homemade wreaths look intentional. When using paper leaves, cut them from the same template. For a ribbon-loop wreath, keep most of the loops a similar size.
If you are decorating with baubles, repeat a few related shapes or finishes instead of adding every ornament you can find.
Repetition does not mean every piece must be identical. A few variations can add interest, but they should still belong to the same general style. For example, a pinecone wreath can use large and small cones while keeping the natural materials as its main feature.
3. Give the Wreath One Main Feature
Choose one detail that draws the eye, such as a large bow, a cluster of baubles or a group of pinecones arranged along one side. Let the remaining parts of the wreath support that feature instead of competing with it.
This is why an asymmetrical wreath can work well on a tight budget. Placing greenery and a bow on one section of the ring leaves part of the base visible, reducing the amount of material needed. A bare twig wreath with one substantial bow follows the same principle.
Before fixing the decorations in place, step back and check the arrangement. If your eyes are drawn to several unrelated areas at once, remove a few accents or move them closer together.
4. Hide the Parts That Make It Look Unfinished
Loose wire, visible glue marks, uneven ribbon ties and exposed cardboard can make an otherwise attractive wreath look poorly finished. Take a little time to check the back and front before hanging it.
- Cardboard bases: Cover exposed edges with paper, ribbon or yarn, or arrange the decorations so the base is less noticeable.
- Wire attachments: Twist the ends securely and tuck them away where they cannot scratch the door or catch on clothing.
- Glue marks: Apply glue sparingly and wipe away excess before it dries, following the adhesive’s instructions.
- Ribbon ends: Trim frayed edges neatly. If the ribbon material allows it, use a suitable method to prevent fraying without bringing an open flame near the wreath.
- Uneven coverage: Turn the wreath as you work and check it from the front. Fill obvious gaps rather than adding decorations everywhere.
These finishing details cost little or nothing, but they can make a noticeable difference to the final result.
5. Choose Decorations That Suit the Size of the Wreath
Tiny decorations can disappear on a large wreath, while oversized ornaments may overwhelm a small one. Consider the size of the base before deciding how much ribbon, greenery or other decoration to use.
A few larger paper rosettes may cover a cardboard ring more effectively than dozens of tiny pieces.
Likewise, a small group of baubles can create a clear focal point without requiring enough ornaments to cover the entire wreath.
Lay out your decorations before attaching them. This gives you a chance to check their proportions and estimate whether you need more materials. It also helps prevent unnecessary purchases.
The aim is not to make a homemade wreath look as though it cost a fortune. These DIY Christmas wreath ideas on a budget can look more polished when the colours work together, the arrangement has a clear purpose and the construction is neatly finished.
Use what you have, make deliberate choices and avoid adding decorations simply because an empty space remains.
Plan a full month of meaningful activities with these 30 Cozy December Crafts for Seniors in Assisted Living to Fill the Whole Month.
Conclusion
Making a Christmas wreath does not have to mean buying new decorations or spending more than your budget allows. With leftover ribbon, paper, fabric, twigs or old ornaments, you can create something that suits your home and your personal style.
These DIY Christmas wreath ideas on a budget also give everyday materials a second use instead of letting them go to waste.
Which idea would you try first? Pick one that matches the supplies you already have, gather your materials and start creating a wreath you will enjoy displaying this Christmas.
This post talked on: DIY Christmas wreath ideas on a budget.