This post contains affiliate links. This means I may earn a small commission if you purchase through my links at no extra cost to you.
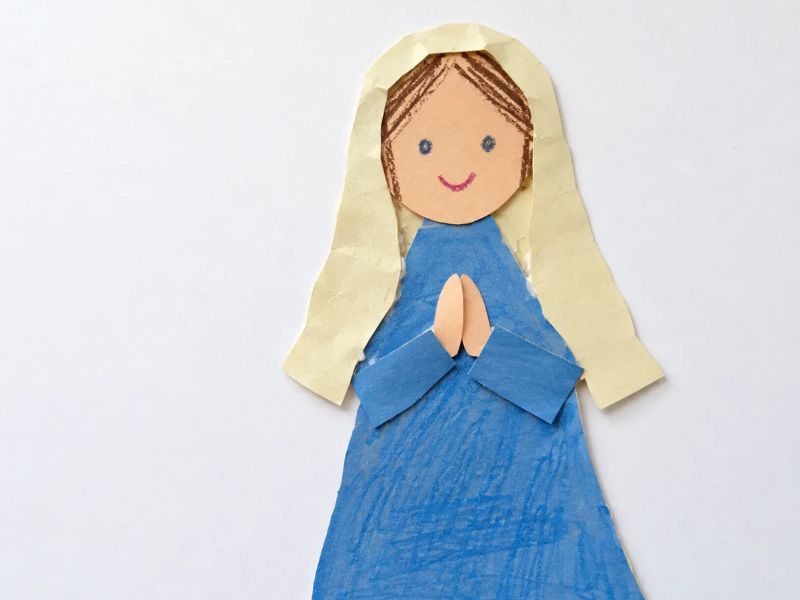
Mother Mary crafts for kids can make learning about her life more engaging. Try these simple ideas for home, Sunday school or church activities.
Children may enjoy making a picture of Mother Mary, but the activity becomes more meaningful when they understand the story behind it.
Why did Mary say yes to God’s message? What happened when she visited Elizabeth? And what can children learn from the way Mary trusted God?
These Mother Mary crafts for kids connect simple art projects with Bible stories and Catholic teachings. From a lift-the-flap Annunciation card to a paper wheel about Marian feast days, each activity gives children something to make and something to learn.
The projects use familiar craft supplies, making them suitable for family time, religious education classes and children’s church activities.
Help children connect Christmas activities with the story of Jesus’ birth using these 20 Christmas Bible Crafts for Kids Sunday School That Actually Fit One Class Period.
A Few Tips Before Making Mother Mary Crafts with Kids
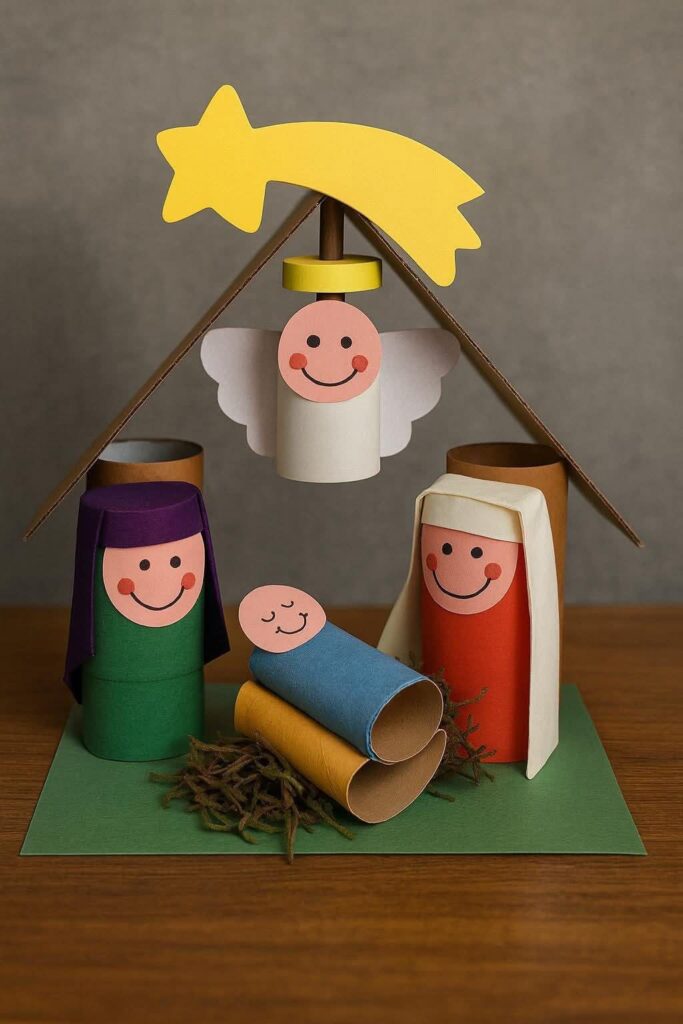
Children learn and create at different paces, so there is no need for every child to finish a craft in the same way. A little preparation can help the activity run smoothly while keeping the focus on Mary and the lesson behind each project.
- For preschool children: Cut out tricky shapes beforehand. Let them choose colours, arrange larger pieces and glue them in place.
- Primary-age children: Invite them to fold paper, put story scenes in order and write short captions. Help them find the Bible passage connected to the craft.
- Mixed-age groups: Give younger children prepared pieces to assemble, while older children add Scripture references or explain what the story teaches.
- Keep materials safe: Choose non-toxic supplies and child-appropriate scissors. Supervise cutting and gluing, and keep small pieces away from children who may put them in their mouths.
Before starting, read the Bible passage together and talk briefly about what happened.
Children do not need to know every detail straight away; a simple question about Mary’s choices, faith or kindness can give them something meaningful to think about as they create.
Make Moses’ encounter with God easier for children to understand through these 12 Moses and the Burning Bush Crafts for Kids That Bring the Bible Story to Life.
1. The Annunciation: A Lift-the-Flap Message Card
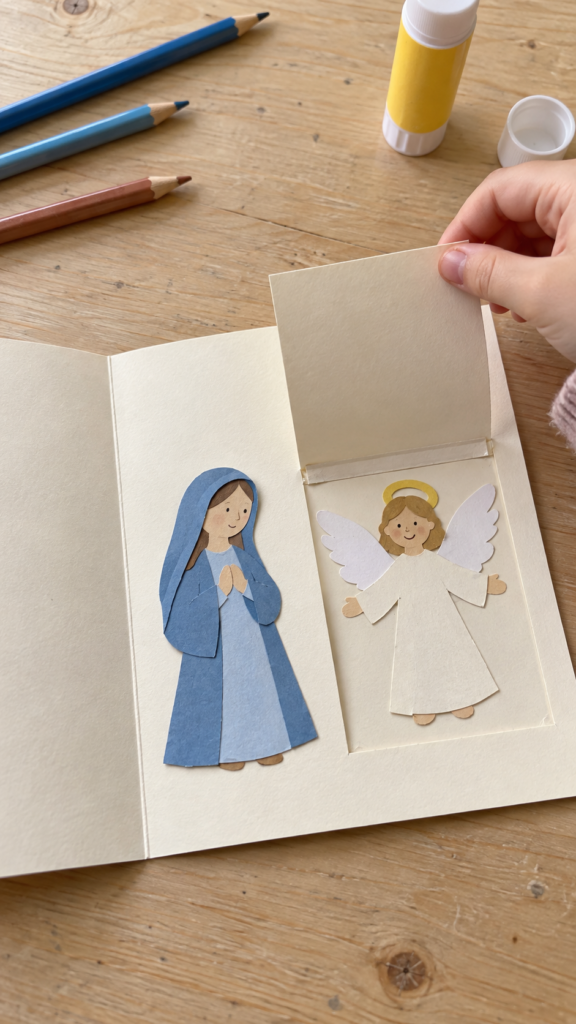
Bible passage: Luke 1:26–38
Mary’s story takes an important turn when the angel Gabriel brings her a message from God. He tells her that she will become the mother of Jesus. Mary asks how this will happen, listens to the angel’s explanation and accepts God’s will.
This lift-the-flap card helps children picture that moment. They can make a simple scene with Mary on the card and Gabriel hidden beneath a paper flap, ready to appear when it opens.
Materials needed
- Cardstock or thick paper for the card
- Coloured paper for Mary, Gabriel and the flap
- Child-safe scissors
- Glue stick
- Pencil and eraser
- Crayons, coloured pencils or markers
- Ruler (optional)
How to make the Annunciation card
- Fold the card. Fold a sheet of cardstock in half. The front will hold the picture, while the inside can contain the Bible message.
- Make the flap. Cut a small rectangle from coloured paper. Attach it to the front of the card along one edge so it can lift like a little door. An adult can help younger children with cutting and attaching it.
- Add Mary and Gabriel. Draw Mary on the card near the flap. Draw Gabriel on a separate piece of paper and position him underneath the flap. Children who find drawing difficult can make the figures from simple paper shapes instead.
- Write the message. Under the flap, write a short line such as, “The angel Gabriel brought Mary a message from God.” Inside the card, children can write a response based on Luke 1:38: “Mary said yes to God’s plan.”
- Finish the picture. Let the child add colour, a simple background or a small heart. The aim is to tell the story clearly, not to make every card look the same.
What children learn from this craft
In Luke 1:26–38, the angel Gabriel announces that Mary will conceive and give birth to Jesus, who will be called the Son of God. Mary does not immediately understand how this will happen, so she asks a question. After Gabriel explains, she responds with faith and willingness to follow God’s plan.
This is an important detail to discuss with children: Mary listens and asks how God’s message will be fulfilled. Her question is part of the conversation, so children should not be taught that asking sincere questions is wrong.
A simple question to ask while crafting
Ask, “What did Gabriel tell Mary, and what did Mary say in response?”
Let the child explain in their own words before helping them with the answer. You can then explain that the Annunciation is the announcement of Jesus’ coming birth to Mary. It is different from the Nativity, which tells the story of Jesus being born.
For younger children: Prepare the paper shapes ahead of time and let them lift the flap, glue the figures and colour the card. Older children can read Luke 1:26–38 with an adult and write a short sentence about Mary’s response.
Make use of autumn’s favourite fruit with these 20 Apple Crafts Kids Will Beg to Repeat.
2. The Visitation: A Fold-Out Journey to Elizabeth
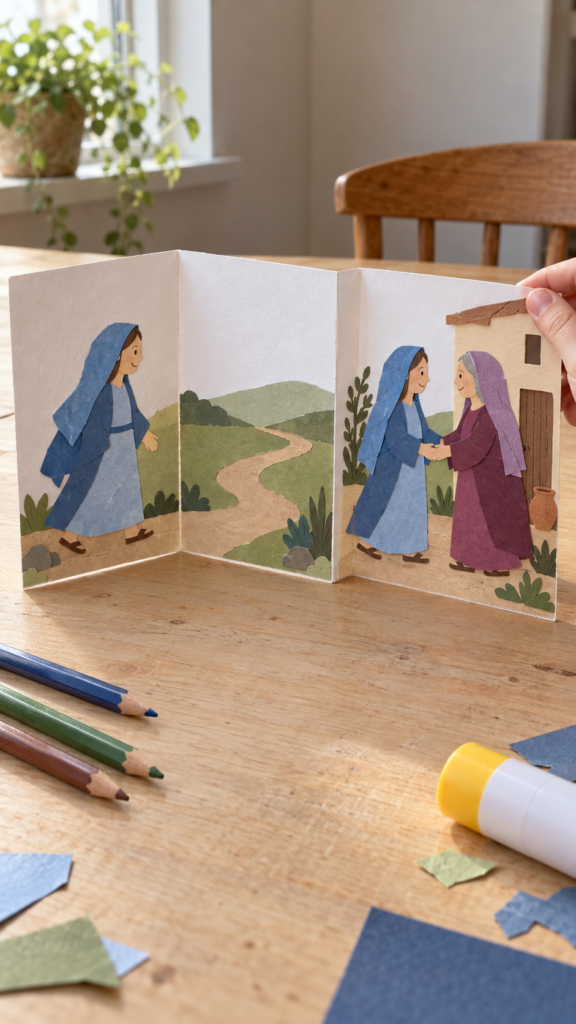
Bible passage: Luke 1:39–45
Mary’s visit to Elizabeth is a lovely story to explore with children because it brings together family, encouragement and shared joy.
After the angel Gabriel tells Mary about her coming child, Mary travels to visit Elizabeth, who is also expecting a baby. When Elizabeth hears Mary’s greeting, her own baby leaps in her womb, and Elizabeth speaks joyfully about Mary and her child.
Among Mother Mary crafts for kids, this fold-out scene gives children a way to retell the meeting rather than simply make another picture of Mary.
Materials needed
- Cardstock or thick paper
- Coloured paper
- Child-safe scissors
- Glue stick
- Pencil and eraser
- Crayons, coloured pencils or markers
- Ruler (optional)
How to make the fold-out journey
- Prepare the paper. Fold a long sheet of cardstock into three or four connected panels, like a small booklet that opens out.
- Draw the journey. On the first panel, draw Mary setting out on her journey. Add a simple path leading towards a home on the last panel. The path is a visual way to connect the scenes, not a claim about the exact route Mary travelled.
- Make the figures. Draw Mary and Elizabeth, or cut their figures from coloured paper and glue them into the scene.
- Show the meeting. On the final panel, illustrate Mary greeting Elizabeth. Children can add speech bubbles with short phrases based on Elizabeth’s greeting in Luke 1:42–45.
- Retell the story. Open the panels one at a time and let the child explain what happens, using the Bible passage for help.
What children learn
Luke tells us that Mary went to visit Elizabeth in the hill country. When Elizabeth heard Mary’s greeting, the baby in her womb leaped, and Elizabeth, filled with the Holy Spirit, blessed Mary and the child she was carrying.
The passage does not describe every part of their journey or all the things they did during the visit, so keep the craft focused on the details the Bible gives.
Talk about it: Ask, “Why might a visit make someone feel encouraged?” Children can suggest ways to welcome a relative, check on a neighbour or spend time with someone who may feel lonely.
Explain that these are ways to practise kindness inspired by the story, rather than details Luke specifically records about Mary’s visit.
3. Mary’s Magnificat: An Accordion Song of Praise
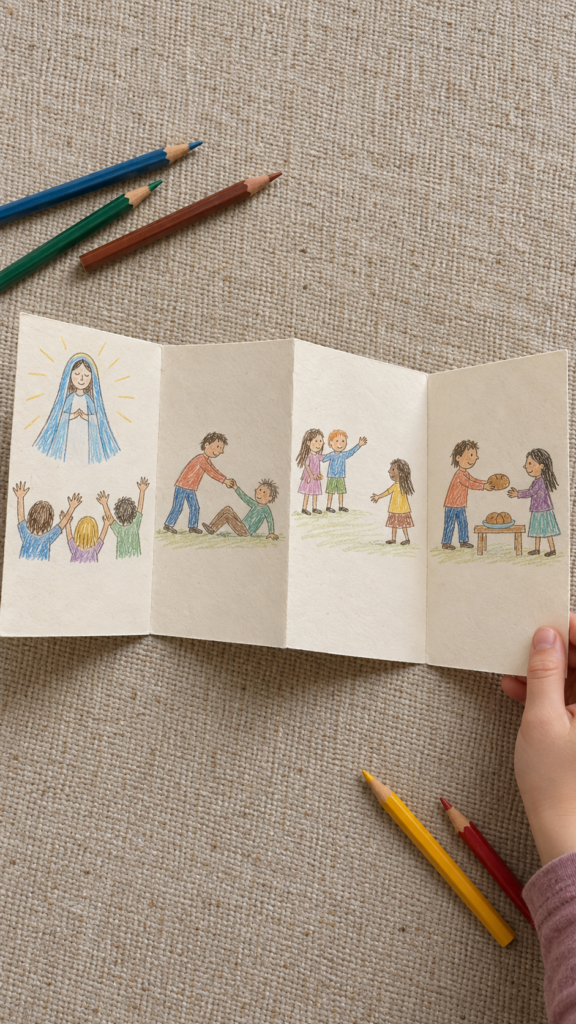
Bible passage: Luke 1:46–55
When Elizabeth welcomes Mary, the meeting leads into one of the most memorable passages in Luke’s account of Jesus’ early life. Mary praises God in words that are often called the Magnificat, from the Latin word meaning “magnifies.”
Her song expresses gratitude for God’s mercy and speaks about how God lifts up the humble, feeds the hungry and remembers his promises.
For this craft, children can make a small accordion booklet that helps them explore the meaning of Mary’s words, one panel at a time.
Materials needed
- A long strip of paper or several sheets joined together
- Coloured pencils, crayons or markers
- Ruler
- Pencil
- Scissors
- Glue stick (if joining separate sheets)
How to make the accordion booklet
- Prepare the strip. Cut a long strip of paper, or join several smaller pieces to make one. Fold it back and forth into equal sections, like an accordion.
- Choose the themes. Use four panels for four ideas from Mary’s song: praising God, God’s mercy, lifting up the humble and feeding the hungry. An older child can add a fifth panel about God remembering his promises.
- Add pictures. Invite children to draw a picture for each theme. They might draw praying hands for praise, a helping hand for mercy, a person being welcomed for the humble, or a meal being shared for the hungry.
- Write short captions. Add a few words beneath each picture. For younger children, an adult can write the phrases for them to copy or read.
- Open and share. Let the child unfold the booklet and explain each picture in their own words.
What children learn
The Magnificat is Mary’s song of praise in Luke 1:46–55, spoken during her visit to Elizabeth. It is more than a song about Mary’s personal happiness.
Mary praises God’s holiness and mercy and speaks of God bringing down the powerful, lifting up the lowly, filling the hungry with good things and remembering his promise to Abraham and his descendants.
These themes can help children understand that praise includes recognising God’s goodness and care for people who are overlooked or in need.
Talk about it: Ask, “Which part of Mary’s song reminds us to care for other people?” Children can choose a panel and give a practical example, such as sharing food, welcoming someone who is left out or treating others fairly.
Make clear that these examples help apply the song’s message; they are not quotations from the passage.
For younger children: Use pictures and short phrases rather than asking them to explain the whole song. Older children can read a few verses from Luke 1:46–55 and choose words that explain each panel.
Keep a little piece of childhood artwork to look back on with these 20 Handprint Turkey Crafts for Kids You Will Want to Keep Forever.
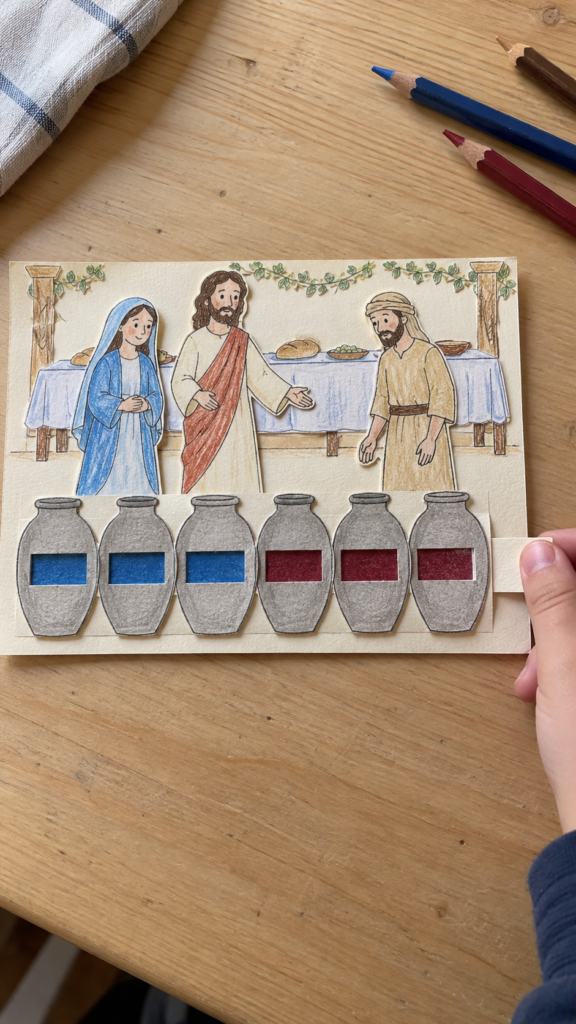
4. The Wedding at Cana: A Sliding Stone-Jar Story
Bible passage: John 2:1–11
Mary appears again in John’s Gospel at a wedding in Cana. When the wine runs out, she brings the problem to Jesus’ attention. She then tells the servants, “Do whatever he tells you” (John 2:5).
Jesus instructs the servants to fill six stone water jars with water, and he turns the water into wine. John describes this as the first of Jesus’ signs.
This paper craft helps children follow the events in order and understand the different roles Mary and Jesus have in the story.
Materials needed
- Cardstock or thick paper
- Coloured paper
- Child-safe scissors
- Glue stick
- Pencil and eraser
- Crayons, coloured pencils or markers
- A ruler
- A second strip of paper for the slider
How to make the sliding jar scene
- Create the background. Draw a simple wedding scene on a piece of cardstock. Add a table, a few guests and space for six large jar shapes.
- Make the jars. Cut six jar shapes from coloured paper and glue them onto the scene. Children can number them from one to six to help them count the jars mentioned in John 2:6.
- Prepare the slider. Cut a narrow strip of paper long enough to move behind the jar shapes. On one part, draw or write “Water”; on another, write “Wine.” The strip should slide through a paper channel or pocket attached behind the scene, allowing the child to reveal the next part of the story.
- Add the story prompts. Write short prompts around the scene, such as “The wine ran out,” “Mary spoke to Jesus,” “Jesus gave instructions” and “The servants filled the jars.”
- Retell the events. Have the child move the slider and explain each event in sequence. An adult can help check the order against John 2:1–11.
What children learn
John’s account shows Mary noticing a need and telling Jesus about it. She then directs the servants to follow his instructions. Jesus is the one who performs the sign by turning the water into wine. The passage also says that the disciples believed in him after seeing the sign.
It is important not to teach that Mary herself changed the water or that the servants knew in advance what Jesus would do. The story presents Jesus as the one who performs the miracle.
Talk about it: Ask, “What did Mary tell the servants to do?” Help children find the answer in John 2:5. Then ask, “Why is it important to listen carefully before acting?”
Explain that Mary’s words direct the servants towards Jesus’ instructions, while the miracle itself is performed by Jesus.
For younger children: Prepare the jar shapes and slider in advance. They can count the six jars, move the strip and retell the main events.
Older children can read the passage and explain how Mary, Jesus and the servants each contribute to the story.
Turn corn husks into simple seasonal projects with these 10 Corn Husk Crafts For Kids Without a Trip to Michaels.
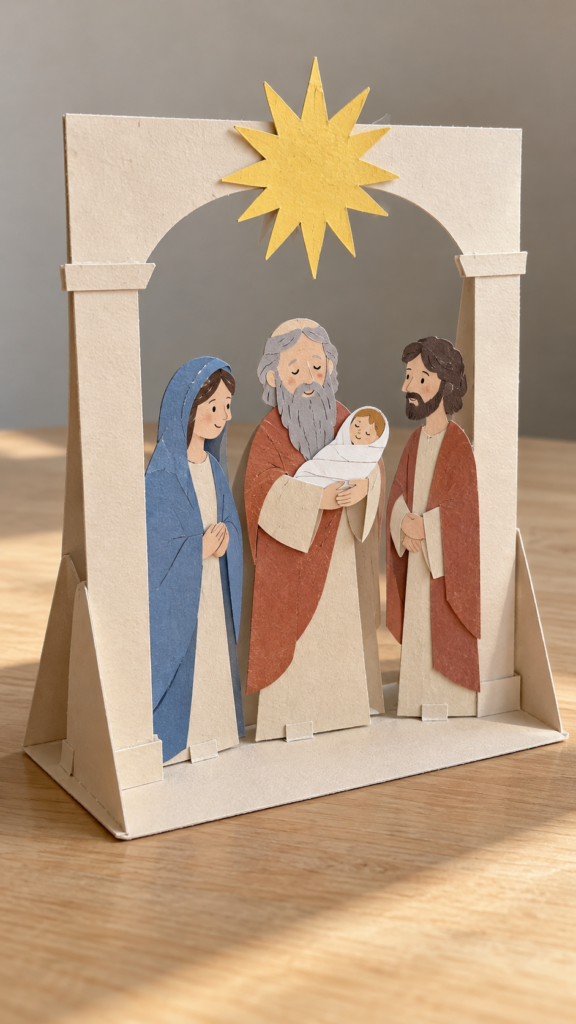
5. The Presentation in the Temple: A Paper Light Display
Bible passage: Luke 2:22–35
When Mary and Joseph bring the child Jesus to the Temple in Jerusalem, they meet Simeon, a man who has been waiting to see the Messiah.
Simeon takes Jesus in his arms and praises God, describing the child as “a light for revelation to the Gentiles” (Luke 2:32). His words help children understand that Jesus came not only for one group of people but as God’s salvation for all nations.
This paper light display gives children a way to remember Simeon’s words and the meeting at the Temple.
Materials needed
- Cardstock or thick paper
- Yellow or gold paper for the light
- Coloured paper for Mary, Joseph, Jesus and Simeon
- Child-safe scissors
- Glue stick
- Pencil and crayons or markers
- Ruler (optional)
How to make the paper light display
- Make the frame. Fold a piece of cardstock into a standing display, or cut out a large window shape from thick paper. An adult can help with any difficult cuts.
- Add the people. Draw or cut out Mary, Joseph, baby Jesus and Simeon. Arrange them inside the frame to show the meeting at the Temple.
- Create the light. Cut a sunburst, starburst or simple beam shape from yellow paper. Write “A light for all nations” on it and attach it above or beside Jesus.
- Add the Bible reference. Write Luke 2:22–35 along the bottom so a parent or teacher can find the passage again.
- Talk about the picture. Ask the child to point to Simeon and explain what he recognised about Jesus.
What children learn
Simeon recognises Jesus as the one God has sent to bring salvation. His words about light are part of his praise in the Temple, and he also tells Mary that her son will face opposition and that sorrow will touch her own life.
The craft can focus on Simeon’s words about light without pretending that the whole passage is only a happy moment.
Talk about it: Ask, “How can we share God’s love with people who are different from us?” Children might suggest welcoming a new classmate, including someone in a game or helping a neighbour.
Explain that these are ways to put kindness into practice, inspired by the idea of Jesus bringing light to all nations.
Safety note: Keep this as a paper display. There is no need to place a real candle inside it. If you choose to add a light, use a suitable battery-operated light with adult supervision and follow the product’s safety instructions.
Use Joseph’s colourful coat to introduce lessons about forgiveness and grace with these Joseph and His Coat of Many Colors Crafts for Kids That Teach Forgiveness and Grace.
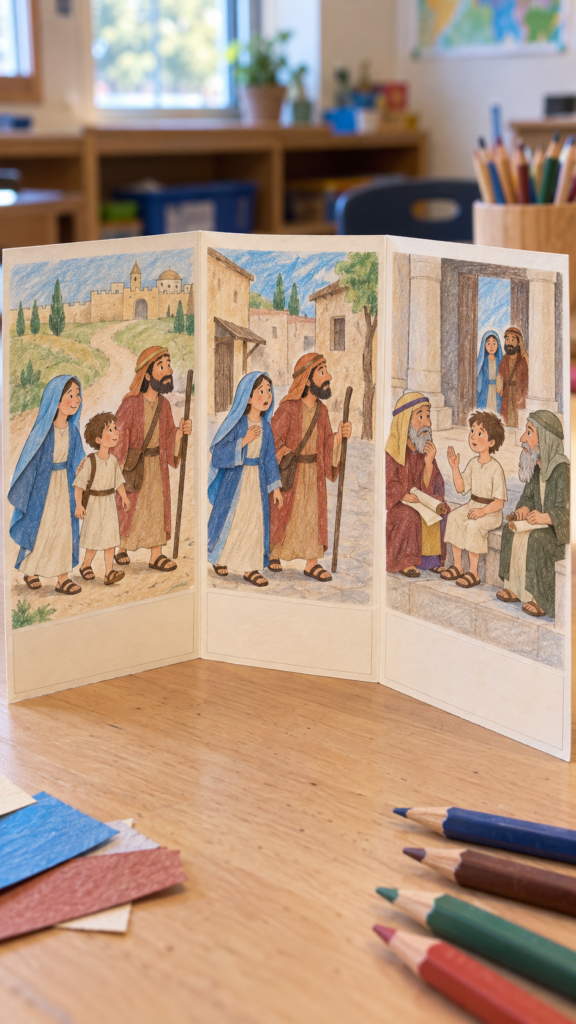
6. Finding Jesus in the Temple: A Three-Scene Storyboard
Bible passage: Luke 2:41–52
Have you ever been worried because someone you expected to be with you was missing? This Bible story gives children a chance to explore a family experience that includes worry, searching and relief when Jesus is found.
Mary and Joseph travel to Jerusalem for the Passover feast. When they begin their return journey, they discover that Jesus is not with their travelling group.
They go back to Jerusalem and find him in the Temple, sitting among the teachers, listening to them and asking questions.
A three-scene storyboard helps children put the events in order instead of remembering only the moment when Jesus is found.
Materials needed
- Cardstock or thick paper
- Coloured paper
- Pencil and eraser
- Ruler
- Child-safe scissors
- Glue stick
- Crayons, coloured pencils or markers
How to make the storyboard
- Fold the paper. Fold a long sheet of cardstock into three connected panels.
- Draw the journey. In the first panel, show Mary, Joseph and Jesus travelling to Jerusalem for the feast. Keep the picture simple, with a road and a few figures.
- Show the search. In the second panel, draw Mary and Joseph looking for Jesus. You can add a short caption: “They searched for Jesus.”
- Show the reunion. In the third panel, draw Jesus in the Temple among the teachers. Luke describes him listening to them and asking questions.
- Add captions. Write one short sentence under each picture. Read the captions in order with the child, then ask them to retell the story without looking at the words.
What children learn
Luke 2:41–52 tells how Mary and Joseph searched for Jesus before finding him in the Temple.
When Mary asks why he has treated them this way, Jesus responds by referring to his Father’s house or his Father’s affairs, depending on the Bible translation. The passage then says Jesus returns to Nazareth with them and is obedient to them as he grows.
Talk about it: Ask, “What did Mary and Joseph do when they realised Jesus was missing?” Help children notice that they went back to look for him.
You can also explain that when a child becomes separated from a parent or trusted adult, the safest response is to stay with a trusted adult nearby and ask for help rather than wander off alone.
This craft is also useful for practising story order: first the journey, then the search, and finally the reunion. Younger children can dictate the captions while an adult writes them.
Teach children about Daniel’s courage and faith through these He Prayed Anyway — Daniel and the Lions Den Crafts for Kids Who Need to Know Courage Is Real.
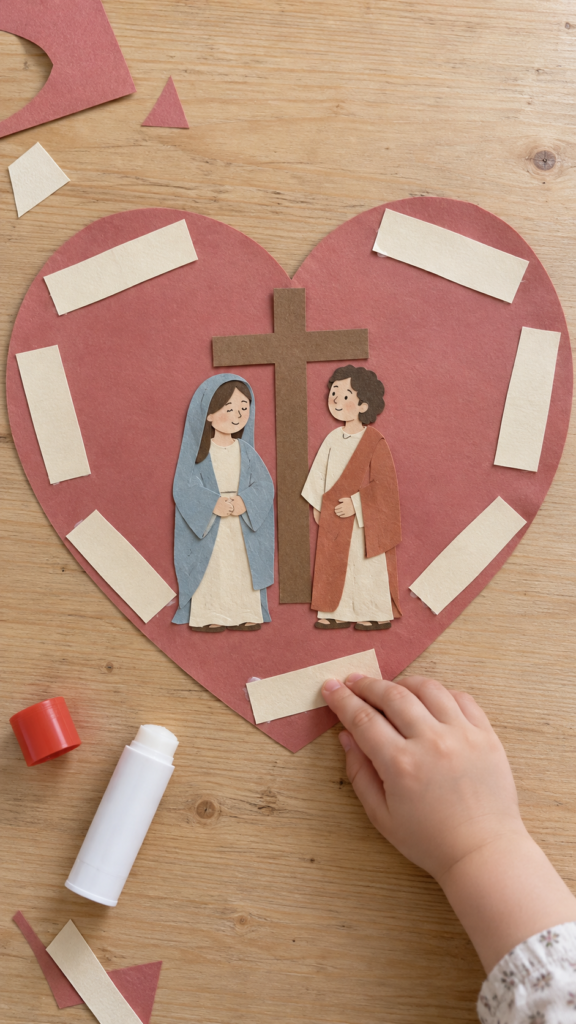
7. Mary at the Cross: A Paper Heart of Care
Bible passage: John 19:25–27
Not every story about Mary is set around Jesus’ birth or childhood. In John’s account of the Crucifixion, Mary stands near the cross with other women and the beloved disciple. Jesus speaks to Mary and the disciple, entrusting them to one another’s care.
This craft approaches a serious part of the Gospel gently. Rather than drawing a graphic scene, children can make a paper heart that helps them remember the care shown in the passage and think about how they can care for others.
Materials needed
- Coloured paper or cardstock
- Child-safe scissors
- Pencil
- Glue stick
- Crayons or markers
- Small paper strips for writing caring actions
How to make the paper heart
- Cut out a heart. Draw a large heart on cardstock and cut it out. Younger children can use a shape prepared by an adult.
- Add the Bible scene. Draw Mary and the beloved disciple, or make them from simple paper shapes. Keep the picture calm and respectful, without graphic details.
- Write the passage. Add “John 19:25–27” at the bottom of the heart.
- Add caring actions. Cut small paper strips and write simple actions on them, such as “listen when someone talks,” “help with a task,” “visit a relative” or “include someone who feels left out.”
- Attach the strips. Glue the strips around the outside of the heart, leaving the central Bible scene visible.
What children learn
In John 19:26–27, Jesus sees his mother and the beloved disciple and speaks to them, saying, “Woman, behold, your son,” and to the disciple, “Behold, your mother” in the USCCB translation.
The passage says that from that hour, the disciple took Mary into his home.
It describes a specific moment of care and responsibility; the list of helpful actions on the craft is a present-day application, not a list of things the Bible says happened at the cross.
Talk about it: Ask, “What does it mean to care for someone?” Let children give examples from home, school or church. If they mention visiting or helping someone, discuss how to do so safely and with a parent’s permission.
For younger children, use pictures instead of written actions. Older children can choose one action they can practise during the week and explain why it matters.
Help children remember Jonah’s Bible story through these Jonah and the Whale Crafts for Kids That Make The Story Story Come Alive With Wonder.
8. Mary with the Disciples: A Prayer-Room Diorama
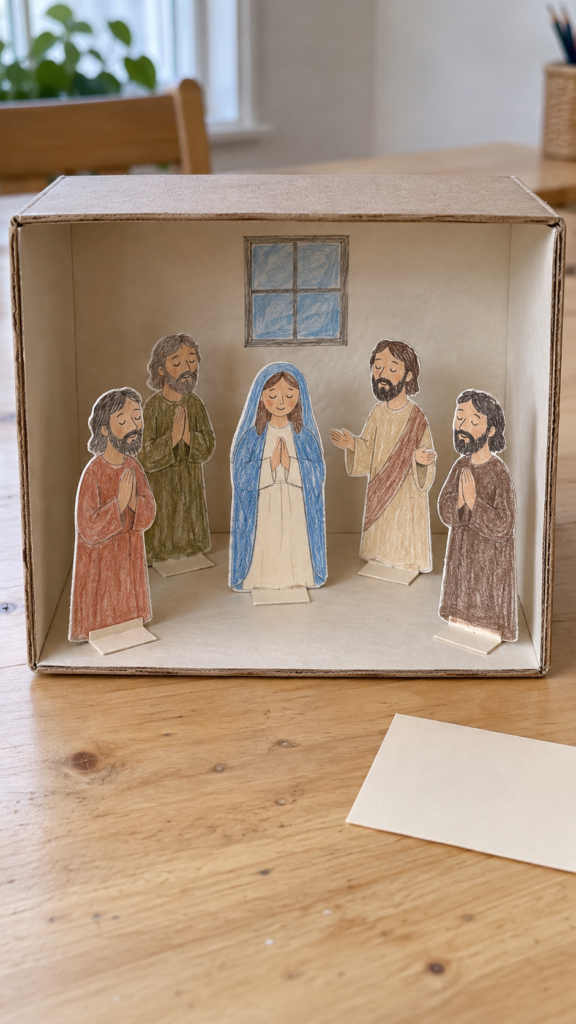
Bible passage: Acts 1:12–14
After Jesus’ Ascension, the apostles return to Jerusalem and gather in prayer. Acts 1:14 specifically names Mary, the mother of Jesus, among those praying with the apostles and other followers.
This passage lets children see Mary as part of the early Christian community, not only in stories about Jesus’ birth.
A small prayer-room diorama gives children a simple way to picture this gathering.
Materials needed
- A small, clean cardboard box
- Coloured paper
- Child-safe scissors
- Glue stick
- Pencil and markers
- Scrap paper for the figures
- A small piece of cardstock for a prayer card
How to make the diorama
- Prepare the room. Turn the box on its side so the open front becomes the view into the room. Cover the inside with coloured paper if desired.
- Make the people. Draw Mary and several disciples on paper. Cut out the figures and fold a small tab at the bottom of each one so they can stand.
- Arrange the gathering. Place the figures in a group inside the box. You can show them seated or standing together, with their hands joined or held in a prayerful position.
- Add a prayer card. On a small piece of cardstock, write “They devoted themselves to prayer” and add the reference Acts 1:14. Check the wording against the Bible translation you use.
- Retell the passage. Ask the child to point to Mary and explain who was gathered with her.
What children learn
Acts 1:12–14 describes the apostles returning to Jerusalem and gathering with other believers in prayer. Mary, the mother of Jesus, is named among the people present.
Acts 2 goes on to describe the coming of the Holy Spirit at Pentecost, but Mary is not explicitly named in that chapter’s account of the event. Keep the diorama focused on the gathering and prayer described in Acts 1.
Talk about it: Ask, “Why might people pray together?” Children may mention asking for help, giving thanks or praying for someone who is unwell. Explain that the passage shows the followers of Jesus praying together while they wait, without needing to invent the exact words they prayed.
For younger children: Prepare the figures in advance and let them arrange the scene. Older children can read Acts 1:12–14 and identify the people named in the passage.
Add a woodland touch to fall crafting with these 18 Handprint Fall Deer Crafts Kids Will Love Making.
9. Mary Around the World: A Marian Title Picture Wheel
Craft focus: Catholic Marian devotions
Children may see pictures of Mary that look very different from one church or country to another. Some show her wearing a particular style of clothing; others connect her image with a place or a local devotion.
This craft helps explain why Catholics use different titles for Mary without suggesting that each title refers to a different person.
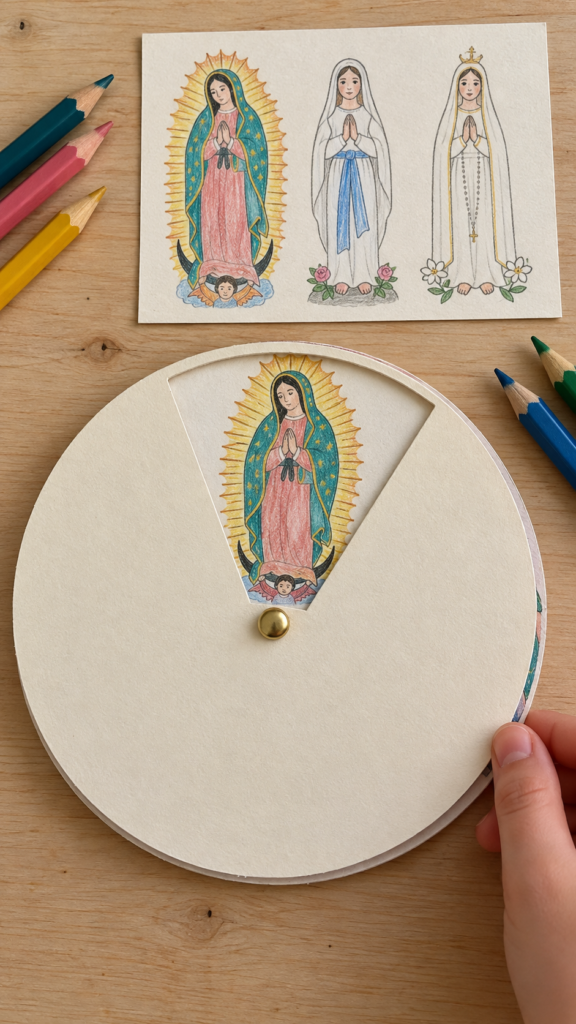
For this Mother Mary craft, children can create a picture wheel featuring Our Lady of Guadalupe, Our Lady of Lourdes and Our Lady of Fatima. Each section can include the place associated with the title and one short, carefully checked fact.
Materials needed
- Two paper circles cut from cardstock
- Pencil and ruler
- Child-safe scissors
- Glue stick
- Crayons, coloured pencils or markers
- A paper fastener (split pin) to join the circles
- Printed reference pictures, if available
How to make the picture wheel
- Prepare the circles. Cut two circles of similar size from cardstock. An adult can help make the circles even.
- Divide the top circle. Draw three sections on one circle, like slices of a pie. Each section will feature one Marian title.
- Add the pictures. Use a reference picture or draw a simple image for Our Lady of Guadalupe, Our Lady of Lourdes and Our Lady of Fatima. Add the associated place names: Mexico, France and Portugal, respectively.
- Write a short note. Under each picture, include one or two sentences explaining the devotion. Check the details before writing them, especially if describing an apparition or a reported message.
- Join the wheel. Place the second circle behind the first and join them at the centre with a paper fastener. Add a small viewing window or arrow so children can turn the wheel to one section at a time.
What children learn
Catholic devotion to Mary has developed in many places and cultures. Our Lady of Guadalupe is associated with Mexico, Our Lady of Lourdes with France, and Our Lady of Fatima with Portugal.
These titles refer to the same Mary within different devotional traditions; they do not mean there are three different Marys.
It is also important to distinguish these traditions from the Bible stories. The Annunciation and Visitation are described in the Gospels, while Guadalupe, Lourdes and Fatima belong to later Catholic devotional history.
If you include details about the reported apparitions, use a reliable Catholic source rather than treating every traditional account as a Bible passage.
Talk about it: Ask, “Why might people in different places use different pictures or titles for Mary?” Explain that art, language and local history influence how communities express their faith. The pictures may differ, but the title wheel is about the same Mary.
For younger children: Focus on matching each title to its place. Older children can add a short researched note about each devotion and label it as Catholic tradition rather than a direct account from Scripture.
Keep basic craft supplies useful throughout the year with these 23 Cute Paper Cup Crafts for Kids for Year-Round Creativity.
10. Mary’s Feast-Day Wheel: Remembering Important Celebrations
Craft focus: Catholic feast days
Church calendars include special celebrations that help Catholics remember important events in the life of Jesus and teachings about Mary.
Children may hear the names Annunciation, Immaculate Conception and Assumption at Mass or in religious education without fully understanding what each one means.
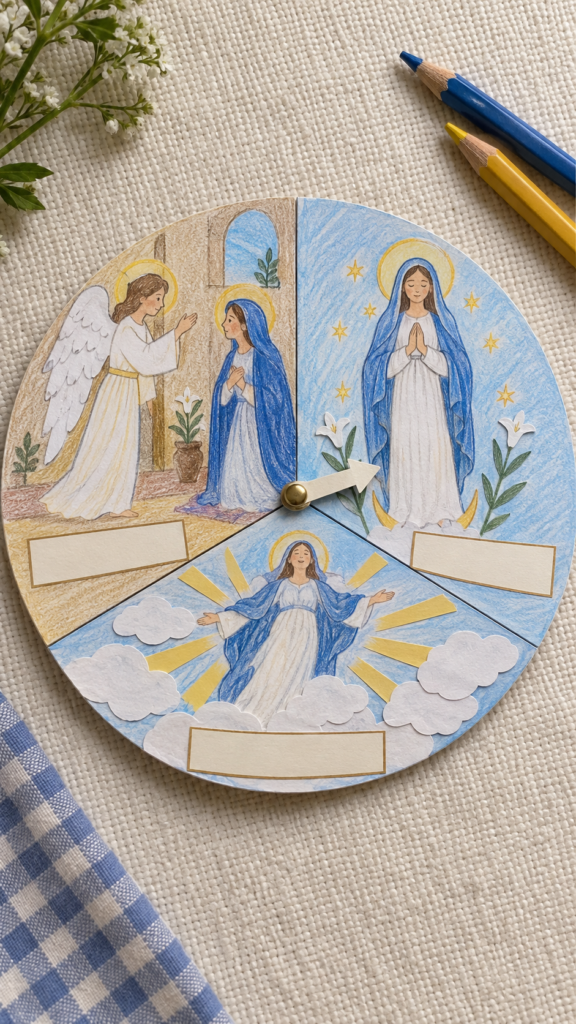
A feast-day wheel makes those names easier to remember by pairing each celebration with a picture and a simple explanation.
Materials needed
- Two circles of cardstock
- Pencil and ruler
- Child-safe scissors
- Crayons or markers
- Glue stick
- A paper fastener (split pin)
- A Catholic calendar or catechism for checking the explanations
How to make the feast-day wheel
- Cut the circles. Make two circles from cardstock. Divide the top circle into three sections.
- Label the celebrations. Write one name in each section: Annunciation, Immaculate Conception and Assumption.
- Add a picture to each section. For the Annunciation, draw Mary and the angel Gabriel. For the Immaculate Conception, use a picture of Mary that represents the Catholic teaching. For the Assumption, draw Mary being received into heavenly glory.
- Write a child-friendly explanation. Add one short sentence for each celebration. For example, “The Annunciation remembers Gabriel bringing Mary God’s message.” Keep the words simple enough for your child to explain them back to you.
- Join the circles. Place the second circle behind the first and attach them at the centre with a paper fastener. Add a small window or pointer to reveal one celebration at a time.
- Practise the meanings. Turn the wheel and ask your child to explain each celebration in their own words.
What children learn
- The Annunciation: This celebration recalls the angel Gabriel’s announcement to Mary that she would become the mother of Jesus.
- The Immaculate Conception: This refers to the Catholic teaching that Mary was preserved from original sin from the first moment of her own conception by God’s grace. It does not mean the conception of Jesus.
- The Assumption: This celebrates the Catholic belief that Mary was taken body and soul into heavenly glory.
In the general Roman calendar, these celebrations fall on 25 March, 8 December and 15 August, respectively. Feast days may be transferred in some circumstances, so check your local parish or diocesan calendar before adding dates to the wheel.
Talk about it: Ask, “Which celebration remembers Gabriel’s message to Mary?” Then ask, “Which one refers to Mary’s own conception?” These questions help children understand that the three celebrations have different meanings.
For younger children: Use a picture and a short phrase for each feast day, helping them match the name to its meaning. Older children can look up the celebrations in a Catholic calendar and write the dates themselves.
Bring the story of Noah’s Ark into your Sunday school lesson with these 15 Noah’s Ark Crafts for Kids Your Sunday School Class Will Actually Be Excited to Make.
Bringing the Lessons About Mary to Life
Making Mother Mary crafts for kids can be a lovely way to introduce Bible stories and Catholic teachings at home, in Sunday school or during a parish activity.
The most meaningful part does not have to be a perfect finished craft. It is the conversation that happens while children cut, colour, ask questions and begin to understand Mary’s place in the story of Jesus.
Choose an activity that suits your child’s age and interest, read the Bible passage together, and give them time to explain what they have learned. Which of these crafts will you make together first?
Teach children how to divide their money between different goals with these Save Spend Give Jars for Kids: The Money System Parents Wish They’d Started Sooner (Free Printable Label).