This post contains affiliate links. This means I may earn a small commission if you purchase through my links at no extra cost to you.
Prepare a busy craft table with ease using 12 harvest crafts for seniors that are simple to batch, portion, and enjoy together without the usual group-table chaos.
A harvest craft can be simple on its own and still become a headache when you’re preparing it for a full table of seniors.
Suddenly, you’re counting supplies, cutting the same pieces over and over, passing around glue, and trying to keep everyone’s workspace from becoming crowded.
That is why harvest crafts for seniors need a little more thought when they’re planned for a group. The best projects are easy to portion in advance, don’t require every resident to use the same tools at once, and leave enough room for personal choices.
These 12 ideas are designed specifically with bulk-group table setups in mind, so you can prepare materials efficiently while giving residents a craft that feels enjoyable, not like an assembly line.
Add another easy seasonal project with 10 Scarecrow Crafts for Seniors You Will Reuse Every Autumn, especially for fall decorating that can come back year after year.
Harvest Craft Supplies Checklist (For Easy Group Activities)
Preparing your supplies before your craft session can make activities smoother, especially when working with a large group of seniors.
Having the right materials ready ahead of time allows you to prepare individual craft kits, reduce table clutter, and give residents more time to enjoy the creative process.
These supplies can be reused across many of the harvest crafts in this guide.
Essential Craft Supplies for Senior Group Activities
Below are some helpful craft supplies you can find on Amazon to make preparing your senior group activities easier. Click on each item name to shop.
Astrobrights Cardstock Paper Assorted Colors
A quality cardstock pack is one of the most useful supplies for harvest crafts. It can be used for making wreaths, leaves, memory cards, pumpkins, tree decorations, and other seasonal projects.
Pacon Tru-Ray Construction Paper Assorted Colors
Construction paper works well for larger craft pieces such as tree trunks, cornucopias, paper flowers, and simple harvest shapes.
Elmer’s Disappearing Purple Glue Sticks Bulk Pack
For group activities, individual glue sticks make the craft table easier to manage. Each resident can work independently without waiting for one shared bottle of glue.
Crayola Broad Line Washable Markers
Markers allow residents to add names, messages, memories, and personal designs to their crafts.
Fiskars Softgrip Craft Scissors
Comfortable scissors can make cutting activities easier, especially for seniors who may find smaller handles difficult to use.
Artificial Autumn Leaves Fall Craft Decorations Pack
Pre-made seasonal decorations can reduce preparation time by providing ready-made leaves, pumpkins, acorns, and other autumn-themed pieces.
Assorted Color Tissue Paper Craft Pack
Tissue paper is useful for creating flowers, sunflowers, and textured seasonal decorations.
Craft Storage Bins With Compartments
Storage organizers make it easier to prepare individual craft kits before residents arrive and keep supplies reusable for future activities.
Bulk Craft Supplies for Senior Centres and Group Activities
If you regularly prepare activities for senior centres, assisted living communities, or large groups, buying supplies in larger quantities can make planning much easier.
Bulk Cardstock Paper Pack for Crafts
Large cardstock packs allow you to prepare multiple wreaths, memory cards, leaves, and seasonal decorations.
100 Pack Glue Sticks for Classroom Crafts
A large glue stick pack allows every participant to have their own supply during group craft sessions.
Bulk Washable Markers Classroom Pack
A larger marker collection works well when many residents need to personalize crafts at the same time.
Adult Arts and Crafts Supply Kit
A mixed craft supply kit can help activity coordinators prepare different seasonal projects throughout the year.
Craft Storage Organizer Box With Compartments
Keeping craft materials sorted in labelled containers makes preparation faster and helps reuse supplies across different activities.
12 Harvest Crafts for Seniors That Fit a Bulk-Group Table Setup
1. Paper Harvest Wreaths With Pre-Cut Leaf Bundles

Paper wreaths are a practical choice when you’re preparing one craft for several residents because the repetitive work, cutting the wreath bases and decorative pieces, can be completed ahead of time.
Residents can then focus on arranging and decorating their own wreath.
Prepare the Wreath Bases
- Cut wreath rings from cardstock or sturdy construction paper.
- Keep the rings light enough to hang easily but firm enough to hold the paper decorations.
- Prepare a few extra bases before the activity begins.
Make the Leaf Bundles
Cut the decorative pieces in batches:
- Paper leaves in different shapes and harvest colors
- Small stems
- Simple berries, acorns, or other seasonal shapes
Divide the pieces into individual bundles, with enough materials for one wreath in each bundle. This keeps residents from having to sort through a large pile of paper.
Let Each Resident Arrange Their Wreath
Give each person a wreath base and one bundle of decorations.
Residents can overlap the leaves, vary the colors, or leave some of the base visible. There’s no need for everyone to follow the exact same arrangement, the prepared materials simply give them an easy starting point.
Why This Is Practical for Group Activities
The preparation can be done in batches before residents arrive, so the table isn’t occupied by repeated cutting and sorting during the activity. Individual bundles also make it easier to see which materials have been distributed and which are still available.
Helpful adjustment: If some residents have difficulty with detailed cutting, do all of the cutting beforehand. The creative part of the activity should remain accessible even when the preparation work is more demanding.
For another budget-friendly approach, try 20 Recycled Crafts for Seniors That Don’t Look Like Trash using everyday materials in creative ways.
2. Handprint Harvest Trees With Ready-Cut Trunks
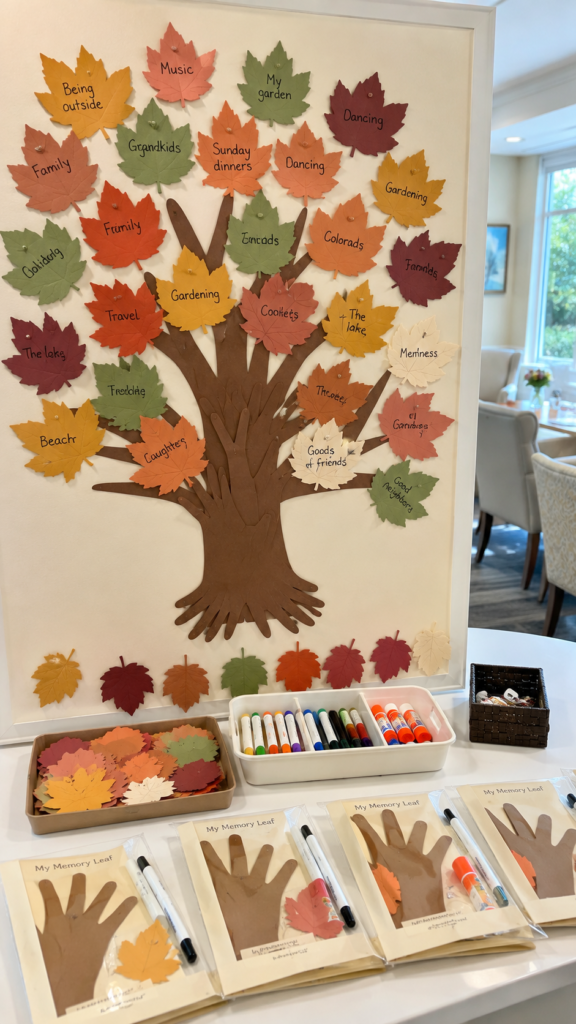
This craft gives residents a simple way to create a seasonal tree without requiring everyone at the table to draw or cut a tree from scratch.
The trunk and branches are prepared beforehand, leaving the creative work to the participants.
Prepare the Tree Pieces
- Cut simple tree trunks with a few branches from brown cardstock or construction paper.
- Make several sizes so the finished trees don’t all look identical.
- Prepare paper leaves in harvest colors such as yellow, orange, red, and brown.
Let Residents Build the Foliage
Give each resident one tree base and a small bundle of leaves.
They can:
- Arrange the leaves across the branches.
- Add fingerprints or small painted dots using washable acrylic paint set for crafts if your group is comfortable using paint.
- Write a short word, name, or autumn memory on individual leaves.
- Leave some branches bare for a more natural-looking tree.
Keep the Table Manageable
Don’t put the entire supply of leaves, glue, and decorations in front of every resident. Portion the main materials first and keep shared supplies in a central area.
This reduces clutter and makes it easier for residents to see what they need without having to sort through a large communal pile.
Make It More Meaningful
For a group setting, the leaves can represent more than decoration. Invite residents to write something they associate with harvest season, such as a favorite food, family tradition, place, or autumn memory.
That gives the finished tree a personal element without making the craft complicated.
Keep seasonal activities going into warmer months with 21 Easy Senior Summer Crafts That Are Relaxing, Creative and Seasonal.
3. Paper Plate Harvest Cornucopias
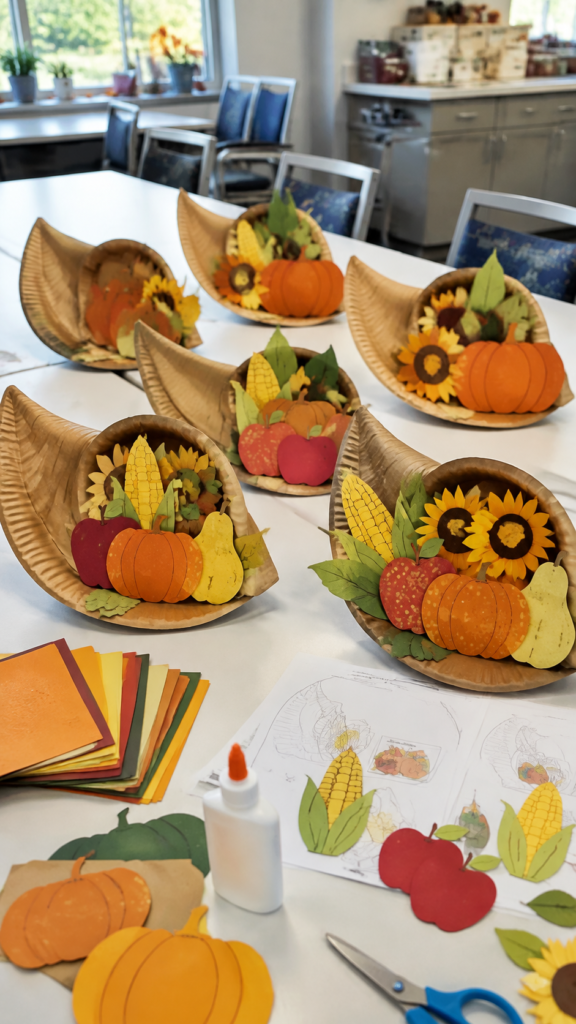
A paper plate makes a useful base for a simple harvest display because it is inexpensive, lightweight, and easy to prepare in quantity.
Most of the work can be done before the group arrives, while residents decide how to arrange their own harvest pieces.
Prepare the Cornucopia Bases
- Use sturdy paper plates rather than very thin ones that bend easily.
- Cut or fold each plate into a simple curved cornucopia shape.
- Secure the shape beforehand if the folding or fastening step would be difficult for the group.
Prepare the Harvest Pieces
Create batches of lightweight paper fruits, vegetables, leaves, and other harvest shapes using craft foam sheets assorted colors.
You can include:
- Pumpkins
- Apples
- Pears
- Corn
- Leaves
- Sunflowers
Give each resident a small selection rather than putting every shape on the table.
Let Residents Arrange the Harvest
Once each person has a base and their decorative pieces, they can decide how full or simple their cornucopia should look.
Glue the pieces onto the base, allowing some to overlap so the finished arrangement has a little depth.
Make Preparation Easier for a Large Group
The useful part of this project is batch preparation. You can cut dozens of identical bases and decorative shapes ahead of time, then divide them into individual kits.
That means residents spend the activity creating and arranging rather than waiting for materials to be prepared.
For gentle Halloween activities, see 20 Simple Halloween Crafts for Dementia Patients That Feel Festive Not Frightening.
4. Gratitude Harvest Garland
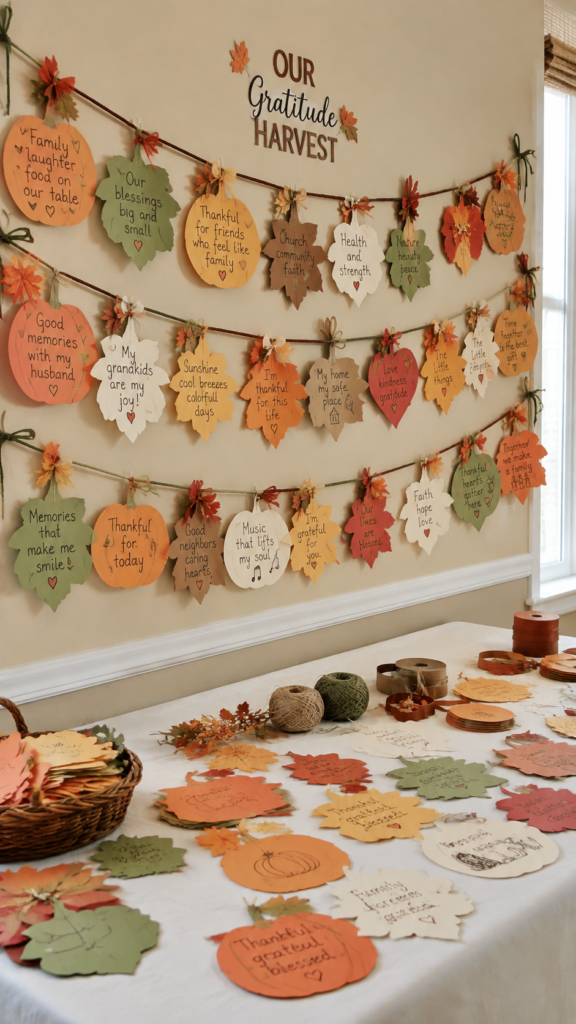
This is one of the harvest crafts for seniors that can turn individual contributions into one shared decoration.
Each resident makes a few simple pieces, and the finished leaves or pumpkins are joined together into a garland for the activity room.
Prepare the Garland Pieces
- Cut leaves, pumpkins, apples, or other harvest shapes from assorted cardstock paper for crafts
- Make enough pieces so each resident receives several.
- Punch holes in the shapes beforehand and use craft ribbon assorted colors if they will be threaded together.
Give Each Resident a Small Set
Rather than handing out a large pile of shapes, prepare small bundles with several pieces per person.
Residents can decorate them with:
- Short gratitude messages
- Favorite autumn memories
- Simple drawings
- Names or initials
- Patterns and seasonal colors
Bring the Pieces Together
Once everyone has finished, collect the pieces and arrange them along a length of ribbon, yarn, or string. Depending on the group’s abilities, a facilitator can handle the threading while residents choose the order of their pieces.
Why it suits a group: The preparation is easy to repeat, but the finished garland reflects contributions from the whole table.
5. Harvest Suncatchers With Pre-Cut Shapes
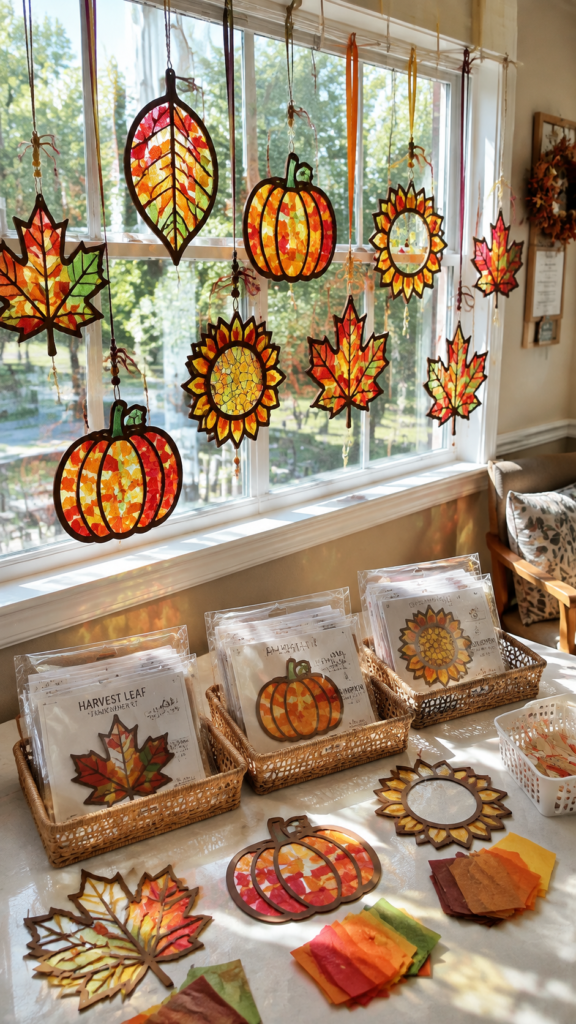
Harvest-themed suncatchers can add color to a window without requiring residents to work with complicated templates. The key for a large group is to prepare the detailed cutting beforehand.
Prepare the Suncatcher Frames
- Cut simple leaf, pumpkin, apple, or sunflower outlines from cardstock.
- Leave an open center for the transparent material.
- Prepare enough frames for each participant, plus a few extras.
Portion the Transparent Materials
Use pieces of transparent colored craft paper behind the openings.
Give each resident a small selection of colors rather than one large communal pile.
Let Them Build the Design
Residents can arrange the transparent pieces inside their frames and secure them according to the chosen craft method.
The designs don’t need to match. Some may use several colors, while others may prefer one or two.
Keep the Activity Comfortable
For harvest crafts for seniors, preparation matters as much as the finished result. Pre-cutting the frames removes one of the more demanding steps and allows residents to concentrate on color selection and arrangement.
Add texture and variety with 25 Bead Crafts for Seniors That Look Beautiful and Work for Every Ability Level.
6. Paper Bag Harvest Baskets
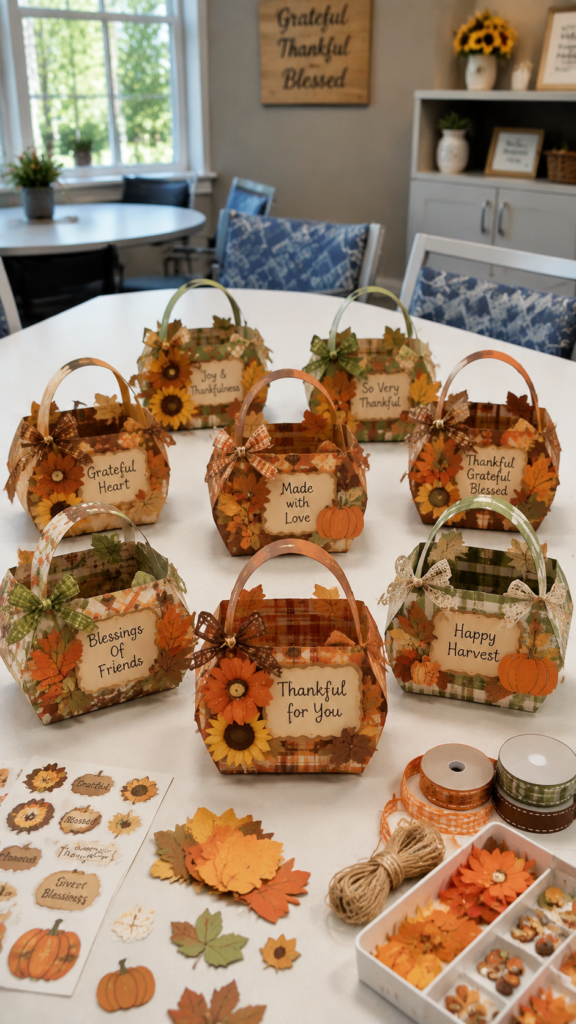
A small paper harvest basket gives residents something three-dimensional to decorate without requiring complicated construction.
The basic basket can be prepared in advance, which makes it suitable when several people are crafting at once.
Prepare the Basket Bases
Use small paper bags or pre-folded paper baskets as the starting point.
If the construction requires cutting, folding, or stapling, complete those steps before the activity so residents aren’t waiting for help with the basic structure.
Set Out Simple Decorations
Prepare small bundles containing fall craft stickers and decorations, paper leaves, harvest-colored shapes, and simple ribbon.
Keep embellishments lightweight so they don’t make the finished basket difficult to handle.
Let Residents Personalize Them
Each resident can choose where to place the leaves and other decorations. A name, short message, or seasonal greeting can also be added to the front.
The finished baskets can remain as tabletop decorations or hold lightweight items.
Make the Supplies Work for a Large Table
Prepare one decoration bundle per basket before the activity begins. This makes distribution quicker and prevents a large pile of small embellishments from spreading across the table.
7. A Collaborative Harvest Table Runner

Instead of making twelve or twenty separate decorations, turn the entire group activity into one large harvest artwork. Each resident contributes a small decorated piece that eventually becomes part of a shared table runner.
Prepare the Runner
Cut a long strip of kraft paper roll for crafts, butcher paper, or another suitable paper.
Lightly mark sections if you want each resident to have a defined working area.
Give Each Person a Few Pieces
Prepare leaves, pumpkins, acorns, apples, or other harvest shapes in advance.
Residents can decorate their pieces with:
- Patterns
- Short messages
- Drawings
- Names
- Simple color combinations
Once the pieces are finished, arrange them across the runner and secure them in place.
Let residents decide where their contributions go when possible. That small choice helps the finished piece feel like something the group created together, rather than a decoration assembled entirely by the facilitator.
Why This Works Beyond the Craft
The activity doesn’t require every resident to complete an identical project. Someone who wants to decorate one leaf can contribute just as meaningfully as someone who wants to make several pieces.
That flexibility makes this one of the more practical harvest crafts for seniors when abilities and energy levels vary around the same table.
For activities that rely more on touch than sight, 21 Crafts for Seniors With Low Vision That Are Tactile, Beautiful and Completely Accessible offers useful adaptations.
8. Harvest Napkin Rings From Cardstock Leaves
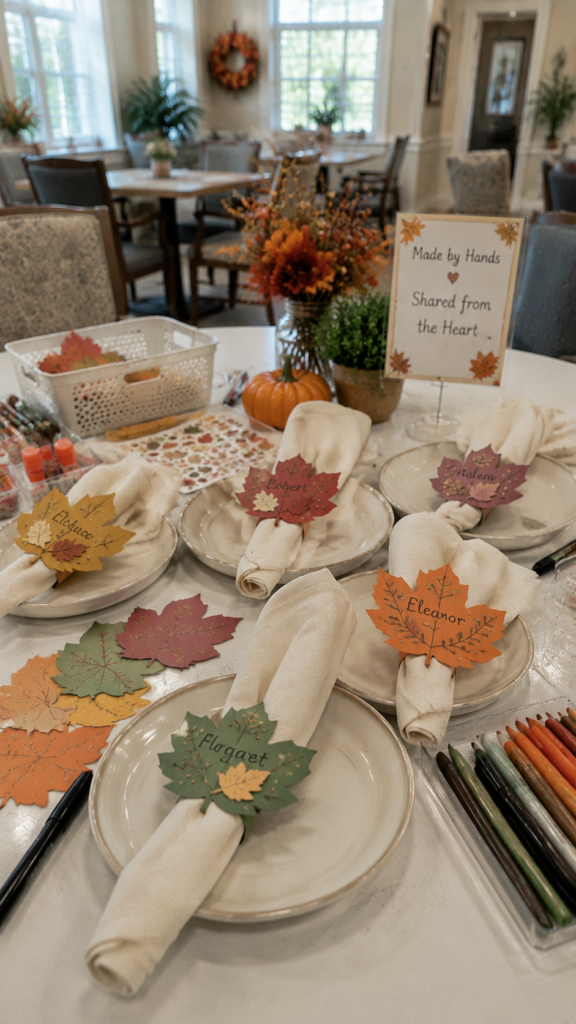
This is a useful choice when you need a craft that is small, inexpensive, and easy to prepare in batches. Each resident creates a simple seasonal napkin ring that can later be used on a dining or activity table.
Prepare the Leaf Bases
- Cut sturdy heavyweight cardstock paper into large leaf shapes.
- Make a small slit or prepare a simple fastening point so the leaf can wrap around a napkin.
- Prepare several leaf shapes in different harvest colors.
Set Up Individual Craft Kits
Give each resident a small bundle containing:
- One or two cardstock leaves
- Stickers or small paper decorations
- Markers or pencils
- A suitable adhesive
Keep the decorative pieces simple and large enough to handle comfortably.
Let Residents Personalize Them
Residents can write their names, add patterns, or decorate the leaves with simple harvest designs. They can also choose whether to keep the design minimal or add several decorative elements.
Make Them Part of the Group Setting
Once finished, use the napkin rings on the dining or activity tables. The craft becomes part of the seasonal environment rather than something that is immediately put away.
Why it suits a group: The pieces are lightweight, easy to prepare in quantity, and small enough that each resident has a complete project without requiring much table space.
9. Pinecone Harvest Decorations
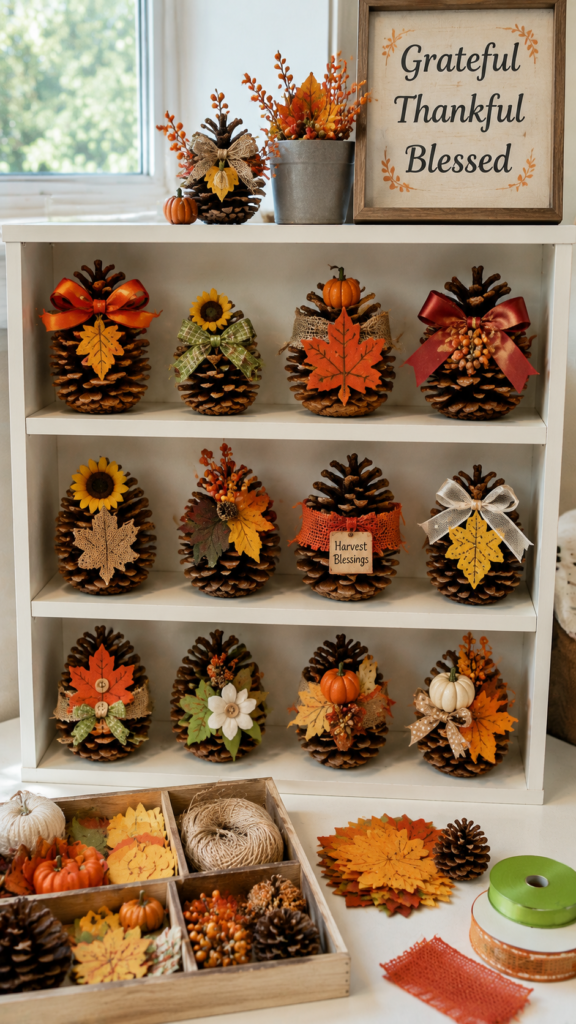
Clean, dry pinecones can become simple harvest decorations without requiring complicated construction.
For a group activity, the important part is preparing the pieces beforehand so residents aren’t spending most of the session handling small materials.
Prepare the Pinecones
- Use clean, completely dry pinecones.
- Check each one for sharp or broken areas before putting it on the table.
- Prepare one pinecone per resident, plus a few extras.
Set Out Larger Decorative Pieces
Prepare easy-to-handle additions such as:
- Paper leaves
- Small cardstock pumpkins
- Ribbon
- Lightweight felt shapes
- Pre-cut paper hats or seasonal details
Avoid filling the table with tiny loose embellishments that are difficult to pick up or easy to scatter.
Let Residents Choose the Look
Residents can attach their chosen pieces to the pinecone to create a simple harvest character or decoration. Some may prefer a heavily decorated piece, while others may want only a leaf or ribbon.
Keep the Activity Easy to Manage
Place one pinecone and a small selection of decorations at each workspace. This keeps the materials contained and gives residents enough choice without overwhelming the table.
Start planning late-summer activities with 20 August Crafts for Seniors in Assisted Living.
10. Harvest Memory Cards
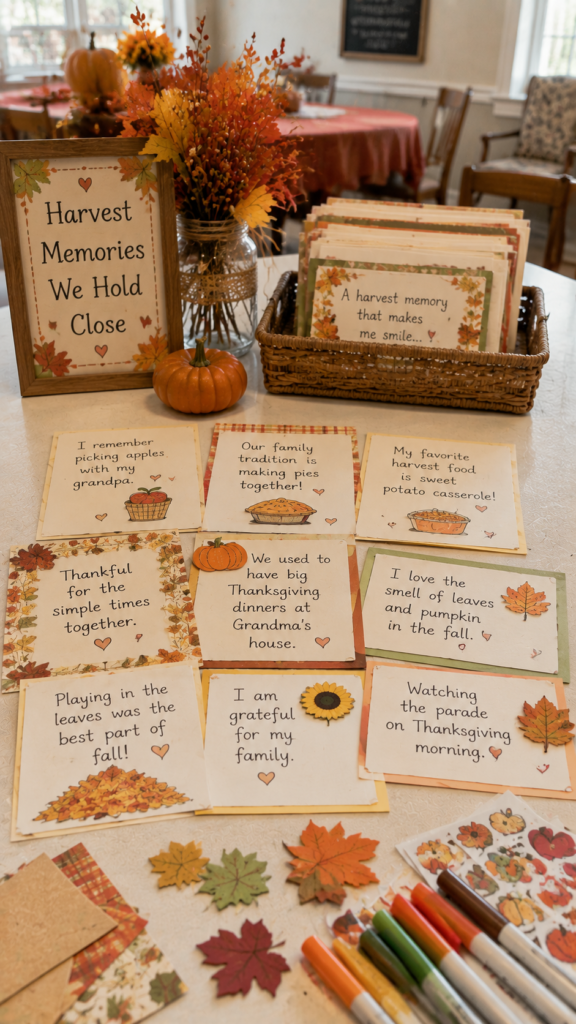
This project combines a craft with conversation without requiring residents to complete a complicated design.
Each person decorates a card and adds a short harvest-related memory, favorite food, family tradition, or seasonal thought.
Prepare the Cards
Cut cardstock into a comfortable writing size and add a simple harvest illustration or border.
Prepare several designs so residents can choose one rather than receiving identical cards.
Make Writing Optional
Some residents may enjoy writing several sentences, while others may prefer:
- A single word
- Their name
- A drawing
- A favorite food
- A sticker or decorative symbol
Someone can also write down a resident’s words if writing is difficult.
Add Simple Decorations
Provide a small selection of paper leaves, stickers, stamps, or other lightweight embellishments.
Keep the decoration stage separate from the writing stage so the table doesn’t become crowded with materials.
Turn the Cards Into a Group Display
The finished cards can be displayed on a bulletin board, placed around the activity room, or kept by the residents themselves. If the group agrees, selected memories can also be shared aloud.
Ease into autumn with Cozy September Crafts for Seniors That Bring Calm and Creativity to Fall Days.
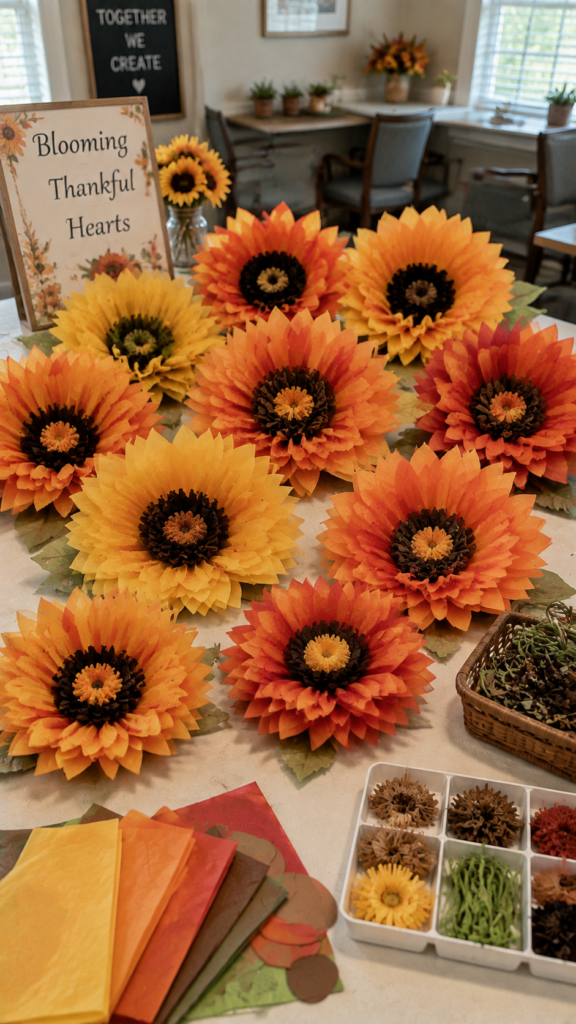
11. Tissue-Paper Harvest Sunflowers
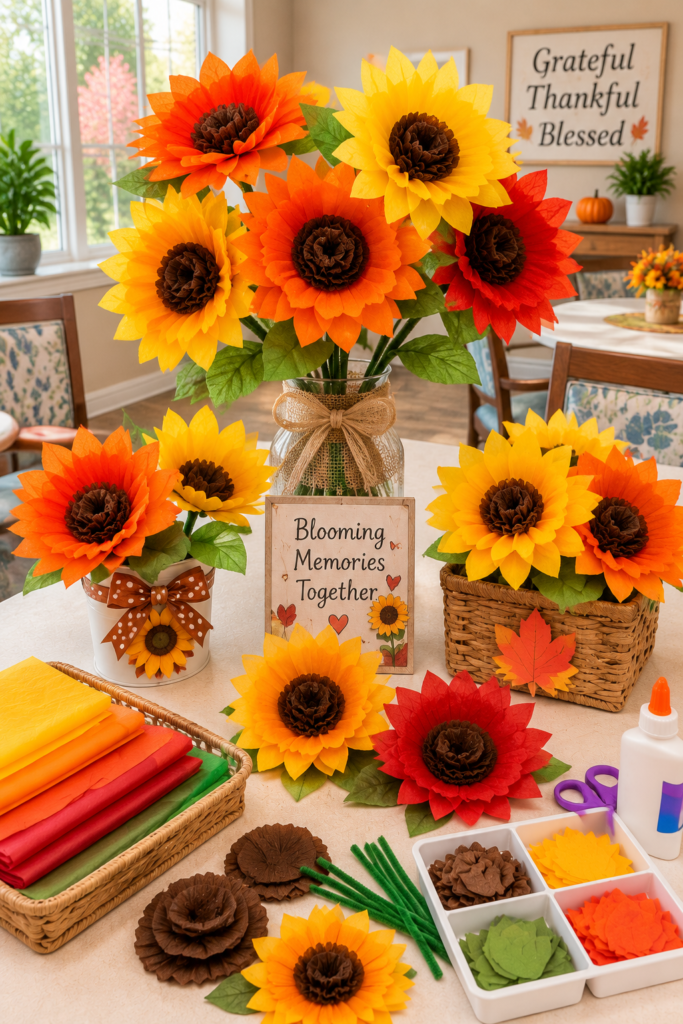
Tissue-paper flowers are useful harvest crafts for seniors because the basic materials can be prepared in batches while the final arrangement still allows for individual choices.
Prepare the Flower Pieces
- Cut cardstock or paper flower centers.
- Prepare petals in harvest colors such as yellow, orange, or deep red.
- Cut tissue paper into manageable pieces before the activity.
- Provide a simple backing for each flower.
Make Individual Kits
Give each resident one flower base with a prepared selection of petals and tissue paper.
This eliminates the need to measure and cut materials repeatedly while the group is working.
Build the Flower
Residents can arrange the petals around the center and add tissue paper for texture.
Don’t worry about making every petal perfectly even. Slight differences give each flower its own appearance.
Display the Finished Flowers
The flowers can be attached to a larger paper display, arranged in a communal “harvest garden,” or taken home as individual decorations.
Continue the fall theme with October Crafts for Seniors in Nursing Homes That Create Memories, Not Just Decorations.
12. One Large Harvest Tree for the Whole Room
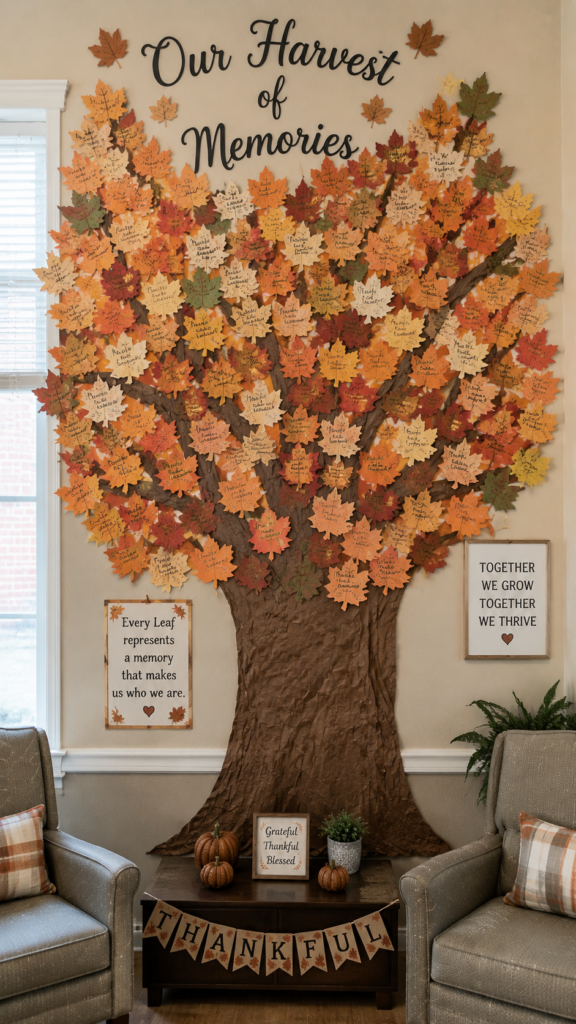
For the final project, make the craft belong to everyone. Instead of preparing a separate finished decoration for every resident, create one large tree and let each person contribute several leaves.
Prepare the Tree
Cut a large tree trunk and branches from kraft paper, cardboard, or another sturdy material. Attach it to a wall, bulletin board, or another suitable display surface.
Give Each Resident Several Leaves
Prepare paper leaves in batches and distribute a few to each person.
Residents can add:
- A short message
- Their name
- A drawing
- A favorite harvest food
- A word that represents autumn to them
Build the Tree Together
Collect the finished leaves and let residents decide where they would like them placed when possible. Attach them around the branches until the tree becomes full.
Why It Makes a Strong Group Project
Among harvest crafts for seniors, this one solves a practical problem: residents don’t need to finish an entire project individually.
Each person contributes a manageable piece, but the room still ends up with one substantial seasonal display that reflects the whole group.
Planning activities for November? November Crafts for Seniors in Assisted Living offers more seasonal projects for the month.
A Better Way to Prepare the Table for 12 Crafts
A good bulk-group setup starts before residents sit down.
The aim is to reduce unnecessary waiting, clutter, and repeated requests for help while still giving everyone enough choice to make the craft their own.
1. Test One Finished Craft First
Make one complete sample before preparing materials in bulk.
- Check how long the craft actually takes.
- Make sure the finished piece is stable enough to handle.
- Notice any steps that require fine cutting, strong hand pressure, or complicated fastening.
- Replace materials that are difficult to work with before preparing the remaining kits.
This prevents you from discovering halfway through the activity that a particular step is impractical for a large group.
2. Portion the Main Materials Ahead of Time
Prepare one small kit for each resident using a tray, envelope, cup, or paper bag.
Include the materials that belong to that person’s project so residents aren’t searching through a communal pile for every piece.
Keep extra supplies separate for replacements rather than putting everything on the table at once.
Some materials don’t need to be duplicated at every seat.
Keep commonly used supplies such as glue, wipes, scissors, or shared decorating materials at clearly defined points around the table. This keeps individual workspaces open and makes it easier to monitor supplies.
For materials that could create spills or require closer supervision, keep the quantity available at the table controlled rather than placing a large container within everyone’s reach.
4. Build in More Than One Way to Participate
Not everyone will have the same comfort level with cutting, writing, gripping small objects, or following several instructions in sequence.
Offer alternatives where practical:
- Pre-cut pieces instead of requiring everyone to cut.
- Let someone choose and arrange materials without doing the fastening.
- Allow drawing, stickers, or simple decoration instead of writing.
- Have a facilitator or volunteer assist with difficult steps.
The goal isn’t to make every resident complete the craft in exactly the same way. The activity should have enough flexibility for people to contribute at a level that is comfortable and meaningful for them.
For simple projects that keep hands engaged, 15 Simple Clothespin Crafts for Seniors That Keep Hands Busy and Minds Sharp offers another accessible option.
How to Make the Crafts Feel Less Like “An Activity”
A well-prepared craft table can still feel like an assembly line if everyone is expected to make the same thing in exactly the same way.
The materials may be organized, but the personal choice is what makes the activity feel meaningful.
Give Residents Room to Choose
Let residents make small decisions throughout the project:
- Choose their own colors or decorations.
- Decide how much or how little to add.
- Contribute a favorite harvest memory or seasonal tradition.
- Decorate one piece of a larger shared project.
- Show another resident a technique they already know.
- Decide where a finished group project should be displayed.
Let the Conversation Happen Naturally
There is no need to turn every craft into a formal discussion. A memory written on a leaf, a familiar color, or a decorating choice can naturally give residents something to talk about.
One person may remember making similar decorations with family, while another may simply enjoy explaining why they chose a particular color.
Make the Finished Work Visible
When residents have helped create a shared wreath, garland, tree, or table display, give them a chance to see where their contribution goes.
That small step changes the experience from “I completed a craft” to “I helped make something for our space.”
The craft still has a finished product, but the process leaves room for choice, conversation, contribution, and connectio, which is especially valuable in a group setting.
When you need more Halloween projects for different ability levels, 25 Halloween Crafts for Seniors in Assisted Living That Work for Every Ability Level is a helpful next read.
Conclusion
The best harvest crafts for seniors aren’t necessarily the most elaborate ones. They are the projects that work when several people are creating at once, without making the table feel rushed, crowded, or overly controlled.
A little preparation beforehand leaves more room for what matters during the activity: choice, conversation, creativity, and the satisfaction of making something together.
Whether you’re planning one afternoon craft or building a full seasonal activity calendar, choose projects that respect the people at the table, not just the supplies on it.
Looking for more practical senior craft ideas? Explore our other group-friendly craft guides for activities that are easy to prepare and enjoyable to make.
If hand comfort is a consideration, Easy Summer Crafts for Seniors with Arthritis: Gentle on the Hands, Good for the Soul has ideas designed around gentler crafting.
FAQs
What harvest crafts are easiest to prepare for 20 or more seniors?
Paper wreaths, harvest garlands, memory cards, and collaborative trees are especially practical because their pieces can be prepared and portioned in advance.
How many supplies should I prepare per person?
Prepare one complete set of the main materials for each resident, plus a small number of extras for damaged or misplaced pieces.
How can I adapt harvest crafts for residents with limited hand mobility?
Pre-cut materials, use larger pieces, choose easy-to-grip tools, and let residents participate in arranging or choosing materials instead of doing difficult cutting or fastening.
Which harvest crafts can be displayed as one group project?
The gratitude garland, collaborative table runner, and large harvest tree can all combine individual contributions into one shared display.