This post contains affiliate links. This means I may earn a small commission if you purchase through my links at no extra cost to you.
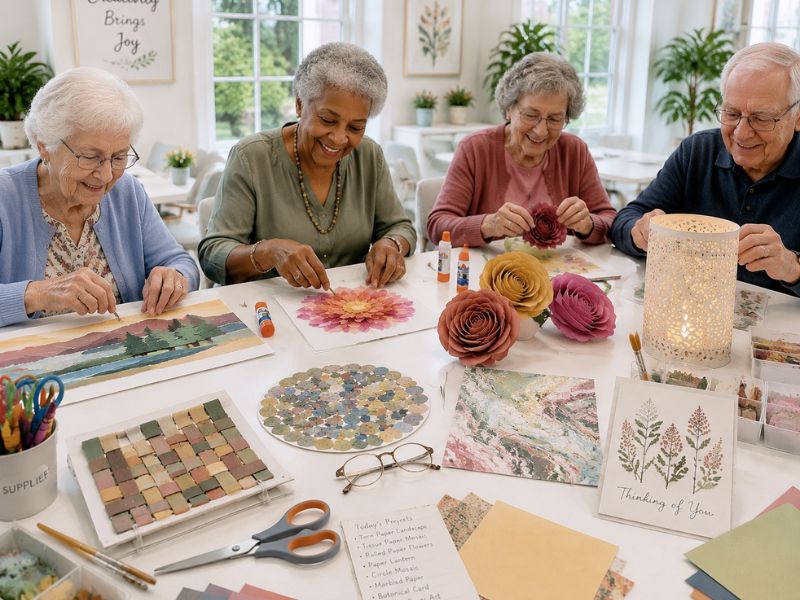
Need paper crafts that won’t leave tired hands struggling? These 13 paper crafts for seniors are beautiful, simple, and designed with minimal gripping in mind.
Somewhere in a craft closet, there’s a bag of supplies for a project someone loved and quietly stopped making.
Not because they lost interest. Because at some point, holding scissors steady for a clean cut, or pinching a fold flat, started to hurt more than the project was worth.
The usual fix is a bigger pair of scissors or a foam grip taped onto a pencil, but the tool was rarely the problem.
It’s the motion. Folding, precision cutting, and holding something steady between two fingertips all rely on a pinch grip, and pinch grip is exactly what arthritis, tremors, and general hand weakness take first, long before the rest of the hand gives out.
Working backward from that changes what counts as easy. Tearing replaces cutting. Rolling replaces folding.
Dipping and blotting replace coloring inside careful lines.
Nothing here is a hard project dressed up as easy, these are 13 paper crafts that look genuinely beautiful, built on motions hands can still do comfortably, whatever shape those hands are in.
Bring some seasonal creativity to the table with 10 Scarecrow Crafts for Seniors You Will Reuse Every Autumn, especially when planning projects residents can revisit each fall.
1. Torn-Paper Landscape or Tree Collage
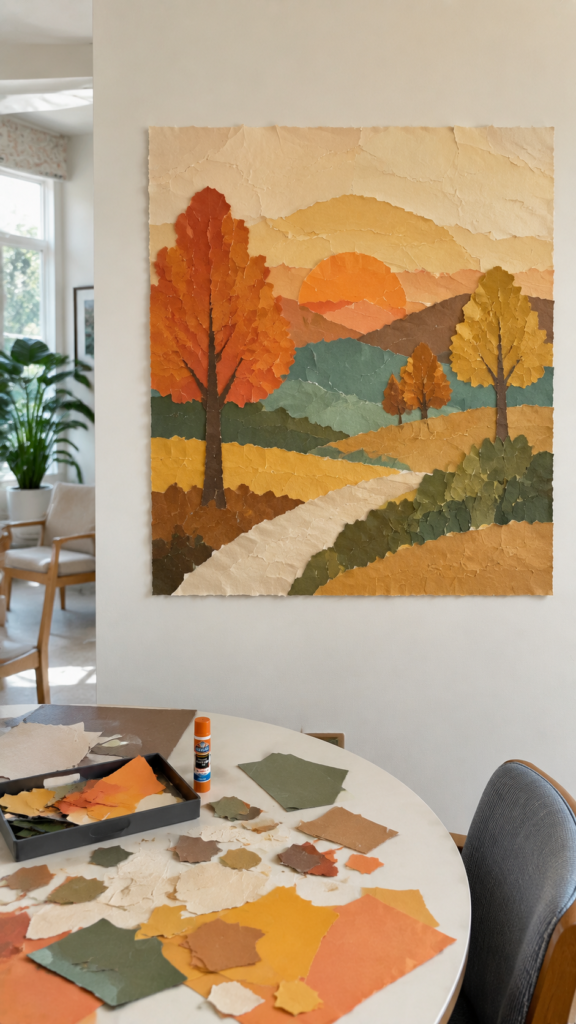
Strips of colored paper are torn by hand into rough shapes, leaves, hills, treetops, and layered onto a plain background sheet to build a simple scene: a tree line against a sunset, a row of hills, a cluster of autumn trees.
There’s no template to follow exactly and no straight edge to match. The torn, uneven edges are what make the finished piece look like layered texture instead of a flat cutout.
What the hands actually do:
- Hold the paper flat between the whole palm and a few fingers, not a pinched fingertip grip
- Pull downward or outward in one motion to tear — no repeated small snips
- Press torn pieces into place with a flat palm, using a glue stick rolled on rather than squeezed
Materials:
- Construction paper or cardstock, 3–4 coordinating colors (standard 8.5″ x 11″ sheets)
- A firm cardstock or mat board base, 8″ x 10″, to hold the layered paper without buckling
- A glue stick (not a squeeze bottle or liquid glue)
Why it looks finished, not simplified:
Torn edges aren’t as flat as scissor-cut ones, they catch a little shadow and overlap unevenly, the same way real leaves or hills do.
Once three or four torn colors sit on top of each other, that unevenness is what gives the picture depth. A flat, evenly cut shape can’t do that on its own.
When you’re planning Halloween activities for a group with different abilities, 25 Halloween Crafts for Seniors in Assisted Living That Work for Every Ability Level is another useful resource.
2. Torn Tissue-Paper Mosaic Art
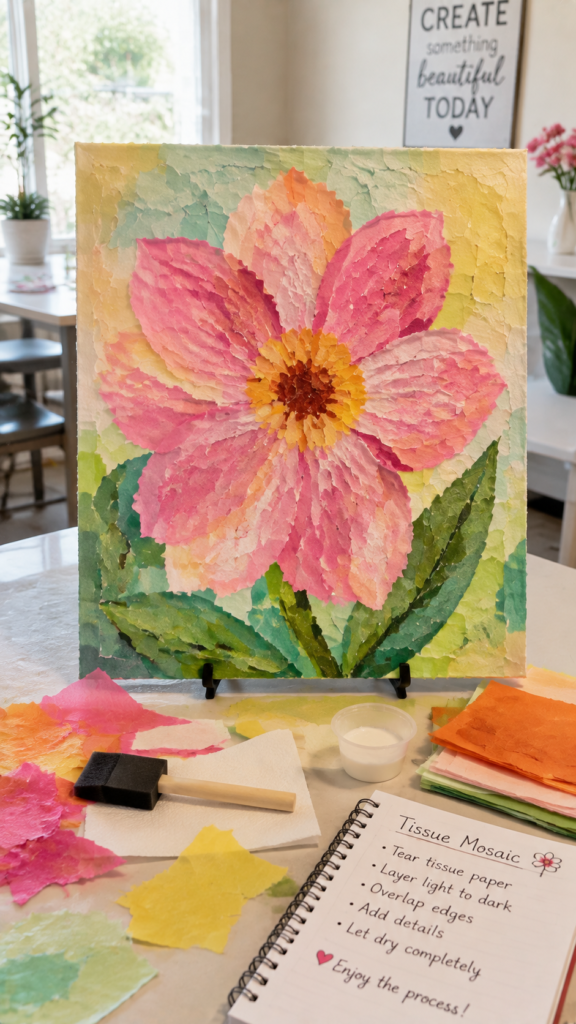
This one uses the same tearing motion as the tree collage, just scaled down and built with tissue paper instead of cardstock.
Small torn tissue pieces get pressed onto a printed or hand-drawn outline, a flower, a bird, a simple shape, filling it in the way a mosaic fills in with tiles.
Among paper crafts for seniors built around tearing rather than cutting, this is the one that produces the most detail without ever needing scissors.
What the hands actually do:
- Tear tissue paper into rough small pieces using a pulling motion, not a pinch-and-cut
- Dab a small amount of glue onto the outline with a flat foam brush
- Press each torn piece down with a fingertip or the flat of a finger, no fine positioning needed, since overlap is part of the look
Materials:
- Tissue paper in 4–6 colors
- A printed or hand-drawn outline on cardstock, 8″ x 10″
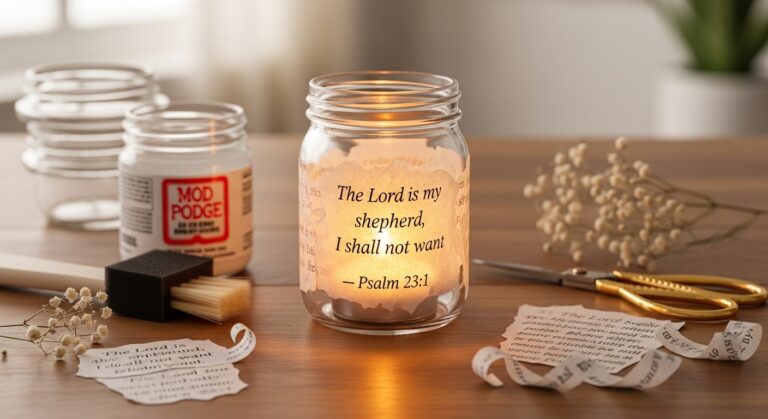
- A foam brush and a small cup of watered-down craft glue (Mod Podge works well)
Why it looks finished, not simplified:
Tissue paper has a slight see-through quality, so overlapping pieces create natural shading and depth on their own.
The mosaic doesn’t need to be neat to look intentional, the texture from the torn edges and layered color does that work.
Turn everyday materials into something useful with 20 Recycled Crafts for Seniors That Don’t Look Like Trash for more budget-friendly crafting ideas.
3. Giant Rolled Paper Flowers
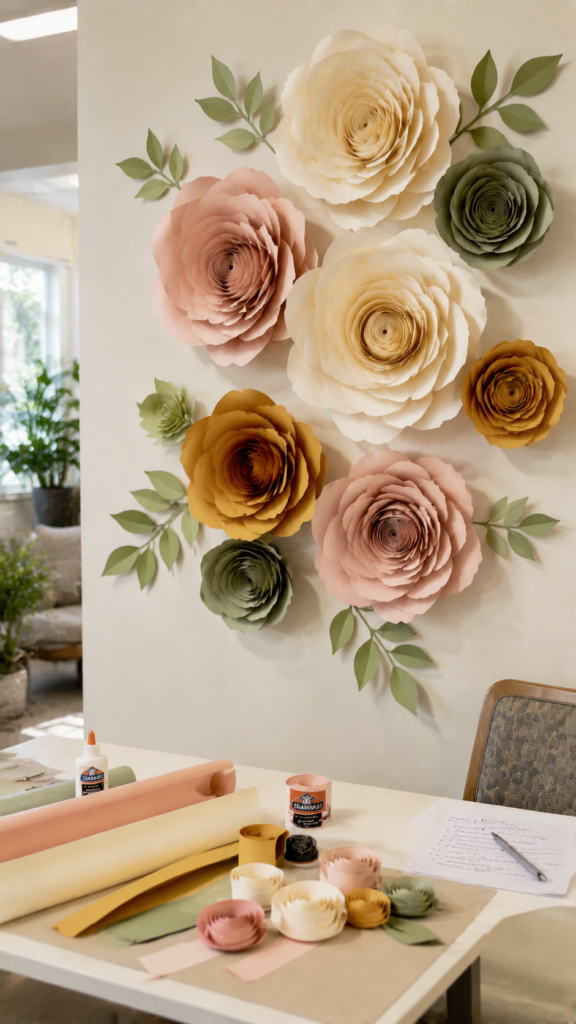
Wide strips of paper, precut, so there’s no cutting involved at all, get rolled loosely around a dowel or thick pencil, then released and shaped by hand into oversized paper roses or peonies.
The rolling happens with the whole palm pressing the strip forward, the same motion used to roll dough, not a fingertip fold.
What the hands actually do:
- Press the paper strip against the dowel with an open palm and roll forward
- Loosen and scrunch the rolled coil slightly by hand to shape petals
- Glue the base together with a dot of glue, pressed flat rather than pinched shut
Materials:
- Precut paper strips, 2″ wide x 24″ long (crepe paper or lightweight cardstock)
- A wooden dowel or thick pencil, about 1/2″ in diameter
- Craft glue in a small squeeze bottle, applied in dots rather than a full line
Why it looks finished, not simplified:
Because these flowers are oversized, small irregularities in the roll just read as natural petal variation.
Real paper flowers rarely look perfectly symmetrical either, the giant scale is what makes this one display-worthy on its own as wall art or a centerpiece.
4. Rolled Paper Cylinder Lanterns
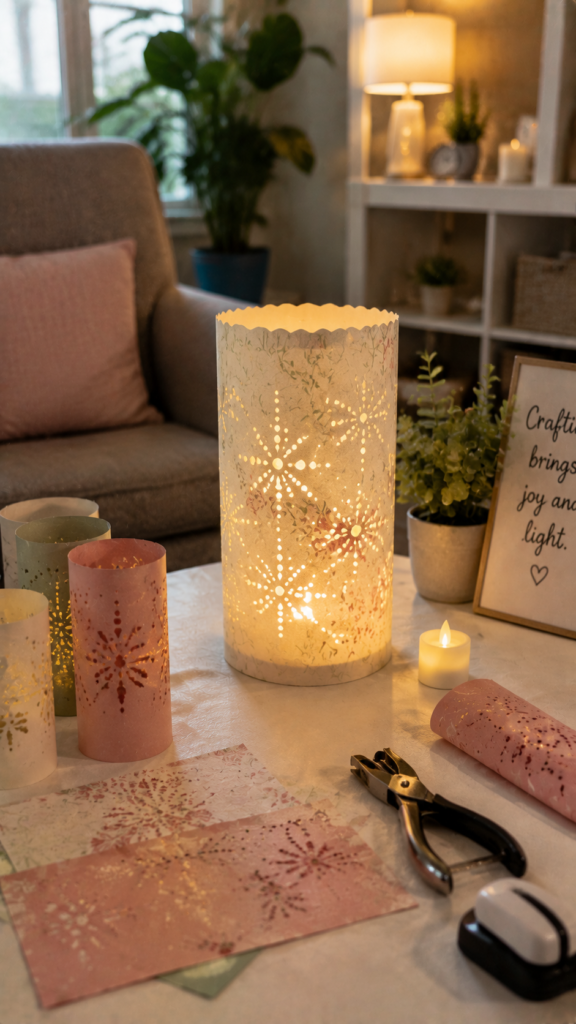
A sheet of cardstock or patterned paper gets rolled into a cylinder around a jar or can, taped closed, and set over a small battery tea light.
The rolling motion is identical to the flower project, palm against paper, rolling forward around a form, but the result is a functional object instead of a decoration.
What the hands actually do:
- Wrap the paper sheet around a jar using a rolling, palm-driven motion
- Hold the overlap closed with a strip of tape pressed flat, instead of a pinched fold
- Punch or press pre-marked holes into the paper before rolling, using a single-hole punch that needs only a palm press, not a squeeze
Materials:
- A sheet of cardstock, 8.5″ x 11″, per lantern
- A glass jar or can to roll around (used as a form, not part of the finished piece)
- Clear tape and a single-hole craft punch
- A battery-operated tea light
Why it looks finished, not simplified:
Punched holes glow unevenly once the light is inside, which hides any slight unevenness in spacing.
The rolled cylinder shape also holds its form well on its own, so there’s no need for the seam or the punch pattern to be perfect for the lantern to look intentional.
For a gentler approach to seasonal activities, try 20 Simple Halloween Crafts for Dementia Patients That Feel Festive Not Frightening.
5. Paper Mosaic with Pre-Punched Circles
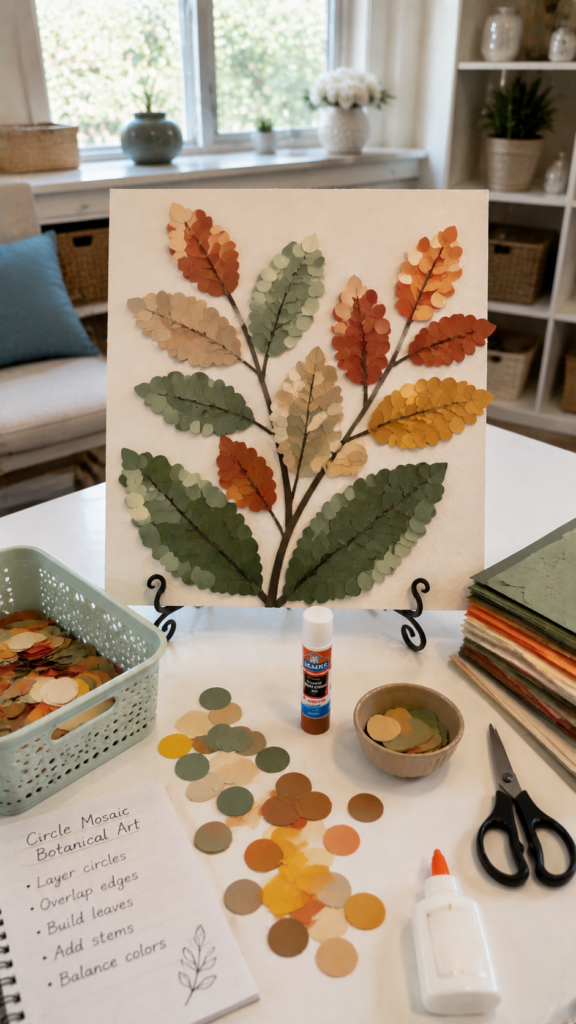
This one skips cutting entirely by starting with pre-punched paper circles, the kind sold in craft packs or made ahead of time with a large single-hole punch.
The circles get arranged onto a background and glued down one at a time, close together, to build a pattern or picture, a sun, a bowl of fruit, a simple flower.
What the hands actually do:
- Pick up each circle between the thumb and the flat side of the index finger, resting it on the table rather than holding it in the air
- Dab glue onto the background with a small sponge dauber, pressing rather than squeezing
- Set each circle down and press flat with a fingertip
Materials:
- Pre-punched paper circles in assorted colors (or a single-hole punch and scrap paper if making your own ahead of time)
- A cardstock background, 8″ x 10″
- A sponge dauber and a shallow dish of craft glue
Why it looks finished, not simplified:
Circles overlapping slightly at the edges give the piece a pebbled, textured look that a flat painted shape doesn’t have.
Small gaps between circles aren’t a mistake here, they read as intentional spacing, the way tile grout does in a real mosaic.
6. Découpage Tray or Coaster
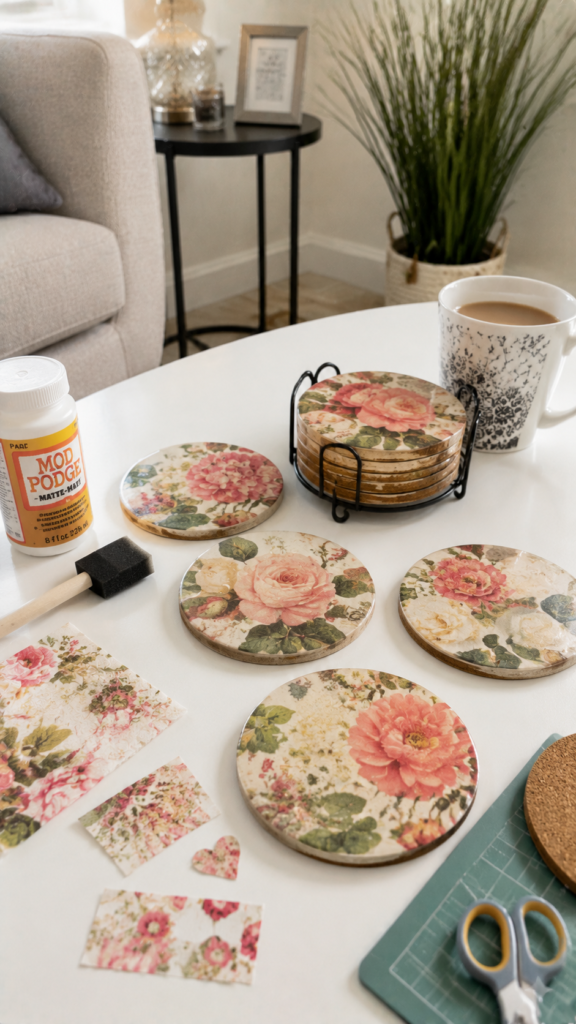
Torn or precut tissue paper pieces get brushed onto a plain wooden or cork tray using a foam brush dipped in découpage glue.
The brush does the pressing work that fingers would normally do, smoothing each piece down and sealing it in one motion.
What the hands actually do:
- Hold the foam brush loosely in a fist rather than a pen grip
- Brush glue onto the surface first, then lay tissue paper on top and brush over it again to smooth and seal
- Let the brush handle the flattening and smoothing, instead of pressing with fingertips
Materials:
- A plain wooden or cork tray, or a set of cork coasters
- Tissue paper or thin patterned paper napkins
- A foam brush and découpage glue (or watered-down craft glue)
Why it looks finished, not simplified: The glue dries clear and slightly glossy, so brush marks and paper overlaps blend into the surface rather than standing out.
It ends up looking like a finished decorative surface, not a craft project sitting on top of a tray.
Add some texture to your craft table with 25 Bead Crafts for Seniors That Look Beautiful and Work for Every Ability Level.
7. Marbled Paper Art
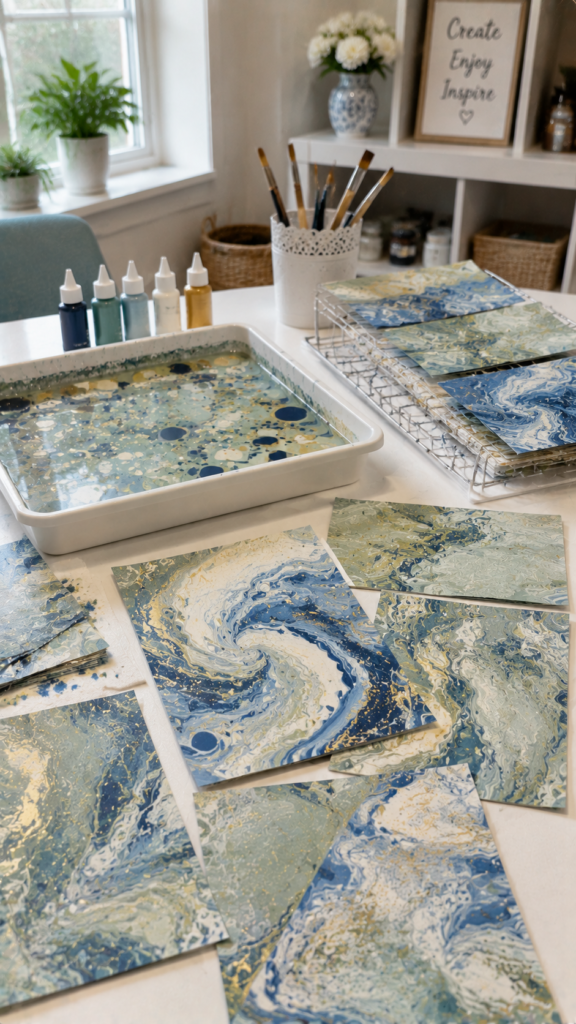
Paint or ink gets dropped onto a shallow tray of water and swirled gently with a comb or the end of a paintbrush, then a sheet of paper is laid flat on top to lift the pattern off in one motion.
There’s no drawing, cutting, or fine control involved, the swirling is loose, and the paper does the rest.
What the hands actually do:
- Drop paint or ink from a dropper or spoon, no squeezing required
- Swirl the surface with a wide, loose hand motion using a comb or brush handle
- Lay the paper flat with both palms and lift it straight up, letting gravity do the work
Materials:
- A shallow tray or baking dish filled with water
- Marbling ink or acrylic paint thinned with water
- Cardstock or watercolor paper, cut to fit the tray in advance
- A comb, skewer, or paintbrush handle for swirling
Why it looks finished, not simplified:
Marbling is one of the few techniques where more randomness looks better, not worse.
Every swirl pattern comes out different, and there’s no “correct” result to compare it against, so the outcome always looks intentional.
8. Chunky Stamped Botanical Art
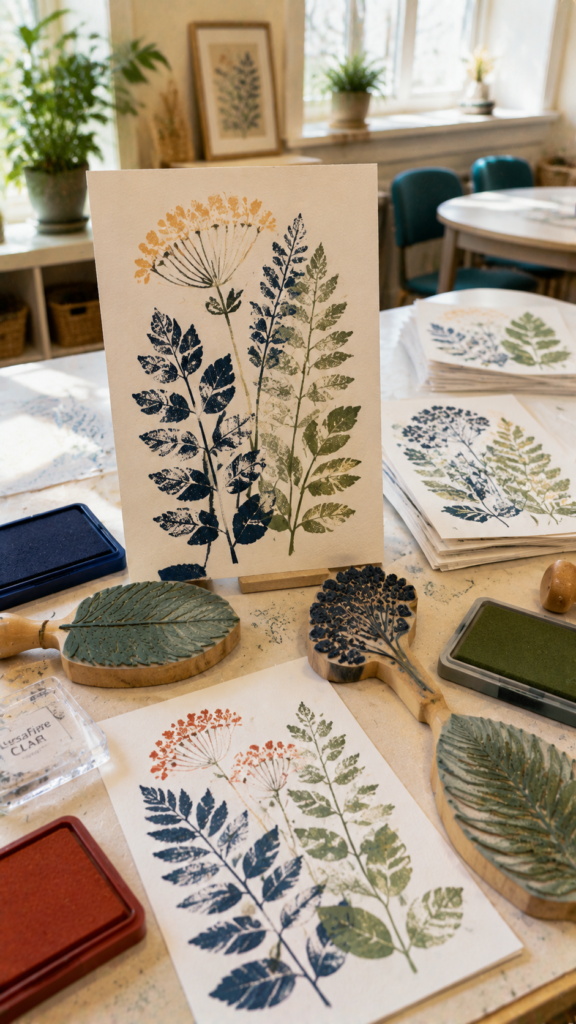
Large, chunky-handled stamps, leaves, flowers, simple botanical shapes, get pressed onto paper using an open palm rather than fingertip pressure.
Several stamps in different sizes, overlapping and layered in ink, build a full botanical scene without a single line being drawn by hand.
What the hands actually do:
- Hold the stamp by its wide handle in a fist grip, not between fingertips
- Press the stamp down onto the ink pad with the flat of the hand
- Press the inked stamp onto paper the same way, using body weight through the palm rather than finger pressure
Materials:
- Large chunky-handled stamps (botanical or leaf designs)
- An ink pad in one or two coordinating colors
- Cardstock or watercolor paper, 8″ x 10″
Why it looks finished, not simplified:
Overlapping stamped shapes in varying pressure create natural light and dark areas, the way real pressed botanicals look layered on a page.
A slightly uneven stamp press reads as texture, not error.
For residents who benefit from tactile activities, 21 Crafts for Seniors With Low Vision That Are Tactile, Beautiful and Completely Accessible offers more accessible project ideas.
9. Paper Weaving Wall Art
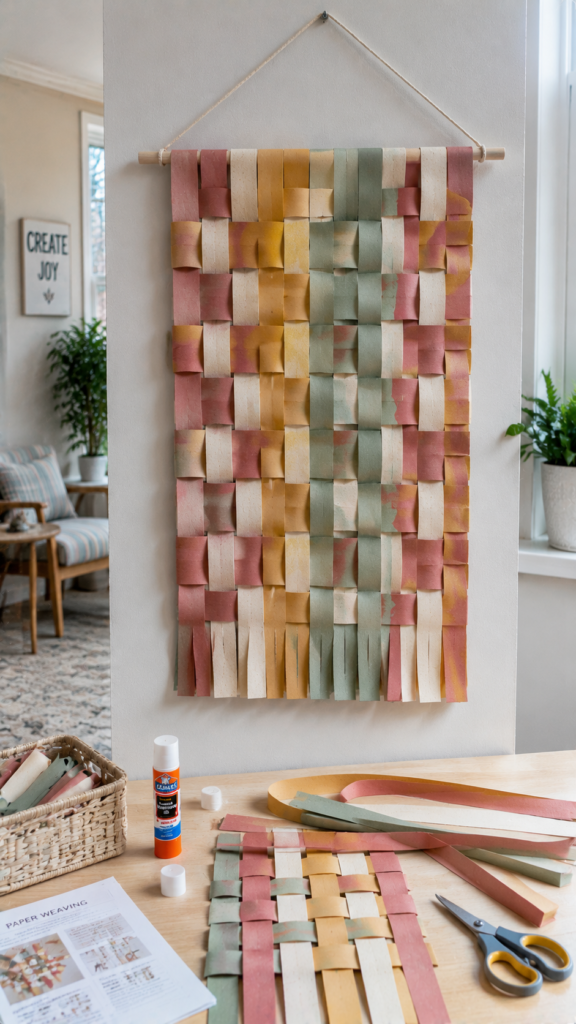
Cut a set of paper strips ahead of time, at least an inch wide, so there’s plenty to hold onto, and glue one set down the length of a board, spaced evenly apart.
Take a second strip and slide it over the first, under the next, over the next, all the way across. Repeat with each new strip, alternating the pattern so it locks together like a basket.
The strip moves through the gaps flat against an open palm, the way you’d slide a bookmark between pages, not gripped tightly at the very tip.
That’s what makes this comfortable to do slowly, one strip at a time, with no rush to keep a tight pinch going.
What the hands actually do:
- Hold the strip flat against the palm and a loose hand, not pinched between fingertips
- Push it through, over and under, in one steady motion
- Press the finished ends down flat and secure them with a glue dot
Materials needed:
- Paper strips, already cut, at least 1 inch wide, in two or three colors that go well together
- A cardstock or foam board base, roughly 8 by 10 inches, with the first set of strips already glued down
- Glue dots or a glue stick for the loose ends
Why it looks finished, not simplified:
A woven pattern looks deliberate and graphic on its own, even with wide strips and a loose weave.
Among paper crafts for seniors, this is one of the few that ends up looking like framed wall art rather than something made at a craft table.
Plan ahead for late summer with 20 August Crafts for Seniors in Assisted Living for more simple activity ideas.
10. Iris Folding Art
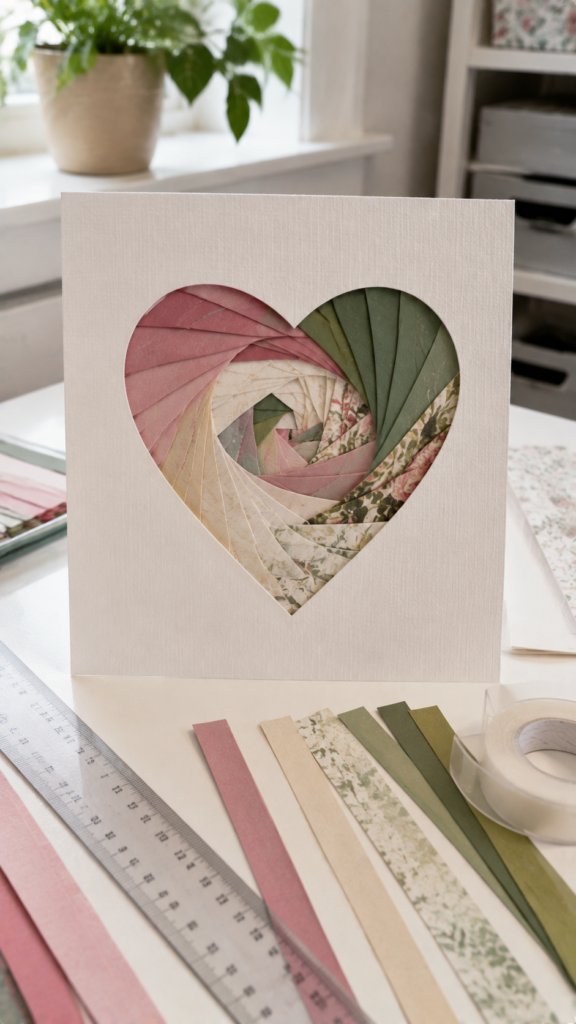
This technique looks like folding from a distance, but nothing actually gets folded.
A shape, a heart, a star, a simple flower outline, is cut out of the middle of a piece of cardstock, and paper strips are laid flat behind that opening, one at a time, overlapping slightly, working inward in a spiral.
Each strip gets taped down before the next one goes on top.
A small ruler placed at the edge of the cut-out shape gives a straight line to lay each strip against, so there’s no guessing where it goes.
The result, once the last strip is taped down and the template is turned over, is a spiral of color visible through the cut-out shape.
What the hands actually do:
- Hold each strip flat against the ruler with an open hand
- Press the tape down gently with a finger or a thumbnail, no squeezing involved
- Turn the template a small amount between strips, using the whole hand rather than just the fingertips
Materials needed:
- An iris folding template, a piece of cardstock with a shape already cut out of the center (these come in packs, or a shape can be traced and cut once ahead of time)
- Paper strips, already cut, in a few shades of one color for a gradient effect
- Clear tape and a small ruler
Why it looks finished, not simplified:
The overlapping strips build a spiral pattern that looks careful and detailed, even though every single step is just laying a flat strip down and taping it.
People often assume it took folding skill to make.
11. Large Slotted Quilling Tool Art
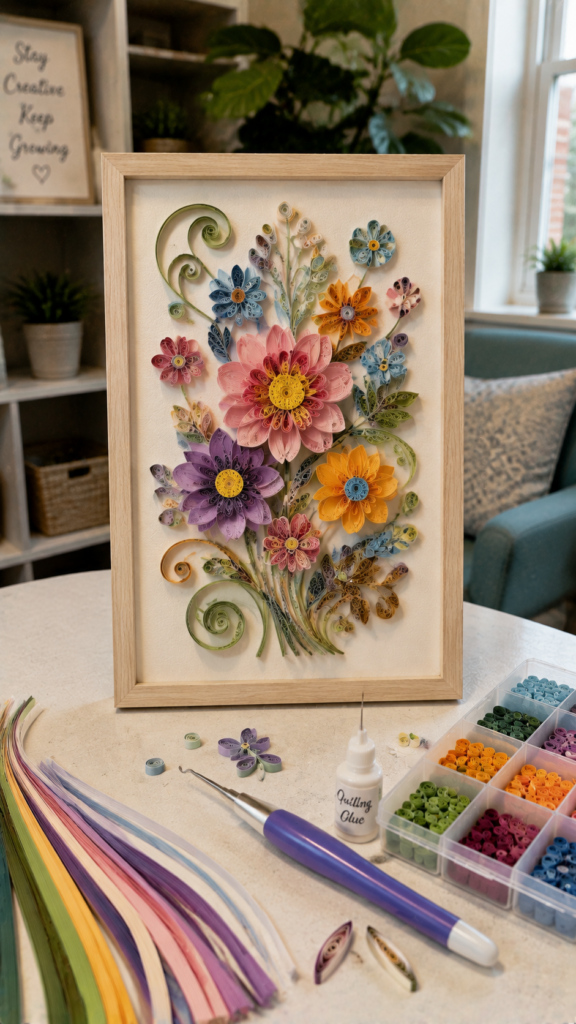
Traditional quilling asks the fingers to pinch a thin paper strip while it’s rolled into a tight coil, which is exactly the motion that gets difficult first. A large slotted quilling tool changes that.
The end of the paper strip slides into a slot at the tip of the tool, and turning the tool’s handle, much like turning a doorknob, winds the paper into a coil. The tool does the holding. The hand just turns.
Once the coil is the size you want, it releases from the tool and gets glued down onto cardstock, either on its own or grouped with others to build a flower or a pattern.
What the hands actually do:
- Slide the paper strip into the tool’s slot using an open hand
- Turn the handle steadily, the same motion as turning a key
- Set the finished coil down onto the glue, touching the paper directly only at this last step
Materials needed:
- A large-handled slotted quilling tool (wider and easier to hold than a standard quilling needle)
- Paper strips, already cut, about a quarter inch wide
- Cardstock and craft glue
Why it looks finished, not simplified:
The coiled shapes sit up off the page with real height and shadow, which gives the finished piece texture a flat paper craft can’t have.
Of the paper crafts for seniors on this list that lean on a tool to do the gripping, this one comes closest to real quilling.
Ease into fall with Cozy September Crafts for Seniors That Bring Calm and Creativity to Fall Days.
12. Washi Tape Mixed-Media Art
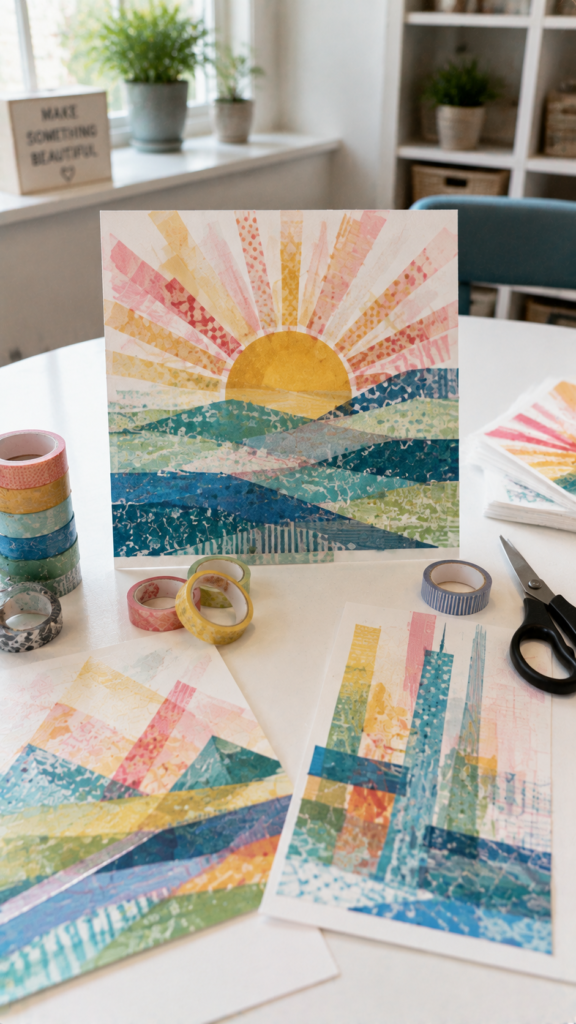
Washi tape is thin, patterned paper tape that tears cleanly by hand, no scissors needed at any point.
One hand holds the roll steady, the other pulls the tape down and tears it against the roll’s edge.
Each torn strip gets pressed onto a sheet of cardstock, overlapping the last one, building up a pattern or a simple picture, stripes, a sunburst, the outline of a house.
Because the tape is slightly see-through, the colors blend a little wherever strips overlap, so the placement doesn’t need to be exact for the result to look good.
What the hands actually do:
- Hold the roll in one hand and pull the tape with the other, tearing it against the roll’s edge
- Lay the strip down and smooth it flat with an open palm
- Overlap the strips loosely, letting the see-through tape do the blending
Materials needed:
- Three or four rolls of washi tape in colors or patterns that go together
- A sheet of cardstock, roughly 8 by 10 inches, as the background
Why it looks finished, not simplified:
The way the colors shift where strips overlap looks planned, even when the tape was placed loosely.
Out of all the paper crafts for seniors on this list, this one comes together the fastest, since there’s no glue and nothing needs to dry.
Continue the seasonal crafting with October Crafts for Seniors in Nursing Homes That Create Memories, Not Just Decorations.
13. Dip-and-Blot Paper Art
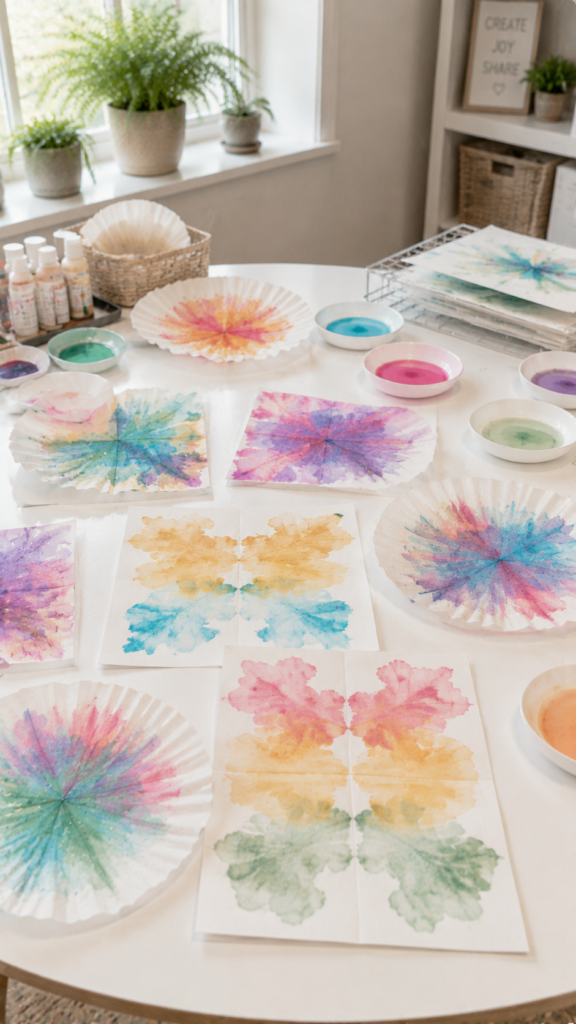
Instead of coloring inside careful lines, a folded piece of absorbent paper, like a coffee filter or thin watercolor paper, gets dipped straight into diluted liquid watercolor or food coloring, one edge or corner at a time.
The color spreads on its own once the paper unfolds, filling in soft, uneven patterns that look like a painting rather than a coloring page.
There’s no brush to hold steady and no line to stay inside. The paper does the work once it touches the color.
What the hands actually do:
- Fold the paper loosely in half or quarters using a flat palm press, not a pinched crease
- Hold the folded edge between an open thumb and palm while dipping it into a shallow dish of color
- Unfold the finished piece gently once it’s dry, laying it flat with both hands rather than pulling at a corner
Materials needed:
- Coffee filters or thin watercolor paper, a few sheets to start
- Liquid watercolor or food coloring, diluted with water, in two or three shallow dishes
- A flat surface lined with newspaper or a tray, for drying
Why it looks finished, not simplified:
The colors bleed and blend where the paper was folded, creating a symmetrical, almost tie-dye pattern that looks intentional every time, since there’s no way for it to come out looking flat or plain.
Keep the paper crafting going into November with November Crafts for Seniors in Assisted Living, which offers more seasonal projects.
How to Make Any Paper Craft Easier on the Hands
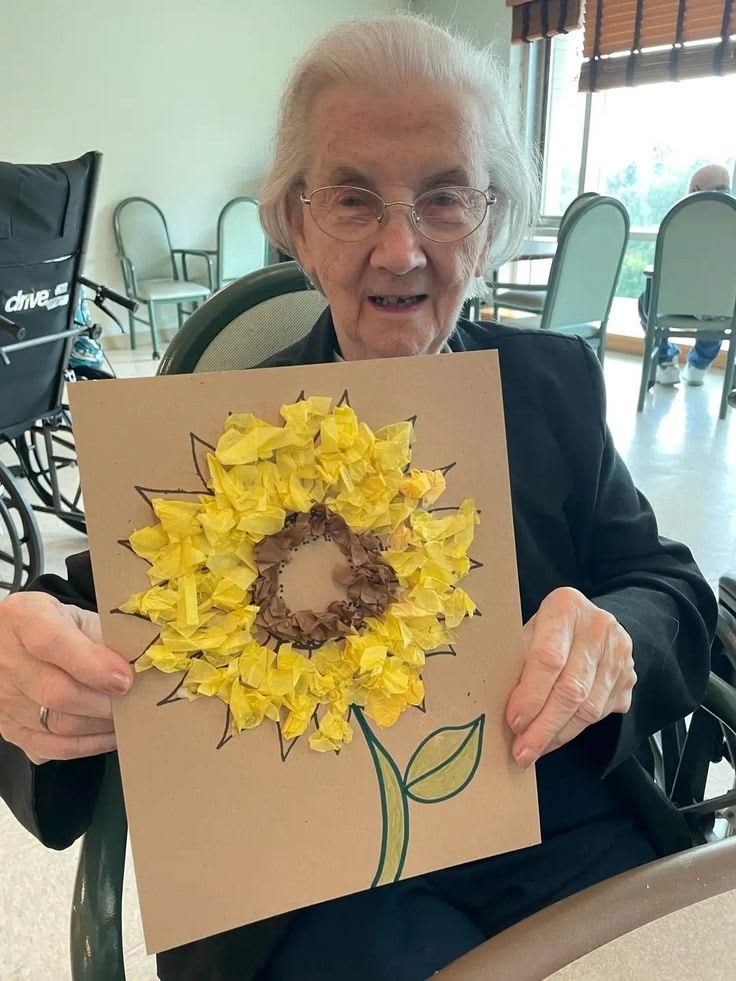
The goal isn’t to make every craft “therapeutic.” It’s to remove unnecessary gripping, squeezing, and tiny hand movements so residents can focus on the creative part.
Hand function varies widely among older adults, and grip strength is only one part of how easily someone can manage a task.
What You Can Do:
Pre-Cut the Difficult Parts
If a project requires repeated cutting, prepare those pieces beforehand. Residents can then spend their energy choosing, arranging, and decorating instead of managing scissors.
Make the Pieces Larger
Large leaves, petals, shapes, and paper sections are generally easier to pick up and position than tiny pieces requiring precise finger movements.
Avoid Materials That Need Strong Squeezing
Small glue bottles, tight markers, or tools that require force can make a simple craft unnecessarily difficult. Use easier-to-handle alternatives or have an assistant handle that step.
Give the Paper a Firm Working Surface
A flat, stable surface makes positioning and gluing easier than trying to hold paper in the air. Non-slip material under the project can also help keep it from moving around.
Replace Precision With Choice
Rather than requiring everyone to fold, roll, or attach pieces in exactly the same way, let residents choose between simpler options.
Someone might arrange large shapes while another person handles a more detailed part.
For another option that keeps hands gently occupied, see 15 Simple Clothespin Crafts for Seniors That Keep Hands Busy and Minds Sharp.
Stop When the Hands Become Painful
Reduced grip strength or dexterity can occur with conditions such as hand osteoarthritis, and painful activities shouldn’t be treated as something a person simply needs to push through.
If a resident regularly experiences hand pain or difficulty with everyday tasks, an occupational therapist or other appropriate health professional can help identify safer adaptations.
Research on hand limitations supports the use of adapted tools and alternative ways of gripping or handling objects.
When hand comfort matters, Easy Summer Crafts for Seniors with Arthritis: Gentle on the Hands, Good for the Soul has ideas designed with gentler movements in mind.
Keep the activities light and seasonal with 21 Easy Senior Summer Crafts That Are Relaxing, Creative and Seasonal.
Conclusion
Beautiful paper crafts do not have to depend on strong hands or complicated techniques.
The better approach is to remove the parts that create unnecessary strain and leave room for the creative choices that make the project personal.
These paper crafts for seniors give you plenty of ways to do that, from arranging large paper pieces to creating a contribution for a shared display.
And when a craft is adapted thoughtfully, residents don’t have to feel like they are being given a “special” activity; they are simply being given a better way to participate.
Want more thoughtful, senior-friendly craft ideas? Find other craft guides for simple projects that can be adapted to different abilities, group sizes, and comfort levels.