This post contains affiliate links. This means I may earn a small commission if you purchase through my links at no extra cost to you.
What can a burning bush teach kids? These Moses and the burning bush crafts for kids turn Exodus 3 into hands-on Bible lessons worth remembering.
A bush was burning in the wilderness, yet the flames were not consuming it. Moses could have kept walking, but he stopped to look more closely.
That moment led to a conversation with God, a command to remove his sandals, and a calling that would change the course of his life.
That makes the burning bush story much bigger than a picture of flames around a green bush.
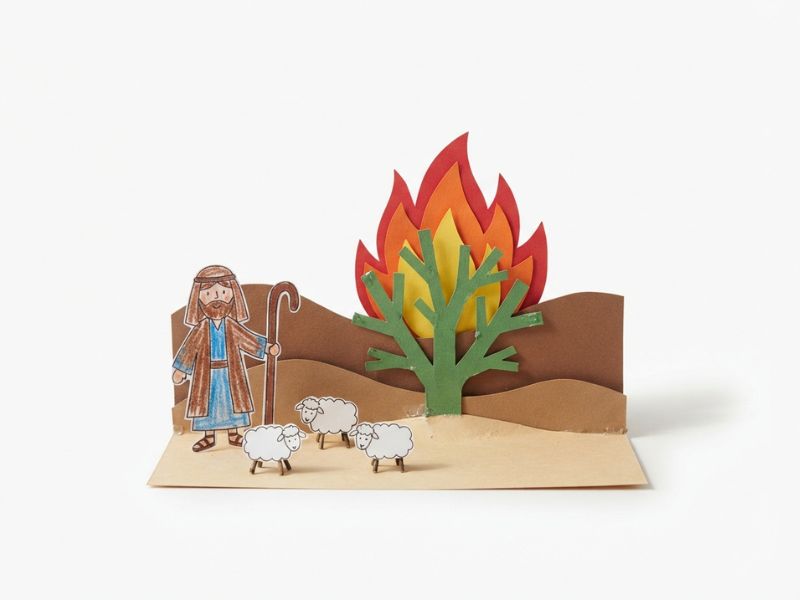
Children can see Moses as a shepherd, notice the strange sight that caught his attention, imagine the moment God called his name, and follow what happened when Moses was given an assignment he did not feel ready to take.
These Moses and the burning bush crafts for kids turn those details from Exodus 3 into hands-on activities, so the craft can help children remember the story instead of simply making something that looks like a burning bush.
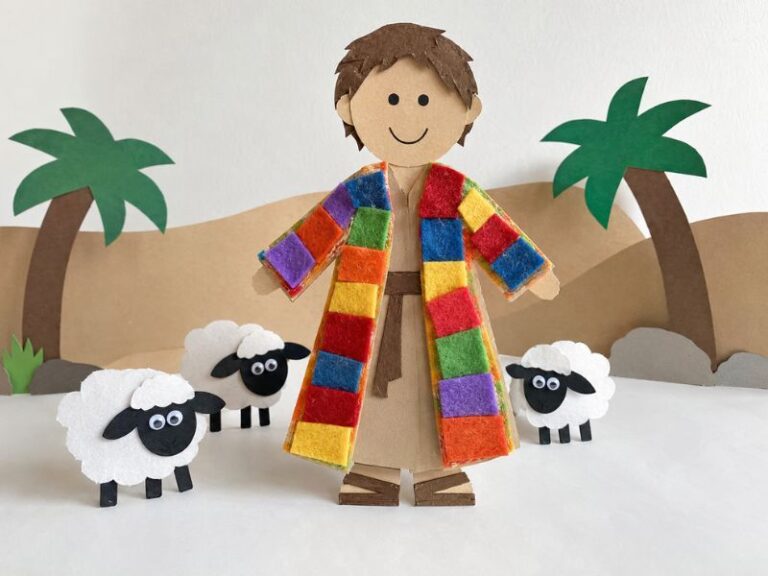
Teach kids about forgiveness through a hands-on Bible activity with Joseph and His Coat of Many Colors Crafts for Kids That Teach Forgiveness and Grace.
What Should Kids Learn From the Crafts?
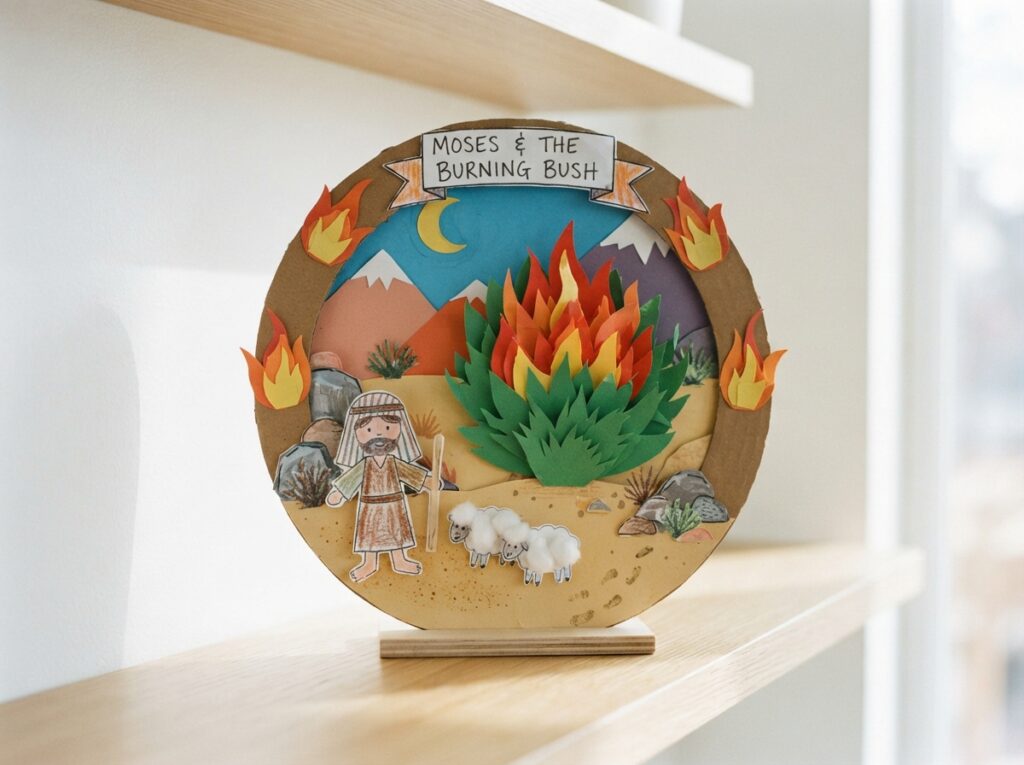
The burning bush story gives children more to notice than the unusual sight of a bush on fire. Each craft can help them remember a specific part of Moses’ encounter with God.
- Pay attention to what catches your notice. Moses stopped and turned aside when he saw the bush burning without being consumed.
- Understand reverence. God told Moses to remove his sandals because he was standing on holy ground.
- Remember that Moses had questions. He did not respond to his calling with complete confidence. His concerns continue into Exodus 4.
- See the bigger purpose of the encounter. God told Moses about the suffering of the Israelites and sent him to Pharaoh.
- Remember the story in sequence. Moses was tending sheep, noticed the bush, heard God call his name, stood on holy ground and received an important assignment.
The crafts work best when they help children retell these details in their own words rather than simply reproduce a picture of the burning bush.
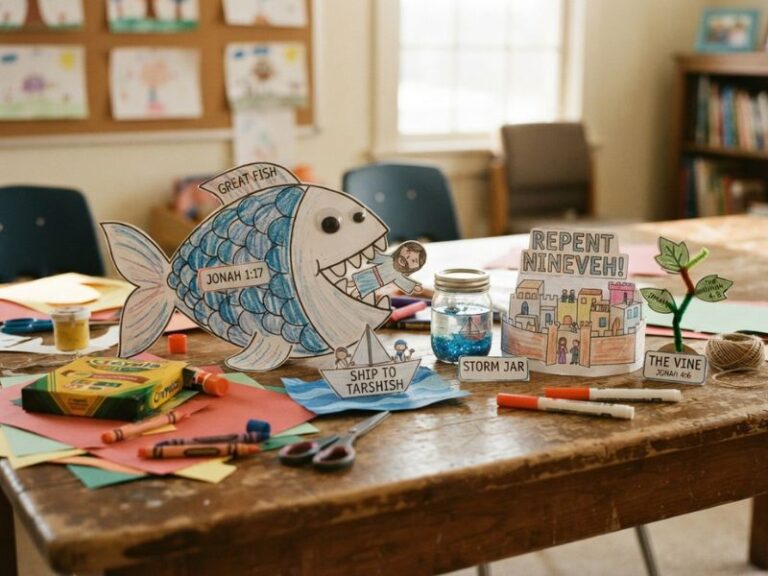
Bring the story of Jonah to life with Jonah and the Whale Crafts for Kids That Make The Story Story Come Alive With Wonder.
The Moses and the Burning Bush Crafts for Kids
1. Burning Bush With Flames That Move
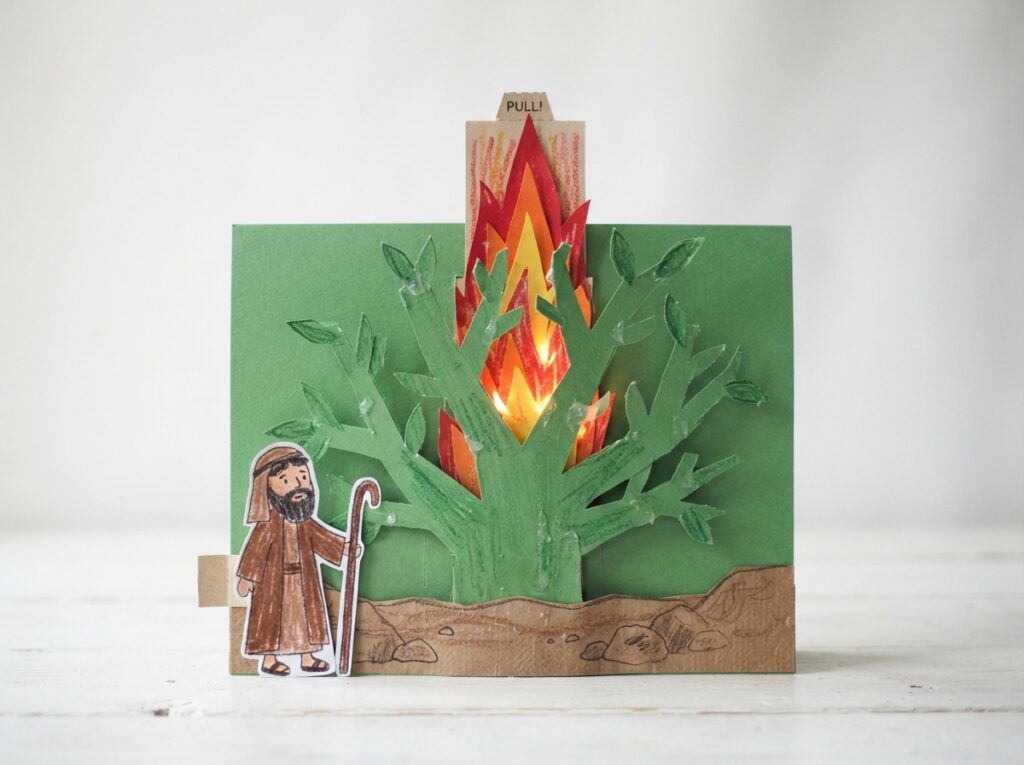
Moses was tending the flock of his father-in-law Jethro when he came to Horeb, the mountain of God. There, he noticed something strange: a bush was on fire, but the bush was not burning up.
Moses stopped and turned aside to look at this unusual sight. God then called his name from the bush and began speaking to him. (Exodus 3:1–4)
That detail gives this craft a purpose beyond simply gluing flames onto a bush. Children can make the bush with a strip of red, orange and yellow paper behind it, then slide the strip up and down so the flames appear through the branches.
What you need:
- Green and brown cardstock
- Red, orange and yellow paper
- Glue
- Child-safe scissors
- Pencil and ruler
- Paper fastener or a small tab for the sliding strip
How to make it:
Cut a bush shape from green cardstock and attach it to a background sheet, leaving enough space behind the bush for the flame strip.
Cut a long strip of flame-shaped paper and slide it through the opening so the child can move it up and down. An adult can make the slit with a craft knife before the activity begins.
The Bible connection:
In Exodus 3:2–3, Moses sees that the bush is burning but is not being consumed. That is what makes him stop and turn aside to investigate.
As children move the flames through the bush, talk about why this sight was so unusual and how it led Moses into his encounter with God.
The moving flames are simply a visual way to help children picture the scene. Scripture does not describe the fire moving in this particular way.
Help kids connect courage with faith through He Prayed Anyway — Daniel and the Lions Den Crafts for Kids Who Need to Know Courage Is Real.
2. Moses Turns Aside — A Reveal Scene Craft
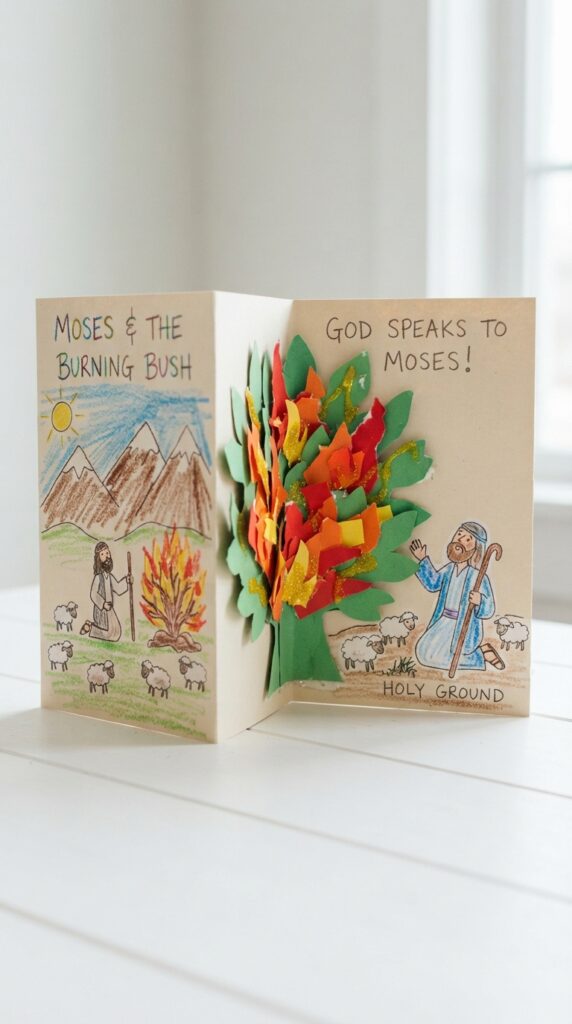
Moses did not immediately walk past the strange sight in the wilderness.
After seeing the bush burning without being consumed, he said, “I will now turn aside and see this great sight” (Exodus 3:3).
He wanted to investigate what he was seeing. As he approached, God called to him from the bush.
A reveal craft can capture that part of the story. Make a folded wilderness scene with Moses and the flock on the first panel. When children open the panel, the burning bush is revealed on the other side.
What you need:
- Cardstock
- Green and brown paper
- Glue
- Child-safe scissors
- Markers or crayons
- Paper fasteners, if you want a moving Moses figure
How to make it:
Fold a sheet of cardstock in half to create two scenes. On the first side, make a simple wilderness setting with Moses and some sheep.
On the inside, create the burning bush. Children can draw or attach Moses facing the bush so the opened scene shows what he stopped to investigate.
The Bible connection:
The opening and reveal help children remember an important part of Exodus 3 that can easily get skipped: Moses noticed the unusual sight and chose to turn aside and investigate it.
The craft therefore follows the movement of the story instead of simply showing Moses beside a burning bush.
Ask children what Moses saw before they open the second panel. Then ask what he decided to do when he saw it. This gives them a chance to retell the beginning of the encounter in the correct order.
Another Bible story to explore through crafting is 15 David and Goliath Bible Crafts for Kids That Teach Courage and Faith.
3. The Holy Ground Sandal Craft
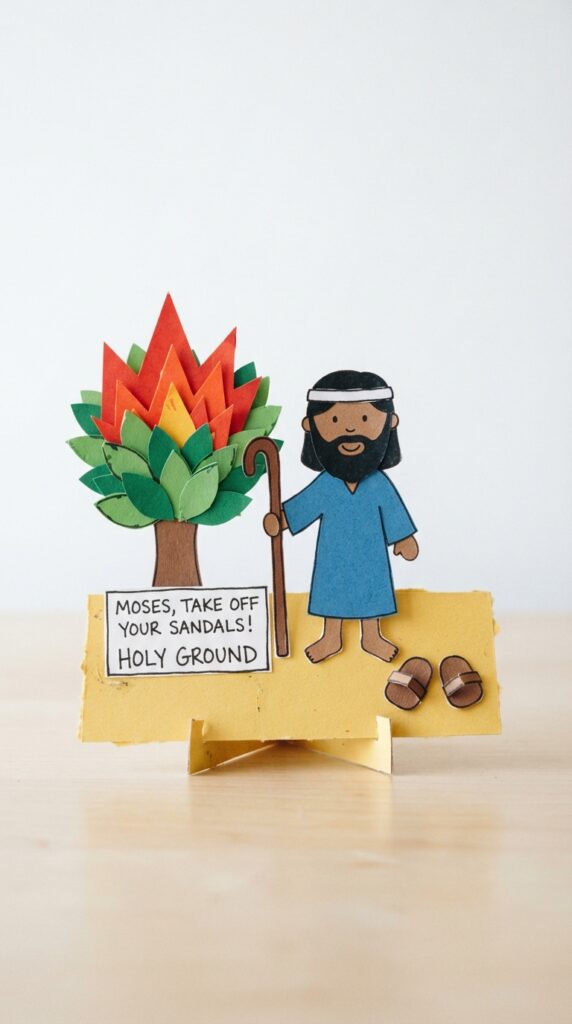
The burning bush encounter changes when God tells Moses to come no closer and remove his sandals.
God explains why: “the place where you are standing is holy ground” (Exodus 3:5). Moses is then told that he is standing before the God of his ancestors, the God of Abraham, Isaac and Jacob.
A removable-sandal craft makes that specific moment part of the activity. Instead of drawing Moses with his shoes permanently attached, children can make small paper sandals that come off and sit beside him.
What you need:
- Cardstock
- Brown paper for the sandals
- Green paper for the bush
- Glue
- Child-safe scissors
- Markers or crayons
- Small paper fasteners, if needed
How to make it:
Create a simple Moses figure with two separate paper sandals attached loosely enough to remove.
Place the figure near a paper burning bush and add a small ground area underneath. Children can remove the sandals and place them beside Moses when they reach the part of the story where God gives the instruction.
The Bible connection:
Exodus 3:5 gives the reason for the sandals being removed: Moses is standing on holy ground.
This is a useful place to explain that the detail comes directly from the biblical account rather than being a decorative addition to the craft.
As children work, ask what God told Moses to do when he came near the bush and why God gave that instruction.
The removable sandals turn a detail they might otherwise hear once in the story into something they can remember when retelling it.
Make animal-themed crafting more meaningful with Farm Animal Crafts for Kids: Building Confidence and Creativity Beyond the Tutorial.
4. Burning Bush Shadow Box
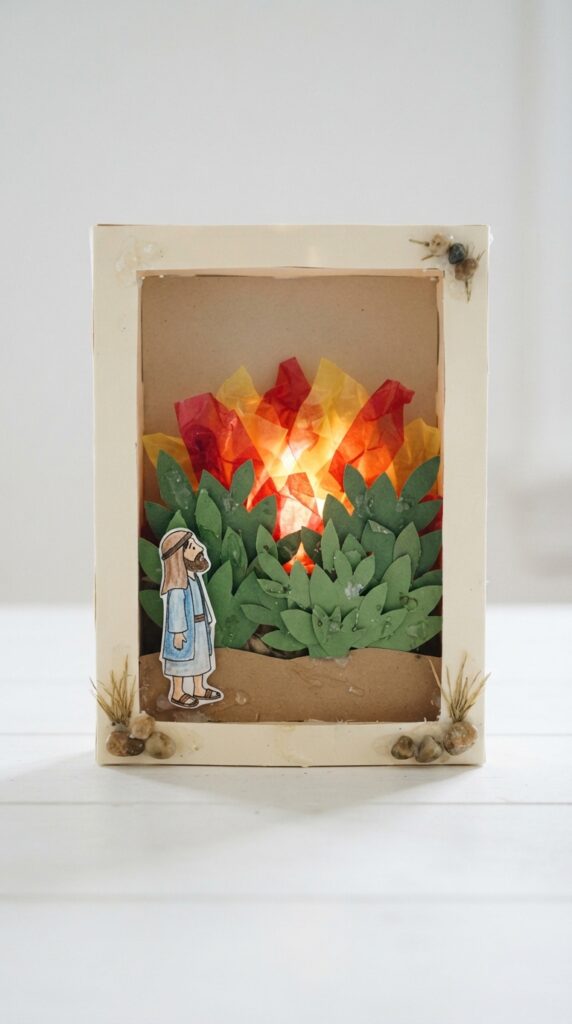
Exodus 3 does not describe the burning bush as an ordinary fire that simply catches Moses’ attention.
The bush is burning, yet it is not consumed. Moses turns aside to investigate, and the encounter soon becomes a direct conversation between God and Moses.
A shallow shadow box can help children picture that unusual scene without using a real flame.
Layer cardstock bush shapes inside a small box or deep frame, then place transparent red, orange and yellow paper behind the layers. A small battery-powered LED light behind the bush can make the coloured layers glow.
What you need:
- Cardstock
- Transparent coloured paper or cellophane
- Glue
- Scissors
- A small box or deep picture frame
- Battery-powered LED tea light
How to make it:
Cut several bush silhouettes in slightly different sizes and layer them inside the box to create depth.
Place the transparent coloured paper behind the bushes, leaving enough space at the back for the LED light. When the light is switched on, it shines through the coloured layers and creates the appearance of a glowing bush.
The Bible connection:
This Moses and the burning bush craft for kids gives children a chance to focus on the detail that made Moses stop: the bush was burning without being consumed (Exodus 3:2–3).
Ask them what they think Moses noticed first and why he decided to turn aside and look.
Use a battery-powered light rather than a candle or open flame. The glowing paper is a craft representation of the scene, not a claim about the appearance or movement of the biblical fire.
For Sunday school or Bible class, 15 Noah’s Ark Crafts for Kids Your Sunday School Class Will Actually Be Excited to Make offers plenty of story-based activities.
5. Moses’ Shepherd Staff Craft
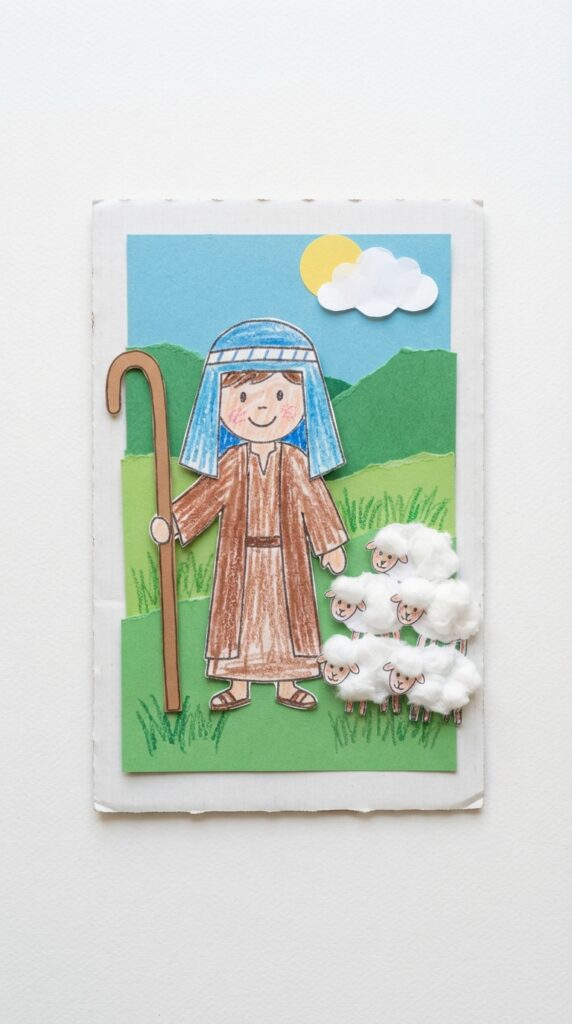
Before Moses stood before the burning bush, he was working as a shepherd. Exodus 3:1 says he was tending the flock of his father-in-law Jethro when he led the flock into the wilderness and came to Horeb.
That detail gives children some context for Moses before the dramatic part of the story begins.
A simple shepherd staff craft can show Moses with the flock he was caring for, rather than presenting him as though he appeared at the bush without a life or responsibility before that moment.
What you need:
- Brown cardstock or craft sticks
- Green and white paper
- Glue
- Child-safe scissors
- Markers
- Wool or cotton, if you want to add simple sheep
How to make it:
Cut a long curved staff from brown cardstock, or use a craft stick for a sturdier version.
Add a small flock of paper sheep and place them against a simple wilderness background. The staff can be made separately so children can move it into Moses’ hand.
The Bible connection:
The staff also becomes important in the next chapter. In Exodus 4, God asks Moses what he is holding, and Moses answers, “A staff.”
God then uses the staff as part of the signs given to Moses.
Keeping the two chapters separate matters: Moses’ shepherding and his staff are introduced around the burning-bush account, but the staff’s transformation into a sign belongs to Exodus 4.
That makes this craft useful for teaching children that the burning bush was part of a larger story.
Moses was a shepherd when he encountered God, and the ordinary staff already in his hand later became part of what God used in his calling.
Get toddlers involved in holiday crafting with 15 Christmas Tree Crafts for Toddlers Can Finish Before the Real Tree Goes Up.
6. Moses! Moses!” Name Pull-Tab Craft
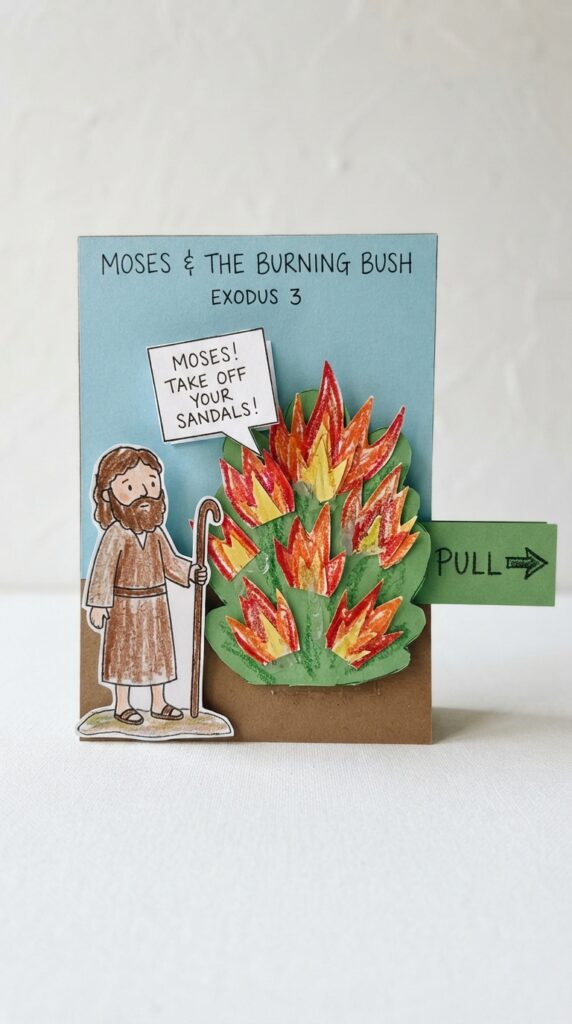
The encounter at the bush becomes personal when God calls Moses by name. Exodus 3:4 records God saying, “Moses! Moses!” Moses answers, “Here I am.”
For this craft, make a simple wilderness scene with Moses facing the bush and add a pull-tab behind the scene.
When the child pulls the tab, the words “Moses! Moses!” appear in a speech bubble or behind the bush.
What you need:
- Cardstock
- Coloured paper
- Glue
- Child-safe scissors
- Markers
- A narrow strip of cardstock for the pull-tab
How to make it:
Create Moses and the burning bush on the front of the card. Cut a small opening where the hidden message will appear, then slide the message strip behind it.
Secure the strip so children can pull it out and reveal the words without removing it completely.
The Bible connection:
The pull-tab gives children a physical way to remember that Moses did not simply notice a strange bush; God called him by name and Moses responded.
After calling Moses, God told him not to come closer and instructed him to remove his sandals because he was standing on holy ground (Exodus 3:4–5).
Ask children what Moses said after God called him.
This helps them remember the sequence of the encounter and keeps the craft connected to the actual conversation in Exodus 3 rather than turning the scene into a generic picture of Moses and a fire.
Bible characters can make fun, meaningful costumes too. See 20 Bible Character Halloween Costumes for Kids — Easy DIY Ideas for Trunk or Treat.
7. Moses Hides His Face Craft
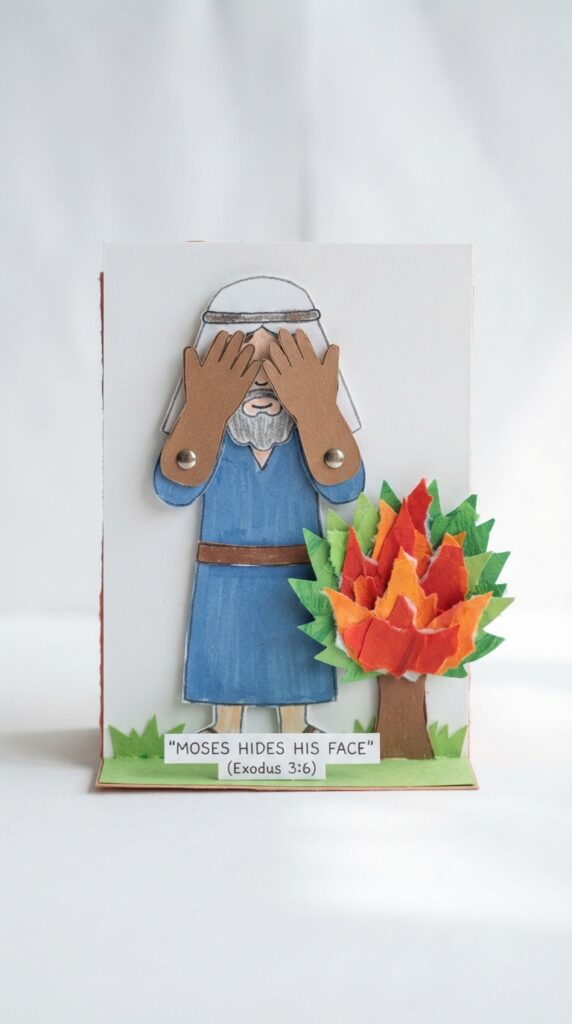
The burning bush was not the only remarkable part of Moses’ encounter.
After God identified himself as the God of Abraham, Isaac and Jacob, Exodus 3:6 says that Moses hid his face because he was afraid to look at God.
That detail can be easy to miss when children hear the story as simply “Moses saw a burning bush.” Make Moses’ hands movable so children can place them over his face, showing his reaction as the conversation unfolds.
What you need:
- Cardstock
- Coloured paper
- Glue
- Child-safe scissors
- Markers
- Paper fasteners for the movable hands
How to make it:
Create a simple Moses figure with two separate hands attached with paper fasteners. Place him near the burning bush, then let children move his hands from his sides to his face.
The Bible connection:
The craft gives children a visual reminder of Moses’ response when God revealed who he was. His reaction was not simply fear of the flames; the text says he hid his face because he was afraid to look at God.
Ask: “Why did Moses hide his face?” Then read Exodus 3:6 together rather than supplying an answer that the verse does not give.
This keeps the craft connected to what the passage actually says and gives children a chance to notice Moses’ response for themselves.
Turn little handprints into a Thanksgiving keepsake with 20 Handprint Turkey Crafts for Kids You Will Want to Keep Forever.
8. I AM WHO I AM” Burning Bush Message Craft
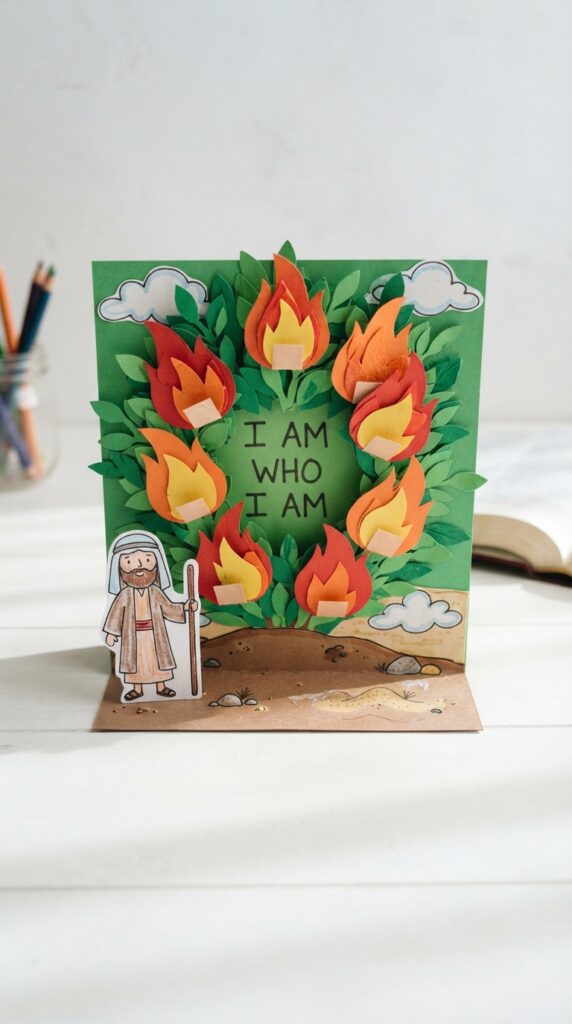
The conversation at the burning bush moves beyond Moses’ immediate surroundings.
When God tells Moses to go to the Israelites, Moses asks what he should say if they ask for God’s name. In Exodus 3:14, God answers, “I AM WHO I AM.”
For this craft, create a layered burning bush with the phrase revealed beneath the flames. The words can sit behind a flap or appear when the top layer is lifted.
What you need:
- Cardstock
- Coloured paper
- Clear adhesive sheets or transparent paper
- Glue
- Scissors
- Metallic or fine-tip markers
How to make it:
Create several layers for the bush and flames. Place “I AM WHO I AM” on the background layer and cover it with a movable flame or bush layer.
Children can lift the layer to reveal the words as they retell the part of the conversation where Moses asks about God’s name.
The Bible connection:
This craft introduces an important part of Exodus 3 that comes after the initial sight of the bush. Moses asks what name he should give the Israelites, and God responds with “I AM WHO I AM” (Exodus 3:13–14).
The phrase was not written on the burning bush in Scripture, so the craft should not present it that way. Instead, use the reveal to show that the words belong to the conversation God had with Moses at the bush.
This idea works better with older children who can discuss why Moses asked about God’s name and what information God was giving him.
Bible characters can make fun, meaningful costumes too. See 20 Bible Character Halloween Costumes for Kids — Easy DIY Ideas for Trunk or Treat.
9. The Wilderness Map Craft
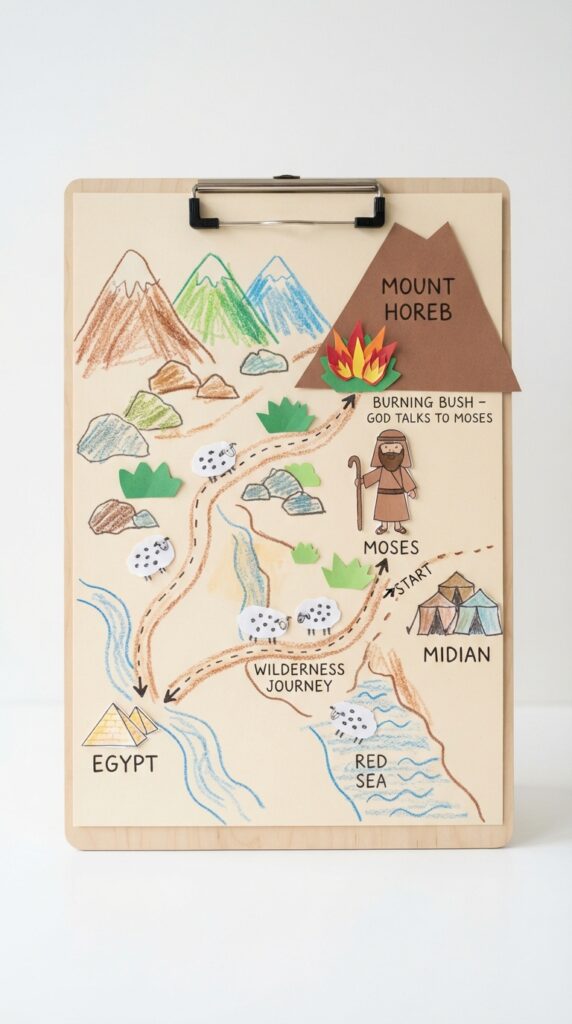
Before Moses encountered the burning bush, he was already on the move with Jethro’s flock. Exodus 3:1 says that he led the flock into the wilderness and came to Horeb, the mountain of God.
A simple story map can help children place the encounter within Moses’ journey instead of imagining the burning bush as an isolated scene with no setting.
What you need:
- Cardstock or a large sheet of paper
- Coloured paper
- Glue
- Child-safe scissors
- Markers
- Optional small paper sheep
How to make it:
Create a simple illustrated map rather than trying to reproduce a modern geographical map.
Mark Midian, the wilderness setting and Horeb, then add Moses and the flock near the Horeb section. A small bush can mark the place where the encounter begins.
Keep the route deliberately simple. Exodus 3 gives the story location and tells us that Moses came to Horeb, but it does not provide enough information to draw an exact travel route or detailed journey map.
The Bible connection:
This craft teaches children that Moses encountered the burning bush while he was tending a flock in the wilderness, not while he was already standing at a special shrine waiting for God to speak to him.
It also introduces Horeb as the mountain of God, as the passage describes it.
As children build the map, ask: “What was Moses doing when he came to Horeb?”
That question brings the story back to its opening detail and helps them remember Moses as a shepherd before focusing on what happened at the bush.
Save those disposable cups for another creative project with 23 Cute Paper Cup Crafts for Kids for Year-Round Creativity.
10. What Is In Your Hand? Staff-and-Sign Craft
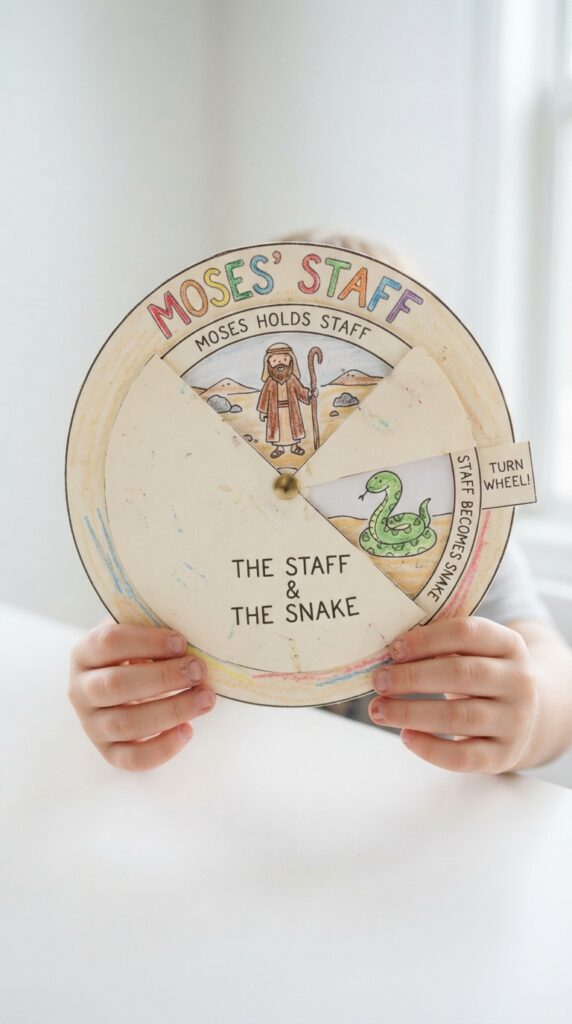
The burning bush encounter does not end with Moses simply returning to his flock.
God gives him an assignment, and Moses raises concerns about whether the Israelites will believe him. In Exodus 4:2, God asks, “What is that in your hand?” Moses answers, “A staff.”
That question becomes the starting point for an interactive craft.
Make a rotating wheel that shows the staff in Moses’ hand, then turn it to reveal the first sign God gives him: the staff becomes a snake. Turn the wheel again to return it to a staff.
What you need:
- Cardstock
- Brown paper
- Green and yellow paper
- Glue
- Child-safe scissors
- Paper fastener
- Markers
How to make it:
Cut two circular pieces of cardstock. On the bottom circle, draw Moses holding his staff.
On the top circle, cut a window large enough to reveal the different stages.
Divide the bottom circle into sections showing the staff, the snake and the staff again. Fasten the circles together so children can rotate the top layer and reveal each stage.
The Bible connection:
This is where accuracy matters. The staff becoming a snake happens in Exodus 4:2–5, after the burning bush encounter in Exodus 3.
God gives Moses this sign when Moses worries about whether the Israelites will believe that God appeared to him.
That makes this one of the more useful Moses and the burning bush crafts for kids because it teaches what happened next without mixing the two chapters together.
Children can learn that the burning bush was the beginning of Moses’ assignment, while the staff sign came as part of the conversation that followed.
Ask: “What did Moses already have in his hand when God asked him this question?” That brings the craft back to the actual wording of Exodus 4 rather than making the miracle the only thing children remember.
For an easy craft using a familiar supply, try 15 Easy Popsicle Stick Crafts for Kids That Turn Out So Cute.
11. Moses’ “What If They Don’t Believe Me?” Question Wheel
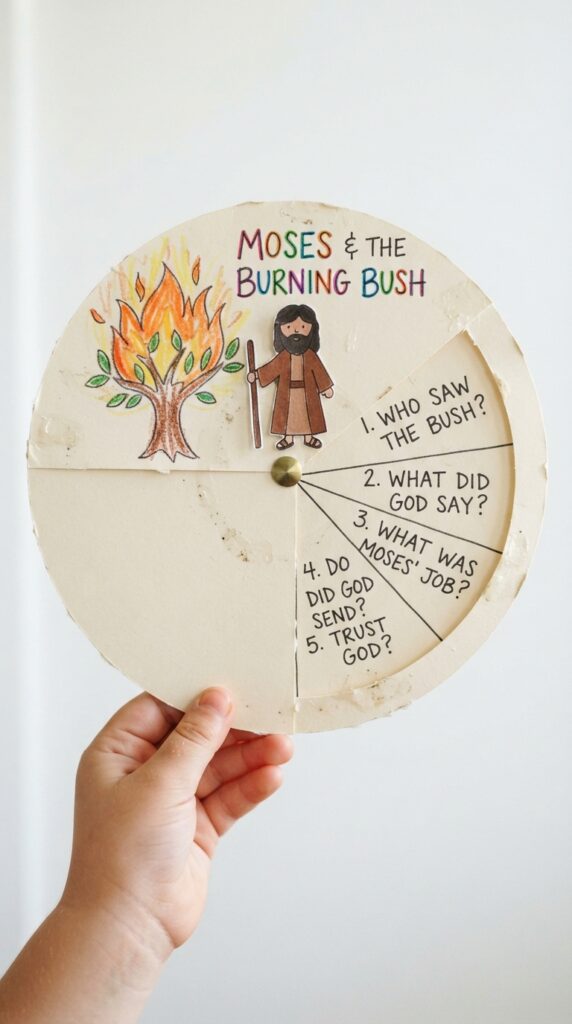
Moses did not respond to God’s assignment as though he had no concerns.
After God sent him to the Israelites and told him what to say, Moses asked what would happen if they did not believe him or listen to him (Exodus 4:1). Later, he also raised concerns about his ability to speak (Exodus 4:10).
A question wheel can turn those parts of the conversation into a discussion activity for older children.
Instead of putting invented dialogue into Moses’ mouth, use short prompts based directly on the questions and concerns recorded in Exodus.
What you need:
- Two sheets of cardstock
- Paper fastener
- Scissors
- Markers
- Pencil and ruler
How to make it:
Cut two circles from cardstock. On the bottom circle, divide the wheel into sections and write prompts such as:
- What if they don’t believe me?
- What if they don’t listen?
- What should I say?
- What about my speaking?
Cut a small window in the top circle and fasten the two pieces together so children can rotate the wheel and reveal one prompt at a time.
The Bible connection:
The questions are important because they show Moses’ response to the assignment God gave him. He had concerns about how the Israelites would respond and later about his ability to speak.
God responds to Moses’ concerns rather than ignoring them, giving signs and eventually providing Aaron to speak with him (Exodus 4:1–17).
For older children, this craft can open a better discussion than simply asking whether Moses was “brave.” Ask them to identify what Moses was worried about, what God told him, and what happened next.
That keeps the activity grounded in the passage and helps children see Moses as a person responding to a difficult assignment, rather than reducing the story to the burning bush itself.
Keep little hands busy with 10 Fun Butterfly Crafts for Kids That Will Keep Little Hands Busy All Afternoon.
12. The Burning Bush Story Wheel
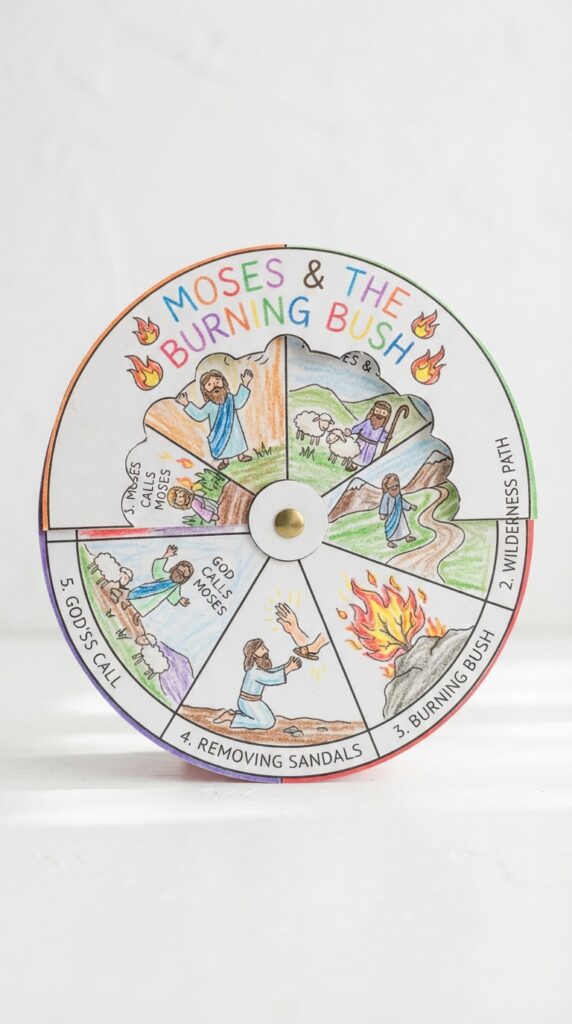
After making separate crafts about the bush, holy ground, Moses’ response and God’s conversation with him, children can put the whole account back together with a storytelling wheel.
This works especially well as the final craft because it asks children to retell the story in sequence, rather than remember isolated details.
What you need:
-
- Two sheets of cardstock
- Paper fastener
- Coloured paper
- Glue
- Child-safe scissors
- Markers
- Pencil and ruler
How to make it:
Create two large circles from cardstock. On the bottom circle, divide the story into sections and add a simple picture for each stage:
- Moses tends Jethro’s flock
- Moses comes to Horeb
- He sees the bush burning without being consumed
- He turns aside to investigate
- God calls, “Moses! Moses!”
- Moses is told to remove his sandals
- God tells him that he is standing on holy ground
- God identifies himself as the God of Abraham, Isaac and Jacob
- Moses hides his face
- God tells Moses about the Israelites’ suffering and gives him an assignment
Cut a window into the top circle and fasten the two circles together. As the child turns the wheel, one event appears at a time.
Add a spooky twist without relying on scary decorations with 10 Glow-in-the-Dark Halloween Crafts Kids Will Actually Want to Repeat.
The Bible connection:
The sequence follows the main events of Exodus 3:1–15, with each section giving children another piece of the encounter. That matters because the story is more than the image of a bush surrounded by flames.
Moses was tending a flock, noticed something unusual, chose to investigate, heard God call his name, learned that he was standing on holy ground and then received an assignment.
Use the finished wheel as a retelling tool. Cover the words and let the child explain each picture in their own words.
For younger children, a parent or teacher can read the relevant verses as the wheel moves. Older children can use the wheel to retell the passage without looking at the Bible.
One important accuracy point: keep the story wheel focused on Exodus 3.
The staff becoming a snake, Moses’ objections in Exodus 4 and Aaron’s role belong to the continuation of the story and should not be added to the Exodus 3 sequence.
Turn simple stones into colourful little projects with 10 Creative Rock Painting Ideas for Kids That Look Like They Took Hours.
A Few Details About the Burning Bush Story That Are Easy to Get Wrong
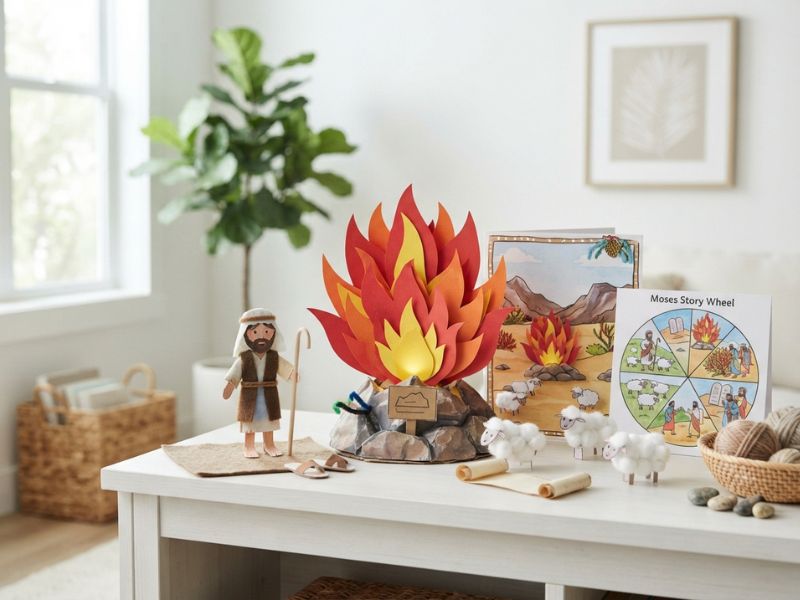
Crafts often add small details to make a Bible scene more visual, but those details can sometimes become part of the story in a child’s mind. These points from Exodus 3 are worth keeping clear.
-
The Bible does not name the type of bush
Exodus simply describes it as a bush that was burning without being consumed. Scripture does not identify the plant by a modern tree or bush species, so there is no need to label it as a particular type of plant in a craft.
-
Moses did not touch the bush
The passage says that Moses turned aside to look at the unusual sight and that God called to him from the bush. It does not say that Moses reached into the flames, touched the bush or picked anything from it.
A craft can show Moses looking toward the bush without adding an action that the Bible does not describe.
Combine crafting with a simple anatomy lesson through 12 Skeleton Crafts That Teach Body Parts While Kids Craft.
-
The fire did not consume the bush
This is the unusual feature that caught Moses’ attention. He saw that the bush was burning, but it was not being consumed (Exodus 3:2–3).
That detail is more important than simply making the craft look like a bush surrounded by flames. It explains why Moses stopped and turned aside to investigate.
-
The sandals detail comes directly from the story
God tells Moses, “Take off your sandals, for the place where you are standing is holy ground” (Exodus 3:5).
So a craft involving removable sandals is not an invented teaching point. It comes directly from the conversation at the burning bush.
-
“I AM WHO I AM” comes later in the conversation
The phrase appears in Exodus 3:14, after Moses asks what he should tell the Israelites if they ask for God’s name.
That means a craft can include the phrase when teaching this part of the story, but it should not make it look as though the words were written on the burning bush itself.
For an autumn project using a natural material, try 10 Corn Husk Crafts For Kids Without a Trip to Michaels.
-
The staff becoming a snake happens in Exodus 4
Moses’ staff is already part of the story because he is a shepherd, but the moment when God tells him to throw the staff down and it becomes a snake happens in Exodus 4:2–5.
That event follows the burning-bush encounter.
A craft can absolutely extend the story into Exodus 4, but it is better to label it clearly so children do not come away thinking Moses watched his staff turn into a snake while he was standing at the bush.
Keeping these details separate makes the crafts more than attractive Bible-themed activities.
They give children a chance to learn the story as Scripture actually presents it, while still leaving room for creative, hands-on ways to remember it.
Add a woodland feel to craft time with 12 Mushroom Crafts for Kids You’ll Wish You’d Found Sooner.
Conclusion
The burning bush story gives children more to remember than a surprising sight in the wilderness.
It introduces Moses’ response to God’s voice, his questions about the assignment, and the details that made the encounter significant.
These Moses and the burning bush crafts for kids can help turn those moments into something children can see, handle and retell, while keeping the activities grounded in Exodus rather than adding details that Scripture does not give.
Choose a craft that fits the child’s age and use the Bible passage alongside it. Then let the child explain what happened in their own words. Which craft will you use first?
Before you leave READ:
Apples can become more than a snack with 20 Apple Crafts Kids Will Beg to Repeat.
Bring an autumn animal into craft time with 18 Handprint Fall Deer Crafts Kids Will Love Making.
Need a simple, flexible craft material? 19 Easy Pipe Cleaner Crafts for Kids That Boost Creativity has plenty of ideas to try.